How to Create and Share an iTunes playlist with Friends and Families
by Jenefey Aaron Updated on 2019-07-25 / Update for iTunes Tips
There’s a reason why we called music as the universal language. It has been part of our life since the beginning of time, and it connects people from all walks of life regardless of their background, location, language, beliefs, age, lifestyle, etc.
A different era has a different way of how music can connect people. For today’s generation, one of the ways to do it is by sharing their digital playlists. And if you are an iTunes user, here’s the way to create and share playlists in iTunes between devices.
- Part 1: What is a Playlist?
- Part 2: How to Create a Playlist in iTunes?
- Part 3: How to Create a Smart iTunes Playlist?
- Part 4: How to Share a Playlist with Friends and Families via iTunes?
- Extra tip: Share iPhone, iPad Video, Music, Photos, Contact, etc. to/from Computer
Part 1: What is a Playlist?
In the time before CD was the king, people share music using mix tape. They recorded their favorite songs in a cassette and gave it to their close friends and family.
In the digital world, however, almost nobody is using tape player anymore. So, music lovers put their favorite songs and albums in their computer and gadgets. These aficionados grouped their music based on various filters inside playlists. And then they share their playlist.
But before you can share your playlist, you need to have one.
Part 2: How to Create a Playlist in iTunes?
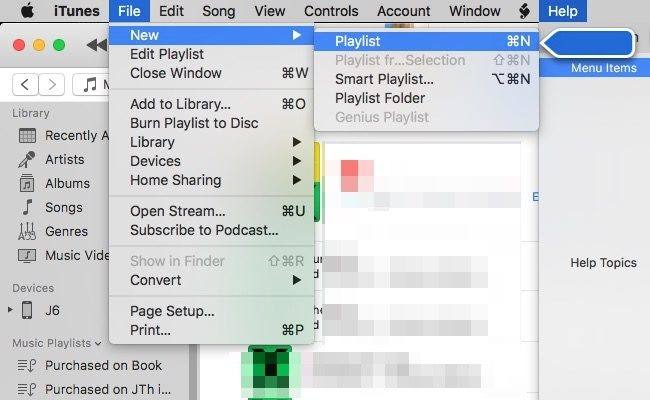
Creating a playlist in iTunes is a snap. Start by going to the File > New > Playlist menu. Then type a name for the playlist, click Edit Playlist.
You can add items by dragging them from the song list to the playlist on the right. When you’re finished adding items, click Done.
Part 3: How to Create a Smart iTunes Playlist?
What if you want to give a boost to your playlist by adding automation? Then you might want to create a smart playlist instead.
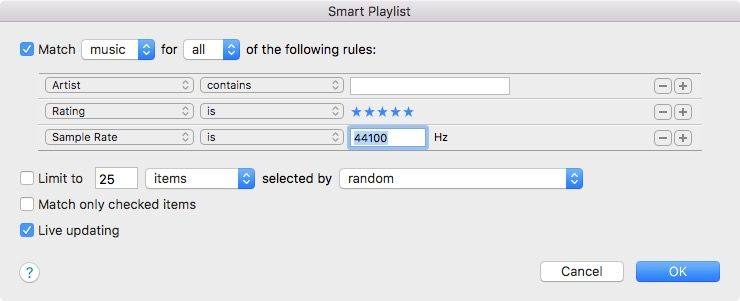
The advantage of smart playlist over the normal one is that smart playlist is dynamic. After you determine the rules, the content of the smart playlist will always be updated according to the pre-set condition.
For example, on my smart playlist about “recently added songs”, the content will always be new songs that added in the last three weeks and have been played no more than three times. The songs that are older than three weeks or have been played three times will be kicked out from the list.
To create a smart playlist, you go through similar steps as when you create a standard playlist., but you choose Smart Playlist instead.
Then set the name of the playlist and the rules.
Part 4: How to Share a Playlist with Others via iTunes?
To share your playlist, all that you need to do is to select one of the playlists that you’ve created from the list on the left sidebar of your iTunes, and go to File > Library > Export Playlist menu.
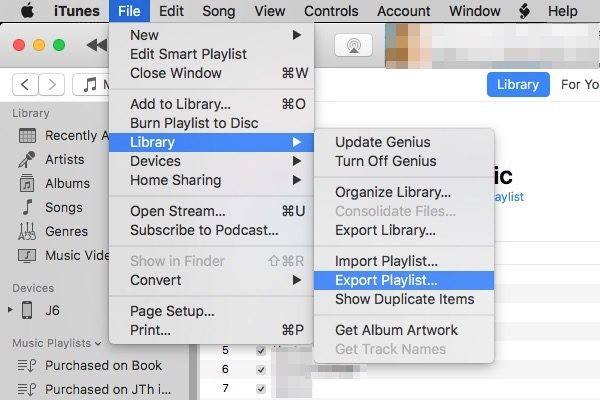
Then choose the file format and location where you want to save the exported playlist.
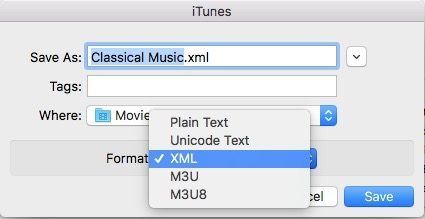
You can share this exported playlist using any sharing method that you know, either send iTunes playlist via email, messages, Dropbox, etc.
Your friends who receive the file can import the file via File > Library > Import Playlist menu.
Extra tip: Share iPhone, iPad Video, Music, Photos, Contact, etc. to/from Computer
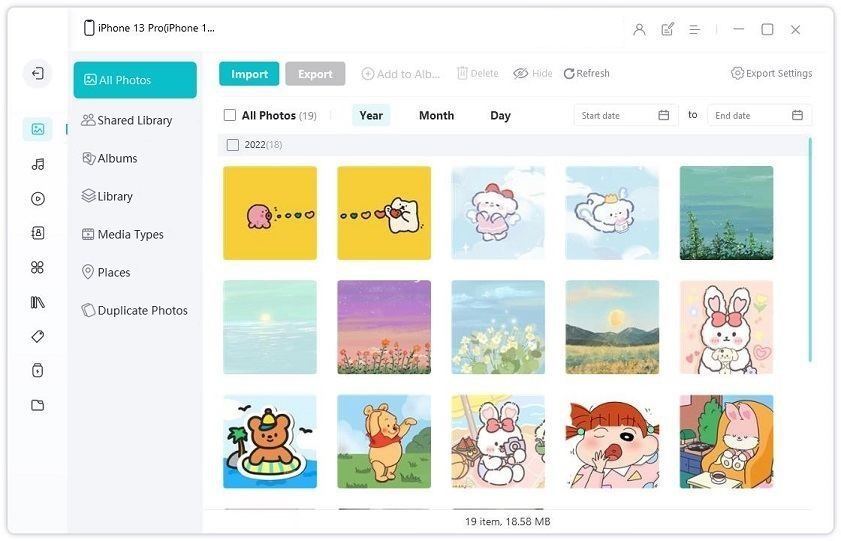
It is extremely convenient to manage and share files with iTunes but iTunes is prone to errors and has many restrictions for iOS files transfer. Fortunately, there’s Tenorshare iCareFone, a professional data transfer tool for iOS that offers you an easy yet effective way to transfer Music, Photos, Videos, Contacts, SMS, Apps, etc. between your iOS device and computer without iTunes restrictions.
- Sync Music between iPhone, iPad, iPod and PC Freely
- Share iPhone, iPad, iPod Touch Video to/from Computer Easily
- Transfer Photos between iPhone, iPad and PC Quickly
- Export Contact, Note, Calendar, Bookmark to PC Conveniently
