Root Note 8: The Detailed Guide on Galaxy Note 8 Root without/with PC
The Galaxy Note 8 is a major Samsung's Note series phone that brings tons of features including Samsung's famous TouchWiz user interface. Soon as you lay your hands on the phone, you can notice the huge number of customization options. But the real fun is when you have the rooted version as it offers much more than what Samsung gives you. The following is a full guide on how to root on Galaxy Note 8 without PC or from computer using Odin.
- Part 1. How to Root Galaxy Note 8 without PC?
- Part 2. How to Root Samsung Galaxy Note 8 with Odin?
- Bonus Tip: How to Recover Deleted Data on Note 8 without Root?
Part 1. How to Root Galaxy Note 8 without PC?
The process for Galaxy Note 8 root without PC is very easy as you need to just download an app and run it on your device and you will have root-access in no time. With the KingRoot app for your smartphone, you can root your Samsung Galaxy Note 8 within a few minutes. The app doesn't cost a penny and can be downloaded from its official website.
- Head over to the KingRoot website and download the APK version of the app on your Note 8.
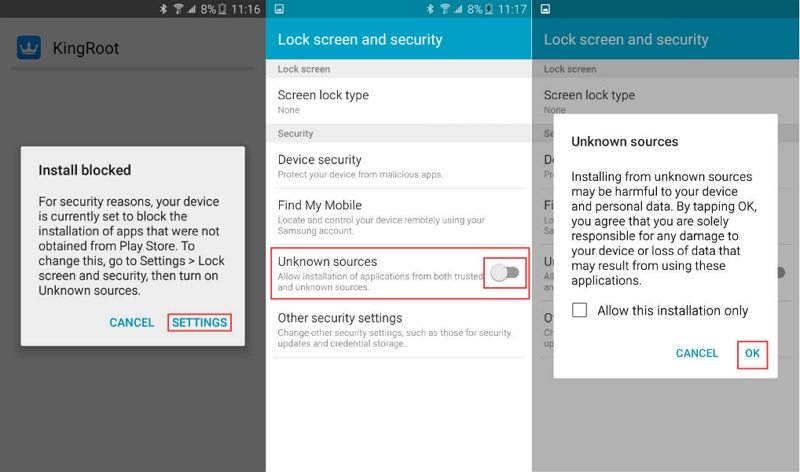
Locate the APK file and then click on it. Follow phone instructions and install KingRoot on your device and allow installs from "Unknown Sources".

Launch it after installation and click Start ROOT. It will begin to root Verizon Note 8 and should be done in a few minutes.

Congratulations, you now have root-access on your Galaxy Note 8 and you can confirm the same using a Root Checker app.
If, for some reason, the above root procedure doesn't work for you, you can try a similar app called KingoRoot to root Note 8. It provides a universal one-click Android root solution for Android users.
Part 2. How to Root Samsung Galaxy Note 8 with Odin?
You can also root Samsung Galaxy Note 8 using Odin on a PC. Below are the detailed steps and they are worked for rooting Note 8 SM-N950F (running on Android 9.0, binary 6).
Go into Settings > About Phone > Software Information > tap on ‘Build Number’ 7 times to enable Developer Options.

- Go into Settings > Developer Options > enable OEM Unlock.
- Download and install Samsung USB driver on your computer.
- Download and extract Samsung Galaxy Note 8 root files on your computer.
Power off your Note 8, then press and hold Volume Down + Bixby button + Power to reboot into Download Mode, and press volume up when asked to continue.

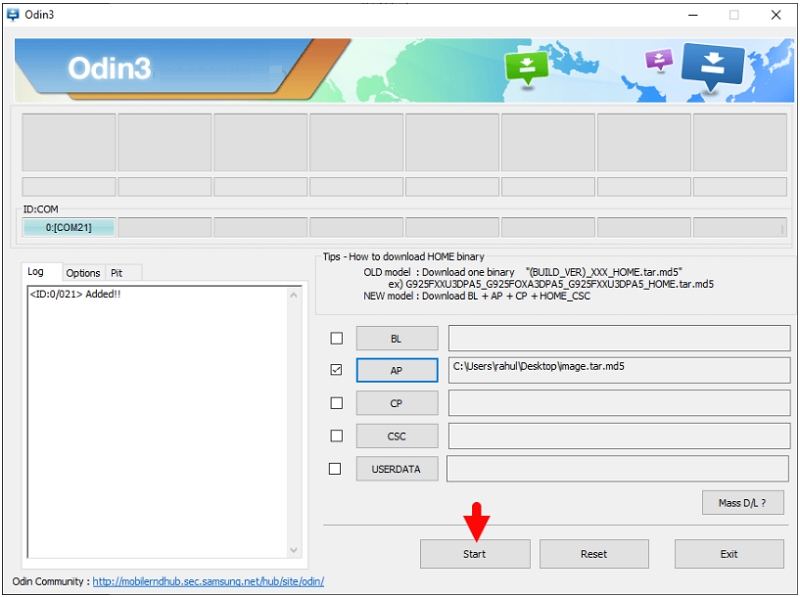
- Run Odin3 on your computer and connect your device to the computer.
You will see the Added messages at the Log Area when Odin recognizes your phone. Now click on AP/PDA tab of Odin, choose the image.tar file you downloaded before, and press Start.

Wait for the rooting process. Once it completed, you will see a Green Box with Pass written on it in Odin.

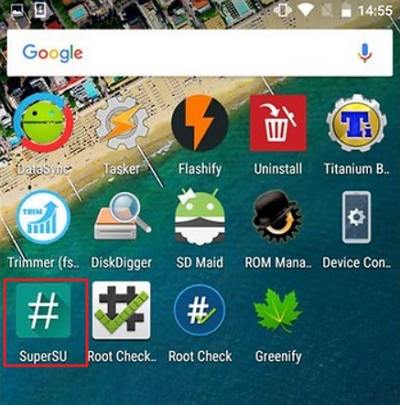
Then disconnect your Note 8 and go to the homescreen, if there is a App Called “SuperSu” then your phone is Rooted.

Bonus Tip: How to Recover Deleted Data on Note 8 without Root?
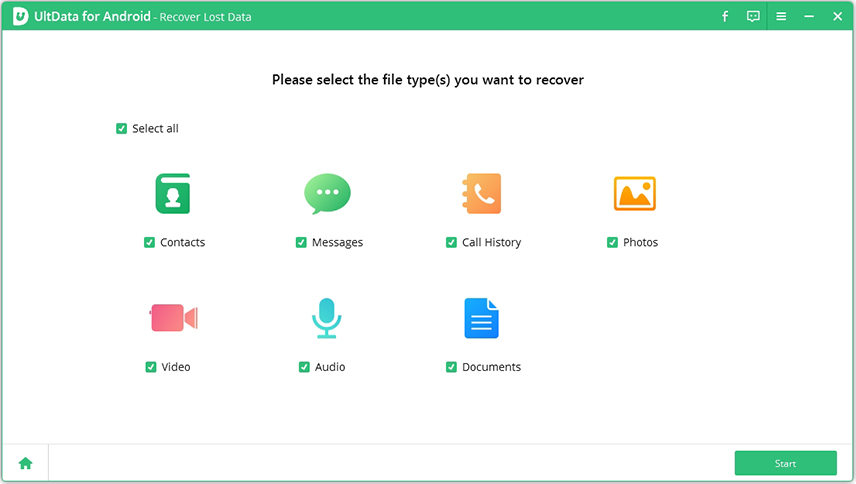
Lost data on Note 8 during or after root? Looking for a way to recover deleted photos on Galaxy Note 8 without rooting? Get Tenorshare UltData for Android! It helps users recover lost photos from gallery, WhatsApp messages and other data on Samsung without rooting or backup. Following are the detailed steps.
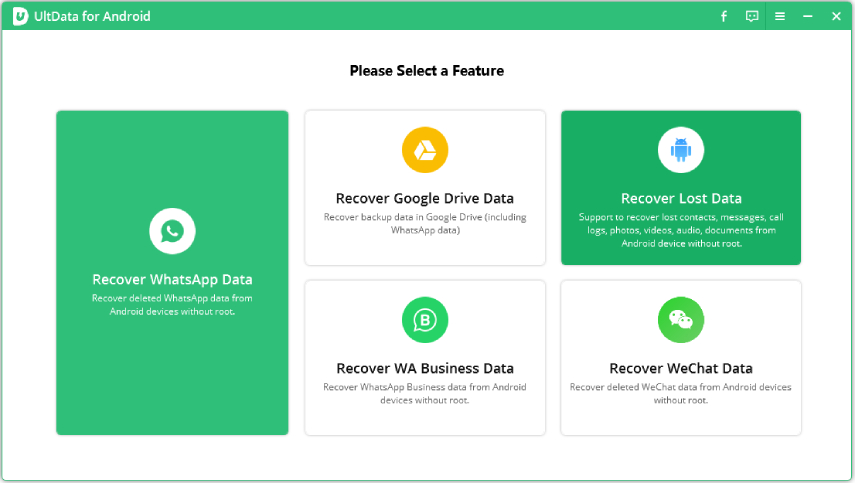
Download and launch the software on your computer. Connect your phone to the computer using a suitable cable. Select the feature "Recover Lost Data".

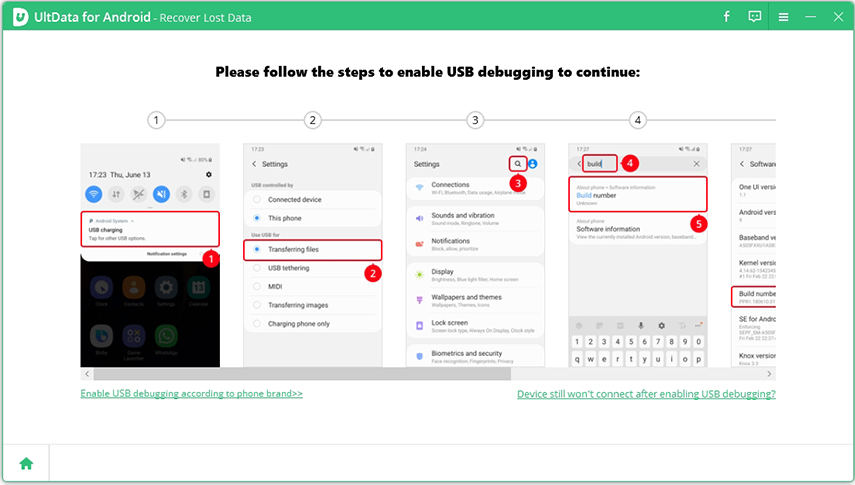
Follow the on-screen wizard to turn on the USB debugging option on your note 8.

When you get a prompt on your device, tap on Allow. Then, hit the Start button in the software to begin to scan your device.

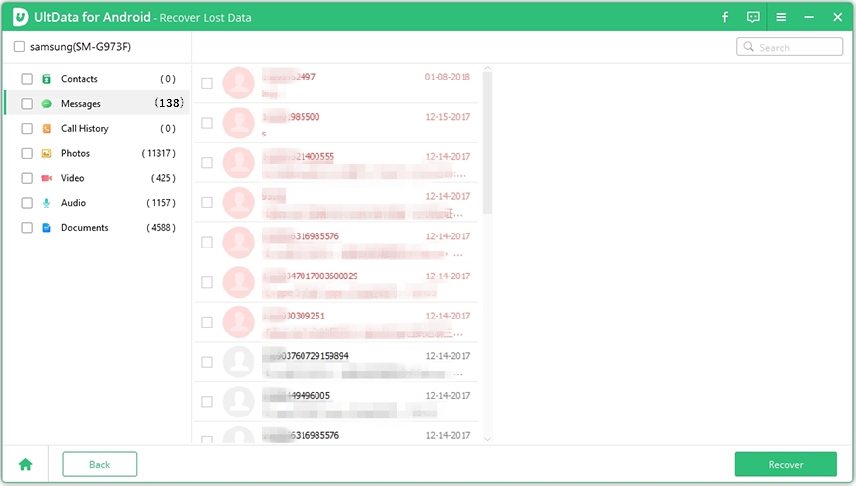
Once the scanning is completed, you can see all data on your device. Choose the ones you want to recover and click on Recover.

Conclusion
We hope the above guide helps you root your Note 8 phone without a PC. And in case you have lost data, you can get Tenorshare UltData for Android to recover your lost data. It's worth giving a try to the app to see if it can help you recover data, especially on your Note 8, if you have lost the data after gaining root-access.
Speak Your Mind
Leave a Comment
Create your review for Tenorshare articles
Tenorshare UltData for Android
Best Android Data Recovery Software
Highest Data Recovery Rate
