How to Root Samsung Galaxy S9 and S9 Plus
Samsung Galaxy S9 is a beast device and it gets much better if you have root access. Rooting a phone is a messy task, there are somethings you must take care of otherwise you could be ending bricking your phone. In this article, you will learn how to root Samsung Galaxy S9, S9 Plus clearly.
Recently TWRP got available for Galaxy S9 and S9 plus, if you don't know what I'm talking about then let me tell you. TWRP is a custom Recovery which will help you get S9 rooted, however TWRP is not officially announced for all of the variants of Galaxy S9 and S9+. Below is list of Samsung Galaxy S9 variants that are officially supported by TWRP.
Supported Devices:
- Samsung Galaxy S9: SM-G960F/FD/N (starlte having Exynos 9810 processor)
- Samsung Galaxy S9 Plus: SM-G965F/FD/N (star2lte having Exynos 9810 processor)
You can check your device model by going into Settings>About.
Note: If your device is not listed in supported device then don't try to attempt rooting your phone, it can erase your data or you could soft/hard brick your device.
Installing TWRP:
Before getting into the process of rooting, you must have TWRP installed to root S9 safely, If you have it installed already you can skip this step and continue from next step. Make sure you have TWRP installed correctly, sometimes encryption protocols of certain devices revert changes and flash stock recovery after reboot. However you can disable that by DM verity. Follow the below instructions to install TWRP recovery:
- 1. First of all make sure you have backed up your important data before starting.
- 2. Download TWRP image file named something like twrp-3.x.x-x-starlte.img.tar, make sure you download the appropriate file for your device you can check your model by going into Settings>About on your phone.
- 3. Download and install Odin on your Computer, there are some methods available to root s9 without PC but they don't work on every device. That's why we are using Odin method which works flawlessly if done right.
- 4. Make sure you have USB drivers installed on your computer correctly.
- 5. Now switch to Download mode on your phone by pressing and holding Volume Down+Bixby+Power buttons for 15 seconds. A warning will be displayed press Volume Up to switch into download mode.
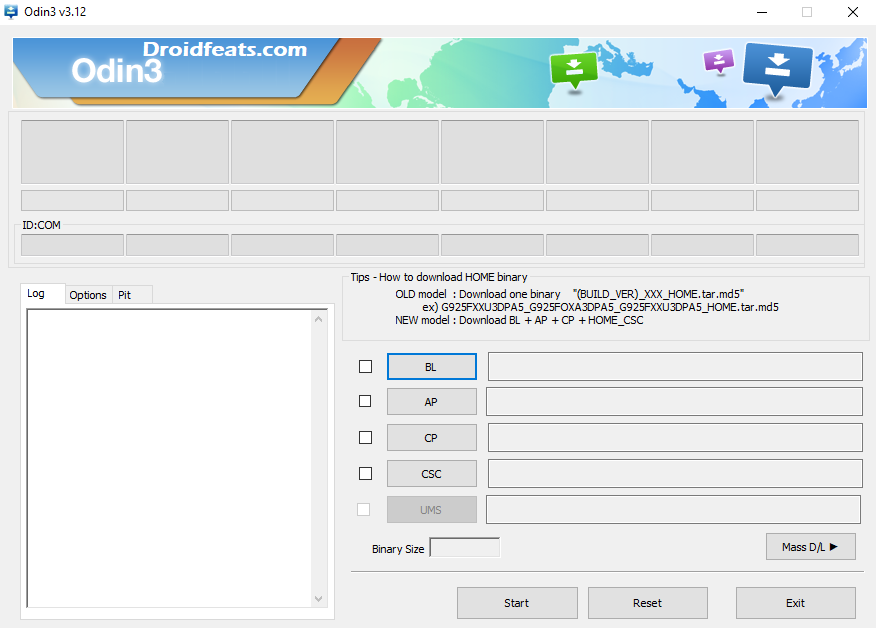
- 6. Connect your phone with computer via USB cable and open Odin.
- 7. Added will be written in logs if you have connected your device right and USB drivers are properly installed.
- 8. Now tick AP checkbox and click AP button and select the recovery file, wait for sometime while its being loaded.
- 9. Now Click Start button to start installing he recovery, once it is completed Success popup will be shown with a green tick.
- 10. Restart your phone

You can install DM Verity which will force encryption disabler if you are having issues with recovery.
Root Preparations:
- Your Device must have at least 80% battery
- Make Sure you have backed up your important data
- Make Sure TWRP is installed and running
- Perform a Dalvik Cache Wipe in recovery mode before rooting, you can switch to recovery mode by pressing and holding Volume Up+Bixby+Power button.
- Enable USB Debugging, you can do that by going into Settings>About Phone> Build Number> Tap it 7 times. Now open Settings>Developer Options and enable USB debugging
All the above things must be done correctly if you want to root s9 without bricking your device.
How to Root S9, S9 Plus
- 1. Download Nemesis Kernel and SuperSU SR5 for your device on your computer
- 2. Connect your device with PC via USB cable
- 3. Copy the downloaded files into internal storage of your phone
- 4. Disconnect your device and turn it off
- 5. Now Press and hold Volume Up + Bixby + Power buttons together and wait till your phone is booted into recovery mode
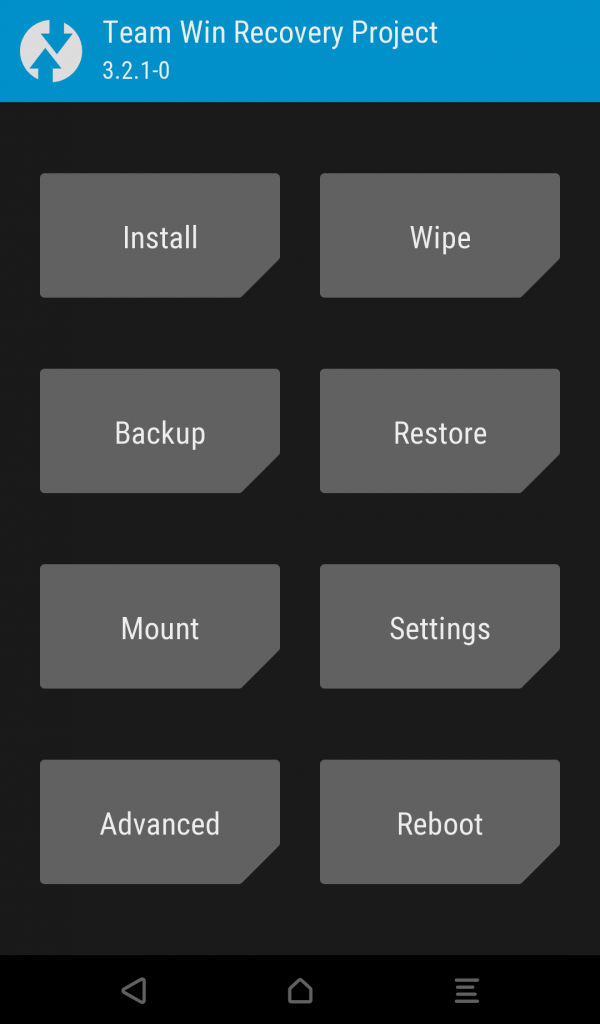
- 6. TWRP recovery will boot up now search and tap "Install" button
- 7. Select Nemesis Kernel hat you have downloaded and copied earlier
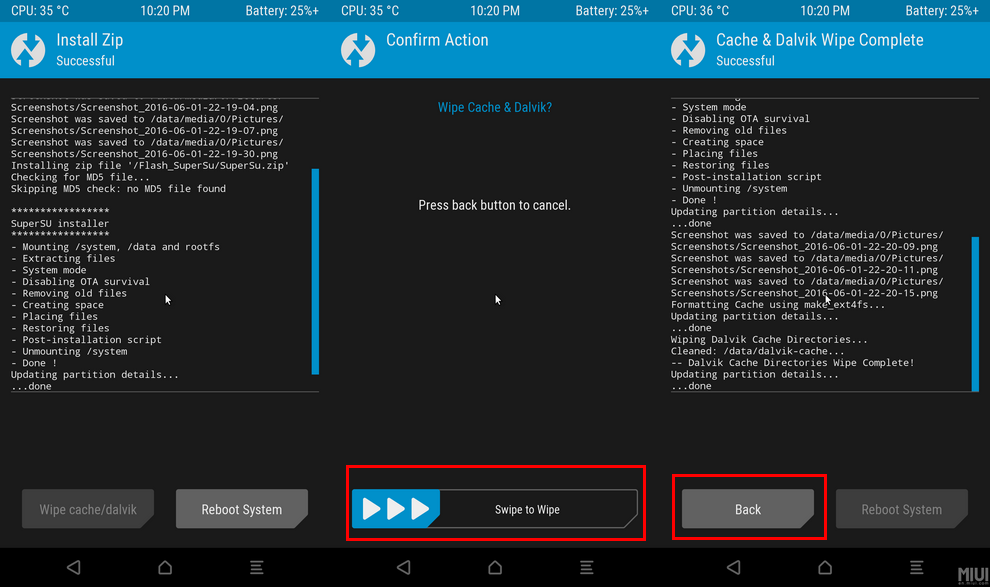
- 8. Swipe and confirm installation
- 9.Now tap "Wipe cache/dalvik" button
- 10.Now Tap install button once more and this time select SuperSU file and then perform dalvik cache wipe once more
- 11.Finally tap Reboot System
- 12.Now you will have root access and SuperSU installed on your device
Troubleshooting:
Follow all of the rooting instruction strictly, you won't face problems most of the time. If you are following all the instructions carefully yet getting any issue, then follow these troubleshooting steps:
- Make sure USB drivers are installed correctly.
- Make sure you use original USB cable.
- Try restarting windows and your phone and then retry.
- Download the latest version of Odin from their official website.
Extra Tip: How to Recover Lost Android Data without/after Rooting?
Tenorshare Android Data Recovery is an awesome tool which can recover all sort of data with simple easy steps, it provides an ultimate solution for your every data loss problem. The best thing about it is that, you can recover files from broken device too. It can restore multimedia and document files of almost every format. It features two recovery modes giving you control to perform a deep scan, too. Follow these steps in order to restore your missing data:
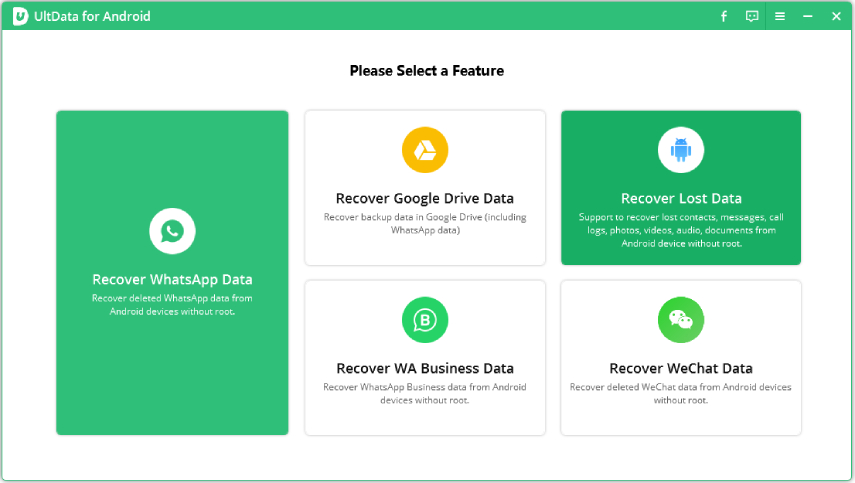
Download and Install Android Data Recovery. Open Android Data Recovery tool and connect Android Device with your PC via USB cable. Select Recover Lost Data from the main interface

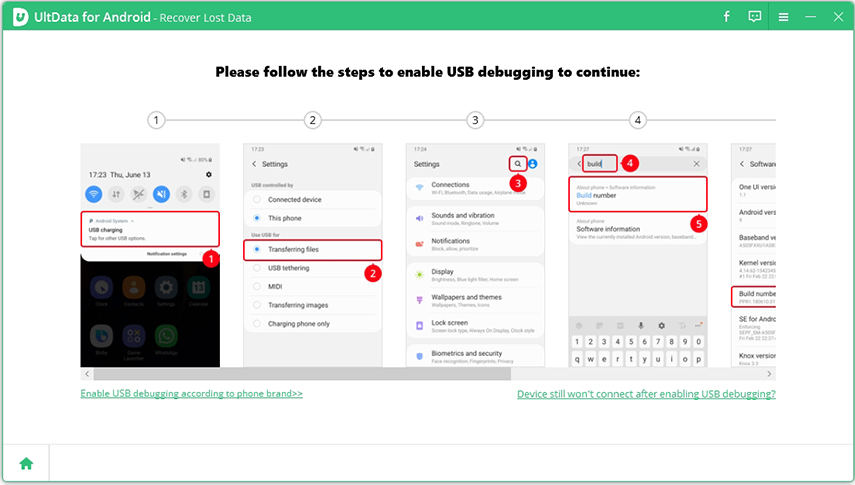
Enable USB Debugging, you can do that by going into Settings>About Phone> Build Number> Tap it 7 times. Now open Settings>Developer Options and enable USB debugging.

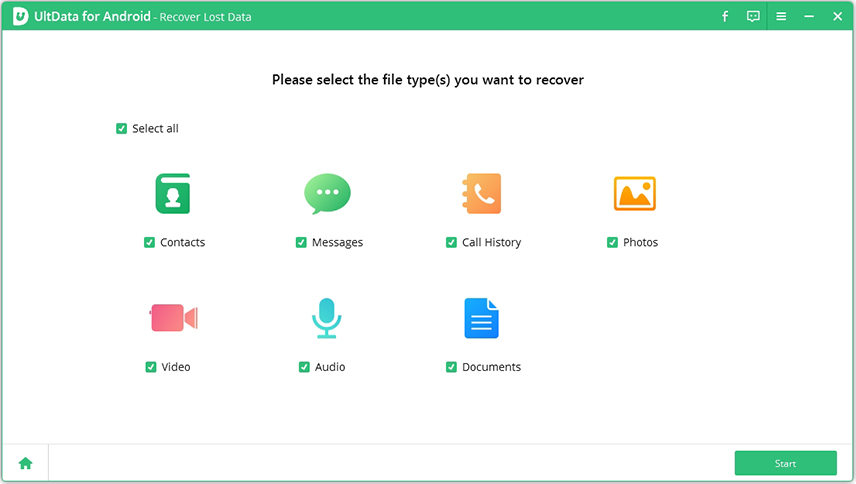
Select the files you want to recover and click Next to start the scanning process.

After the scanning, preview the lost data and click "Recover" to recover and save the lost files on your PC.

Conclusion
Rooting an Android phone unlocks true potential of the device and allow you to do customization and actions that can't be done without root. You can block annoying ads on your device, optimize RAM management, flash custom kernel, change DPI and much more.
Follow all of the instructions strictly to root Samsung Galaxy S9, you won't have any problems so far but there are slight chances that you can lose your data, if you have done anything wrong. If you haven't backed up your data, you can recover it by using Android Data Recovery.
Speak Your Mind
Leave a Comment
Create your review for Tenorshare articles

Tenorshare UltData for Android
Best Android Data Recovery Software
Highest Data Recovery Rate


