How To Share Location On iPhone? Top 5 Ways For You
Location sharing has become an essential part of our lives. It saves a lot of time and allows easy navigation in unfamiliar territory.
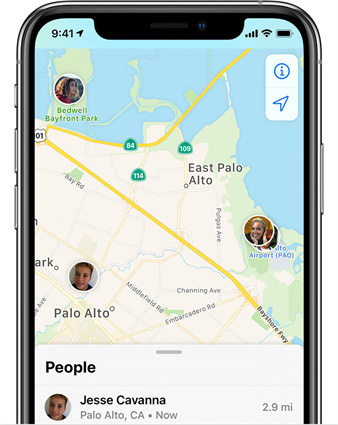
If you’re missing out on such a time—and sometimes life—saving feature just because you don’t know how to share location on iPhone, then that ends now. Below you’ll find step-by-step guidance on how you can share your location via different iOS app.
- Pre-Tips For How To Share Location On iPhone
- Way 1: How To Share Location On iPhone with Find My
- Way 2: How To Share Location On iPhone with Messages
- Way 3: How To Share Location On iPhone with Apple Maps
- Way 4: How To Share Location On iPhone with Google Maps
- Way 5: How To Share Location On iPhone with Contact
- Tips: How To Share Fake Location On iPhone
Pre-Tips For How To Share Location On iPhone
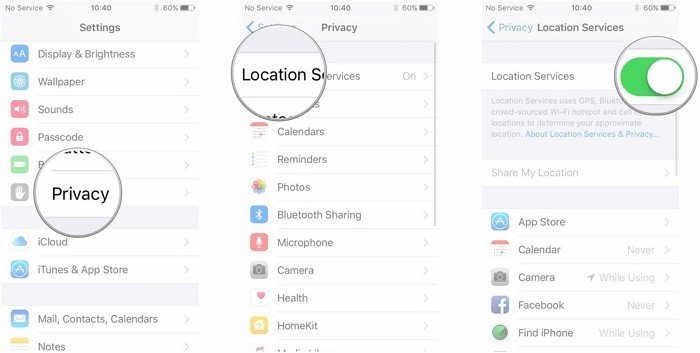
Before addressing the specifics of location sharing, it’s important to learn about the core feature that allows location sharing in the first place. And that feature is location Services. Location Services combine the power of GPS and Bluetooth to approximate your location. Follow these steps to enable Location Services:
- Go to Settings>Privacy >Location Services.
- Enable Location Services by swiping the slider to the right.
- Once enabled, you’ll find plenty of options there that’ll allow you to control which apps can access your location.
To share your location with someone specific, turn on “Share My Location” and set the duration of how long you want your location to be shared.

Way 1: How To Share Location On iPhone with Find My
Find My is a powerful app to track your lost iPhone. But the truth is that the app is much more than that. It has a feature that allows you to share your location with family and friends in a few clicks.
Find out the answer to “how do I share my location on iPhone?” in the following steps:
- Make sure that the Location Services is on for the Find My app. You can check this by going into Settings > Privacy > Location Services > Find My.
- In the Find My app, go to “Me” and turn on “Share My Location.”
Tap “People” and “Share My Location” and enter the people you want to send.

Way 2: How To Share Location On iPhone with Messages
iOS devices offer multiple ways to share your location, Messages being one of them. It’s convenient and safe because you only send your location to the concerned person. In addition, you get to control the duration of location sharing.
If you’re wondering how to send location on iPhone via Messages, follow the given procedure:
- Start by going to the Messages app and searching for the person you want to share your location with.
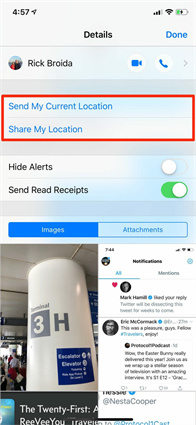
- Open the conversation and tap the top of the screen, which will take you to their profile.
Locate the “i" button and select one of the two location sharing options available there:
a. Select “Send My Current Location” to share your current whereabouts.
b. Select “Share My Location” if you’re on the move and wish to share your location over an extended period.

Way 3: How To Share Location On iPhone with Apple Maps
Apple Maps is a build-in app that provides location services and enables you to share locations on your iPhone easily.
Here are the steps to share location on Apple Maps:
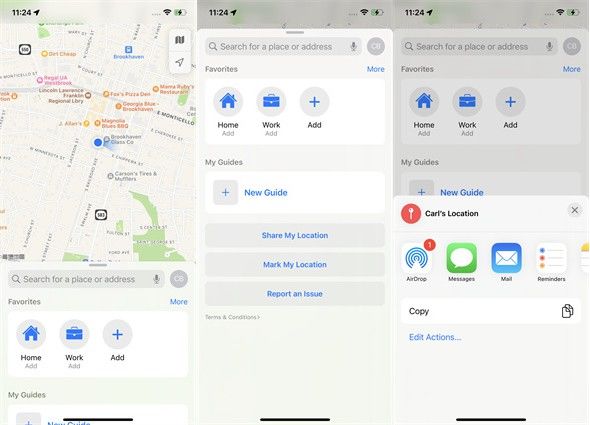
- Launch Apple Maps on your iPhone.
- Scroll down the search bar and you will see the “Share My Location” button.
Click “Share My location” and choose a way to share your location.

Way 4: How To Share Location On iPhone with Google Maps
Google Maps offer a convenient way to share your real-time location with one person or a group of people. To protect your privacy, it also offers the option of one-time location sharing.
If you’re asking yourself, “how to share my location on iPhone?” the following steps may come in handy:
- Start by opening the Google Maps application on your iOS device.
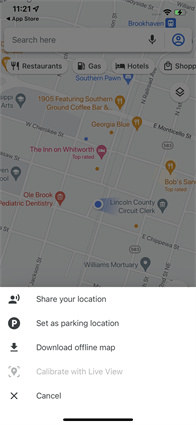
- You’ll see a blue dot on the map showing your current location. Tap the blue dot to open up the menu.
- If you don’t see the blue dot on the map, tap on the GPS icon.
From the menu, select “Share Your Location.”

Way 5: How To Share Location On iPhone with Contact
Curious about how to share your location on iPhone with a contact? As with the Messages app, sharing your location via Contact is just as easy. It can be broken down into the following steps:
- First things first, open the Contact app.
- Find the person you intend to share your location with within your contact list.
- Tap on the relevant Contact, and you’ll be taken to their profile.
- On their profile, look for the “Share My Location” option.
- Now, you can select how long you intend to share your real-time location with the concerned person.
Tips: How To Share Fake Location On iPhone
So far, the whole content has been all about sharing your real-time location. But what if it’s not the real-time location you wish to share but a fake one.
Without any judgments, let’s get you educated on how to share a fake location on iPhone. Hint: it’s as simple as using the software Tenorshare iAnyGo.
Here’s a brief step-by-step guide on how to use the software to share fake locations on iPhone:
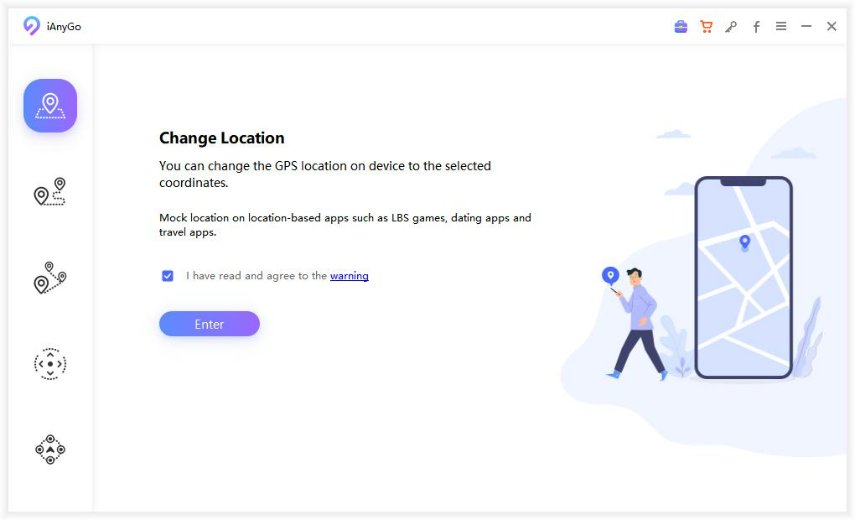
Download iAnyGo on PC/Mac. It is free to download.

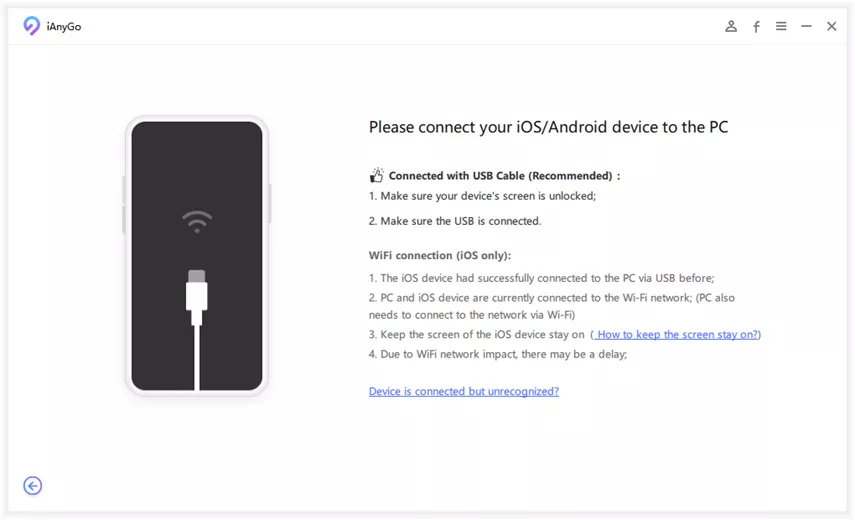
Connect your iPhone to it.

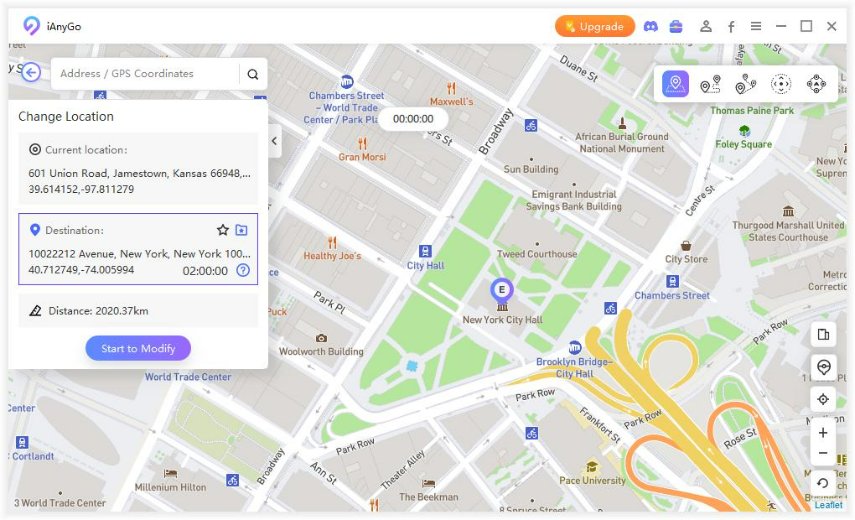
A map will appear on the iAnyGo interface. Select the fake location you wish to broadcast and click “Start to Modify.” And that’s all it takes to fake your location using iAnyGo. No Jailbreak, no fuss.

Final Word
Not only did we cover 4 methods for how to share location on iPhone, but we went a step further. We even learned how you could fake your location for privacy or fun reasons. To sum it up, sharing your iPhone location mainly relies on Location Services. And as for faking the location, that’s the job for Tenorshare iAnyGo.
Speak Your Mind
Leave a Comment
Create your review for Tenorshare articles

Tenorshare iAnyGo
2024 Top Location Changer
With Bluetooth tech built-in: no cracked/error 12, 0-risk.

