How to Create Windows 10 Image Backup with Easy Steps
A Windows 10 image backup is a backup of all of your Windows PC's data saved in an image file. If you do not already know, an image file is like a zip file. It consists of various individual files in it and it it a single file that you can use and move around anywhere you want.
Windows 10 allows you to create a full backup of your data and save the backup in an image file. This Windows 10 system image file can then be stored anywhere you want, such as on an external hard drive. In the future, if things go wrong with your computer, you can restore this image file and it will restore all of your data on your computer. Let us check out the ways on how you can create backup image Windows 10:
- Part 1. How to Create an Image Backup in Windows 10?
- Part 2. Notice for Windows 10 System Image Backup
- Part 3. One Click to Backup Windows 10 Hard Disk to Image with Tenorshare Data Backup
- Extra Tip: How to Restore a System Image Backup on Windows 10?
Part 1. How to Create an Image Backup in Windows 10?
The feature to create image backups is built right into the Windows 10 operating system so you do not need to install any third-party software. Also, it is pretty easy to use the feature to create your computer backups.
All you basically need to do is follow a step by step wizard and it will get an image backup ready for you to use. Here is how you do it.
Keep in mind though it is only available in the modern versions of the Windows OS. If you still happen to run Windows XP, then sorry but you are out of luck.
Step 1: Launch Control Panel on your Windows 10 PC and click on System and Security followed by Backup and Restore (Windows 7). It will launch the utility you need to create backups.

Step 2: Click on Create a system image in the left sidebar on the following screen.
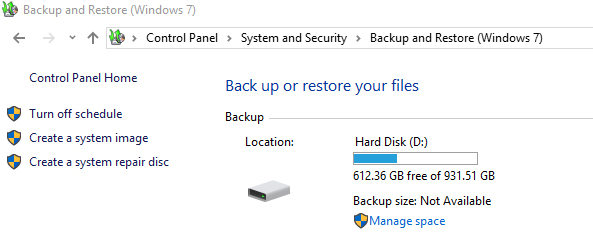
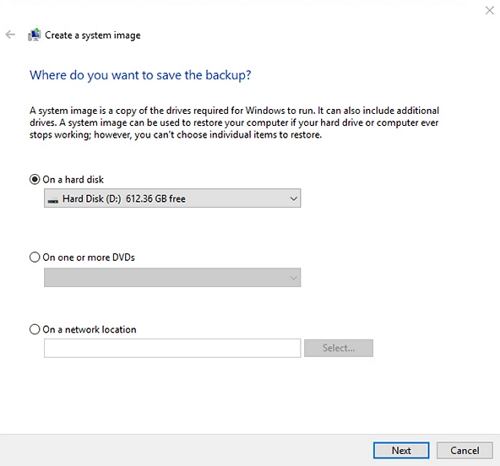
Step 3: The first screen will ask where you would like to save the backed up image file. You have three options available to choose from. Once you have chosen an option, click on Next to continue.
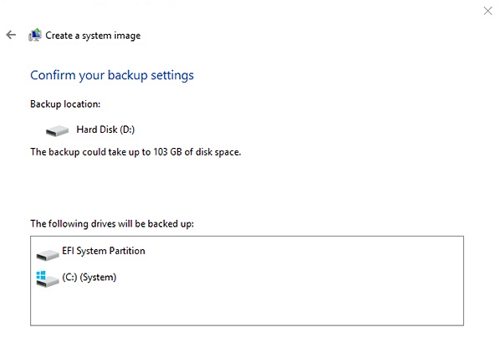
Step 4: On the following screen, you can add the drives that you want to be included in your backup. Then, click on Next to continue.
Step 5: Click on the Start backup button on the final screen to start creating a backup of your Windows PC.
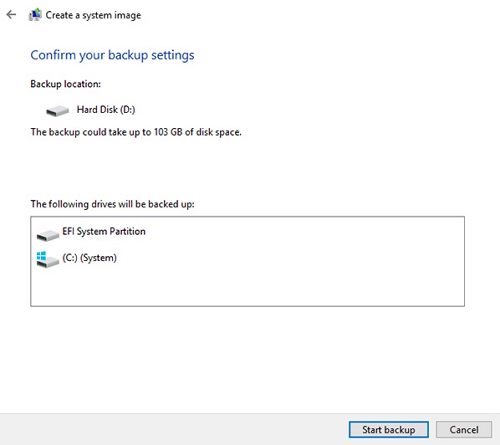
Your image backup is created and saved on your computer.
Part 2. Notice for Windows 10 System Image Backup
While we do teach you how to use the system image backup feature to create backups, we would like to inform you that the feature will not be available in the future releases of Windows 10.
Microsoft is no longer maintaining the System Image Backup feature since Windows 10 version 1709. Microsoft is deprecating the feature and as a result it will stop workingin newer releases of the operating system.
Part 3. One Click to Backup Windows 10 Hard Disk to Image with Tenorshare Data Backup
If you do not wish to rely on a feature that will be gone in the newer releases of Windows 10, you may want to look for other solutions to create an image backup of your PC. One of the best software that lets you create system image backups is Tenorshare Free Data Backup. It is able to create a compressed image of everything saved on the drive — OS, settings, and files — that can be used to restore your PC in the event of a failure.
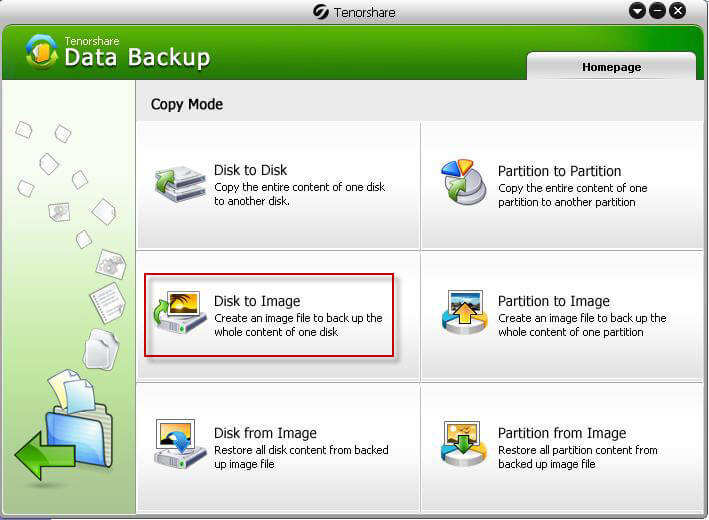
Step 1 Connect an external hard drive to your computer to save your image backup. Launch the software and select the option that says Disk to Image. It will let you create an image backup of your data.
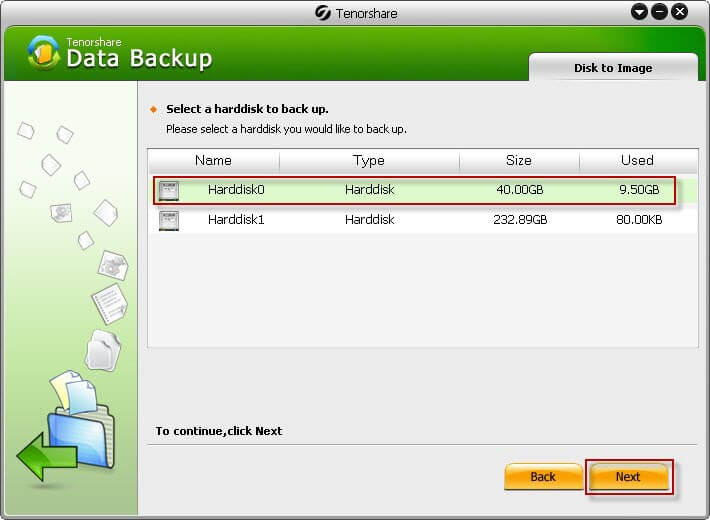
Step 2 On the following screen, choose the disk you would like to back up to an image file. Click on Next to continue.
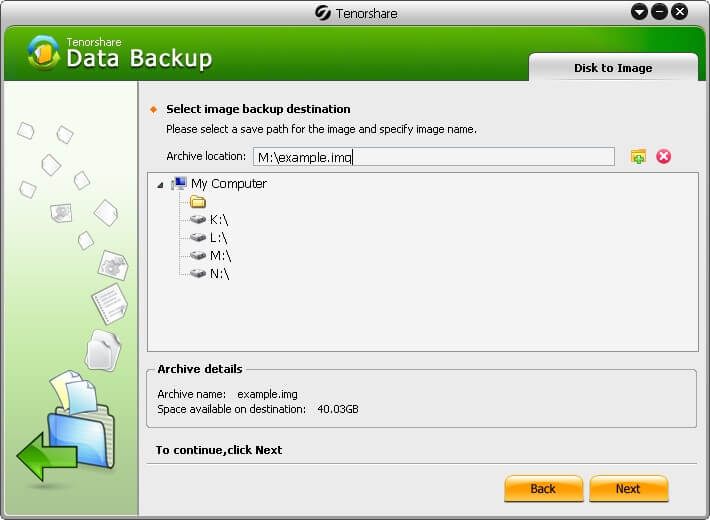
Step 3 The following screen will ask where you would like to save the image file. Choose a folder for it and click on Next to continue.
Step 4 Choose a compression level on the following screen. Then, click on Next. Wait while the software creates a full image backup of your selected disk.
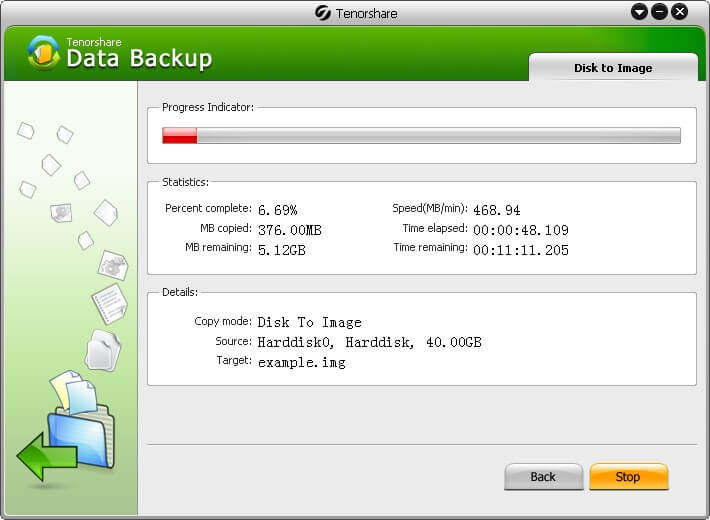
Once the backup is ready, you can copy it to any drive and you can even upload it to your cloud storage if you wish. That is how you create a full system backup Windows 10.
Extra Tip: How to Restore a System Image Backup on Windows 10?
Restoring a system image backup Windows 10 is as easy as creating one. All you need to do is reboot your machine, select a few options, and you can restore the backup.
Step 1: Reboot your computer from a bootable Windows 10 drive and select Repair your computer on the setup screen.
Step 2: Reboot your computer from a bootable Windows 10 drive and select Repair your computer on the setup screen.

Step 3: Select the image file on the following screen to restore it on your PC.
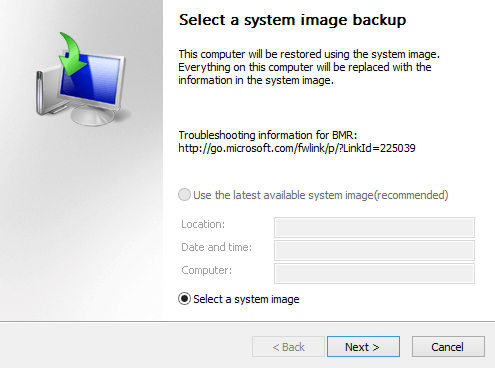
Your chosen image backup will be restored along with all of your files on your computer.
Wrap It Up
Creating a Win 10 image backup is not as hard as you might think. In fact, you do not even have to download any third-party apps to do the task on your computer. There is a built-in option to create image backups on your Windows 10 machine. And if you do not wish to use it, you have Tenorshare Data Backup at your disposal.
Speak Your Mind
Leave a Comment
Create your review for Tenorshare articles


