How to Recover Lost Data from Mac OS X 10.10 Yosemite
Can't find the files you want on Mac OS X Yosemite? Don't worry! Here we state two highly recommended solutions for Yosemite data recovery.
Before choosing a specific way to find back the files in Mac 10.10, you need to figure out whether they have been deleted or you just forgot where you've put them. Click the Spotlight at the top-right corner of Yosemite, then type the keyword and let it search.
But if you can't find the files with Spotlight, they are very probably missing. Under this condition, you need to find a 4DDiG for Mac Data Recovery utility to help you get them back.
1. Overview of Mac Yosemite Data Recovery
This Yosemite data recovery program (also named Mac Data Recovery) is designed for data recovery on Mac Yosemite, as well as Mavericks (10.9), Mountain Lion (10.8) and Lion (10.7). It supports a variety of files from Mac's hard drive and other portable devices.
- Work on Mac OS X 10.10/10.9/10.8/10.7
- Retrieve photos, videos, audios, emails, ZIP and others from Mac hard drive and USB flash drive, external hard drive, SD card.
- Support to recover data lost due to altered, corrupted, formatted or deleted.
- Offer 5 modes to scan lost files.
- Free recover 500MB files with the trial version.
2. Steps to Recover Data from Mac Yosemite Hard Drive
- Step 1: Download and launch the software on your Mac. Choose a drive where your files were saved before they got deleted and click on the Scan button.
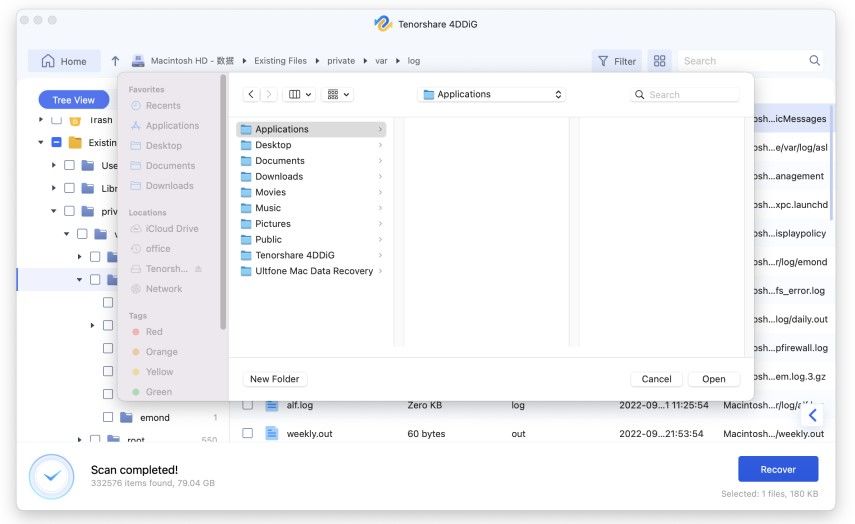
- Step 2: When the software has scanned your drive, select the data you wish to recover and click on the Recover button at the bottom.
- Step 3: Choose a folder where you would like to save the recovered photos and click on the Open button.


The solution and steps on data recovery Mac OS X 10.10 have been introduced here. All operations on all Mac OS X are identical.
Speak Your Mind
Leave a Comment
Create your review for Tenorshare articles


