How to Restore Files from File History in Windows 10
Windows 10 is very well-known for its various features including user interface and desktop, system security, command line, storage requirements, online services and functionality, multimedia and gaming, and the list goes on. But the most useful one for the people who usually have a habit of losing their important data is File History feature in system security. And today we are going to take you through this feature to recover files from File History on Windows 10.
The File History automatically creates a copy of every file in every folder in order to keep your files safe. As it takes backup of your files on regular basis, you can even have different versions of files. However, File History will not work unless and until you turn it on. You can have more backups only when you turn it on as early as possible. Simply follow below steps to restore your files with File History Windows 10.
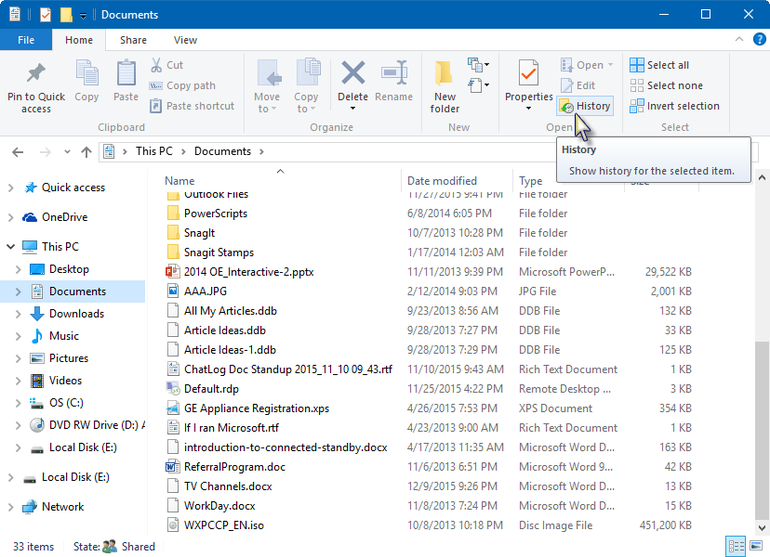
Step 1—Click on the File Explorer icon on taskbar. Now click the folder you wish to restore files from. This will open the folder that has all the files you wish to recover.
Step 2—Click the Home button residing on the top of the folder. Next, click on History tab. By clicking on the History tab, the File History program is fetched. The program looks similar to any plain folder.
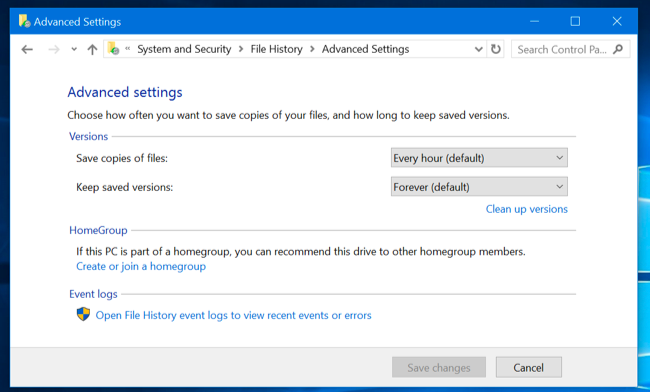
Step 3—You can now view all the files that are backed up by File History, that is, your desktop files, main folders, contacts, music, videos, and so on. Here, you can even check the contents in any folder. Take a note that you can always control the time interval of backup to be taken. This can be done by going to Windows 10 File History advanced settings. Here you will see two options—1. Save copies of files and 2. Keep saved versions. The first option allows you to manage the time interval of the backup to be taken. The default option is "every hour". In the second option, you can choose the time for which your backups should be stored.
Step 4—Now, you simply have to select which files you wish to restore. Herein, you will have to choose what exactly you need to retrieve—folder, multiple files, or just one file. In order to restore a particular version of any file, you can sort the files based on backup time. You can also simply search for any file/folder by typing the name of the same in the search bar.
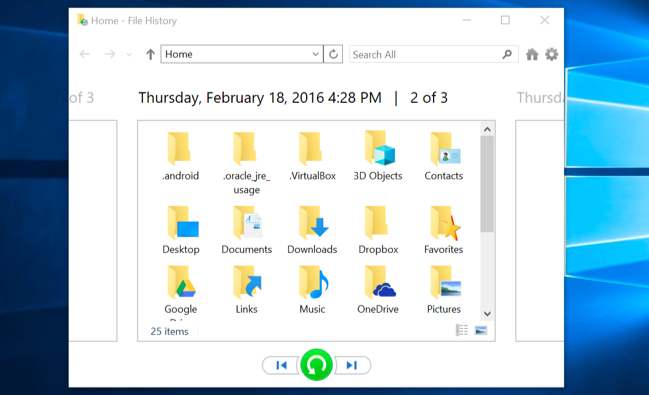
Step 5—Now that you are done with all the searching, selecting, and sorting process, you are just one step far to restore files from File History Windows 10. You just have to click on the Restore button. The clicking of Restore button places the file on its place from where it was deleted.
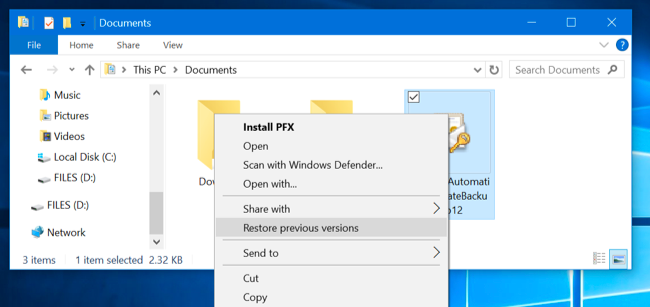
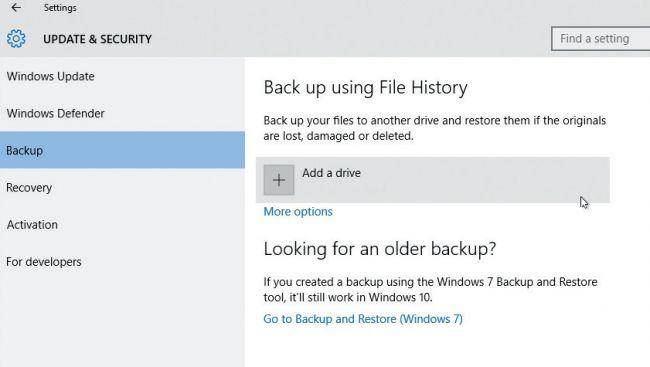
Note that, in case you encounter messages such as Windows 10 your File History drive credentials are no longer valid OR your File History drive is disconnected, you can simply go to the Settings—>Update & security—>Backup and again select the network. Now you are good to go. Follow steps described in the article above.
Tip: If you have lost data due to any possible reason (such as deleting, crashing, formatting), you can simply use 4DDiG for Windows Data Recovery. It is highly efficient and free-to-use software that can restore all your data in no time. For how to use 4DDiG to recover lost data from Windows 10, follow the steps below:


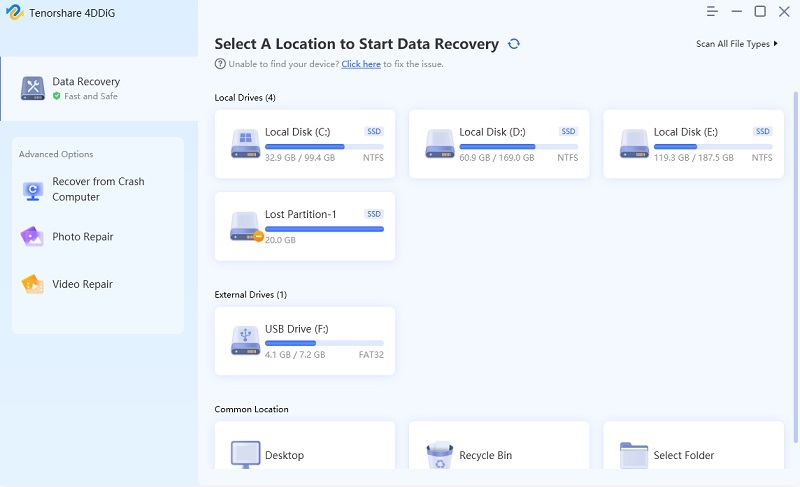
- Download and install Tenorshare 4DDiG in your Windows. Launch the program and select a location where you lost data and click Scan to proceed.
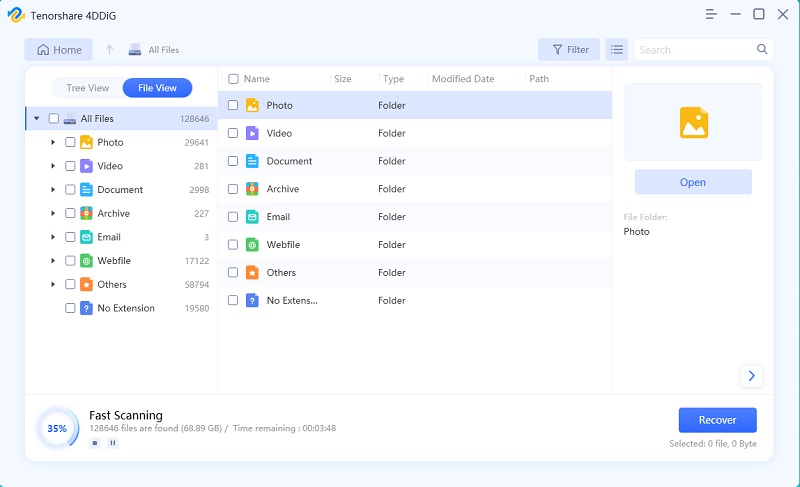
- 4DDiG will do an all-round scanning on the selected drive to find your lost or deleted data. After the scanning, you can select files to preview.
- Finally, you can choose target files and then click Recover to save them to a safe location.

Summary
We hope that the above-described simple steps in this article through which you can recover files from File History Windows 10 are helpful to you. In case of any concerns regarding the data restoring process from File History, feel free to contact us by commenting below. Your questions are always welcome.


Speak Your Mind
Leave a Comment
Create your review for Tenorshare articles


