How to Recover Data from Uninitialized Disk?
If you often plug-in new disks to your Windows based computer, you have likely experienced the uninitialized disk error at least once in your life. The issue arises due to several reasons and it could prevent you from accessing data on your drive. If that's the case with you, you have a few ways available to recover data from uninitialized disk. For most users, since an uninitialized disk does not allow you to access the contents on it, there really is no way for you to access your data on it. Fortunately, there is a data recovery software that allows you to recover data from your disks. The following guide shows how to recover uninitialized disk and how you can fix the issue altogether on your machine.
- Part 1. How to Recover Data from Uninitialized Disk?
- Part 2. 3 Tips on How to Fix Hard Drive Uninitialized
Part 1. How to Recover Data from Uninitialized Disk?
It's normal to panic if you have your important business files saved on your disk and your disk appears as uninitialized on your system. However, using a data recovery software, you can recover your files from your disk and use your files as if they were never lost.
Tenorshare 4DDiG for Windows Data Recovery is a software that makes it possible for you to recover data from your uninitialized disks. It can work with you to locate your files that can be recovered and offers you the option to save your recovered files in any folder on your machine.
The software can be used to recover data if the uninitialized disk shows disk capacity, 0 bytes used space, or 0 bytes free space in the file explorer. The following is how you use the software to recover your data.


Step 1 Get the latest version of the software and install it on your computer. Launch the software, select your uninitialized drive, and click on the button that says Scan.
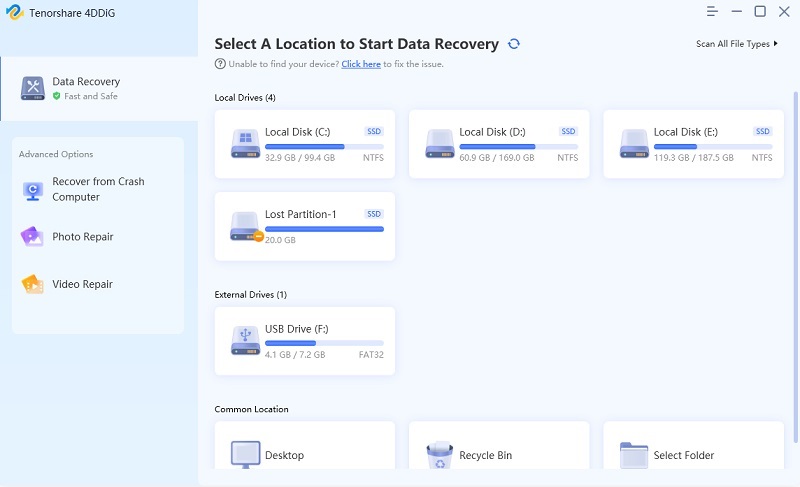
Step 2 On the following screen, you will see all the files you can recover from the disk. Select the files to be recovered and click on the button that says Recover button.
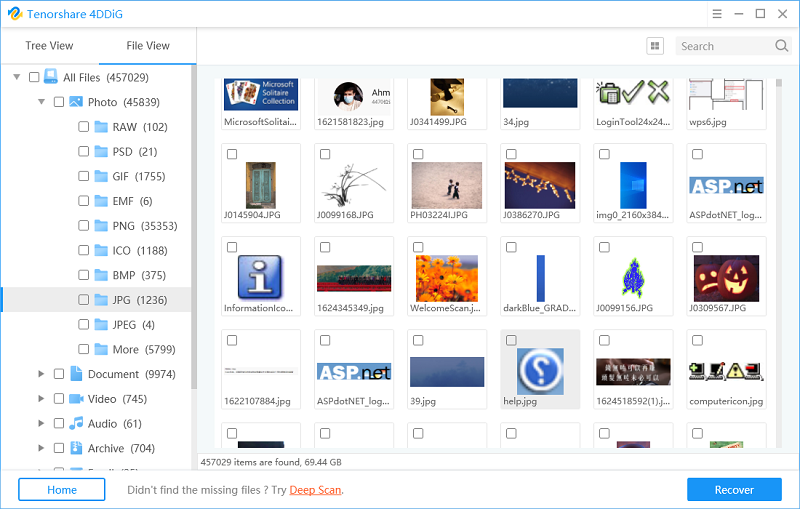
Step 3 The following screen will ask where you would like to save the recovered files. Choose a folder on your computer for it.
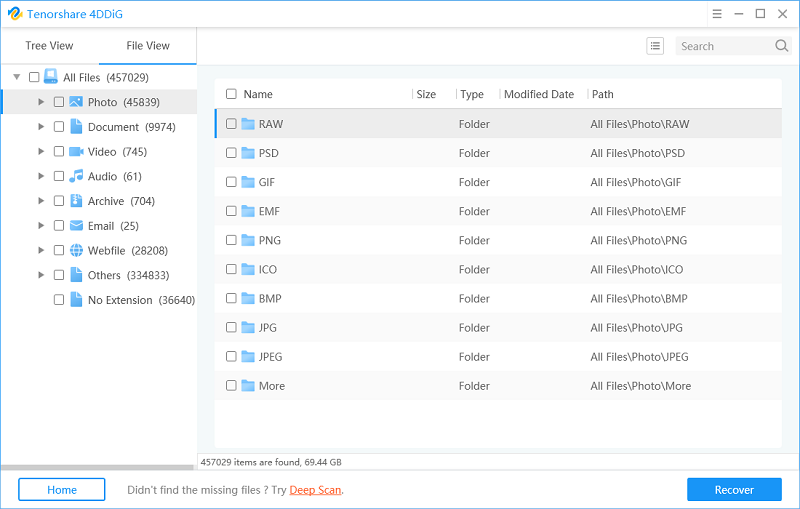
You are done. Your chosen files will be recovered from your uninitialized disk and saved to the selected folder on your computer. That is how you do a data recovery from uninitialized hard drive.
Video tutorial: How to Fix External Hard Drive Not Initialized|Disk Unknow Not Initialized
Part 2. 3 Tips on How to Fix Hard Drive Uninitialized
Recovering data from your uninitialized drive is one thing and you may want to fix your drive so that errors like this never occur again.
There are a few things you can do to fix the hard drive uninitialized issue on your computer. Each of these methods use a unique approach to fix the issue and so use all the methods until you find the one that works for you.
1. Reinsert the hard drive and reboot the system
The first thing you will want to do is remove the hard drive from your system and then put it back in. This will reinitialize your hard drive in the system and your system will recognize the drive and let you access the contents in it.
To do that, simply eject the drive from your system. Wait for about a minute and then put the hard drive back in to your system. Reboot your system and you will find that your drive is no longer uninitialized.
2. Check the hard drive with Chkdsk command
If there is an issue in the drive itself, you may want to run a drive check test to find and fix the issues on your hard drive. It is easy to do that as there is a command in your command prompt that lets you check your disks for any errors. It also offers the option to fix the issues for you.
Step 1. Press the Windows + X keys on your keyboard and select Command Prompt (Admin) to launch a command prompt window.
Step 2. When a command prompt window launches, type in the following command and press Enter.
chkdsk /f /r
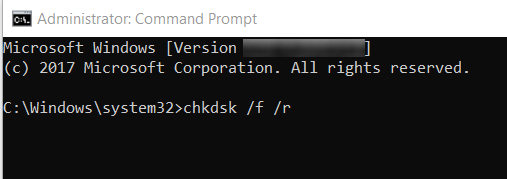
The command will scan your drive for any issues and fix the issues for you.
3. Initialize Disk in Disk Management
There is an option on your computer to manually initialize an uninitialized disk. Doing so may affect the files stored on the drive and so you are highly recommended you first recover your data using the above data recovery method. Then, you can follow the following steps to initialize your disk using the Disk Management utility.
Step 1: Right-click on My Computer and select the option that says Manage. It will launch the Disk Management utility.
Step 2: When the utility opens, find your disk and right-click on it and select Initialize Disk.
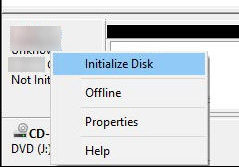
The utility will manually initialize the disk for you so you can use it with your computer. There are options for external hard drive uninitialized Mac issue as well and you may use a dedicated software to get the task done.
Summary
If your disk appears as uninitialized on your computer, the first thing you will want to do is recover data from uninitialized disk so you do not lose your data. You may then follow the tips to fix the issues on your drive.


Speak Your Mind
Leave a Comment
Create your review for Tenorshare articles


