How To Fix 'This Device Isn't Eligible For The Requested Build' Error
iTunes performance errors are not too uncommon and we all have to face to every now and then. Recently, many users have reported about an error where they get the device not eligible for requested build message while trying to update or restore their iPhones using iTunes.
This error indicates that iTunes cannot connect to Apple Update Servers and can cause a great deal of irritation and discomfort to the users. Before you start panicking, let me tell you that you can easily resolve this error. All you need to do is implement the below methods one-by-one until this issue is fixed. Let's read them out.
Why This Device Isn't Eligible For The Requested Build Error Occurs
Before reading the solutions, it is vital to know the reasons that have prompted iPhone not eligible for requested build issue in the first place. Knowing them will help you avoid facing this issue in the future.
Some common reasons that may trigger this error include:
- Weak internet connection
- Issues in Host File
- Glitches in iTunes that an be removed by Updating it
- System issues in iTunes that warrant Repairing
6 Methods To Fix Device Isn't Eligible For The Requested Build
After going through the potential reasons of why you're facing the device isn't eligible for the requested build error, let us delve into the 6 simple yet proven ways of troubleshooting it.
- Method 1: Update iTunes
- Method 2: Check The Internet and Router
- Method 3: Temporarily Turn Off Security Software
- Method 4: Check The Hosts File (Win & Mac)
- Method 5: Update Or Restore With Another Computer
- Method 6: Quickly Repair "This Device Isn't Eligible For The Requested Build" With TunesCare
Method 1: Update iTunes
First things first, you should update iTunes to the latest version. Every iTunes update involves automatic fix of many underlying bugs or errors. That's why we recommend you to install the Update soon after it's available.
To check and install Updates:
On Mac:
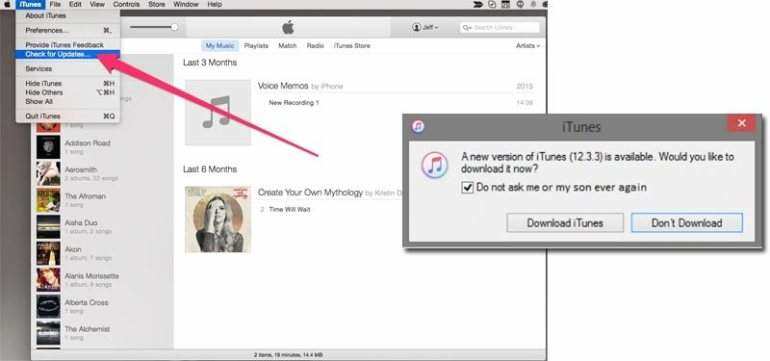
- Open iTunes and click on iTunes option on the Top bar. From the drop-down menu, select Check for Updates.
iTunes will provide you the on-screen instructions to update your iTunes.

On Windows:
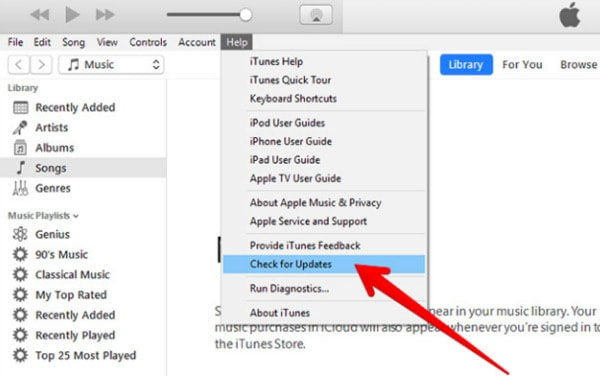
- Launch iTunes and click on Help at the Top Menu.
On the drop-down list, hit on Check for Updates and follow the on-screen instructions to update your iTunes.

Method 2: Check The Internet and Router
Needless to say, iTunes need an active Internet connection to update your device. One of the reasons of why this error appeared could be your weak or disabled Wi-Fi connection.
You should ensure that your computer has an active internet connection. Open the Web Browser page and refresh it to confirm the strength of your Wi-Fi connection.
Method 3: Temporarily Turn Off Security Software
Sometimes, the Antivirus or Windows Defender Antivirus feature on your computer blocks the connection between iTunes and Update or Apple Servers. Such action is taken when these software detect an unauthentic activity or action that may expose your computer to malware threats.
To avoid this, you should disable the Security Feature on your computer for a few minutes and connect your iPhone to iTunes again and complete the Restoring or Updating process.
Method 4: Check The Hosts File (Win & Mac)
Host file is an OS file that your computer uses to connect Servers (including Apple Server) to IP addresses. You need to check if Host File is available to connect iTunes to Update Server.
To do that:
On Mac:
- Launch Finder and navigate to Applications > Utilities > Terminal.
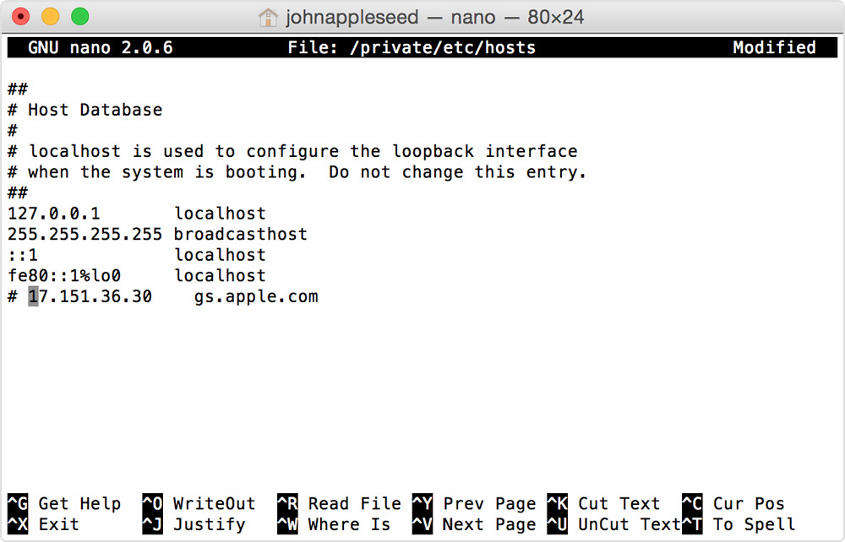
- Now, type "nano /private/etc/hosts" command and hit Return. It will display the Host File.
Now, go to "gs.apple.com" entry using Down key. If you can't find this entry, then Host File is having any issue.

To fix Host File:
- Add # symbol + Space ("#") at the start of gs.apple.com entry and press Ctrl + O to save it.
- After that, press Return when the terminal asks for the File Name and hit Ctrl + X to leave the Terminal.
- Finally, restart your Mac.
On Windows:
Go to Microsoft Support and follow the subsequent guideline corresponding to your Windows version to restore the Host File back to default.
Method 5: Update Or Restore With Another Computer
You should try to Restore your iPhone from another computer to confirm that there aren't any software or hardware issues with your current computer.
Additionally, you should also change the internet connection as Network Settings can interfere with communication between your computer and Apple Servers.
Method 6: Quickly Repair "This Device Isn't Eligible For The Requested Build" With TunesCare
Have you ever thought how great it would be to have a professional software that can repair iTunes without having to go through all these complicated methods? Luckily, you do have such an option. Tenorshare TunesCare is the one-stop solution.
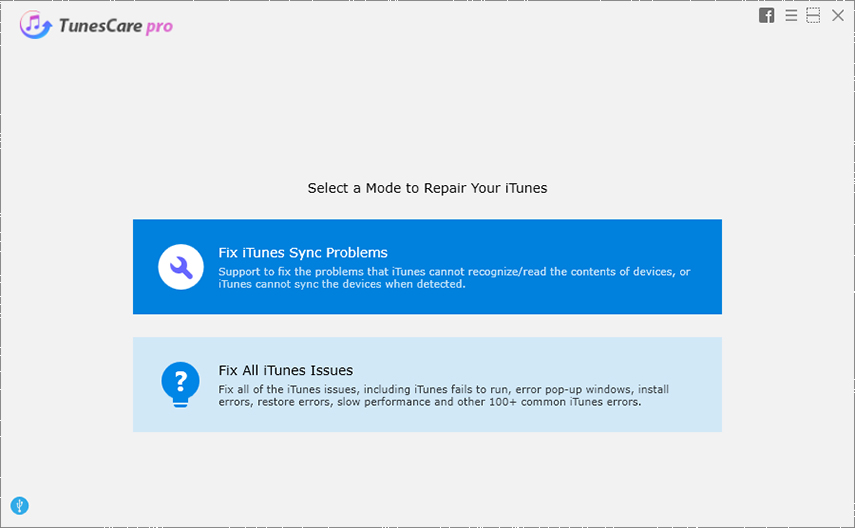
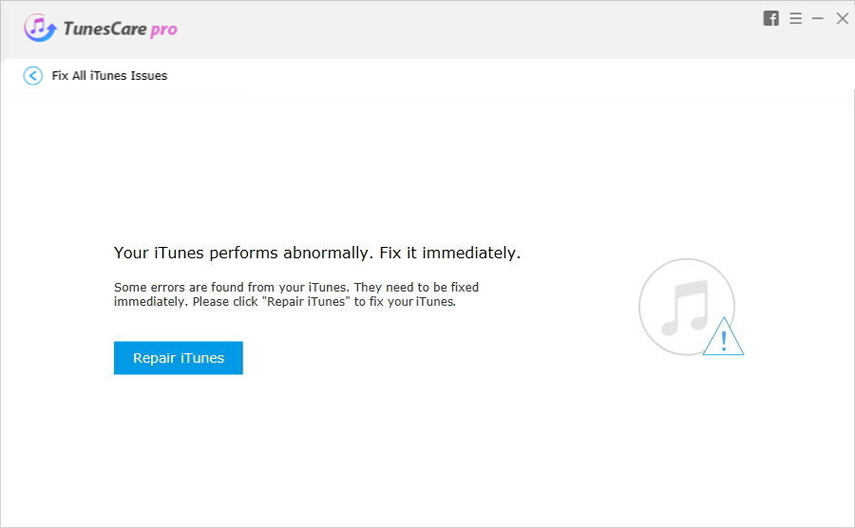
After downloading and installing TunesCare on your computer, launch it and hit on "Fix All iTunes Issues".

The software will scan your iTunes and ask you to repair it if it finds any issues in its performance. Hit on Repair iTunes to proceed.

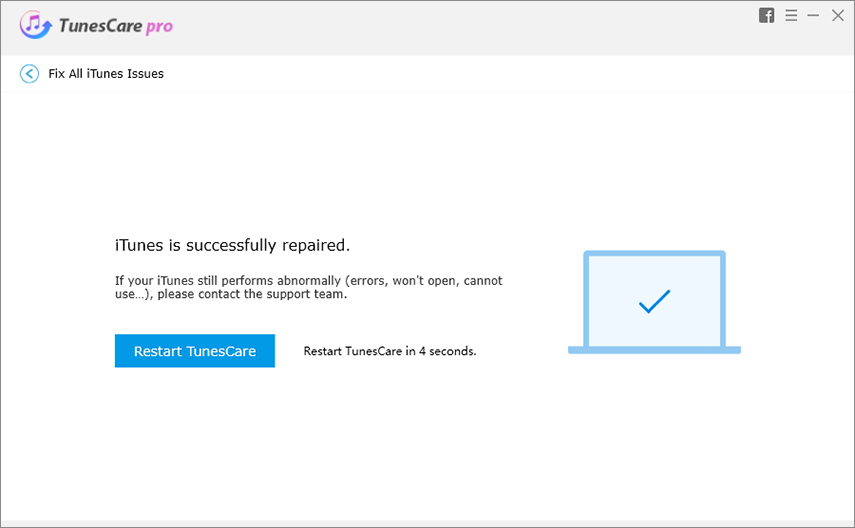
The software will start repairing your iTunes. It will hardly take a few minutes to make iTunes running properly like it's supposed to be.

Summary
This blog post has discussed a number of methods you can rely on whenever facing with "this device isn t eligible for the requested build" error. I hope these methods will prove to be helpful for you in fixing this issue.
I recommend you to install Tenorshare TunesCare to repair your iTunes software and avoid facing any iTunes-related errors in the future.
- Solve iTunes Sync Problems & Fix All iTunes Errors
- Boost iTunes to Best Performance
- Fix iTunes cannot Recognize New iPhone 11/11 Pro/XS/XS Max/XR
- Pefectly Solve All iTunes Connection Issues on iOS 13 Devices
- Fully Compatible with iTunes 12.9
Speak Your Mind
Leave a Comment
Create your review for Tenorshare articles

