How to Boot Windows 8 or 8.1 from USB Drive
It happens more often that it should be: your computer is failing you, and you can’t use the CDs or DVD installer because there’s no optical drive. What can you do to get your back on your feet? You can use a USB drive to boot or reinstall your Windows. And for today’s tech world, a USB drive is a better solution because we can safely say that almost every computer on earth has USB ports.
If you are ready to get your hands dirty, let’s start.
Part 1: What Do You Need?
As the title suggested, you need an empty flash drive or any USB storage that you can put your hands on. It should be 4 GB in size if you plan to install the 32-bit version of Windows 8 or 8.1, or 8 GB drive for the 64-bit version. If your drive is not empty, a pre-formatting process is suggested.
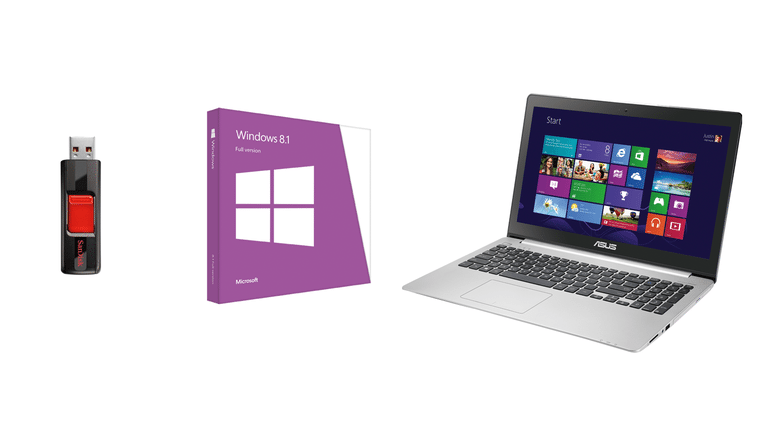
Second, you need the Windows 8 or 8.1 installers in the form of DVD or ISO (recommended) along with the product key. Either you already have it as part of your computer purchase, or you could purchase a new copy.
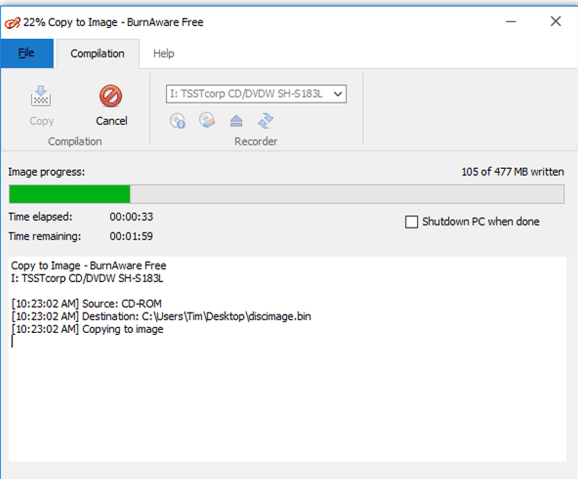
If your installer is in the form of an optical disc, you need to create the ISO version of it. Since your computer doesn’t have the optical drive, you need access to another computer that does. There are tons of applications that can help you turn a DVD into an ISO file such as BurnAware Free.
And needless to say, you need a working computer to boot the drive and install or repair Windows 8 or 8.1.
Part 2: Create a Bootable USB Drive from the ISO file
Unfortunately, due to the different file structure, you can’t just copy an ISO file to USB drive and hope it to boot. You need to create a bootable drive.
Fortunately, creating the bootable drive is not difficult. You need a free tool from Microsoft called Windows 7 USB/DVD Download Tool. Even though the tool bears the name Windows 7, it works perfectly fine with Windows 8 and 8.1 ISO images.
Install the tool after you finish downloading it. And depending on what version the Windows version of the computer where you install the tool, you might be required to install another free tool from Microsoft called .NET Framework.
Then run the tool and locate the ISO file by clicking Browse. Choose it as the source file.
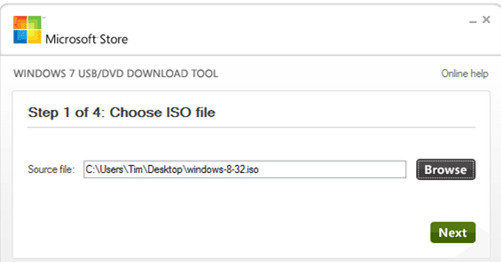
Then click Next to continue. You will be asked to choose the media type. Choose USB Device and not DVD. Then you need to choose the USB that you want to use and click Begin Copying.
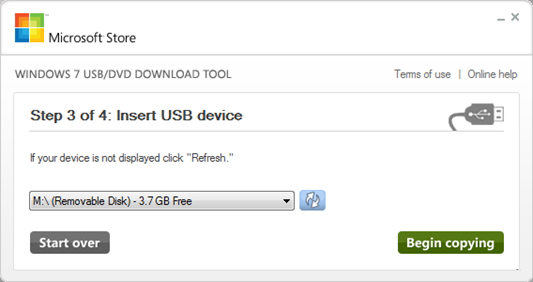
If the USB is not empty, there will be the option to erase it. Confirm the process, and wait for the tool to format the drive and then copy Windows 8/8.1 installation files. The process could take some time, so please be patient.
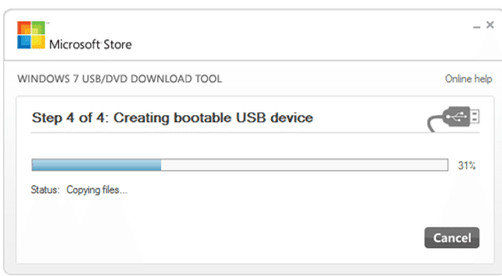
When everything is done, you will receive the "Bootable USB device created successfully" message.
Part 3: Boot Windows 8/8.1 from the Bootable USB Drive
Normally, your computer is set to boot from the main hard drive. But you could change this configuration.
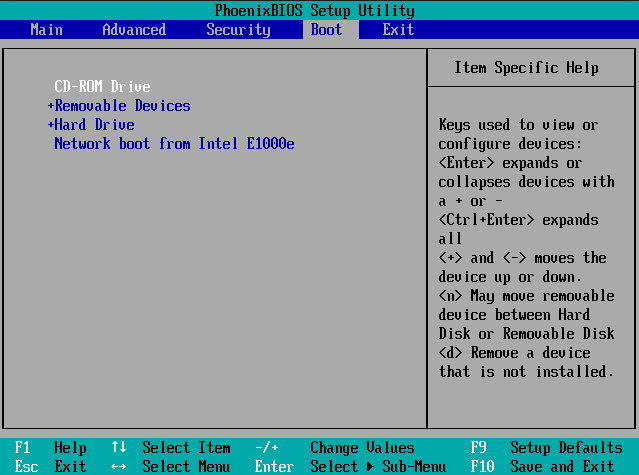
Some computer will give you options to choose the boot drive during the startup, but most don’t, and you need to configure this from the BIOS. Since there are virtually too many different startup setups, you should consult your documentation. But in general, you should restart your computer and press one of the Function Keys to enter the BIOS. Then you navigate the BIOS menu using the arrows and enter keys.
After confirming the changes, your computer would restart once more, and it will boot from the USB. Make sure that you’ve already inserted the bootable USB that you created above before the restart.

Since the USB is already configured with Windows 8/8.1, the booting process will use the Windows 8/8.1 inside the USB to continue. All that you need to do is to follow the onscreen process.
The Booting Specialist
To help you make the whole booting process easier, you could use some help from an app called Windows Boot Genius. This is the ultimate Windows boot doctor that aims to fix a variety of booting issues including computer crashes, blue screen, random restarts, can't boot, and other Windows booting problems.

Speak Your Mind
Leave a Comment
Create your review for Tenorshare articles

