Top 2 Methods to Create Windows 7 64/32 Bit Repair Disc/Disk
If your Windows 7 won't start or start with significant problems, you may need to use the System Repair Disc to fix problems with Windows 7. When computer came with a Windows 7 DVD, you can use that DVD to repair your system. But what if you don't have one? It is necessary to create a System Repair Disk at once. Spend a few minutes to read this passage, which tells 2 ways to create Windows 7 64/32 bit repair disc and how to use it to repair your computer.
2 Methods to Create a System Repair Disk for Windows 7 64/32 Bit
Situation 1: When Your Windows 7 PC is Unable to Start Normally
If your computer has failed to boot normally, you can take use of a professional Windows 7 repair disk creator, also known as Windows Boot Genius. To start with, you should prepare a workable computer and a blank disk, such as CD/DVD/USB flash drive. And then you can follow the instructions below.
- 1) Download and install Windows Boot Genius on the workable computer you have prepared.
- 2). Insert the CD/DVD or USB into the computer and launch the program. Then, just click "Burn" to start creating a Windows 7 system repair disk.

- 3). Then you can insert the newly burnt disk into the PC which has run into a problem, and start to fix your computer. You just do the following:
Reboot the computer and set its BIOS settings to let the PC boot from the disk.
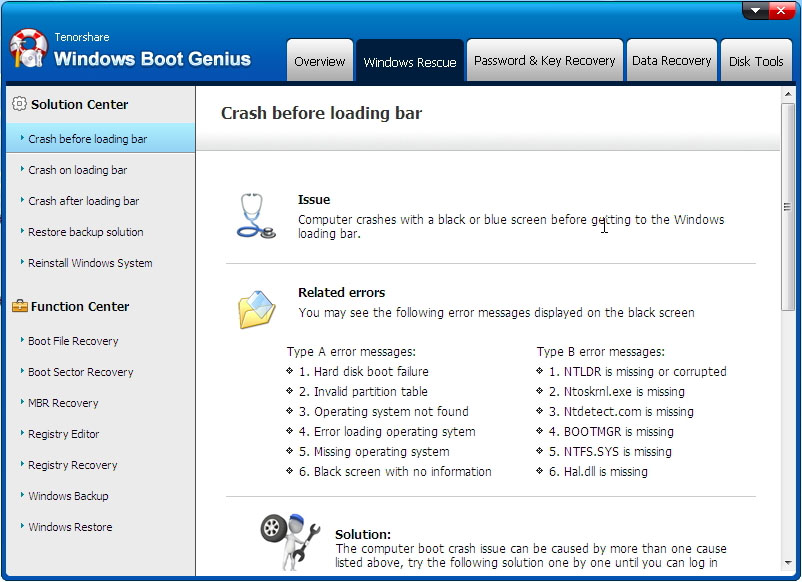
After entering the Windows system, launch Windows Boot Genius again. Choose "Windows Rescue" on the top tab. It shows "Crash before Loading Bar" by default. Choose the right error type, and try the provided solutions to fix the problem your computer has run into.
Situation 2: When Your Windows 7 Computer can Boot up Normally
If your computer can work properly, and you want to create a Windows 7 repair disk for further use, then you can try this way. Please do as the following:
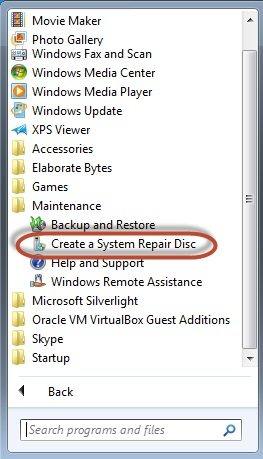
- 1) Open the Start menu and type Backup. Choose "Backup and Restore". Click "Create a system repair disc".

- 2) Click the Create a System Repair Disc link.
- 3) Insert a blank DVD into your DVD drive. Click the Create Disc button, and Windows will copy over the appropriate files. Once it's finished, the autorun window will appear, showing that the disc is named "Repair Disc Windows 7 64-bit" (or "32-bit", if you are using that version of the OS).
Take disc out and put it in some place where you will be able to find in an emergency.
You can choose either of the 2 ways to create a system repair disk for Windows 7, according to your own situation. You can also take use of the same methods to create repair disk for Windows 8, Windows 10 and etc.

Speak Your Mind
Leave a Comment
Create your review for Tenorshare articles


