Guideline for Tenorshare iAnyGo
Guideline for Win
Try iAnyGo Now
Easily scan Pokéstops and Gyms, generate optimal routes, and maximize item collection for efficient gameplay. Enhance your Pokémon GO experience with iAnyGo!
Try iAnyGo Now
If you're a Pokémon GO enthusiast, iAnyGo offers unique features to enhance your gameplay. Discover how to catch specific Pokémon nearby, tackle tough raid battles, and generate optimal routes by scanning PokéStops and Gyms.
This guide is perfect for both new and experienced players looking to enhance their Pokémon Go experience. Get ready to explore new possibilities for your Pokémon journey with ease and convenience!
News Please note that this new feature is available on iAnyGo latest version.
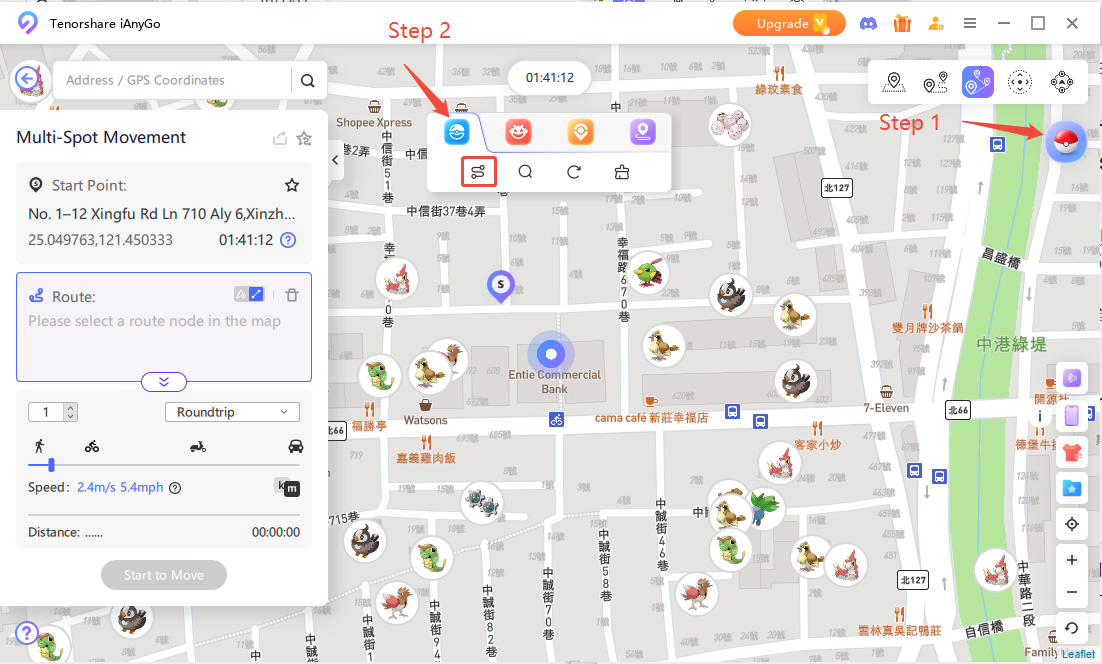
This feature allows you to load data for Pokémon within a 5km radius of your current location and display it on the map interface. You can view Pokémon details such as Type, Distance, and Despawn Time. Note that you need to spoof your location to Taiwan in order to use this feature. Currently, it is only available in the Taiwan region, with other regions still under development.
Video
Step 1 Change location to Taiwan: Click on the Poké Ball icon in the top right corner. After the navigation bar appears, click the first icon to scan for nearby Pokémon.
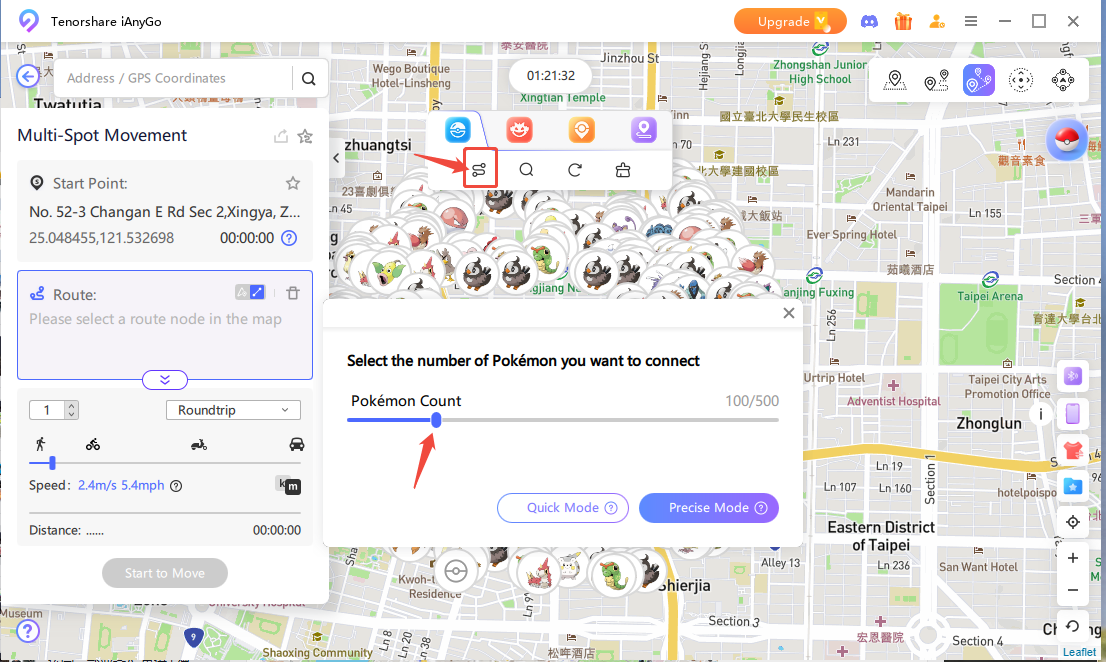
Step 2 Pokémon Count: Select the number of Pokémon you want to connect (up to 500). The system will generate the route for you automatically.
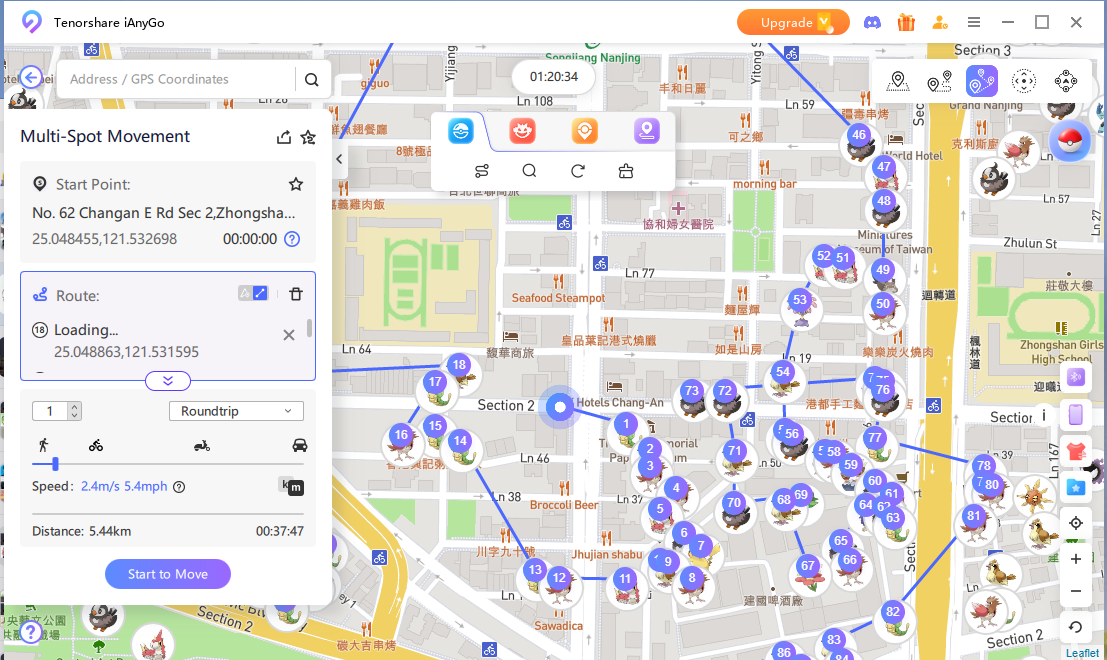
Step 3 Catch Pokémon: Start moving according to the selected number. The system will adjust the spoofing speed and type. Now you're ready to catch Pokémon!
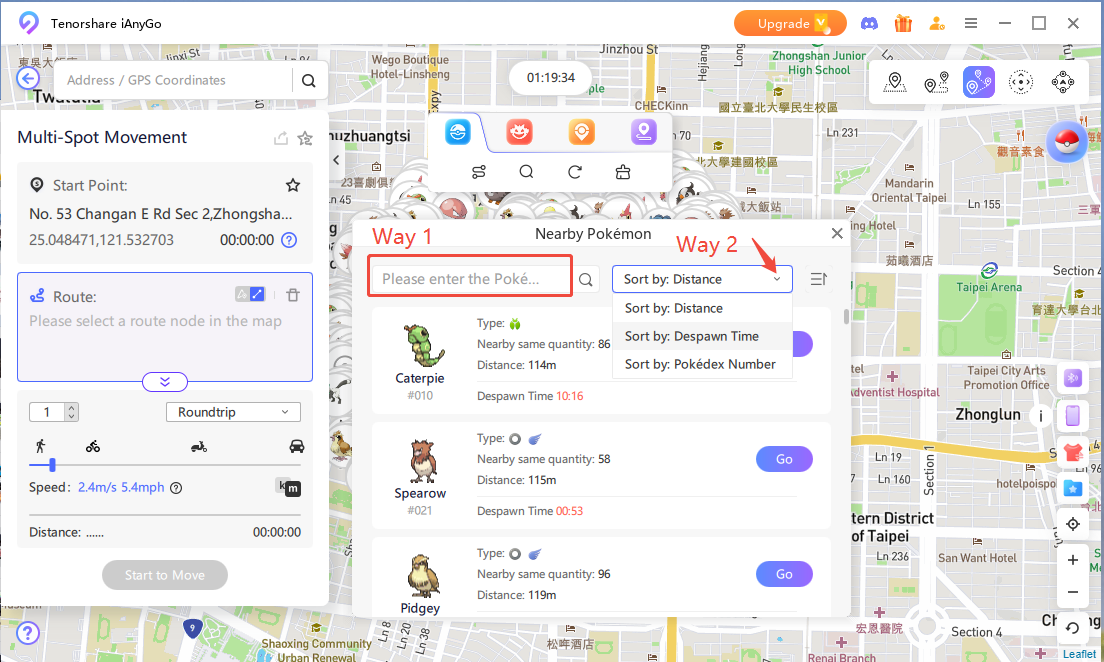
Step 4 Nearby Pokémon: You can use the second magnifying glass icon to search for Pokémon within a 5km radius.
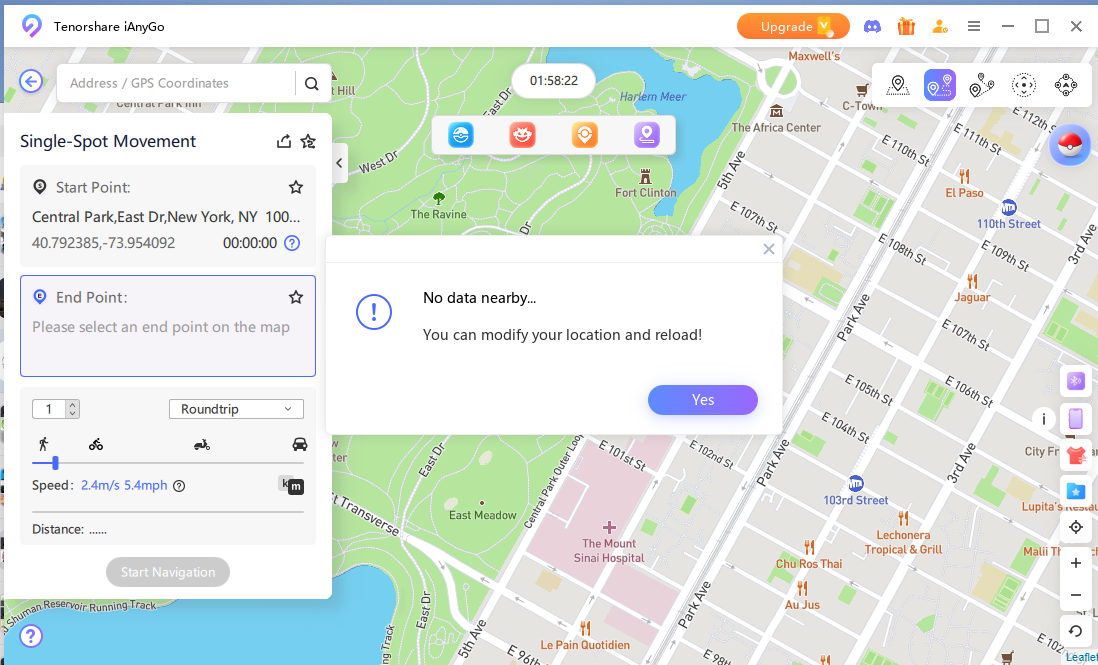
Note "No data nearby" Solution
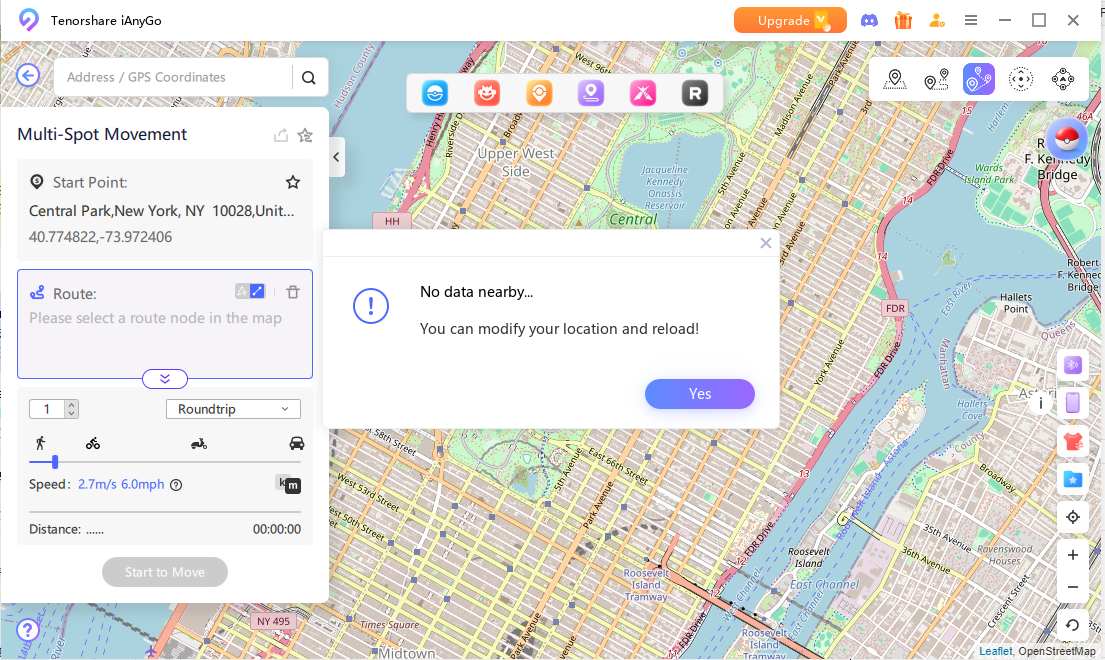
If you see the message "No data nearby", it is likely that the selected location is not in the Taiwan region and this feature will not work. You can change your location to one of the following popular Taiwan coordinates:
News Please note that this new feature is available on iAnyGo latest version.
This feature loads the raid battle data within a 5km radius of your current location and displays it on the map. You can also view detailed information about the Pokémon, such as its level, distance, and type.
Step 1 Nearby Raid Battles: Click on the Poké Ball icon in the top right corner. After the central navigation bar appears, click the first icon to scan for nearby raid battles.
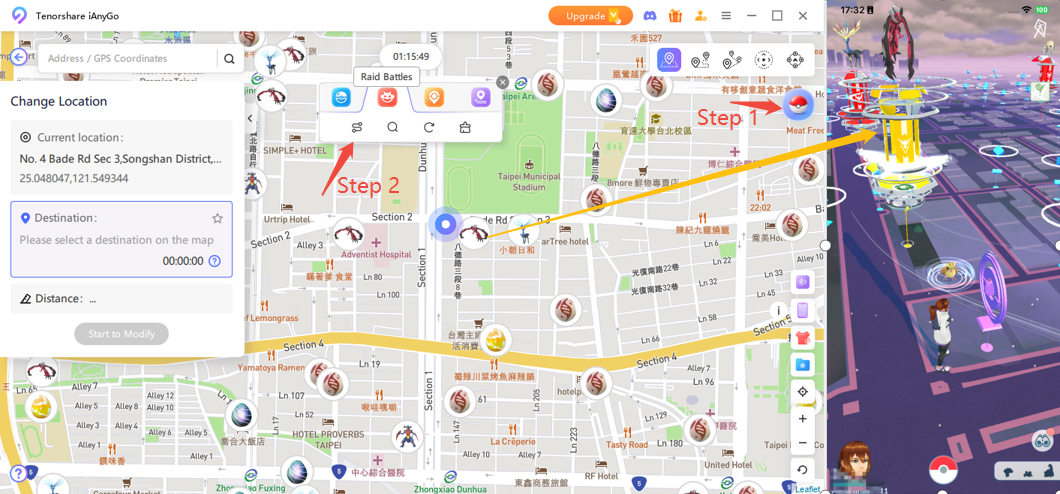
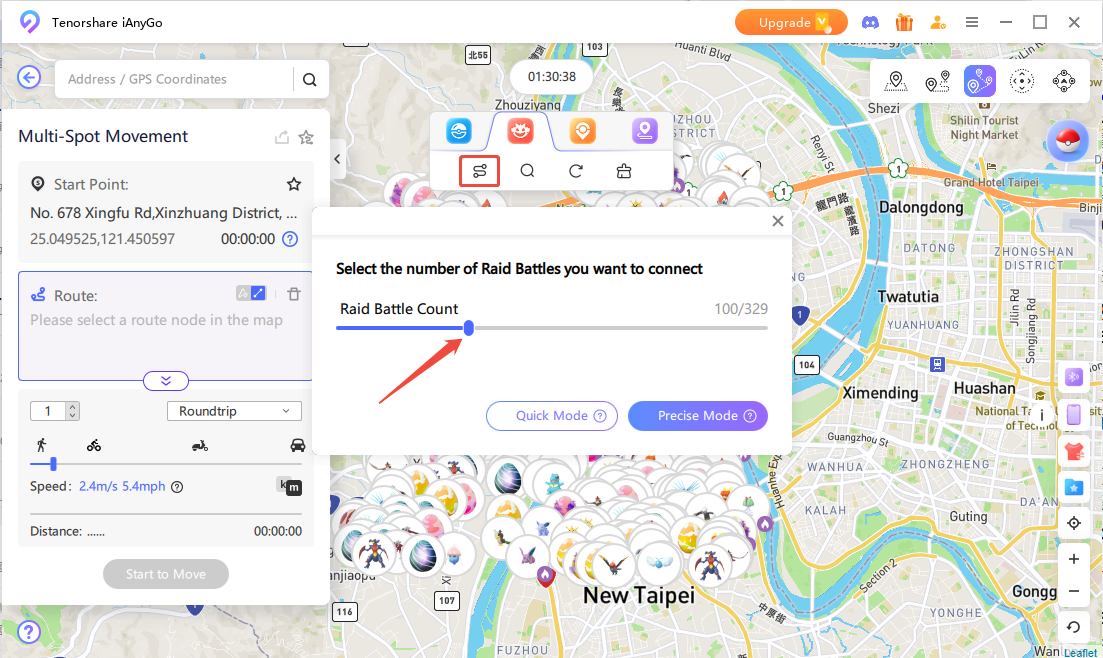
Step 2 Raid Battle Count: Select the number of raid battles you want to connect to.
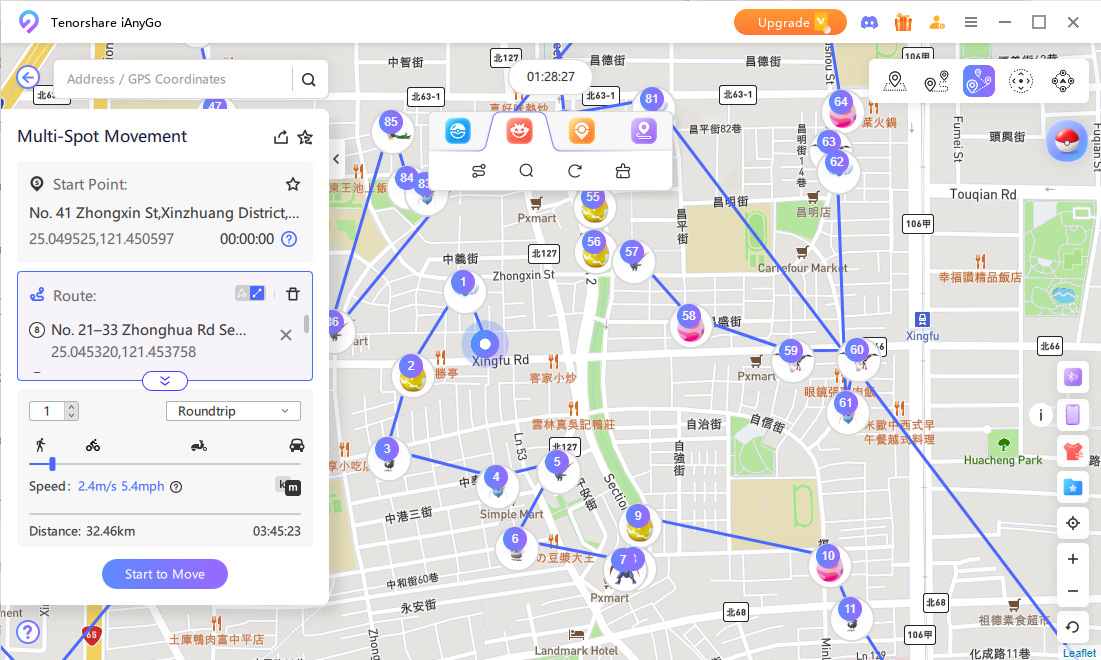
Step 3 Start to Move: Based on the number of raids you selected, the system will generate a route (you can adjust the spoofing speed and type). Get ready to catch Pokémon!
TipsYou can find nearby raid battles within 5km by clicking the second magnifying glass icon.
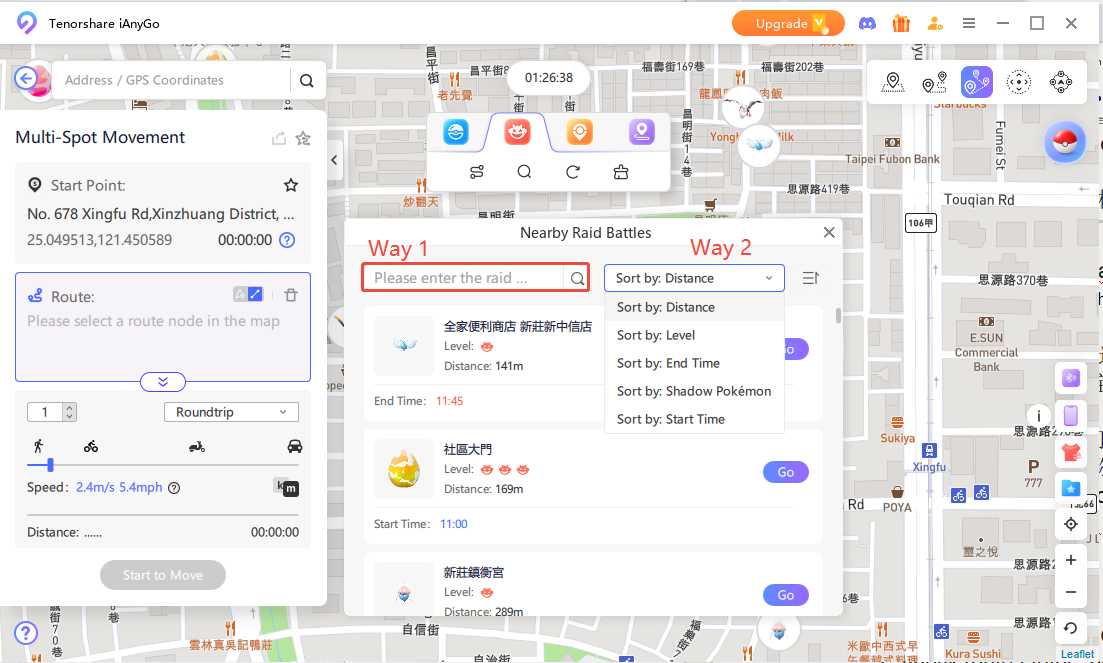
Note If you see a “no data nearby” message, it’s likely that the location data you’ve selected is insufficient. It’s recommended to try changing to another popular coordinate.
Never waste time planning routes again! Our new smart route generator creates the most efficient path for your Pokemon GO adventures instantly.
News Revolutionary Features Update
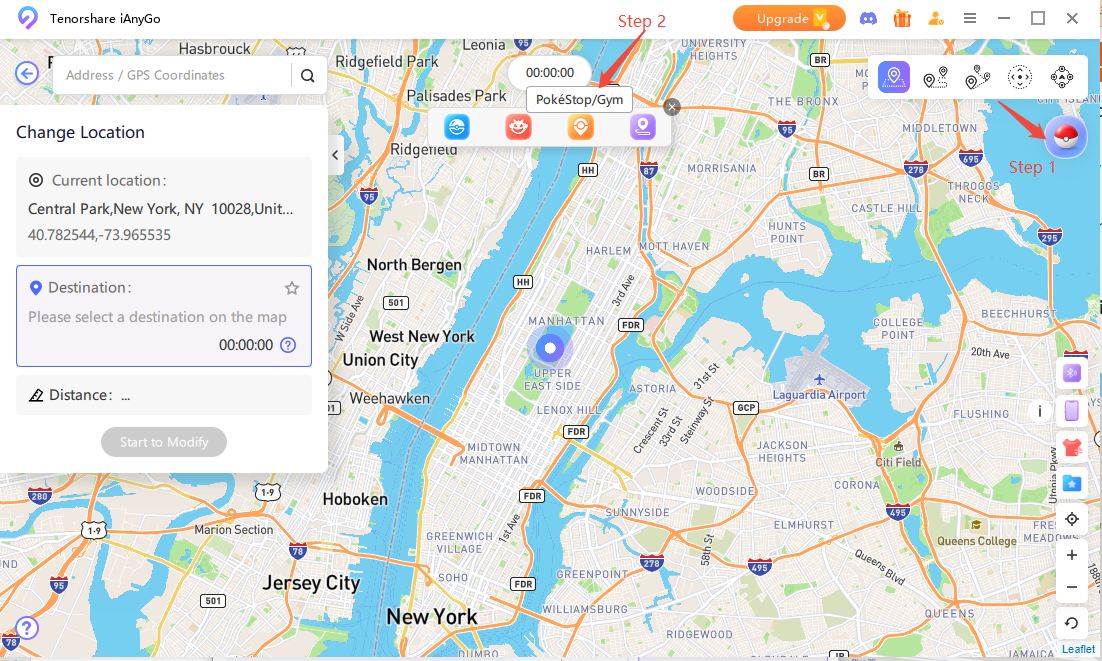
Step 1 Scan Pokestop & Gym
Click on the second icon in the lower left corner to scan Pokestop & Gym nearby. Then tap “Start to Move” after selecting your route. iAnyGo will automatically scan for Pokestop & Gym near the selected location.
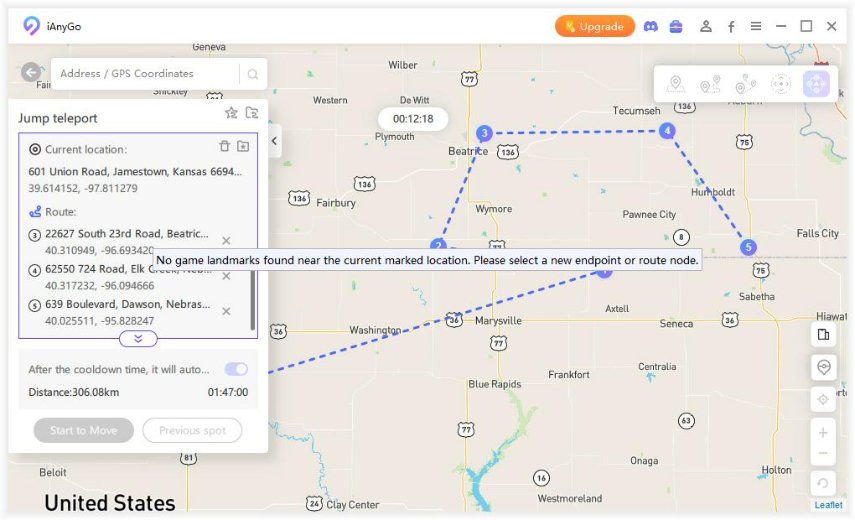
Step 2 Select a New Route Node
If there is no game landmarks found near the current marked location, there will be a reminder. You should select a new endpoint or route node.
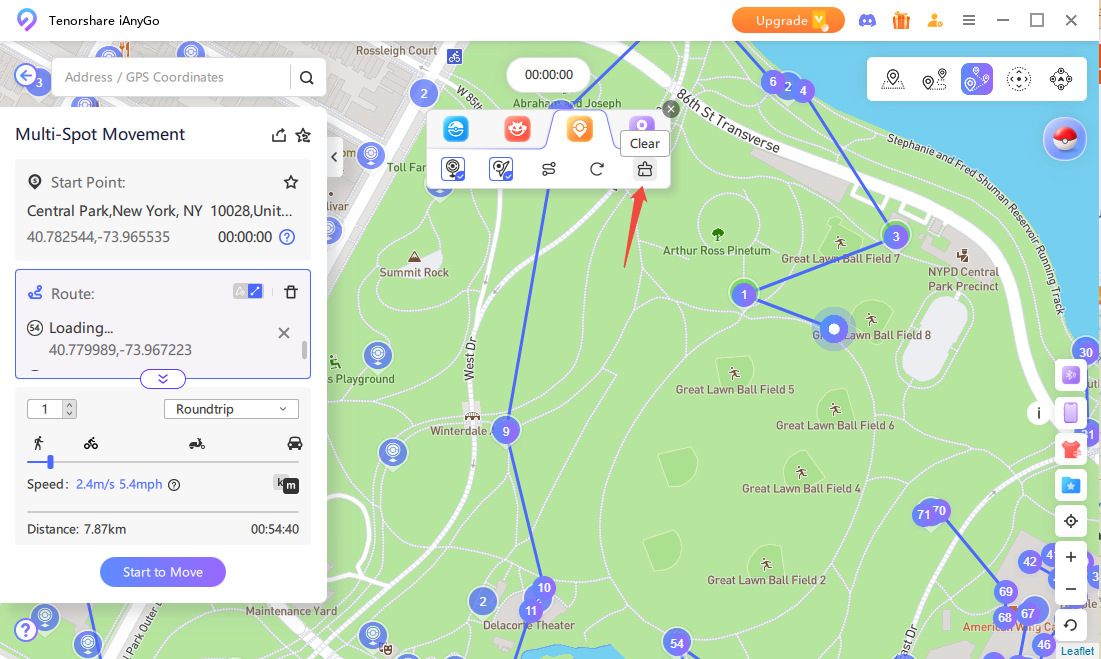
Step 3 Wipe out Marked Location
Tap on “Clear” icon to wipe out all marked locations. Now you can mark and find new game landmarks again.
Step 4Auto Connect Nearby Pokestops and Gyms
After scanning is complete, click "Auto Connect Nearby Pokestops and Gyms" at the top of the screen.
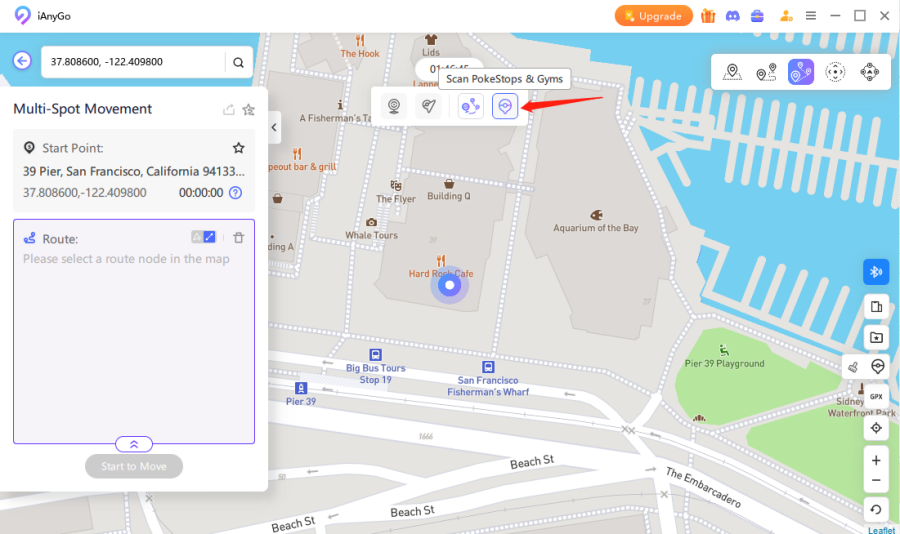
Step 5Generate Route
Select the number of Pokestops and Gyms you want to connect (up to 1000 each), then click "Generate Route".
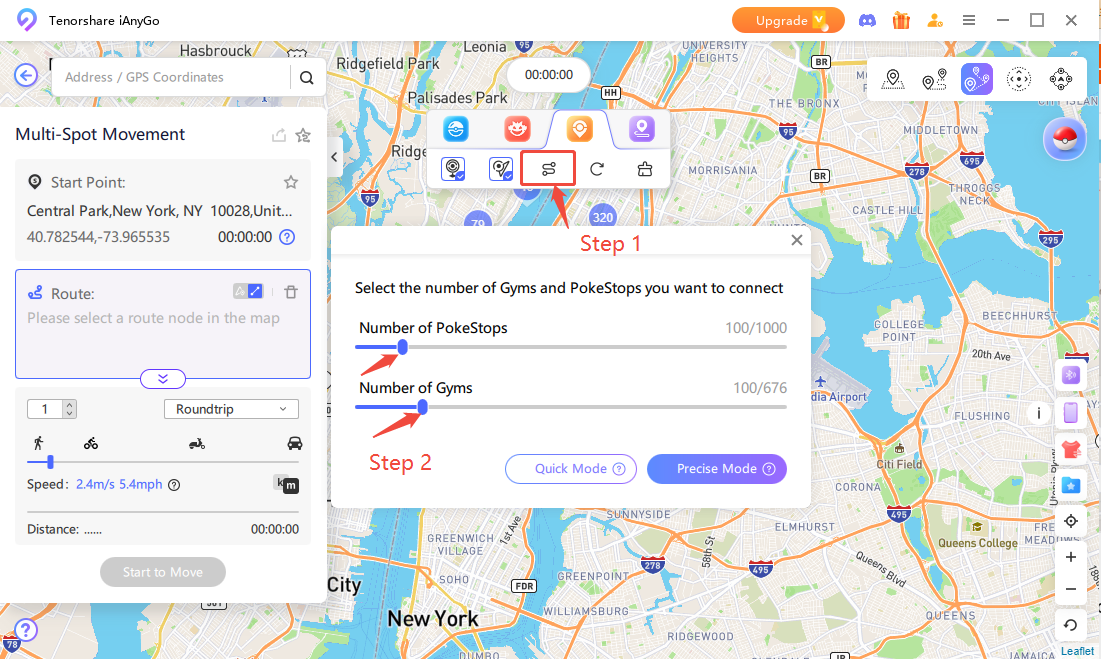
![]() Note:
Note:
Combined with Pokemon GO Plus+, this feature helps you collect maximum items with minimal effort while you focus on other activities!
News Please note that this new feature is available on iAnyGo latest version.
Easily track and manage your Pokémon route tasks with the following steps. This feature helps you check route lengths, estimated times, and other relevant information to optimize your route planning.
Step 1 Click the fourth button to get nearby information.
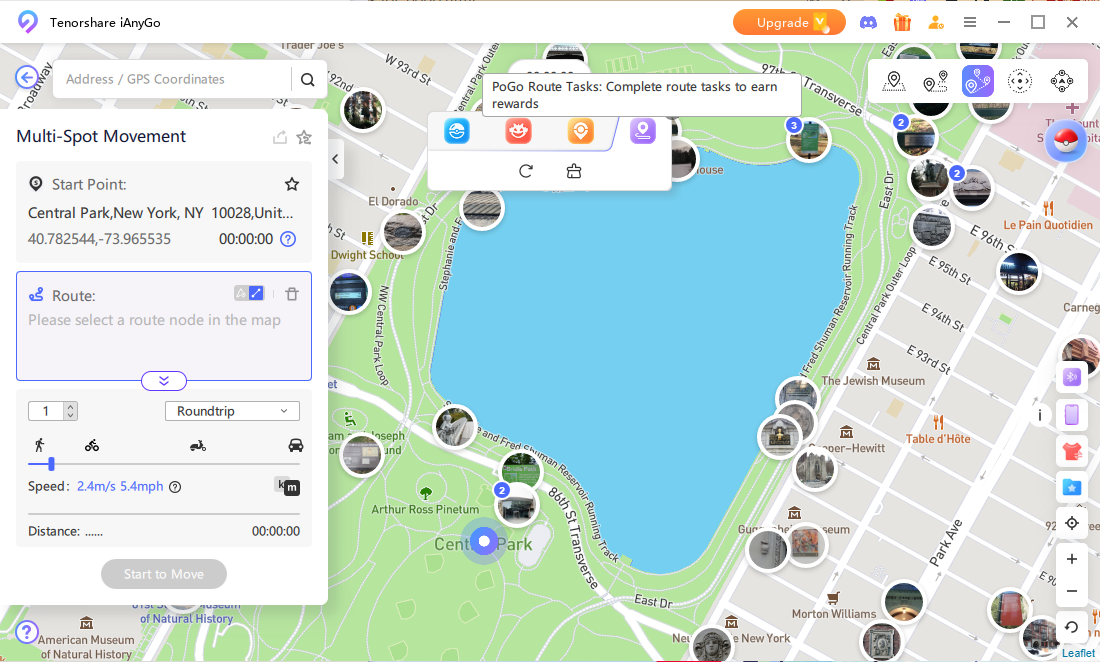
Step 2 Select an icon on the map to view the route length, time required, distance, and other task information.
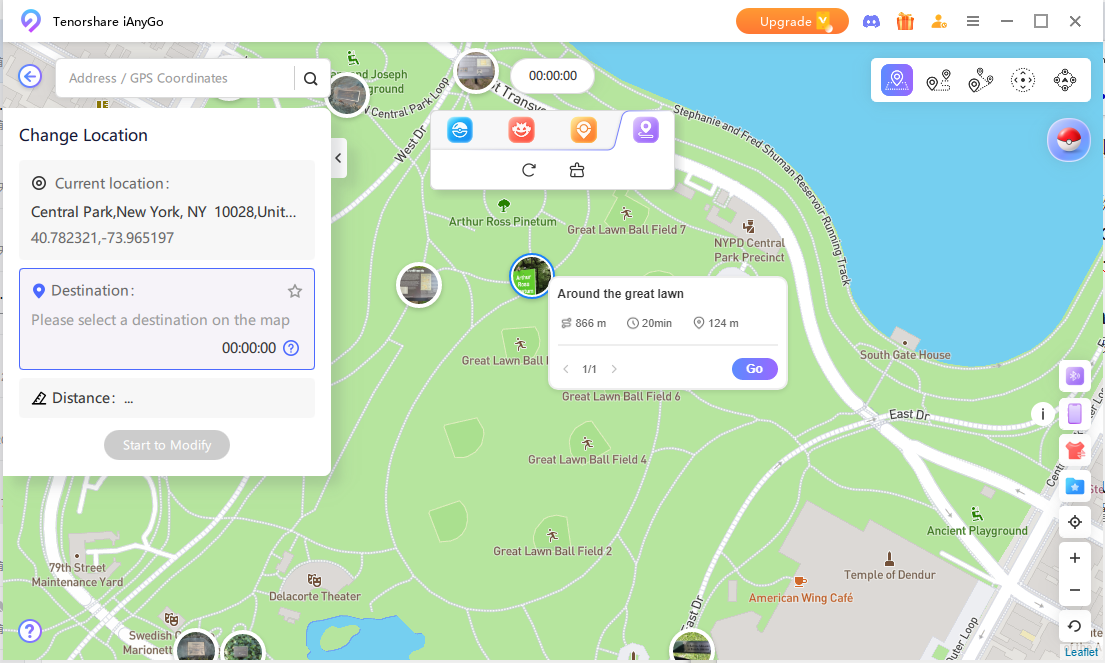
Step 3 Click the "Go" button to automatically generate the route.
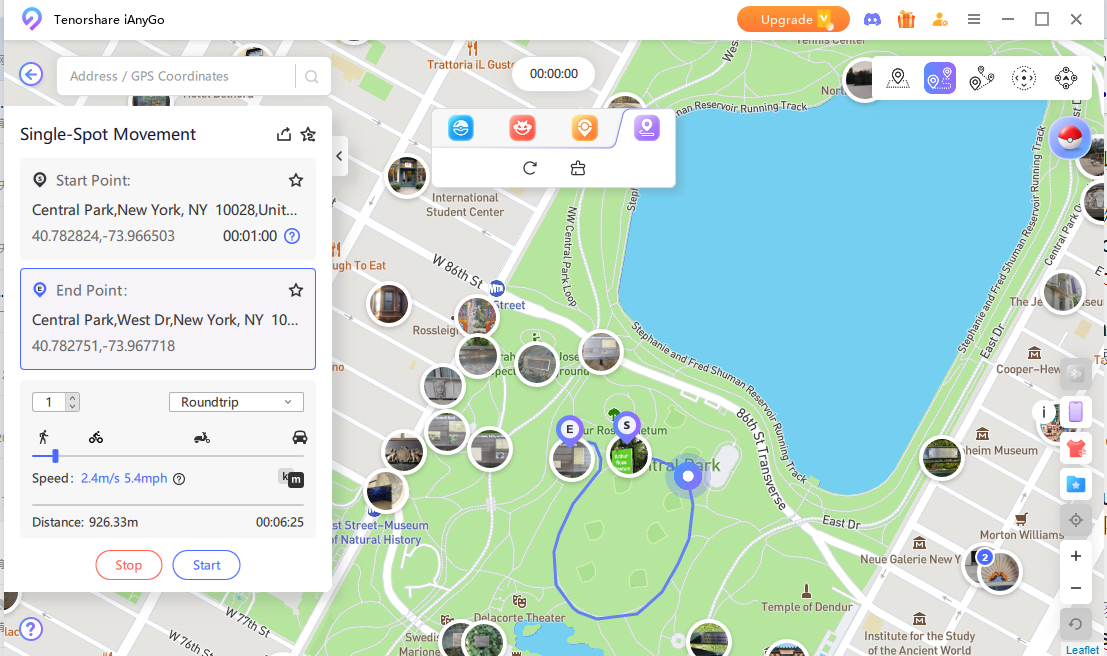
News Please note that this new feature is available on iAnyGo latest version.
Step 1 Tap the second icon in the lower-left corner of the screen. Then, select a location on the map where you want to search for Dynamax Pokémon.
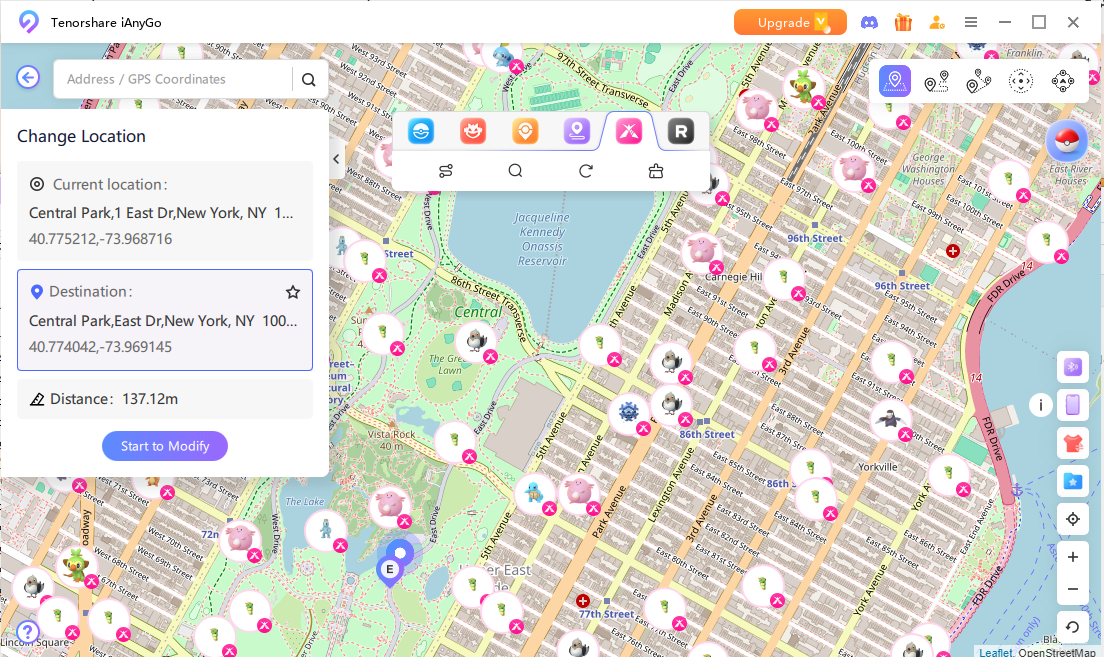
Step 2 If you want to explore multiple locations, set a start and end point. You can add all available Dynamax Raid stops to expand your search range.
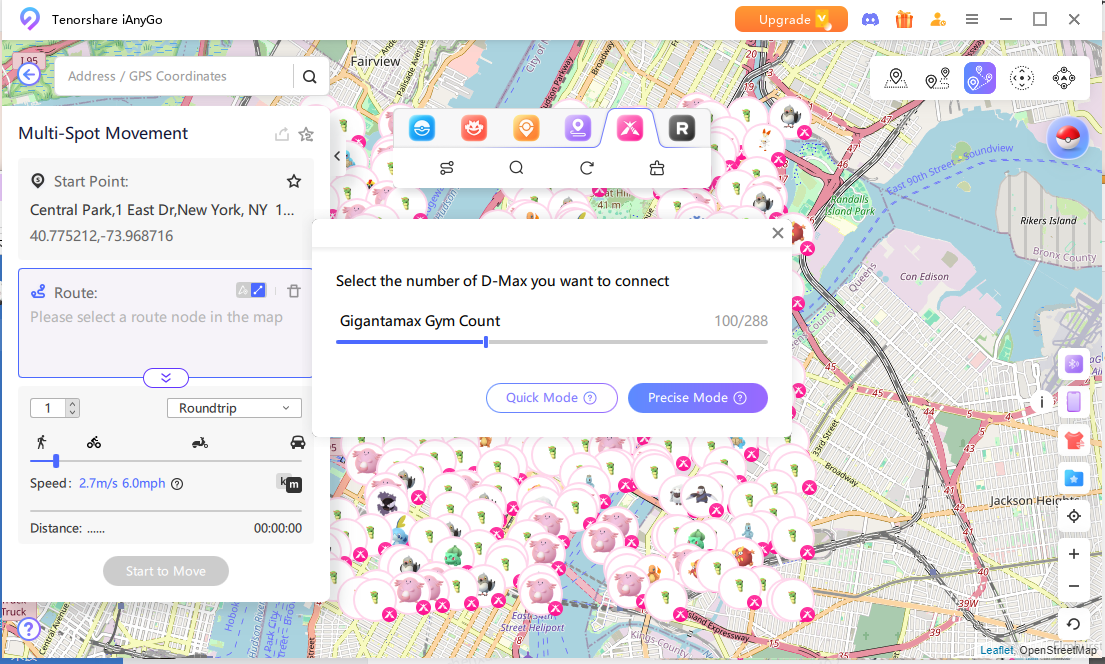
Step 3 iAnyGo will automatically scan within a 5km radius to detect all nearby Dynamax Raids and Gyms, displaying real-time locations without regional restrictions. The Pokémon’s name, level, spawn time, and distance will be shown. For example:
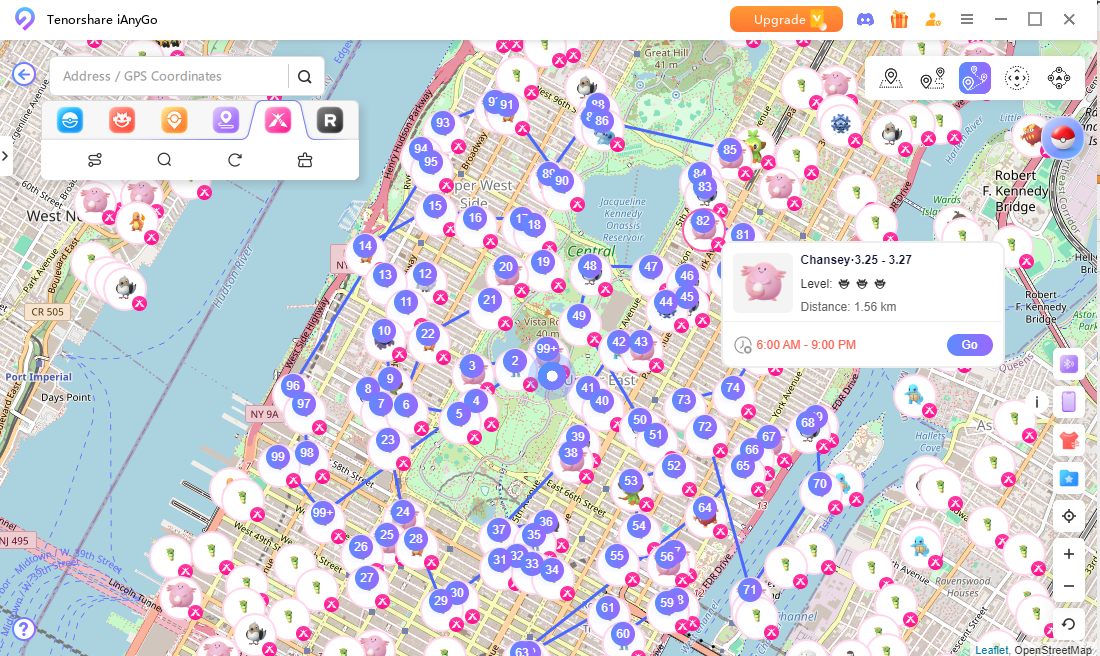
Step 4 Click "Start to Modify", and iAnyGo will teleport you instantly or follow your custom route to the chosen location.
News Please note that this new feature is available on iAnyGo latest version (available only in Taiwan).
Step 1 Tap the first icon in the lower-left corner of the screen. Then, select a location on the map where you want to find Team GO Rocket. The tool will display nearby Team GO Rocket leaders, their distance, and despawn time. Tap "Go" to instantly navigate to the selected leader's coordinates.

Step 2 iAnyGo will automatically scan within a 5km radius to detect all Team GO Rocket leaders. Tap the first route icon to automatically generate a route with multiple stops, maximizing your search efficiency.

Step 3 Click "Start to Modify", and iAnyGo will instantly teleport you or follow your custom route to the chosen location.
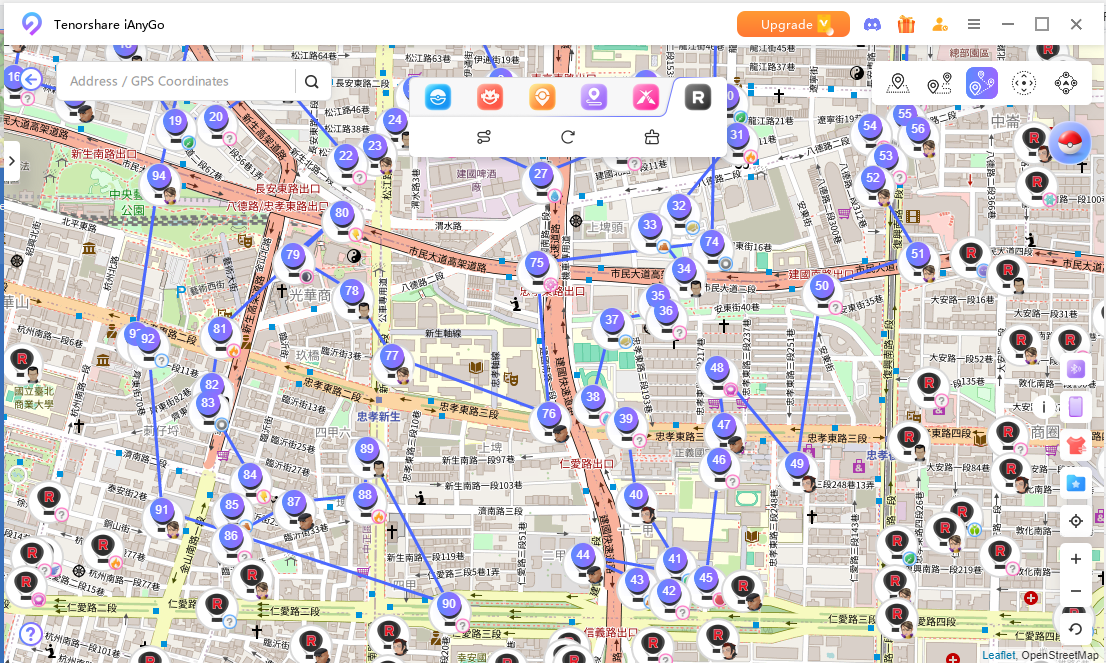
Tip If you see "No data nearby" , it may take some time for the system to load the data. Try tapping multiple times, and it should appear. You can also change your location to Taiwan , as data coverage is more comprehensive in there.
Was this page Helpful ?
Still Need Help?
Just contact our support team and we will reply to you within 24 hours on business days.
Contact Support