Guideline for Tenorshare iCareFone
Guideline for Win
Try iCareFone Now
Try iCareFone Now
In addition to the main functions(file manager/file transfer/backup&restore), Tenorshare iCareFone also provides more useful tools for users, considering their different needs. The best thing is that most of these functions are free, such as HEIC Converter(free for 10 photos), Device Accessibility Control, iPhone Real-Time Screen on PC, etc.
Tenorshare iCareFone allows you to batch convert images from HEIC to JPG in seconds. And it offers a free trial for users: convert 10 HEIC files to JPG for free. Let’s see how to use it:
Step 1 Connect Device
Download and install Tenorshare iCareFone on your PC and connect your device with it by using a lightning to USB cable. If prompted to "Trust This Computer", please unlock your device and enter the passcode to ensure successful detection.
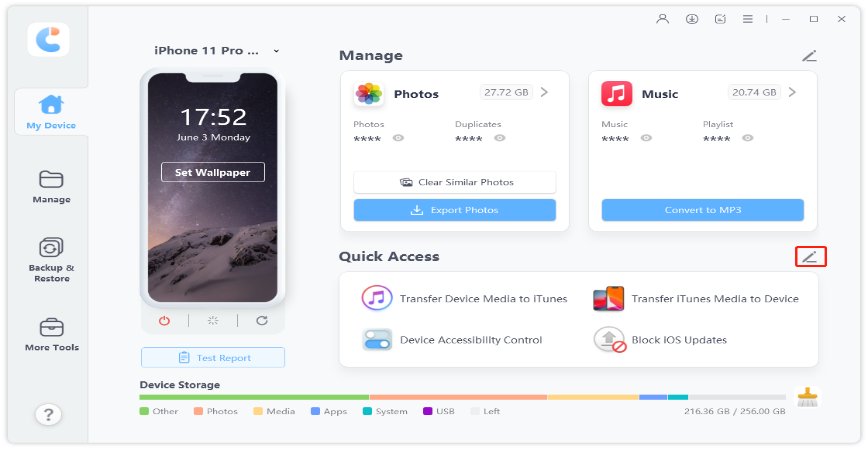
After the device is connected, click on the edit button (represented by a pen icon) next to the Quick Access section on the home page. Then, xadd HEIC converter tool to the quick access section to use.

Step 2 Select HEIC Photo(s)
Choose Add Photos and then click “Select Photos” or “Select Folder” to select the HEIC photos. (“Select Folder” allows you to choose multiple HEIC photos at once.)

You can also click “Add Again” from the top left corner to add more photos. If you need to delete photo(s), click “Remove” under the “ Operation” list to delete a single photo or choose “Clear List” to clear all selected photos.

![]() Note:
Note:
After selecting the HEIC photo(s), you can choose the converted JPG image quality from Original(95%), Medium(70%), and Standard(40%).
Step 3 Start Converting HEIC to JPG
iCareFone will save the converted JPG photos on your desktop by default. You can click “Change” button to select the output path as you wish. If all the settings are set, click “Convert to JPG” to start the conversion.

![]() Note:
Note:
No more than 1,000 photos can be converted at a time.
Step 4 Conversion Completed
When the conversion is completed, the folder of the output path will pop up. If not, you need to click “Open Folder” to check the converted JPG photos.

Apple Music prevents users from playing Apple Music songs on other platforms or devices due to its DRM encryption. Luckily, Tenorshare iCareFone enables you to convert Apple Music to MP3/FLAC. Each users enjoy 3 free song conversions, let’s see how to convert Apple Music to MP3/FLAC losslessly and effortlessly.
Step 1 Login with your Apple ID
On the main interface, click Convert to MP3 on the Music section.

Then login with your Apple ID in the upper right corner to access Apple Music on home page.

![]() Note:
Note:
You can only convert songs while you are an Apple Music subscriber.
Step 2 Add songs
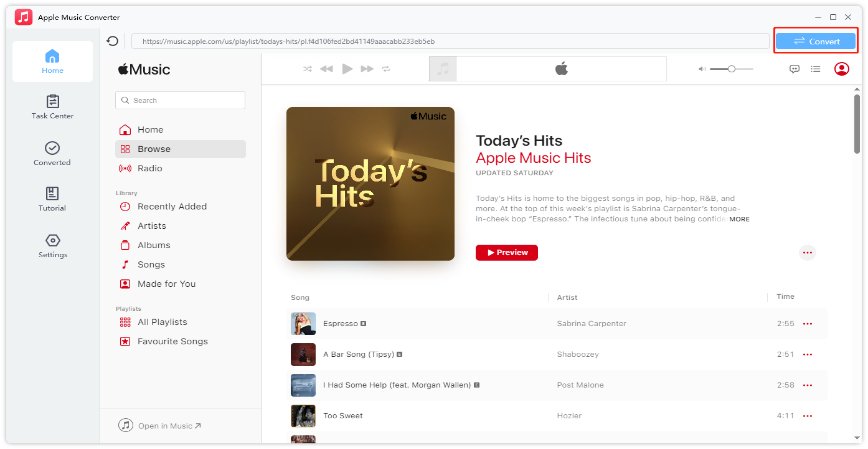
Then you can go to playlist, artists or albums etc. to add songs that you want to convert to Task Center.
Step 3 Start conversion
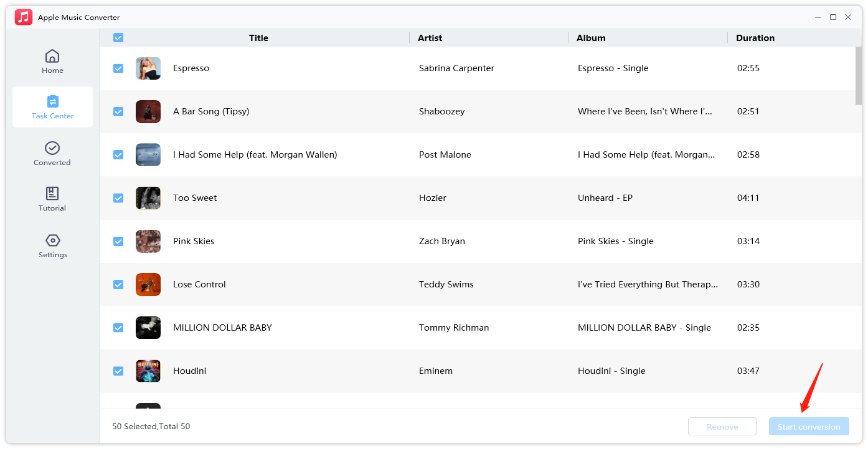
In task center, you will see all the songs you’ve added, choose the songs that you want to convert and click Start Conversion to start the process.
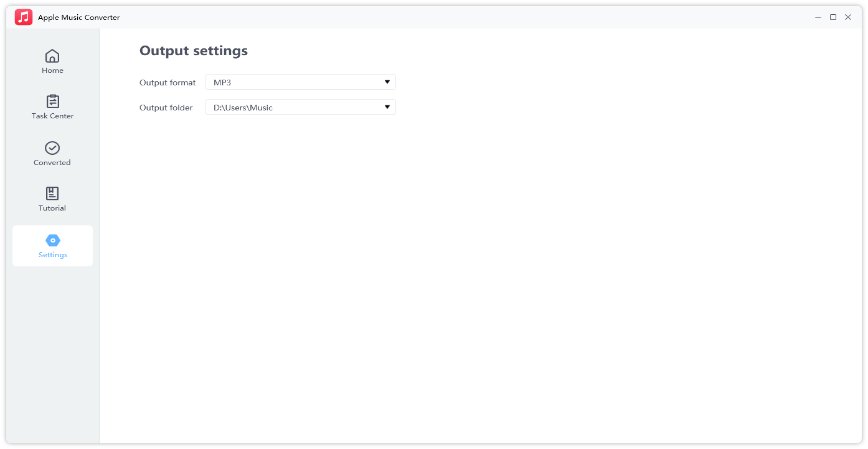
In Setting section, you can choose the output format (MP3 or FLAC) and output folder.
All converted songs will stored on your pc, and you can also use iCarefone to export them to your iPhone.
Step 1 Connect Device
Download and install Tenorshare iCareFone on your PC and connect your device with it by using a lightning to USB cable. If prompted to "Trust This Computer", please unlock your device and enter the passcode to ensure successful detection.

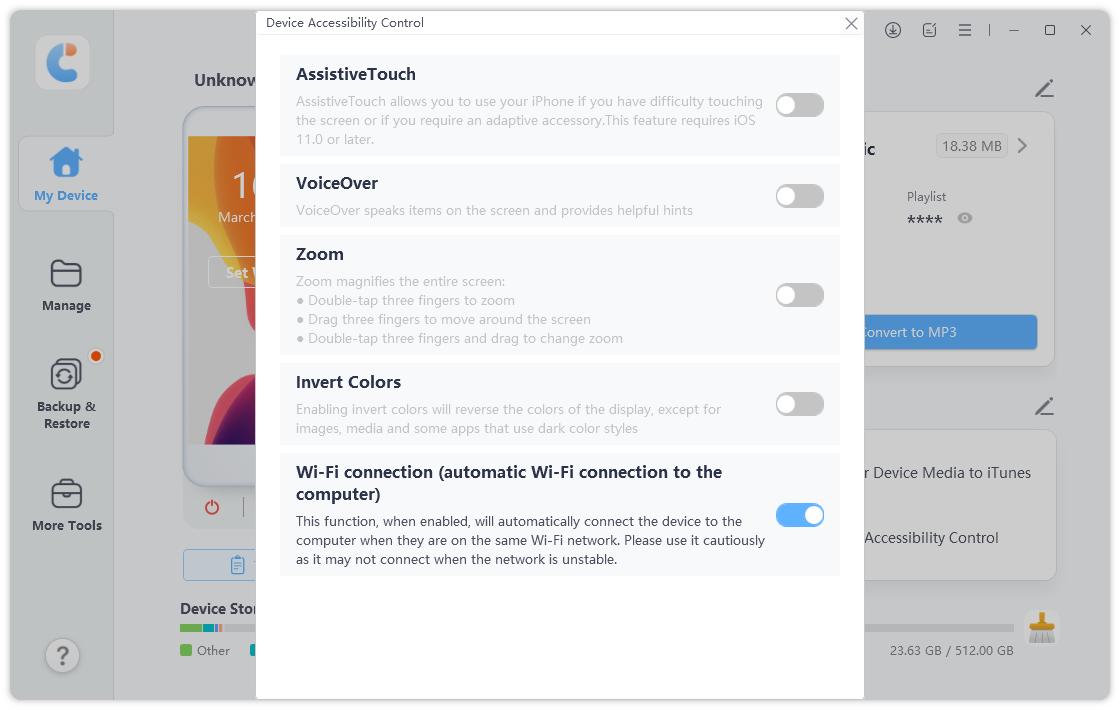
After the device is connected, click on the edit button (represented by a pen icon) next to the Quick Access section on the home page. Then, add Device Accessibility Control tool to the quick access section to use.


Step 2 Turn ON/OFF Device Accessibility Features
Now you can turn on/off device Accessibility features without any restrictions.
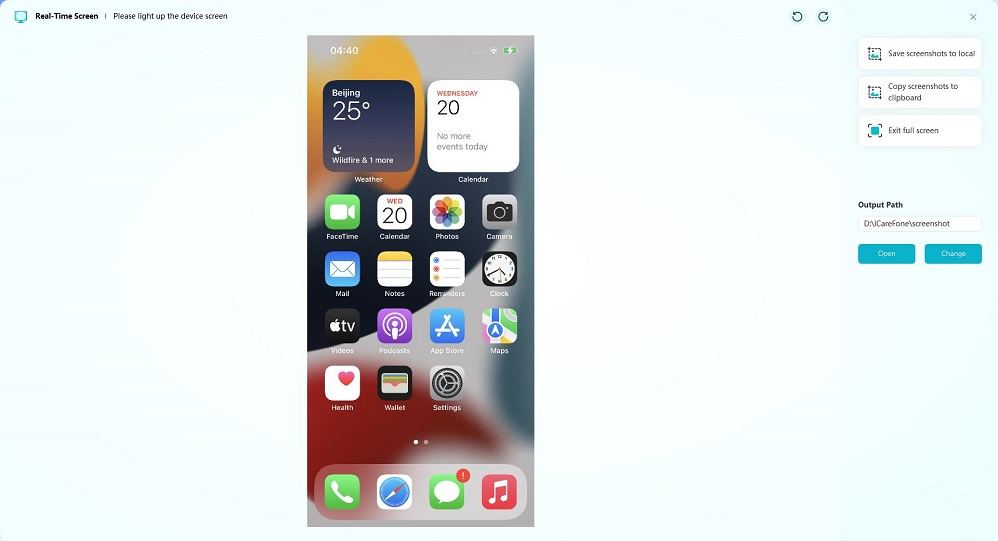
With the “Real-Time Screen” feature, you can easily share your iPhone screen with computer. iCareFone also allows you to take screenshots of your iPhone on the PC without iPhone buttons. This feature will be helpful if you want to view iPhone photos or videos on a big screen.
Step 1 Download and Install iCareFone
Download and install Tenorshare iCareFone on your PC and connect your device with it by using a lightning to USB cable. If prompted to "Trust This Computer", please unlock your device and enter the passcode to ensure successful detection.
After the device is connected, click on the edit button (represented by a pen icon) next to the Quick Access section on the home page. Then, add Real-Time Screen tool to the quick access section to use.


Step 2 Connect your Device and view iPhone screen on PC
Connect your device to the computer and wait for the plugin to load.

Within seconds, you will see your iPhone screen on the PC.

Take iPhone Screenshots
Now you can take iPhone screenshots on PC directly. You can save the screenshots to local or copy the screenshots to clipboard.


![]() Note:
Note:
Please make sure the output path is the right one if you want to save the screenshot to local. You can also change the output path as your wish.
Full Screen
You can choose the “Full screen” button from the menu and then the iPhone screen will occupy your whole computer screen. (You can also take screenshots when it is in Full-screen mode.)
Have you ever been annoyed by the pop-up “A new iOS update is now available”? If you did, use Tenorshare iCareFone to get rid of automatic iOS updates now! iCareFone enables you to block iOS updates with easy steps. After that, you’ll not receive the annoying iOS update pop-up notifications and your device will not download the iOS updates automatically!
Step 1 Download and Install iCareFone
Download and install Tenorshare iCareFone on your PC and connect your device with it by using a lightning to USB cable. If prompted to "Trust This Computer", please unlock your device and enter the passcode to ensure successful detection.
Step 2 Connect Devcie
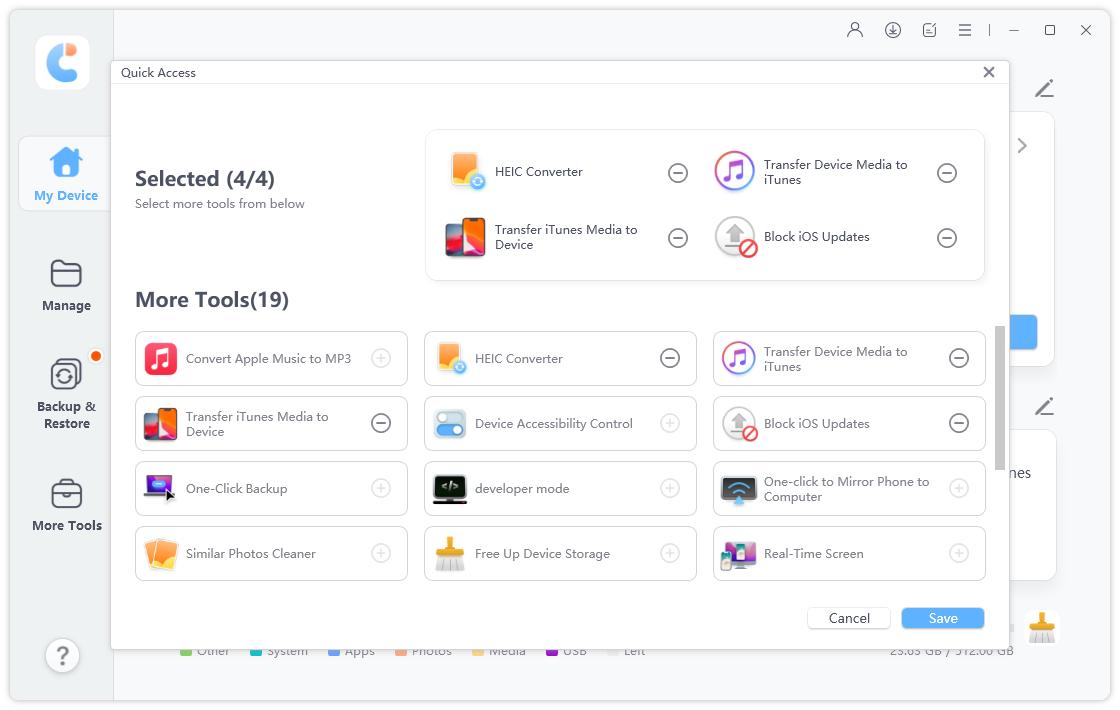
After the device is connected, click on the edit button (represented by a pen icon) next to the Quick Access section on the home page. Then, add Block iOS Updates tool to the quick access section to use.

Step 3
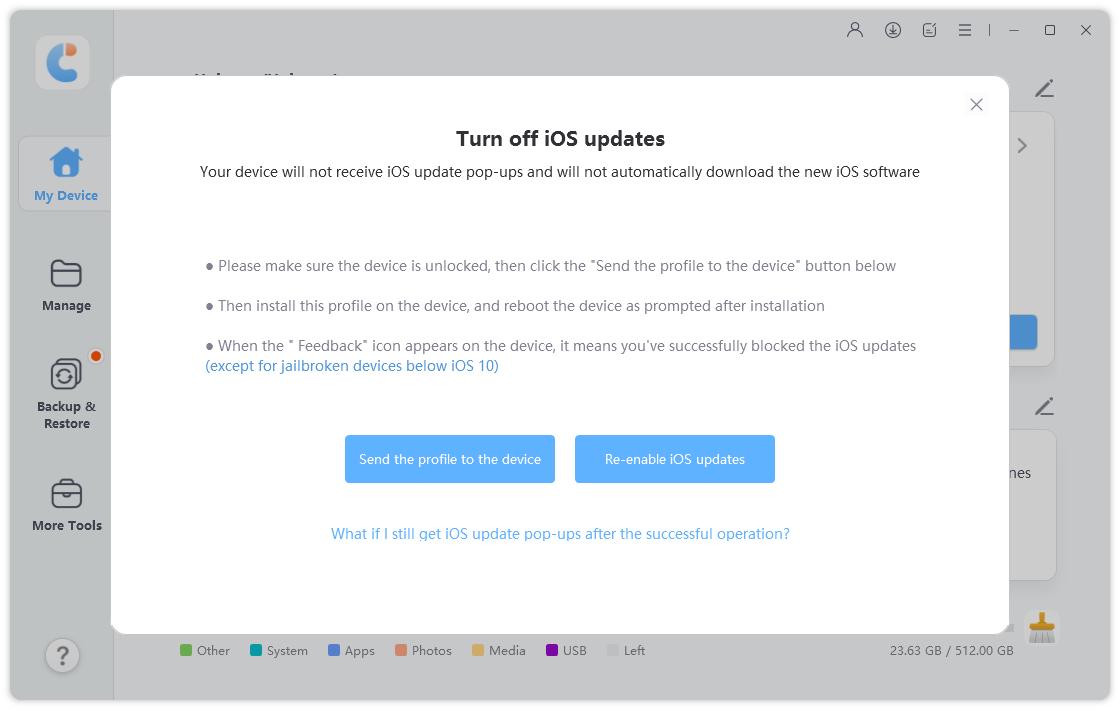
Click the "Send the profile to the device" button to send the profile to your iPhone.
![]() Note:
Note:
make sure your device is unlocked.
Step 4
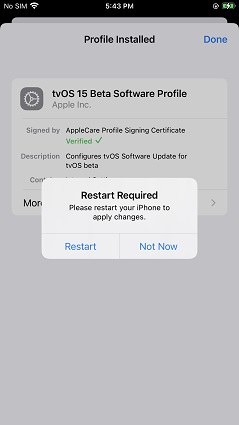
Install the profile on your device. You can find the profile through: Settings - VPN & Device Management - tvOS 15 Beta software profile.

Step 5
Then reboot your device.
Step 6
When you see a “Feedback” icon on your device screen, it means that you’ve successfully turned off automatic iOS updates on your device (except for jailbroken devices below iOS 10).

After that, your device will not automatically download the iOS updates and you will no longer receive the iOS updates pop-ups.
Are you running out of storage on your iPhone or iPad? Don't worry, iCareFone can help you clear up device data (system redundant temporary files and expired log files) with just a single click.
Step 1 Download and Install iCareFone
First, open iCareFone on your computer and connect your device to it. Make sure to trust your computer on your device. Once your device is detected, click on the broom icon located next to the storage bar at the bottom.

Step 2 Clear Device Storage
iCareFone will scan your device for cache and log files, and you'll see how much space can be freed up. Just click the "Clean" button to proceed.


Quick Clean vs. Deep Clean:
Wait for the cleanup process to finish, and keep your device connected during the process. Don't worry, only unnecessary cache files will be deleted.

In just a few seconds, the system cache data will be removed from your device.

Was this page Helpful ?
Still Need Help?
Just contact our support team and we will reply to you within 24 hours on business days.
Contact Support