7 Methods To Fix Wrong Apple ID On iPhone
Download 4uKey for free, and remove or sign out wrong Apple ID/iCloud account without password in simple clicks. All iPhones and iPads are supported and NO data loss!
Although an iPhone user gets many conveniences and excellent features, there are times when things get worse for them as well. But, what if iOS keeps asking for a password or different Apple ID, then surely there is something wrong, and you need to fix it as soon as possible.
In this guide, we have explained seven methods to fix wrong Apple ID/Apple Account on iPhone so keep reading.
- Method 1: Force Restart Your iPhone
- Method 2: Relogin Your Apple ID/Apple Account
- Method 3: Uninstall Apps When App Store Ask for Wrong Apple ID/Apple Account
- Method 4: Update iOS Version
- Method 5: Factory Reset Your iPhone
- Method 6: Restore iPhone via iTunes
- Method 7: Fix Wrong Apple ID/Apple Account On iPhone with 4uKey [100% Works]
Reasons for Wrong Apple ID/Apple Account On iPhone Poping up
Some iPhone users complain, “my apple password keeps saying incorrect; why so?” There can be a few possible reasons for this problem which are:
- You may have inherited a second-hand iPhone with someone else’s Apple ID/Apple Account in it.
- Someone else used your iPhone and logged in their Apple ID.
- You or someone else (who has access to your device) made a purchase in the App store with a different Apple ID/Apple Account.
- Your device may have been protected with iCloud Activation Lock and unlocked using bypass software.
7 Methods to Fix Wrong Apple ID/Apple Account On iPhone
Here are the potential ways which can help you to resolve your problem of incorrect Apple ID/Apple Account on iPhone.
Method 1: Force Restart Your iPhone
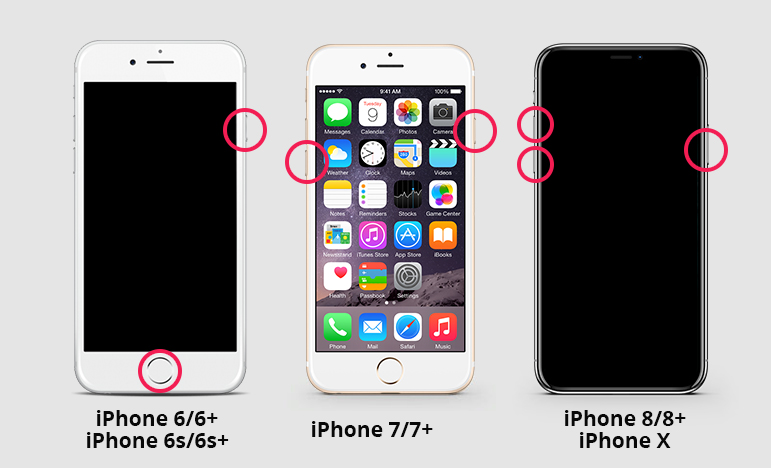
This may sound cliché, but you cannot ignore the power of this method. Even apple owners are surprised at how many problems in iPhone can be rectified by just simply restarting iPhone. So, before deciding to take any drastic measures, start with this method and see if it solves your problem.
- Restart iPhone 6s or earlier models: Hold the home and top (or side) button simultaneously and wait for the apple logo on the screen.
- Restart iPhone 7 and 7 Plus: Press and hold the volume down, and the side button simultaneously and wait for the apple logo showing on the screen.
Restart iPhone 8 or later models: Press and release the volume up and the volume down button. Next, press and hold the power button and wait for the apple logo on the screen.

Method 2: Relogin Your Apple ID/Apple Account
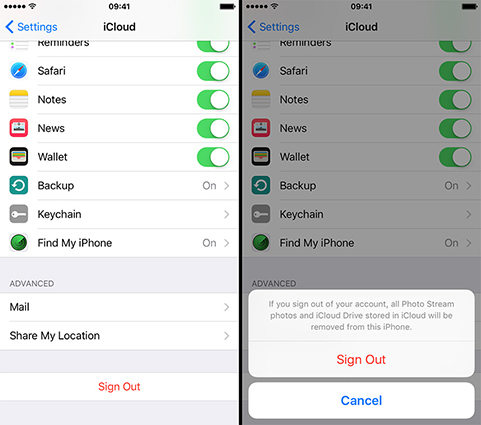
If restarting your iPhone did not solve the problem, then it’s time to look for another method. The second way to do it is by logging out of your account and then re-login. Because this can be due to a minor glitch of the account so it’s a better idea to log out your account as it can refresh the system, and you can log in again.
- Open settings.
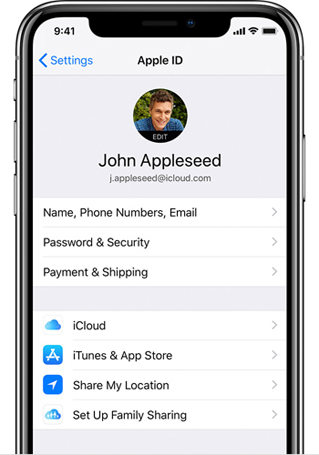
- Tap your Apple ID/Apple Account profile.
Scroll down and select sign out (of iCloud).

- Re-login to your account.
Method 3: Uninstall Apps When App Store Ask for Wrong Apple ID/Apple Account
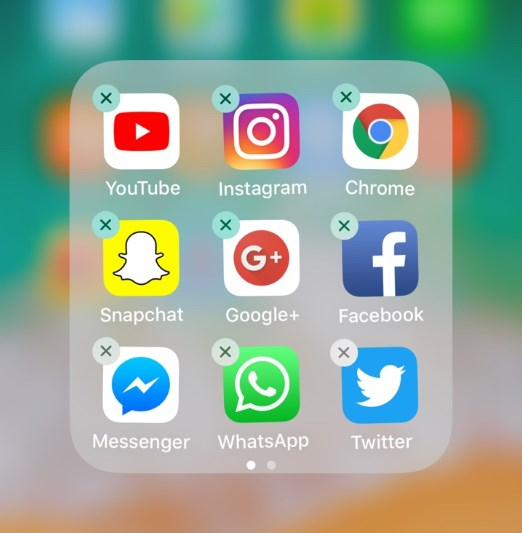
It has been said earlier that iphone asking for wrong Apple ID/Apple Account can be due to the purchase of an application with another Apple’s id. So, if you see any application which does not open or fails to operate smoothly might be linked to wrong Apple ID/Apple Account. So, it’s a better idea to uninstall all those apps and see if this method works for you.
- Step 1: Hold the app icon you want to delete until it starts to jiggle.
- Step 2: Press the “X” icon next to the apple.
Step 3: Confirm the action and uninstall (delete) it.

Method 4: Update iOS Version
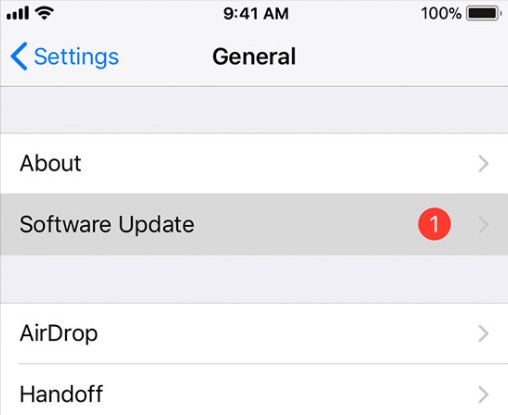
It is also very important to continuously check for the newly available updates. Sometimes a simple update can resolve your problem in minutes.
- Open setting.
- Go to general and then click on software updates.
You will see the available updates here.

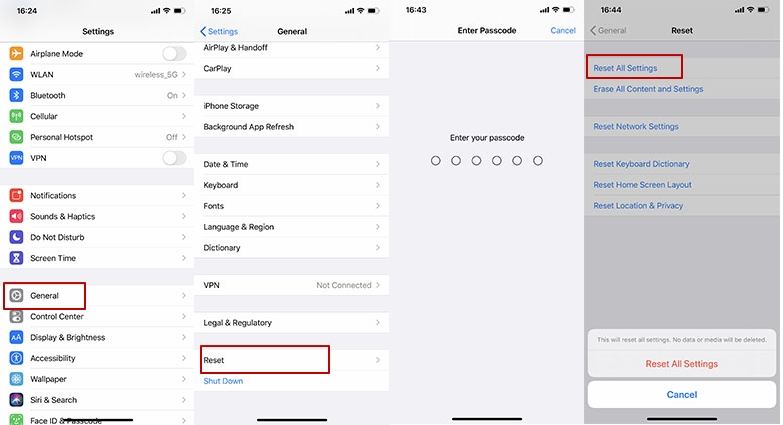
Method 5: Factory Reset Your iPhone
If iPhone still asking for wrong Apple ID/Apple Account the then it can be due to the security features put in place by apple. A better way is to factory reset your iPhone, which will erase all your data present on your iPhone. So, if you are tired of this problem, then try this method.
- Open settings.
- Go to general > Reset > Erase all contents and settings.
Enter your password to erase all data.

Method 6: Restore iPhone via iTunes
You can try your luck with reinstalling the software on your device by using iTunes and restoring it to its default settings. This method can also fix your wrong Apple ID/Apple Account problem by bringing your device to default settings. Here is how to do it:
- Connect your device to the computer using a USB cable.
- Open iTunes app on your computer and click on the device button on the top left of the window.
- Click on “Summary.”
Click “Restore” and follow the onscreen instruction to complete the process.

Method 7: Fix Wrong Apple ID/Apple Account On iPhone with 4uKey [100% Works]
If you have tried your luck with all solutions or you may need to find the only solution that guarantees to resolve your problem, we got you. All thanks to Tenorshare 4uKey as it can easily reset your locked iPhone and also offers a range of features that help to rectify serious issues in your iPhone.
Here is what you exactly need to do:
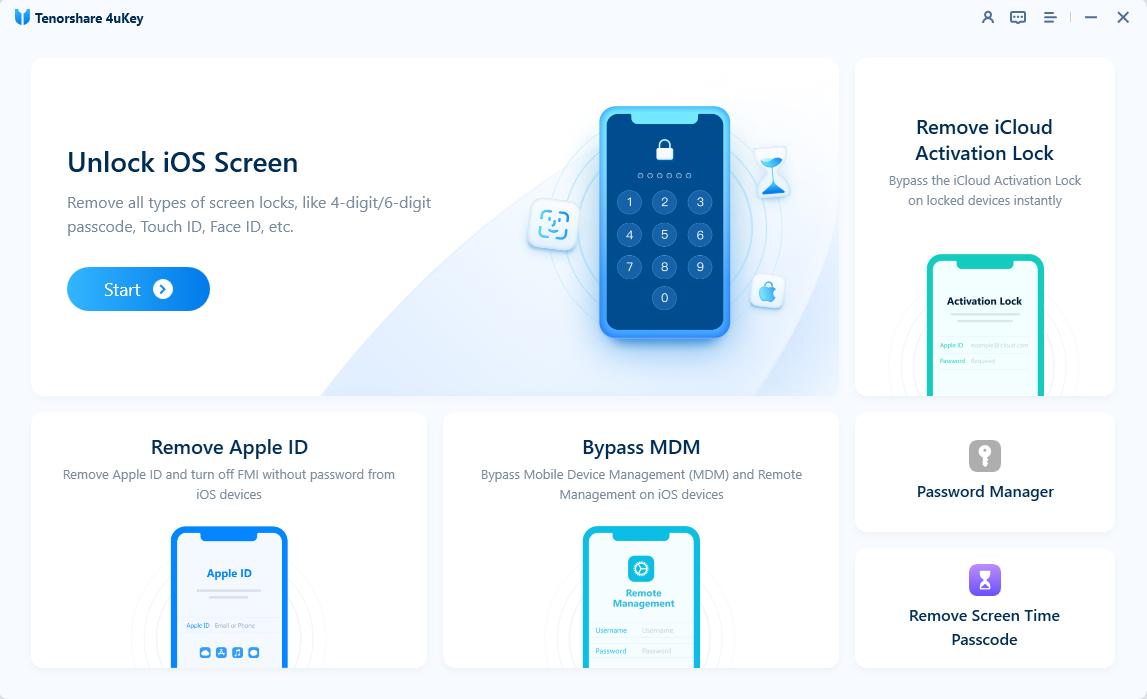
Click the free download button and install 4uKey on your PC/Mac. Choose the Unlock Apple ID in the interface.

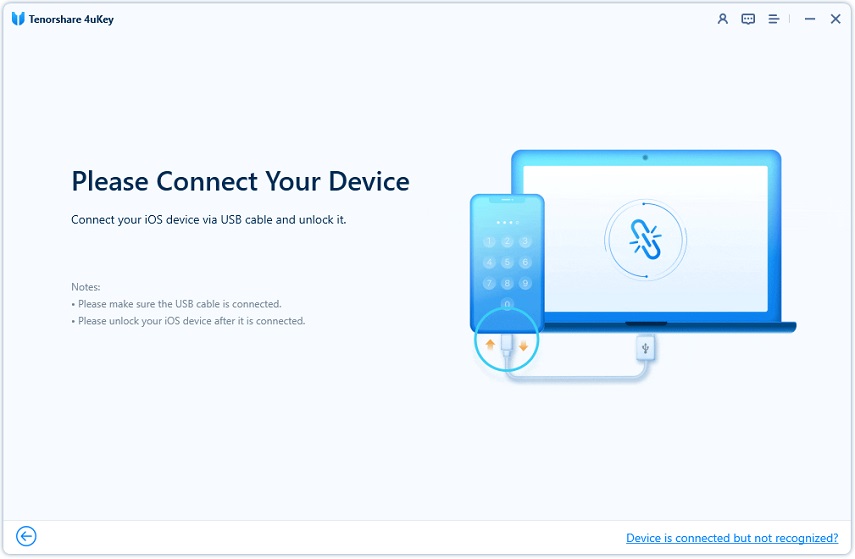
Connect your iPhone device to PC via a USB cable.

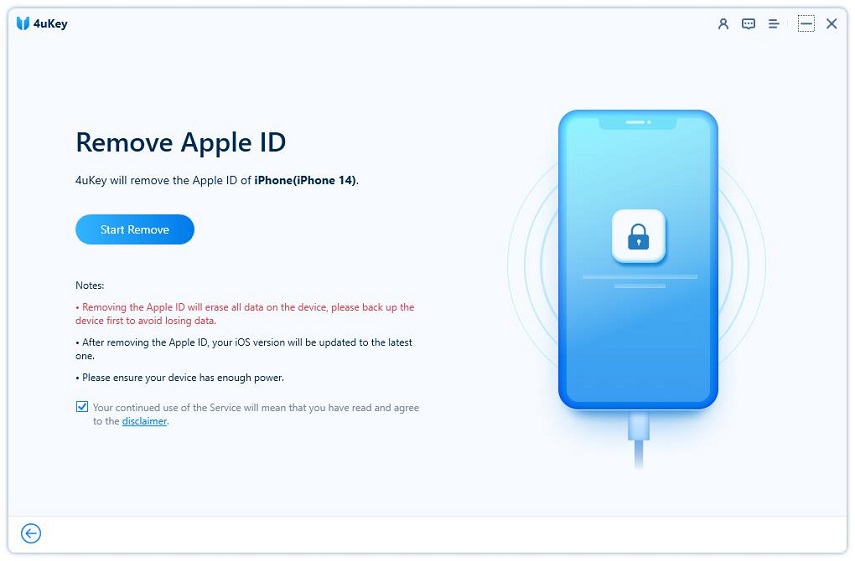
Click Start Remove to start the process of removing Apple ID/Apple Account.

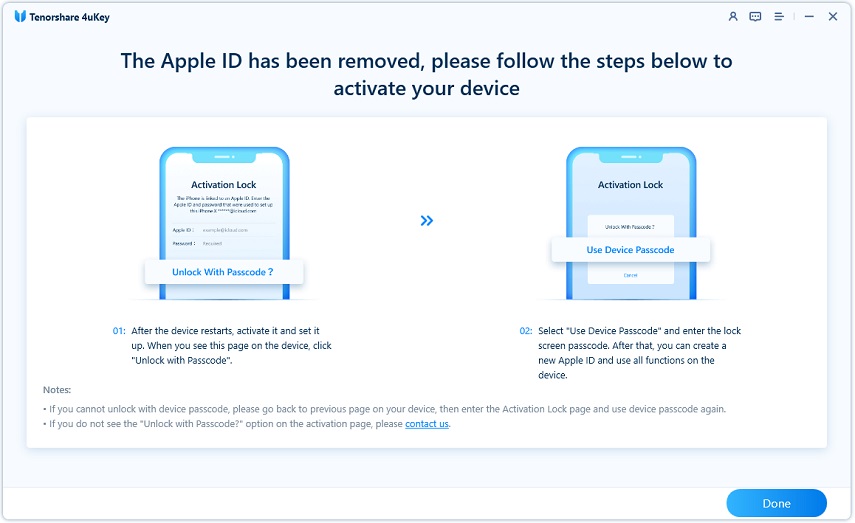
Follow the instruction on 4uKey to remove Apple ID on your device and then activate your device. Now the Apple ID/Apple Account is remove successfully on your iOS device. You can use a new Apple ID on the device if its iOS version is higher than iOS 11.4.

The Bottom Line
Having an iPhone which keeps on asking for wrong Apple ID/Apple Account on iPhone is way more frustrating and solving this issue is time-consuming, which can worsen the condition. If you want to rectify this problem, then try your hands on Tenorshare 4uKey as it ensures to bring back your device to life with its simple and easy process.
Speak Your Mind
Leave a Comment
Create your review for Tenorshare articles
4uKey iPhone Unlocker
Easily Unlock iPhone passcode/Apple ID/iCloud Activation Lock/MDM
100% successful unlock


