5 Ways to Fix Messages in iCloud is Currently Disabled
Messages in iCloud is currently disabled in the newest iOS 17? You can try a lot of things to solve this issue but without following proper method you will never succeed. Messages in iCloud is an unreleased feature and is currently only available to iOS 17. If you want to fix messages in iCloud is currently disabled then follow this article till the end. So there is nothing to worry about at all.
- Way 1: Force Restart your iOS Devices
- Way 2: Sign out of iCloud and Sign in Back Again
- Way 3: Turn on Two Factor Authentication
- Way 4: Reset Network Settings
- Way 5: Remove iOS 16 or Update iOS 17
Way 1: Force Restart Your iOS Devices
This process is different for iPhone 14/13/12/11/X/8. Just follow the below steps to solve messages in iCloud is not working issue.
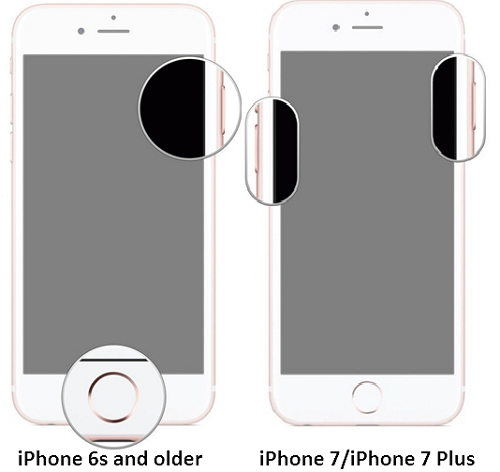
1.Hold your iPhone in your hand. Press and hold the sleep/wake button and the home button together in your iPhone 6. Keep holding both buttons for 10 seconds and you will see the Apple logo appear on the screen.
2.For iPhone 7 or iPhone 7 Plus, hold the "volume down" button instead of the home button.
3.For iPhone 8/8 Plus and iPhone X: quickly press and volume up and then volume down button, after that, long hold the side button till you see the Apple logo.
4.Your device will restart now and hopefully you will get rid of this issue.
Way 2: Sign out of iCloud and Sign in Back Again
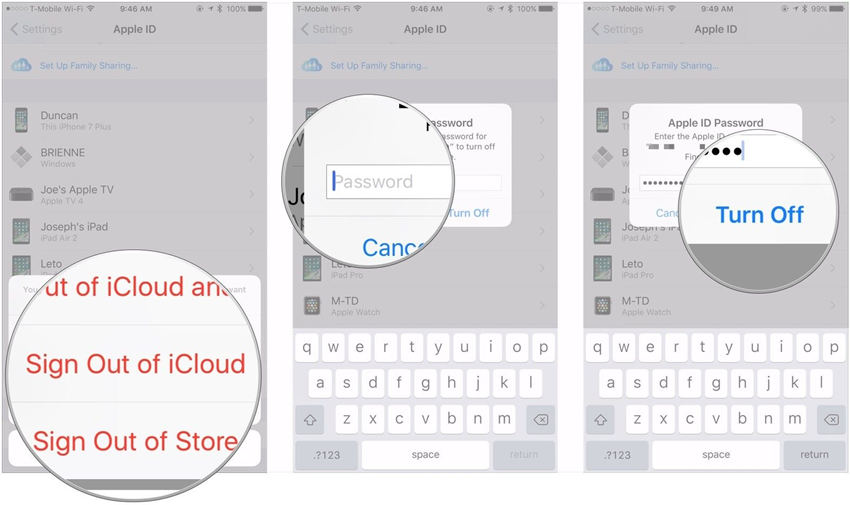
You can sign out of iCloud and sign in back again to try solving messages in iCloud is currently disabled on iPhone issue. Here is how to do it.
1. Go to the "Settings" option.
2. Now tap on "Apple ID" option.
3. Now choose "Sign Out" or "Sign out of iCloud" option.
4. Enter your password in the box and tap on "turn off".
5. Wait some time and again go back to "Settings" option to log into your iCloud account again.
Way 3: Turn on Two Factor Authentication
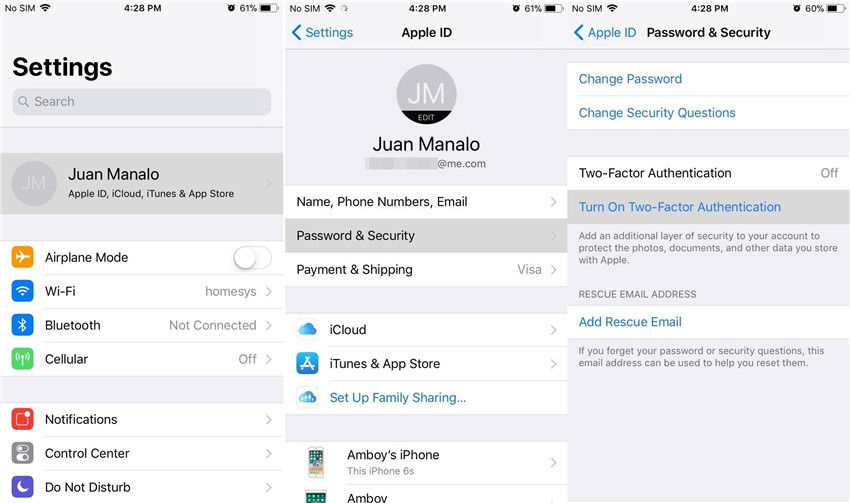
1. First you need to go to the "Settings" option and then tap on your name at the top of this page.
2. Now choose "Password & Security".
3. Now tap "Turn on Two-Factor Authentication".
4. At this stage you will see a page in front of you describing the details of this feature and you will have to choose "Use Two-Factor Authentication".
5. Now you can choose a new or existing number to send the verification code for this process.
6. Now you will have to enter the password of your Apple ID to complete this process.
Way 4: Reset Network Settings
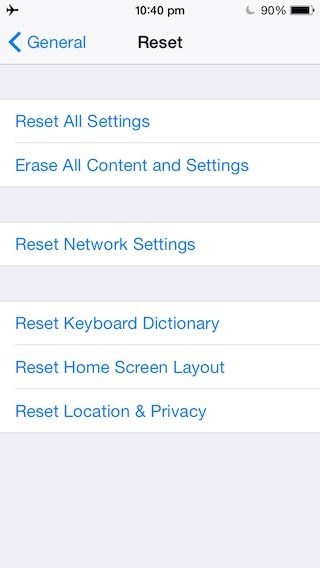
1. In this method, at first you will have to open "Settings" option and tap on "General" then "Reset".
2. Now choose "Reset Network Settings" and confirm it to finalize your execution.
3. If it asks for a passcode, enter it.
4. Now go back to your home screen and follow Way 1 again to reset your device.
Way 5: Remove iOS 16 or Update iOS 17
This problem is seen in both iOS 16 and iOS 17, the ultimate solution is to remove version or update iOS 13 to iOS 14. To remove your iOS version or to upgrade your iOS from 15 to iOS 17 you can use the best software for this issue. Yes, I am talking about Tenorshare ReiBoot. This is a professional iOS reboot tool that can fix all iOS 16 or 14 downgrading stuck issues including recovery mode, DFU mode, Apple logo, black screen, white screen, endless reboot, etc. without any data loss. Follow these steps to solve messages in iCloud is currently disabled iPhone.
1.Launch Tenorshare ReiBoot and connect your iOS device to computer by using a data cable. Now click on "Fix All iOS Stuck" option from the main interface to enter system recovery screen.
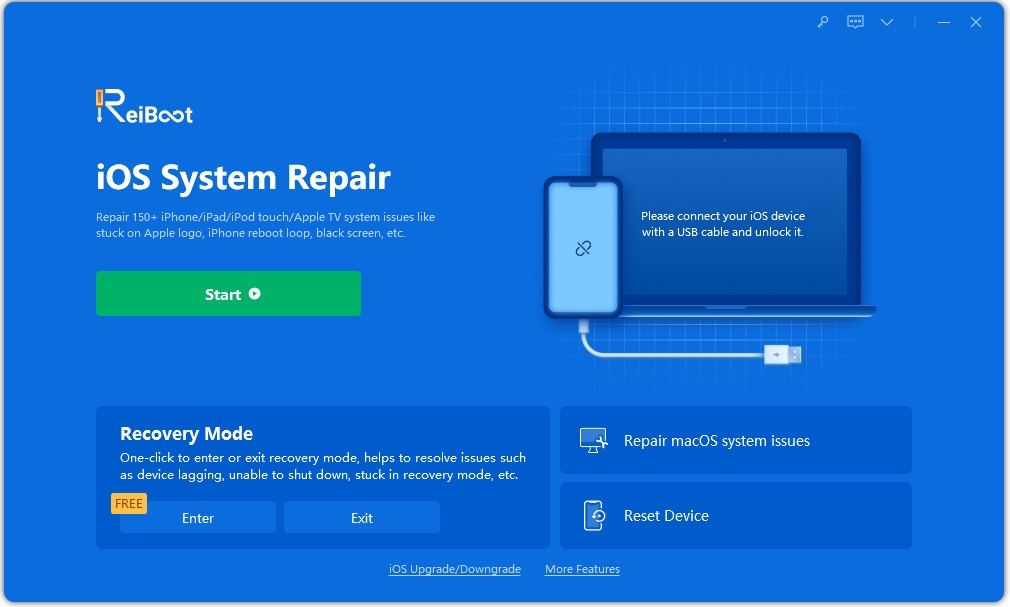
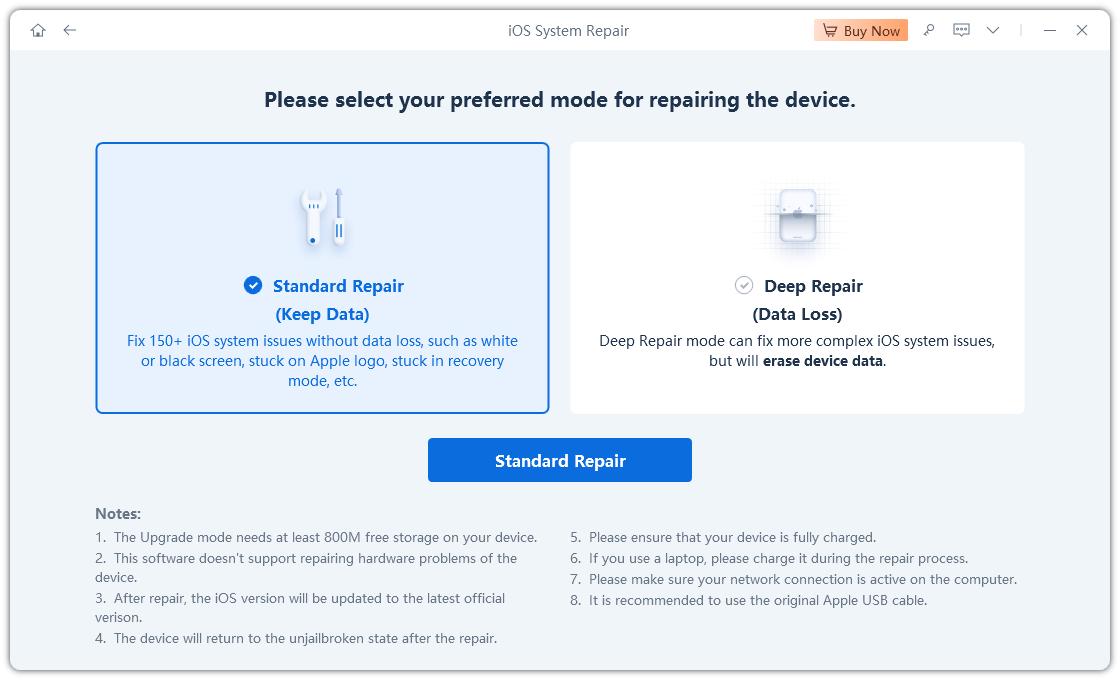
2.You can repair your system to improve the performance of your device. Just click on "Fix Now" to begin.
3.Tenorshare ReiBoot Pro will display the matching the firmware package for your iOS device. It is the up to date iOS firmware package. In this way your device will be updated to the newest iOS version. Click "Download" button to start downloading the firmware package online. You can also click "Copy" to download through browser.
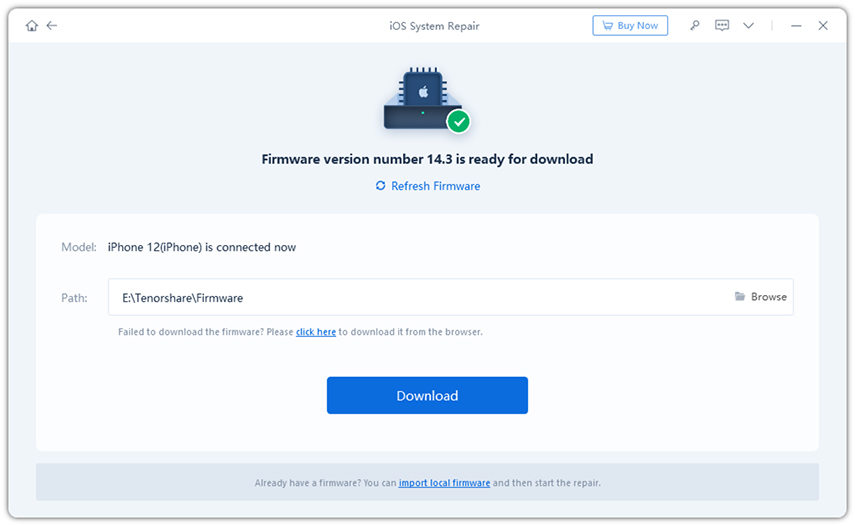
4.It may take some time because the firmware package file is almost 2.5 GB.If you already have that firmware package file on your PC, you can just click on the "Select" button and import the firmware package manually.
5. After downloading the firmware package click on "Start Repair" to start system recovery.
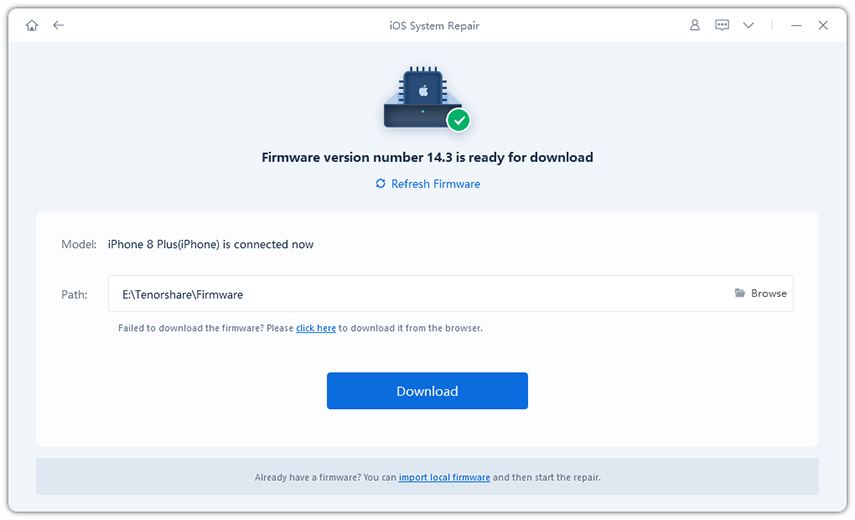
6. It will take 10 minutes to complete the process and don't disconnect the device during this process. When this whole process completes, your device will boot up and it will be fine now. You will get the latest iOS version and your problem will be solved.
You can face messages in iCloud not available issue anytime if you have ungraded your iOS to the latest iOS version or you are using an old iOS version such as 11.3. You can try any of the ways mentioned in this article to solve this issue but to permanently solve it, Tenorshare Reiboot is highly recommended. This amazing tool can repair your device in a very short time and help you upgrade your iOS version to make your deice normal again. You won't lose any data or settings at all. This is the best chance you can get to solve messages in iCloud is currently disabled in iOS 11.3. So just take it right now!
Speak Your Mind
Leave a Comment
Create your review for Tenorshare articles
