Back Up iPhone Before Upgrading to iOS 17: Multiple Methods Here
Hi. I’m about to update to iOS 17 and wondering what’s the best way to back up my important data. Can you help me with that? Thank you.”
It’s that time of the year again! iOS 17 was released on September 18, 2023 and it is out for you to install. If you’re planning to move from iOS 16 to iOS 17, you should definitely back up your device before doing so. Why? Simply because if the update doesn’t go as intended, you can restore your important data from the backup, without having to lose it. But what’s the best way to back up iPhone before upgrading? Let’s find out!
- Method 1: Use iCloud to Back Up Your iPhone
- Method 2: Back Up iPhone to Mac/PC Using Finder/iTunes
- Method 3: Back Up iPhone to Computer without iCloud/iTunes [FREE]
Method 1: Use iCloud to Back Up Your iPhone
The most obvious way to back up your iPhone is through iCloud. Your iPhone has a built-in feature to back up and restore your important to/from the cloud.
However, be noted that this method consumes data/WiFi. So, if you have limited data and/or have a slow connection, it may not be the best way to go about the situation.
Furthermore, be noted that you need to have enough iCloud storage space to back up all of your data. For example, if you have 50GB of data on your iPhone but only have the free 5GB iCloud plan, you can’t back up your data.
If you’re fine with that, here’s how to back up your iPhone to iCloud.
- Connect your iPhone to a Wi-Fi network.
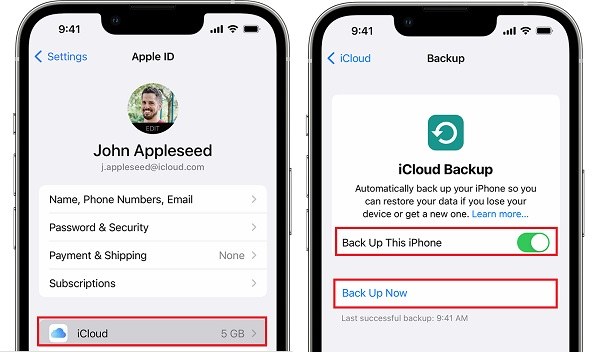
- Go to the "Settings" app on your iPhone and tap on your name at the top of the screen.
- In the Apple ID settings, tap on "iCloud".
Scroll down and tap on "iCloud Backup".

- Make sure the "Back Up This iPhone" toggle is turned on. If it's off, tap on the toggle to enable it.
- Tap on "Back Up Now". This will initiate an immediate backup of your iPhone to iCloud. Keep in mind that the backup process may take some time depending on the size of your data and the speed of your internet connection.
When the process is complete, you’re all ready to go!
Method 2: Back Up iPhone to Mac/PC Using Finder/iTunes
If you’d like to back up your iPhone to your PC or Mac instead, this section is for you.
Backing up your data to your PC before iOS upgrade is a great choice. You can restore your data quickly if anything goes wrong with the iPhone.
First, here’s how to back up your iPhone to a Mac. We will talk about PC afterward.
- Connect your iPhone to your Mac using a USB cable.
- If prompted on your iPhone, unlock it and tap "Trust" to establish a connection with your Mac.
- On your Mac, open a Finder window. You can do this by clicking on the Finder icon in the dock.
- In the left sidebar of the Finder window, you should see your iPhone listed under the "Locations" section. Click on your iPhone to select it.
- In the main window of Finder, you'll see various tabs related to your iPhone. Click on the "General" tab if it's not already selected.
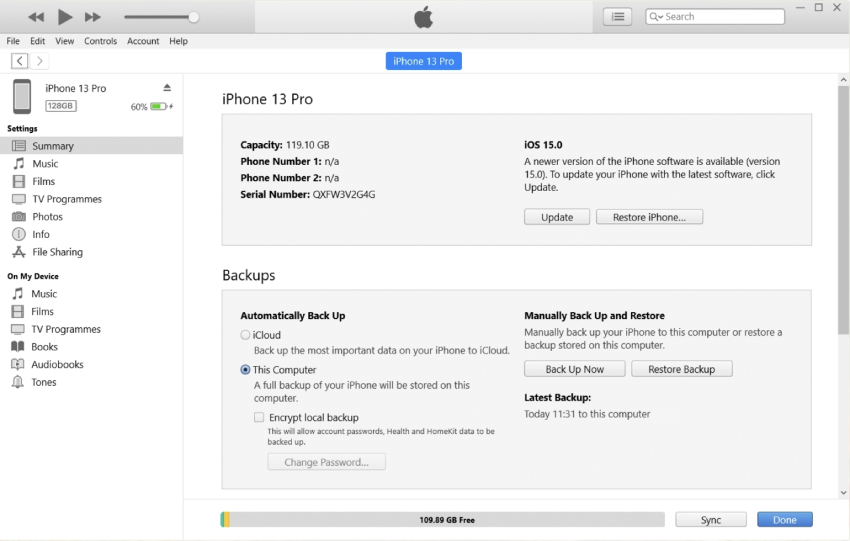
Under the "Backups" section, click on the checkbox next to "Back up all of the data on your iPhone to this Mac."

- If you want to encrypt your backup, which includes sensitive information like passwords, health data, and more, tick the checkbox next to "Encrypt local backup" and set a password.
- Once you have chosen your backup preferences, click on the "Back Up Now" button.
- Wait for the process to complete, and you’re all set!
Now, here’s how to back up your data to a Windows PC.
- Download and install the latest version of iTunes from the Windows Store.
- Connect your iPhone to your Windows PC using a USB cable.
- If prompted on your iPhone, unlock it and tap "Trust".
- Launch iTunes on your Windows PC.
- In iTunes, click on the iPhone icon that appears in the upper-left corner of the window. If you don't see the icon, make sure your iPhone is connected properly.
- On the left sidebar of the iTunes window, under the "Settings" section, click on "Summary."
To create a backup, select the option "Back up all of the data on your iPhone to this computer."

- Click on the "Apply" or "Sync" button in the lower-right corner to start the backup process.
Related read How to Change iPhone Backup Location Windows and Mac.
Method 3: Back Up iPhone to Computer without iCloud/iTunes [FREE]HOT
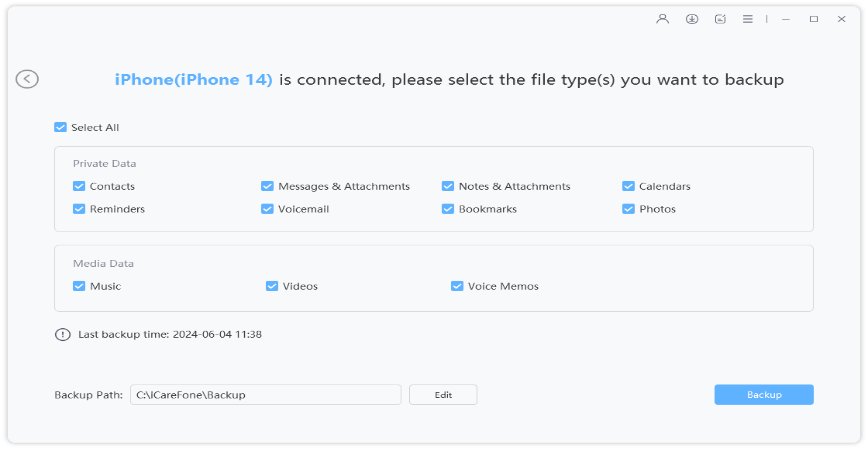
If you’d like to individually choose what kind of data you want to back up before the iOS upgrade, Tenorshare iCareFone is your best bet! With iCareFone, you can choose to back up one or more kinds of data based on your requirements.
Furthermore, it’s super fast and reliable. Doesn’t need an internet connection to operate either. iOS users can use iCareFone to back up their device data to computer for free and restore backup to device anytime they want.
Here are the steps you need to follow to use it:
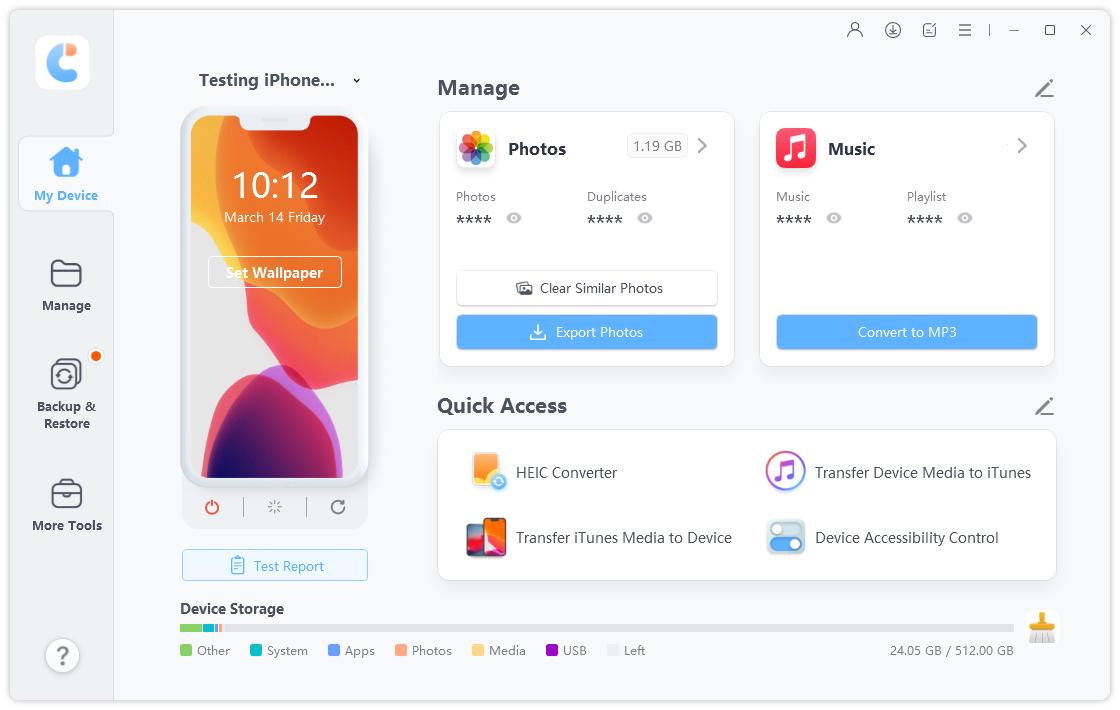
Download and install Tenorshare iCareFone on your computer. Connect your iPhone to the computer, and select “Backup & Restore” from the sidebar on Tenorshare.

Select all the data you’d like to back up, then hit “Backup”.

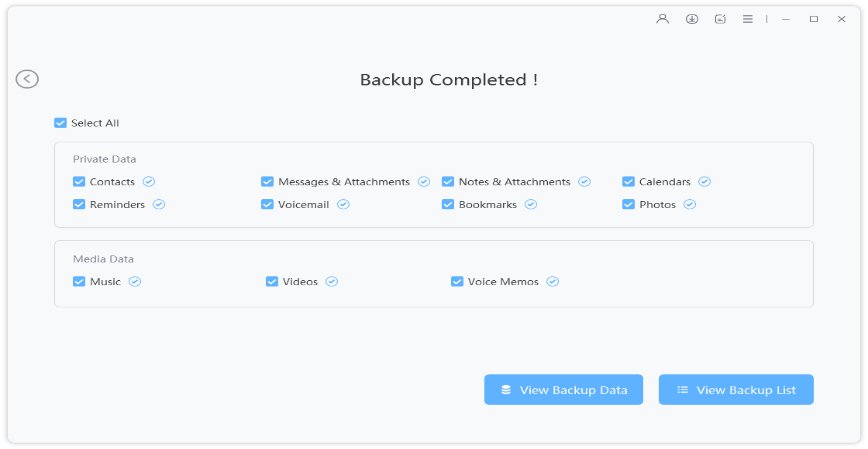
Wait for it to complete. Within several minutes, your data has now been backed up!

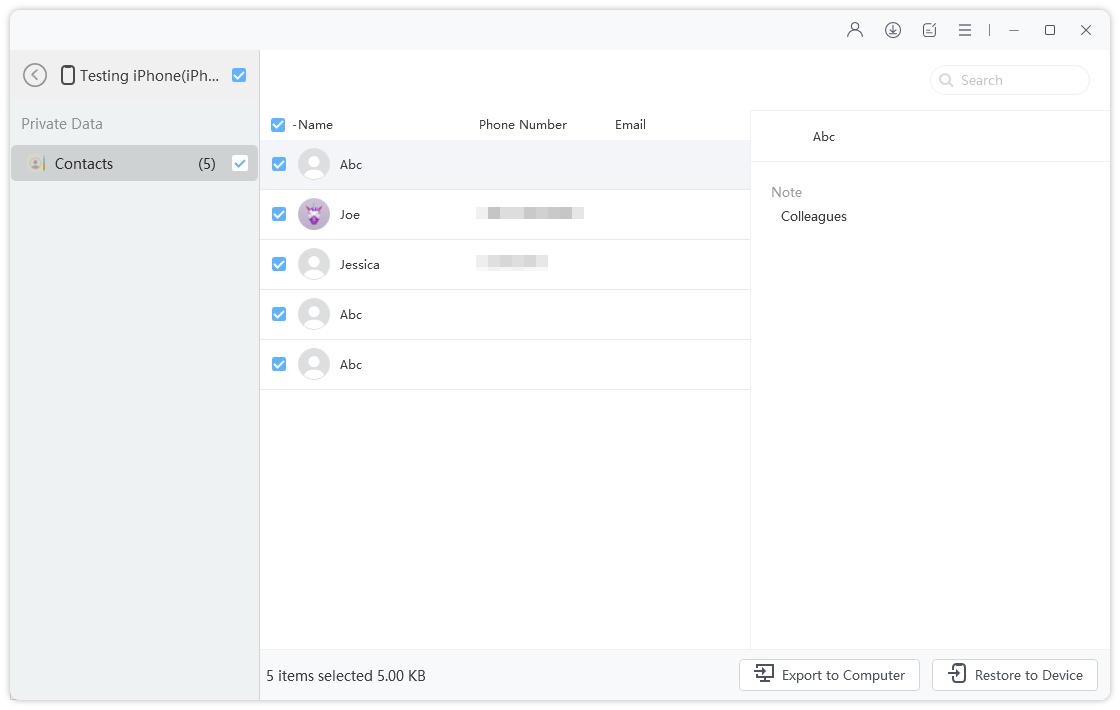
When you’re ready to restore the data later on, simply select the Restore tab from the left bar and follow the instructions.

The Bottom Line
It’s highly recommended to back up your data before installing the iOS 17 iPhone update. In case something wrong happens to your device, you can restore the data using the backup.
The best way to go about the situation is to use a dedicated tool that lets you choose exactly what types of data you want to back up. Luckily, Tenorshare iCareFone is just the right tool for you.
Speak Your Mind
Leave a Comment
Create your review for Tenorshare articles
