How to Set Up and Use Personal Voice in iOS 17 You Should Know
This article enlists everything you need to know about the new personal voice feature. Learn how to use personal voice in iOS 17 and get some expert tips on using the live speech feature. You also get a step-by-step guide on setting up your personal voice. Also, find out how to fix the personal voice not available issue on iOS 17.
- Part 1: What Does Personal Voice Do in iOS 17
- Part 2: How to Set Up Personal Voice on iOS 17
- Part 3: How to Use Personal Voice in iOS 17
- One-Stop Solution: Fix iOS 17 Personal Voice Not Available/Working
- Bonus Tip: How Do You Use Personal Voice Live Speech
Part 1: What Does Personal Voice Do in iOS 17
With every iOS update, Apple introduces new accessibility features and apps to improve the usability of their devices. Starting with iOS 17, one of the notable new features is the user's Personal Voice. It allows users to use their own voice along with live speech to communicate with others by reading phrases and text. It is for users who have difficulty speaking to let them create a copy of their voice and use their phone to communicate.
If you want to know how to use personal voice in iOS 17, it is better to understand what this feature does and how it improves usability. Personal voice enables users to create a digital copy of their voice by recording a few phrases. After recording, your device uses machine learning to analyze your voice for some time, and then it generates a custom voice model that sounds just like you.
After the device creates your voice, you can use it to have any text spoken out loud in your voice without saying anything. It can help you answer phone calls and voice messages. People who have difficulty speaking can use it for in-person conversations.
Part 2: How to Set Up Personal Voice on iOS 17
If any user wants to set up personal voice in iOS 17, they need to record their voice for 15 minutes by reading phrases that appear on the device screen. After that, putting the device on charge and locking its screen will start the personal voice setup. Based on your device and how long you put your device on charge, it might take one or two days before the feature is ready for use.
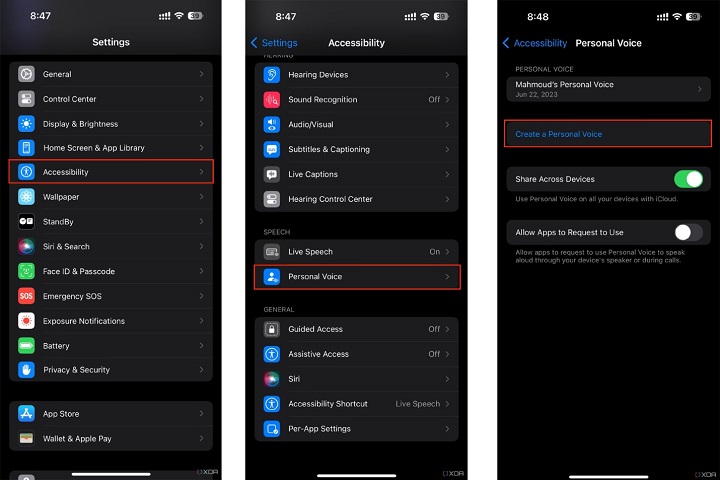
Open “Settings” on your iOS 17 device and navigate to “Accessibility << Personal Voice”. Tap on the “Create a Personal Voice” option.

Proceed by tapping “Continue” on the next two prompts, and type the name of your personal voice. Hit the “Continue” option to advance.

Now, tap on the record button and start reading the phrases that appear on the screen. Once you are done, tap on the “end” option and listen to your recording to check for background noises. The system will notify if the background is too noisy.

- After you complete the sound check, you are ready to record your personal voice. Next, complete the 15-min voiceover session by narrating the lines that appear. You can review, replay, and record any line again if you think it’s not good. After recording, put your device on charge and lock its screen to begin the personal voice generation.
The process might take more time to complete than advertised, as you can only access iOS 17 bet version. So don't worry if it takes several days for personal voice to activate. Once it does, you will get this message on your screen.

Part 3: How to Use Personal Voice in iOS 17
Personal voice integrates with Live Speech and enables users to make a digital copy of their voice in their accent. If you want to use personal voice, you need to set it up first and then activate Live Speech. Follow these steps to enjoy this new iOS 17 feature.
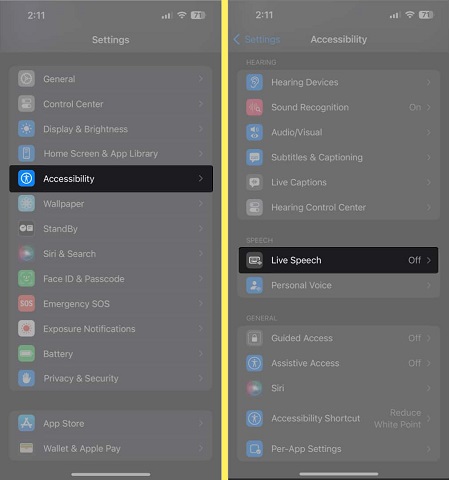
Open “Settings” and tap on the “Accessibility” option.

Tap on “Live Speech” and turn on the toggle.

- Look down and tap on the “Voices” option. Here, your personal voice will appear at the top, select it and go back.
One-Stop Solution: Fix iOS 17 Personal Voice Not Available/Working
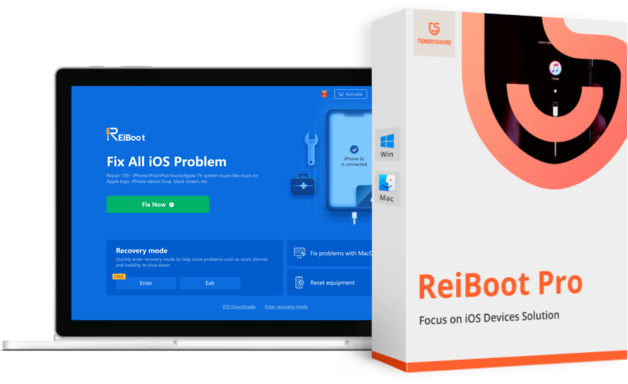
If you encounter the iOS 17 personal voice not available glitch after updating to the latest ios 17 version, don't worry, as you can easily fix it with Tenorshare ReiBoot. Its Standard Repair features can fix 150+ iOS-related bugs and issues. Whether your device glitches, some of its features don't work, its screen gets stuck, apps crashing, or any other problem, ReiBoot can fix it with one click. Here is how to fix personal voice on your iOS device with Tenorshare ReiBoot.
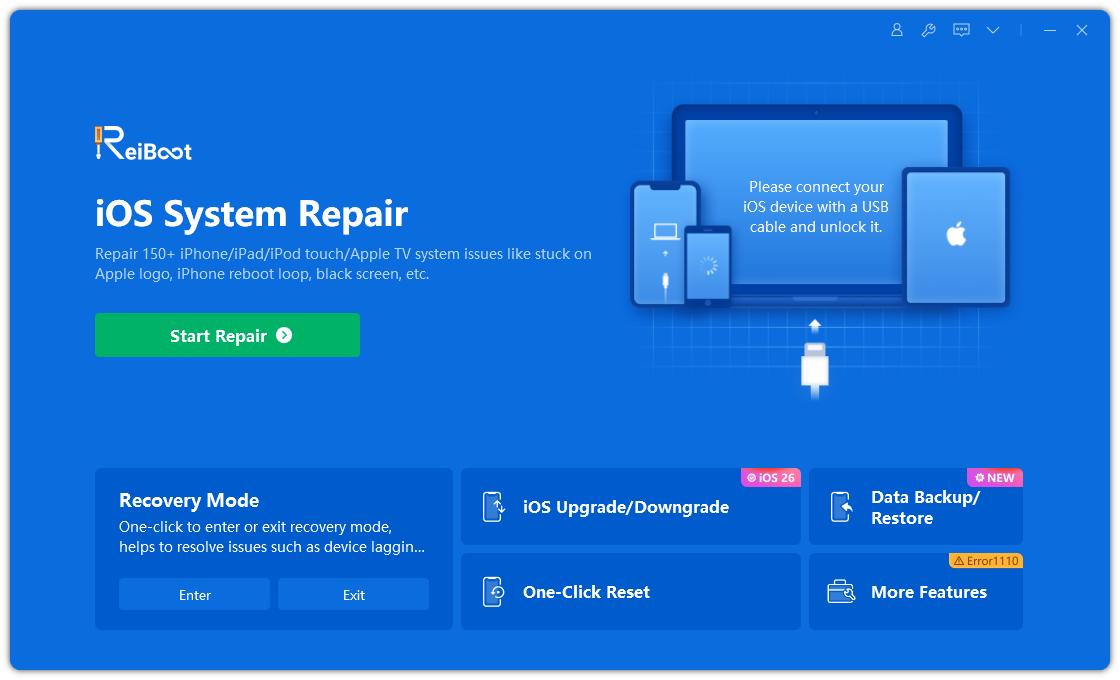
Download and install ReiBoot on your PC. Run it and connect your iPhone to your computer. Once the device gets recognized, click “Start”.

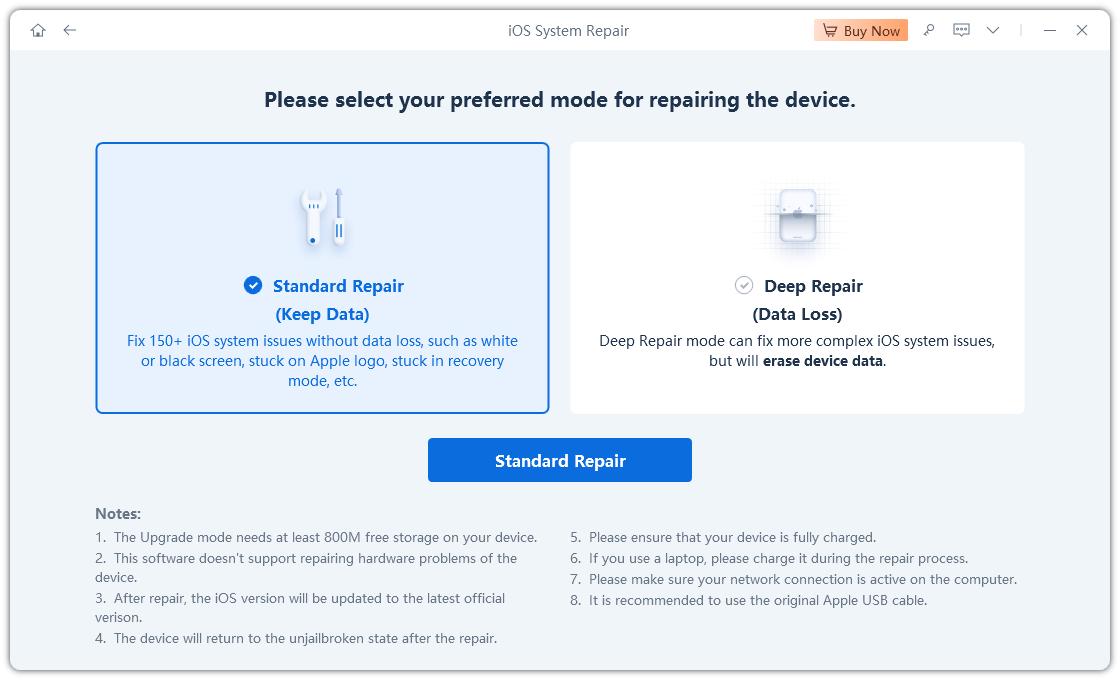
Select the “Standard Repair” tab and read the note below. Next, click on the “Standard Repair” button.

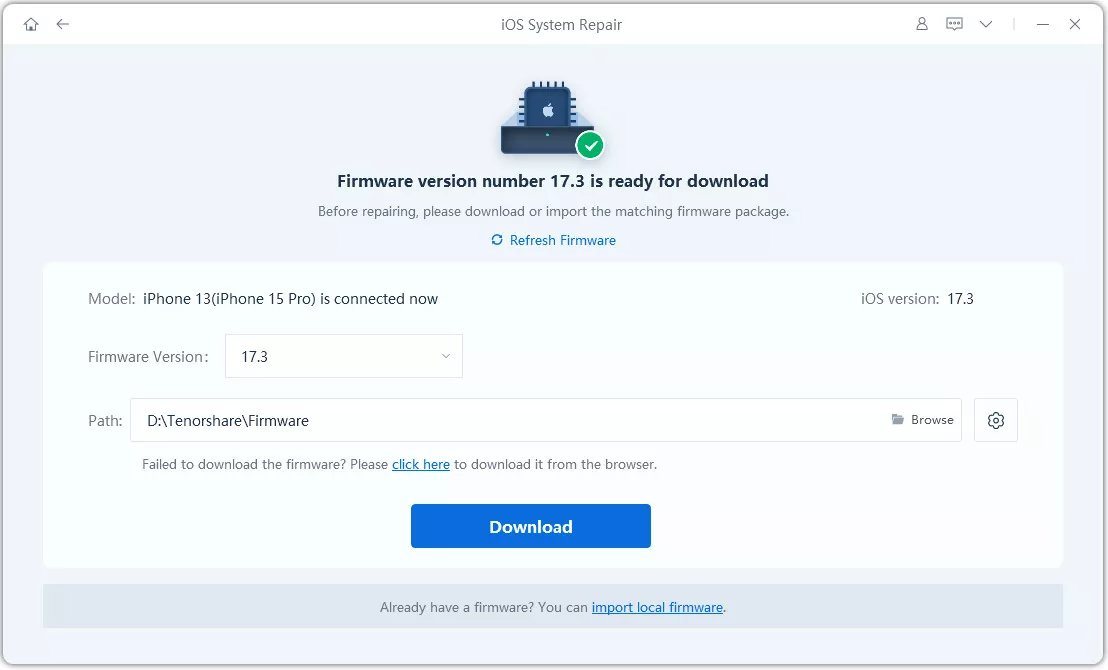
Click the "Download" button to download the latest firmware package for your device.

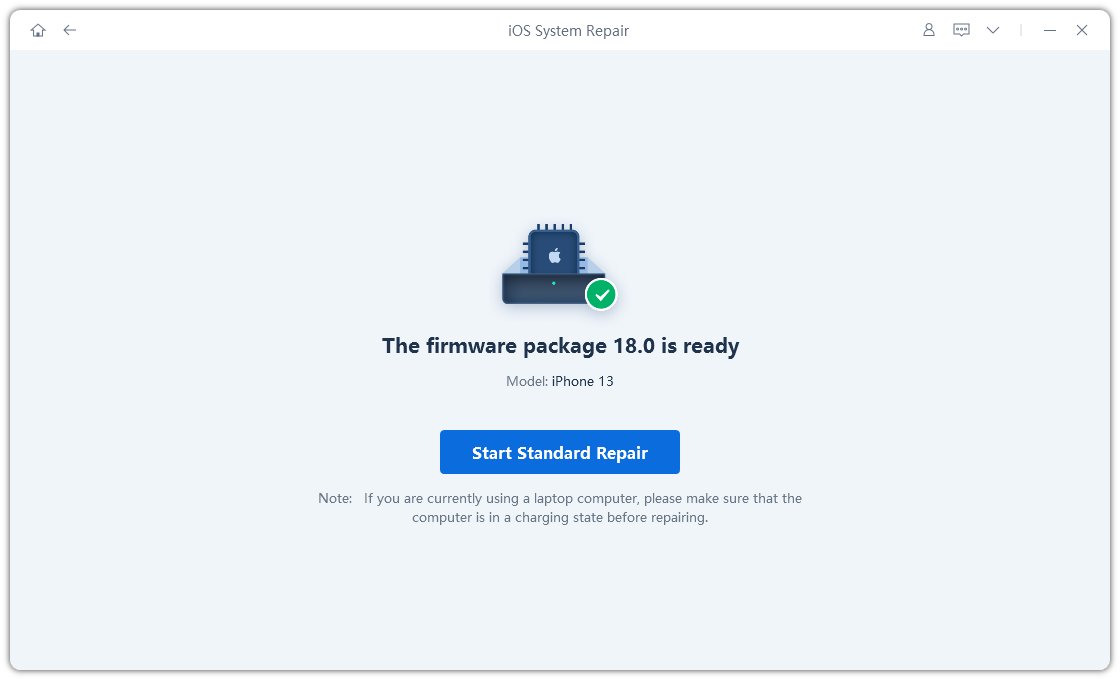
Click on the “Start Standard Repair” button and wait for the process to complete.

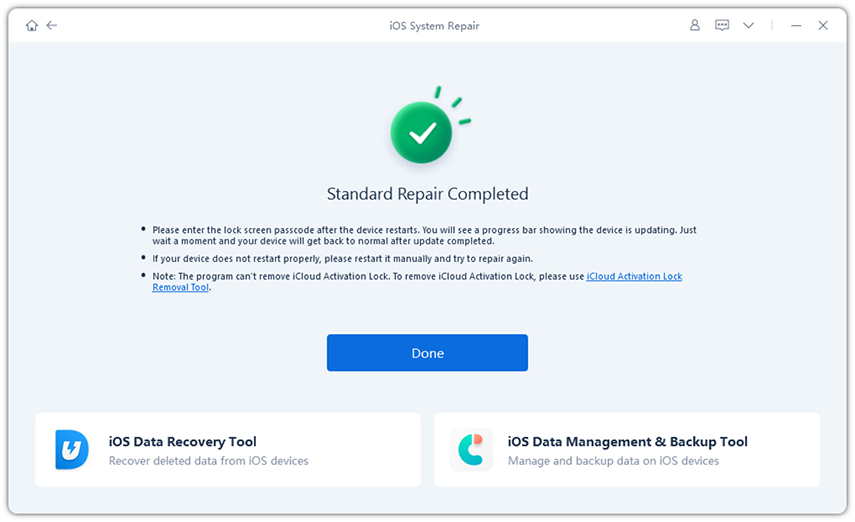
After the repair is complete, click “Done” to end the repair.

Bonus Tip: How Do You Use Personal Voice Live Speech
Now that you know how to set up personal voice and how to activate it in live speech, here are some tips that will help you when using personal voice. Although turning live speech on means you can use personal voice anytime, it doesn't specify how it works. Follow these steps to use your personal voice without mistakes.
Go to the “Live Speech” page in settings and tap on the “Favorite Phrases” option. Next, select the “+” icon to add any phrase.

Type the phrase you want to add and tap on the "Save" button. Go back and make sure you have selected your custom "Personal Voice" from the voices list.

- Now, you can triple press the power button to open live speech any time and type in whatever you want your iOS device to speak out loud in your voice.
- If you get the iOS 17 personal voice not working error at any point while using personal voice with live speech, use Tenorshare ReiBoot to fix the issue.
Conclusion
And this is how to use personal voice in iOS 17 after activating live speech. Although the process looks easy, you need to do everything step-by-step and make sure you turn on live speech. If personal voice features don't work or show up, it means there is a bug or glitch in your iOS 17 update. Use Tenorshare ReiBoot to fix it without data loss.
- Downgrade iOS 18 to iOS 17 ;
- Fix iPhone won't restore in recovery mode, my iPhone is stuck on the Apple Logo,iPhone black screen of death, iOS downgrade stuck, iPhone update stuck, etc.
- Support all iPhone models and the latest iOS 18 and earlier.
Speak Your Mind
Leave a Comment
Create your review for Tenorshare articles
