Detailed Guide to Transfer Photos from iPhone to Windows PC
“I am new to the whole iOS and iPhone scene. Is there any way I can transfer my photos to my Windows 10 PC? I am stuck with a low storage warning. Please do help!”
This is a typical query of many iPhone users nowadays. If you also have this issue and you don’t know how to get photos from iPhone to PC, then you are just at the right place. We are here with some effective solutions that can make your life a lot easier and make your user experience a lot smoother as well. So, let’s get going…
Way 1: Get Photos from iPhone to PC using Tenorshare iCareFone
If you want a potent transfer program for all your photo transfer needs, just go for Tenorshare iCareFone. It is a utility tool that can transfer unlimited photos from your iPhone to PC. It is available for both Windows and Mac and it is compatible with every single version of the same. We recommend Tenorshare iCareFone to you due to the following factors:
- Intuitive and user-friendly. The whole interface is very simple yet effective.
- No need for Wi-Fi or internet connection.
- Compatible with all iOS versions, Mac as well as Windows.
- Higher transfer speeds compared with other software or methods.
- Unlike iCloud, there are no storage limitations.
- Unlike iTunes, the photos transferred will be fully readable and accessible.
- You can easily select one or multiple or all photos for transfer. No restrictions on import and export.
- Uncompromised photo quality and no data loss.
To use Tenorshare iCareFone for getting photos off iPhone to PC, follow the steps below:
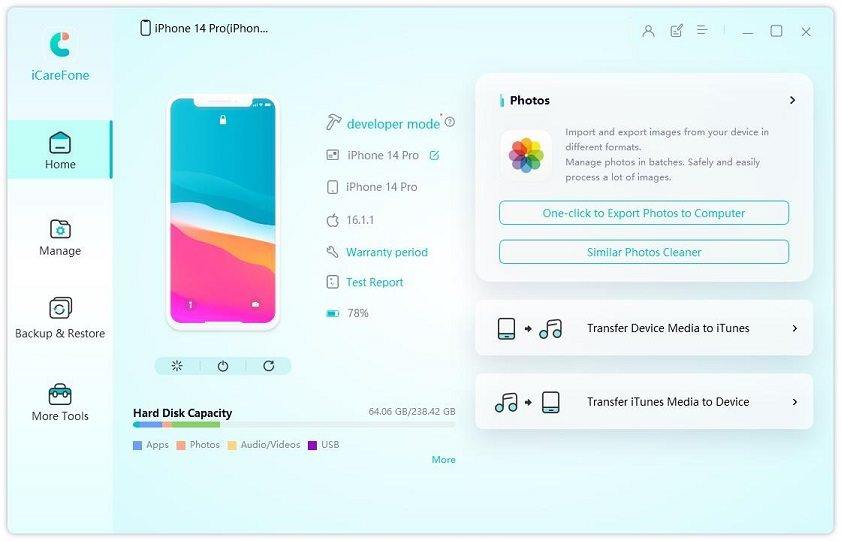
- First, download, install and launch the Tenorshare iCareFone software on your Windows PC.
- Now, connect your iPhone to your PC via USB cable. Try to use the original lightning or USB cable. The main interface will open up.
- Now, select “File Manager” from the interface.
- Under “File Manager”, find and click on “Photos”.
- This will automatically showcase all your iPhone photos on the screen. You can select the required photos for transfer now.
- After choosing the photos, tap on “Export”
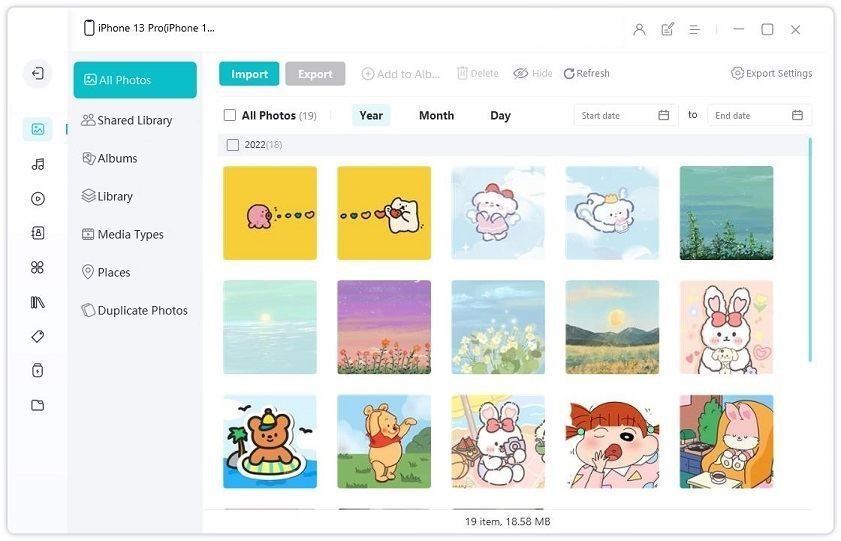
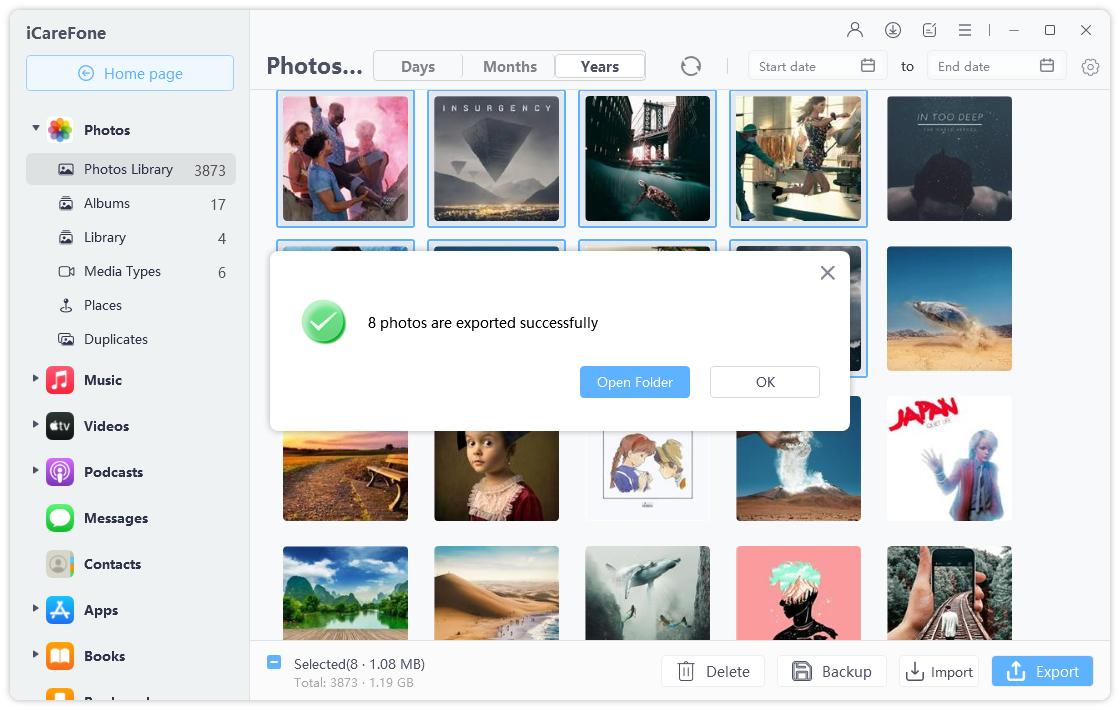
You will get all the selected photos from your iPhone straight to your computer within seconds now and it is the best way transfer photos from iPhone to computer without iTunes.
Way 2: Import Photos from iPhone to Windows 7 PC
If you are using a Windows 7 PC, then this is the most basic way to get your pictures from an iPhone. And for this you will need to have iTunes pre-installed on your PC. You can download it from the official website. Though it won’t be opened in this whole process but it is recommended by Apple to have it installed before doing anything.
This particular process includes Windows File Explorer. So, to get started, connect your PC and your iPhone with a USB cable. Now, you have to wait a few moments and the computer will recognize the device.
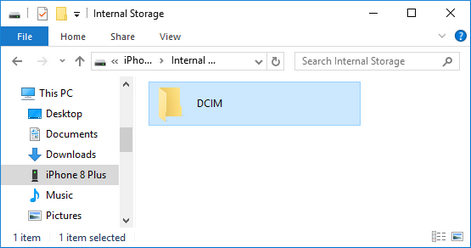
Now, visit “My Computer” and you will notice that your PC has recognized your iPhone as a portable device under the “Devices” section. Click on it to open and look for a folder called “DCIM”, you will find your pictures in there, just copy and transferring photos to Windows10 to get access whenever you want. This way you can also store it for backup.
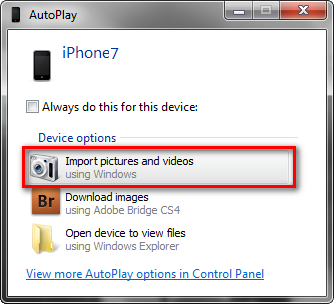
You can also use the AutoPlay feature for transfer as well. It is also very simple. To activate this function, connect your iPhone to your PC via the USB cable and open Camera from your phone. The AutoPlay box will pop-up on your computer screen. Now, you just have to select “Import Photos and Videos” option and choose a path for the import.
Way 3: Get Pictures from iPhone to Windows 10/8 PC
iPhone is one of the best smartphones in the market. Still, when it comes to transferring photos from iPhone to a Windows PC, users tend to get confused as they don’t know how to get photos off iPhone to PC the right way. It is not that the process is difficult but you need to know and apply the proper technique for every version of Windows to make it happen. For a Windows 10/8 PC, the whole transfer process is a bit different, you just have to make a few changes to be successful.
For this process you will need a USB cable and iTunes pre-installed on your PC. The process is as follows…
- Connect both of the devices with a USB cable.
- The moment you connect the devices, the Photo App will launch automatically, if it does not you have to do it manually.
- On the Photo App panel, you will find the blue colored “Import” button on the top right corner.
- After clicking the button, select the photos you wish to transfer then click the “Continue” button located on the lower-left corner of the panel to complete the process.
- Now, that the process is complete, you will have all your photos synced. Now, a pop-up will appear asking if you want to delete the photos after importing. Answering Yes or No is completely up to you. Keep in mind, this is a good way to clear your iPhone storage.

And this is exactly how to get pictures from iPhone to PC for Windows 10/8.
Click the video below to learn more about how to transfer photos from iPhone to computer:
Way 4: Download Photos from iPhone to PC from Cloud
Data transfer to a Windows PC from an iPhone is not difficult as it seems. When it comes to downloading files to a Windows PC, most users panic mainly because the Operating Systems is different. Actually, there is nothing to worry about, the company even provides support through iCloud and iTunes so, that your data transfer gets completed fluently.
As an iPhone user you know that every user gets a storage space of 5 GB after registering to iCloud, it may not seem much but every little space counts. You can get more space if you buy it. The process is as follows…
- First, you need to install iCloud for Windows and the wizard will provide the instructions for the whole installation.
- After you install it on your PC, log-in with your Apple-ID and you will be able to use any services they are providing, including device syncing and photo sharing.
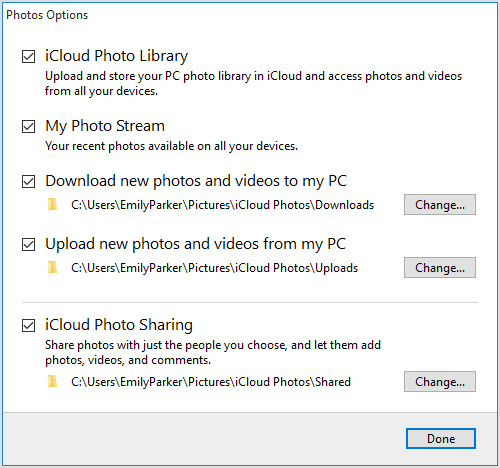
- Now, navigate to “Options” and then to “Photos”
- Enable the “iCloud Photo Library” from the list and click “Done”
- Go hold of your iPhone and go to "Settings". Similarly, you need to make sure that your iPhone is running on the latest version of iOS, if not then update it.
- Now, navigate to “Photos & Camera” and simply turn on “iCloud Photo Library”. For iOS 11 users, you can go to “Photos” and enable “iCloud Photo Library.”
- You can get hold of your photos in the “iCloud Photos” tab on your Windows Explorer. Click on “Download” when prompted.
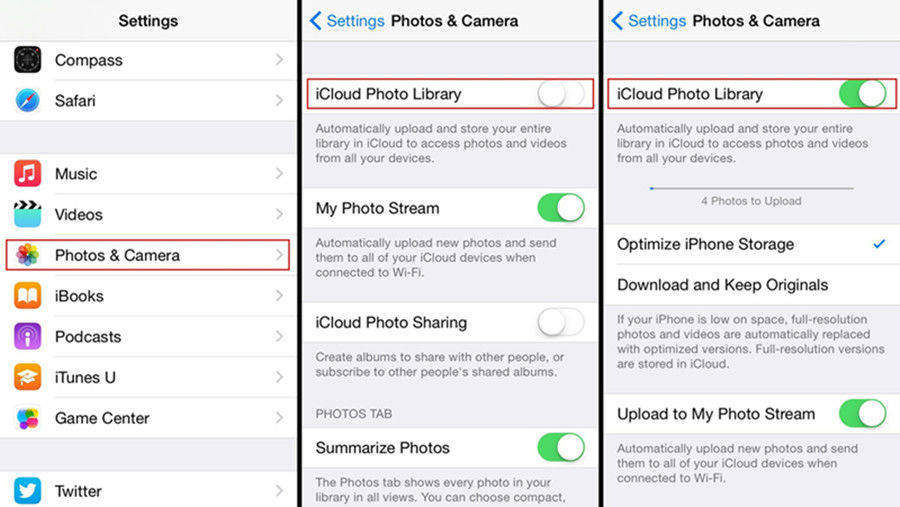

This will ensure that all the images from your iPhone will be synced to your Windows 10/8 PC, only when you have a Wi-Fi connection.
So, here are the most effective ways to import photos from iPhone to Windows 10/8/7. All of these methods are tested and proven and it works fluently. But in case you want the full-proof way to get your photos, just go for Tenorshare iCareFone with your eyes closed. It will take care of all your photo transfer needs efficiently and flawlessly. So, if you have this question going on in your mind “How can I transfer photos from iPhone to Windows”, now you know where to go and what to choose!
If you find this article helpful, don’t forget to share and comment below!
Speak Your Mind
Leave a Comment
Create your review for Tenorshare articles

Tenorshare iCareFone
Best Free iPhone Transfer & iOS Backup Tool
Easily, without iTunes


