Top 6 Ways to Import Photos from iPhone/iPad to Mac without iTunes
Situations you will need to transfer photos from iPhone to Mac are many. Maybe simply save photos to Mac simply save photos to Mac and delete from iPhone to free up memory, or edit photos with Mac-based software after importing. In this tutorial, we will show you 6 different ways to import files from iPhone 14/13/12/11/X/8/7/6/5 to Mac without using iTunes.
- Method 1: Selectively Transfer iPhone Photos & Files to Mac with Tenorshare iCareFone
- Method 2: Import Photos from iPhone to Mac Using Photos App
- Method 3: Sync Photos from iPhone to Mac with iCloud Photo Library
- Method 4: Send Photos from iPhone to Mac Wirelessly via Email or iMessage
- Method 5: Import Photos from iPhone to Mac with Airdrop
- Method 6: Move iPhone Photos to Mac Computer with Image Capture
- Comparisons between the 6 Ways to Transfer iPhone Photos to A Mac
Method 1: Selectively Transfer iPhone Photos to Mac with Tenorshare iCareFone(iPhone 12 Supported)
There are actually lots of ways and apps to sync your iPhone photos with Mac computer. We’ve experienced all the methods mentioned in this article and found Tenorshare iCareFone is the most effective way. All images, including Cameral Roll, Photo Stream, Photos Library, third-party software downloaded pictures, can be exported to your Mac at once within clicks, and you can decide whether to transfer multiple or a single picture to computer. Below steps will show you the process to get photos off iPhone and into your Mac.
- Launch Tenorshare iCareFone on your Mac computer and connect your iOS devices with it. This program works well with all Mac OS versions from the latest 10.14 Mojave to Mac 10.13, 10.12 and even earlier.
- When Tenorshare iCareFone detectes your device, go to File Manager > Photos.
- Tenorshare iCareFone will display all pictures from your iPhone chronologically so that you can easily locate the target files. Pick up all or the individual you want to export to your Mac and click the Export button.
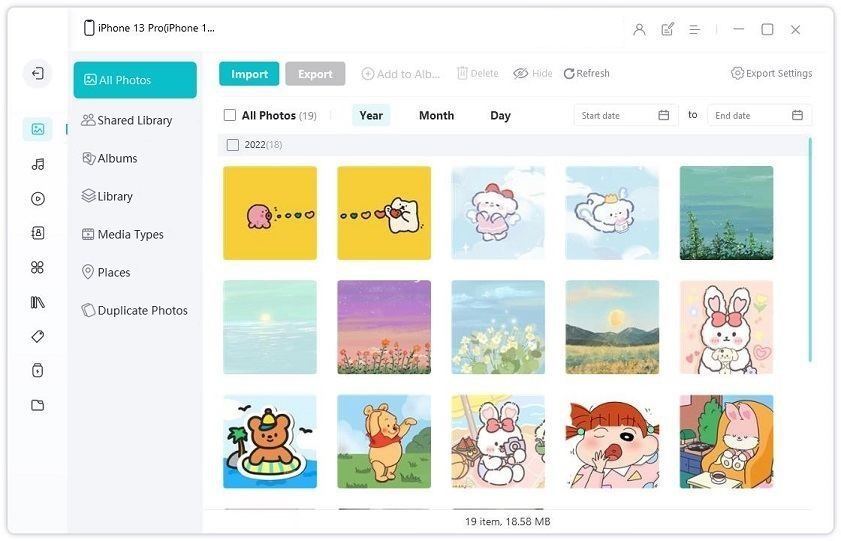
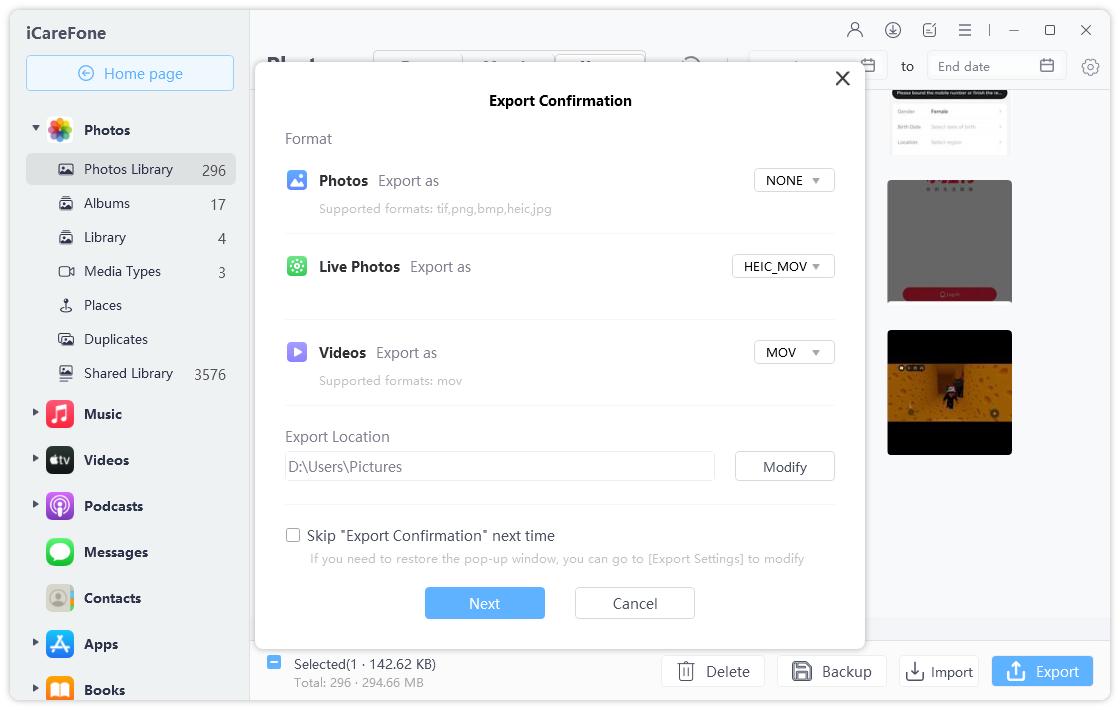
There you finished iPhone photos transferring to Mac. Quite easy and fast, isn’t it? Don’t miss the best iOS file transferring software – Tenorshare iCareFone. Now fully supports with iOS 12 iPhone Xs/Xs Max/XR.
Method 2: Import Photos from iPhone to Mac Using Photos App
With Mac OS X Yosemite 10.10.3 and later, Apple introduced the Photos App as a replacement of iPhoto to systematically manage, edit and share images between iOS devices and a Mac. By default, the Photos app is set to copy iPhone photos to your Mac automatically when connected via the USB cable. If not, do the following:
- Connect your iOS devices to a Mac and wait for Photos app automatically open. If it doesn’t, click the Photos icon.
- Select Import from the top menu bar. If you no longer need these photos after transferring, check Delete items after import option.

Method 3: Sync Photos from iPhone to Mac with iCloud Photo Library
iCloud Photos Library can automatically backup iPhone pictures among all your Apple devices as long as you sign up the same Apple ID and whenever there is a WiFi network available. To migrate iPhone photos library to your Mac computer, you need to set up a few things first:
On iOS 12 and iOS 11 devices: go to Settings > Your Profile > iCloud > Photos and turn on iCloud Photo Photo Library.
If you are using iOS 10.2 and earlier, go to Settings > iCloud > Photos and do the same way.
On your Mac, go to System Preferences > iCloud. Find Photos and click the Options and check the iCloud Photos Library.
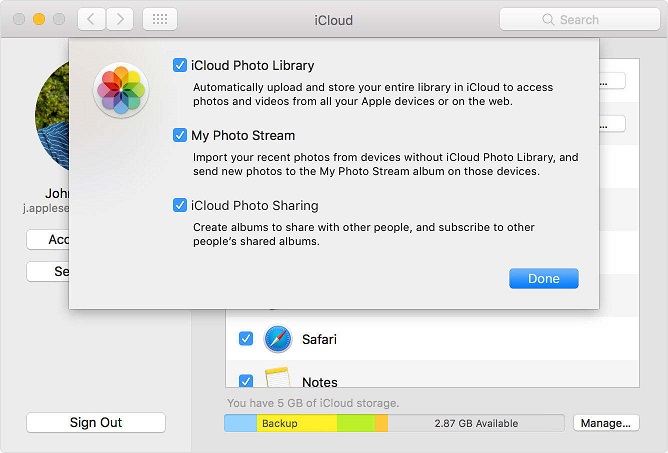
Then your iOS device accesses to a WiFi network, iCloud Photos Library will upload photos from iPhone to Mac automatically and you just need to download and add it to Mac storage later.
Method 4: Send Photos from iPhone to Mac Wirelessly via Email or iMessage
If you just need to transfer only a few photos to your MacBook or iMac, either Email or iMessage is a good choice for the easy operations and timeliness. Here we take Email as an example to get photos from iPhone to Mac.
Open Photos app on your iPhone and select the photos you want to import to a Mac. Tap the share icon on the lower left and it bring a few options. Choose Mail from the provided list.

You will be navigated to Email screen, where you should type you own email address to send to. After all these, download it on an Internet- available Mac computer and you can now view iPhone photos on Mac freely.
Method 5: Import Photos from iPhone to Mac with Airdrop
Similar to Email, you can use Airdrop to add pictures to Mac from your iPhone, but this will require Mac OS X Yosemite, El Capitan or macOS Sierra. Make sure you do this under WiFi connection.
To start with, enable Airdrop on your iPhone and choose Everyone. Then open the Finder and launch Airdrop. When connected, tap Photos app and choose images to transfer to your computer by the share icon.
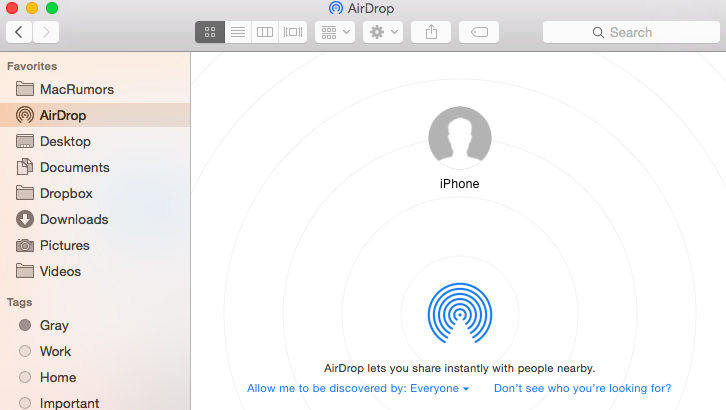
However, if you Wi-Fi is not steady, the whole transferring process will take a long time. And one import thing is that don’t forget to turn off Airdrop after syncing.
Method 6: Move iPhone Photos to Mac Computer with Image Capture
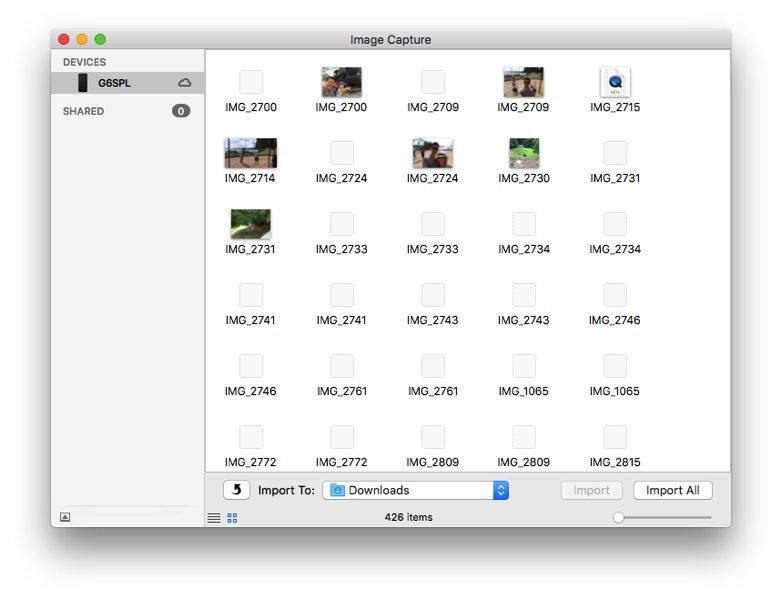
Last but not least, there is another app that allows you to transfer photos from iPhone to Mac without iTunes, which is the default Image Capture app. Compared with Photos app, it’s much handy to organize and share your pictures especially for the folders.
To sync your photos from iPhone to Mac, you will need to connect your device with Mac and launch Image Capture. Select your iPhone from the Devices list and decide the output image folders, after that click either Import or Import All option. Like Photos, you can also choose Delete after Import to free up the storage on iPhone.
Comparisons between the 6 Ways to Transfer iPhone Photos to A Mac
| Tenorshare iCareFone | Photos | iCloud Photos Library | Image Capture | Airdrop | ||
|---|---|---|---|---|---|---|
| 1-click photos transferring | ||||||
| Automatically sync up on all Apple devices | ||||||
| Preview before importing | ||||||
| Two-way transfer between iOS devices and Mac | ||||||
| No WiFi required during transferring | ||||||
| Keep the original quality and filter | ||||||
| Transfer other iOS files like messages, contacts, music, books, etc. | ||||||
| Support all Mac OS | ||||||
| Support with iOS 12/11 and earlier devices |
After reading so much, which method do you think works the best in iPhone photos exporting? Leave a comment below to let us know.


Speak Your Mind
Leave a Comment
Create your review for Tenorshare articles

Tenorshare iCareFone
Best Free iPhone Transfer & iOS Backup Tool
Easily, without iTunes


