How to Move Photos from iPhone X/8/8 Plus to Computer
Most of the photos on iPhone X/8/8 Plus are of great significance for users on account of the personal unforgettable memory. However, some people have the habit to move pictures to PC/Mac as backup due to the limited storage on iPhone. Here I am going to share 3 practical methods to transfer photos from iPhone X (10), or iPhone 8/8 Plus to computer (Windows 10/8.1/8/7 or macOS High Sierra/Sierra/EI Caption/Yosemite, etc.).
- Approach 1. Copy Photos to Computer from iPhone X/8/8 Plus via USB
- Approach 2. Import Photos from iPhone X/8/8 Plus to Computer with Tenorshare iCareFone
- Approach 3. Sync Photos from iPhone X/8/8 Plus to Computer by Using iCloud
Approach 1. Copy Photos to Computer from iPhone X/8/8 Plus via USB
There are lots of limitations in iOS system, which is different from Android. For instance, you are only able to access Photos and Videos once you connect iPhone to computer. Other third-party applications are permission denied to visit iPhone. Consequently, just using a little USB can you transfer photos. The steps are:
- 1.Connect iPhone X/8/8 Plus to an accessible computer with a usable USB cable.
- 2.Tap “Trust” on your iPhone to permit computer accessing your iPhone data.
- 3.iTunes will pop up automatically if you have installed one. Just ignore and close it.
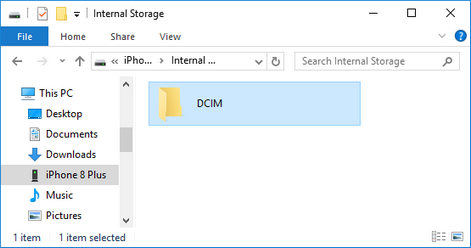
- 4.Open “This PC” and figure out the portable devices. Then choose your iPhone model or iPhone name and click it.
- 5.Open the sub-folder, you will see a DCIM photo folder. In that folder, there are various pictures and videos on Camera Roll.
- 6.Choose your target pictures and add photos from iPhone X/8/8 Plus to computer easily and rapidly.
Approach 2. Import Photos from iPhone X/8/8 Plus to Computer with Tenorshare iCareFone
As you will know, Tenorshare iCareFone is a simple-to-use yet workable iOS file manager as well as iTunes alternative program running on Windows and Mac. It even provides the all-in-one solutions to fix any malfunction, optimize performance, remove advertisements, backup and restore on iOS devices. Let’s see the user guide as below:
Step 1. Download, install and launch this application to your computer and ensure you have installed the latest iTunes on the PC, even though you don’t have to run it.


Step 2. Connect iPhone X/8/8 Plus to your computer through UBS cable. The program will recognize the phone. Tap “Trust” on iPhone to allow computer visit your data.
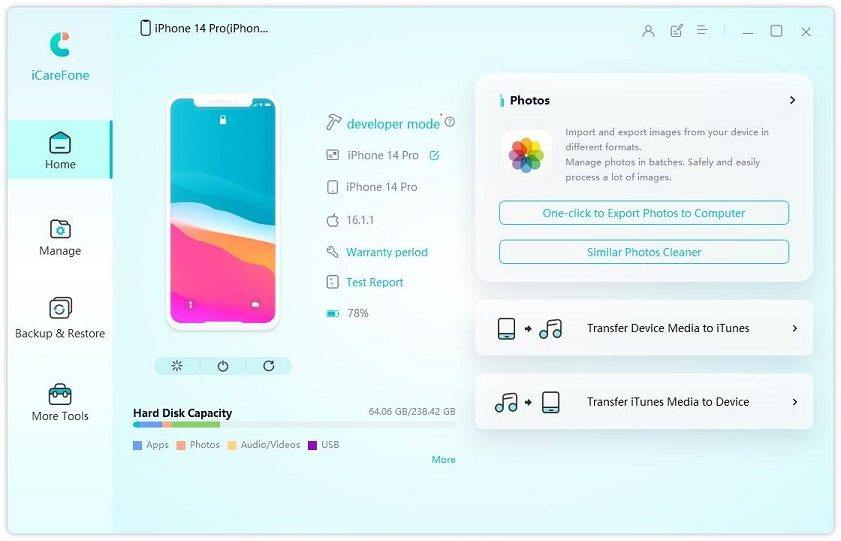
Step 3. Tap on “File Manager” of the main interface and you will see a few file types. Given your situation, choose “Photos” and continue.

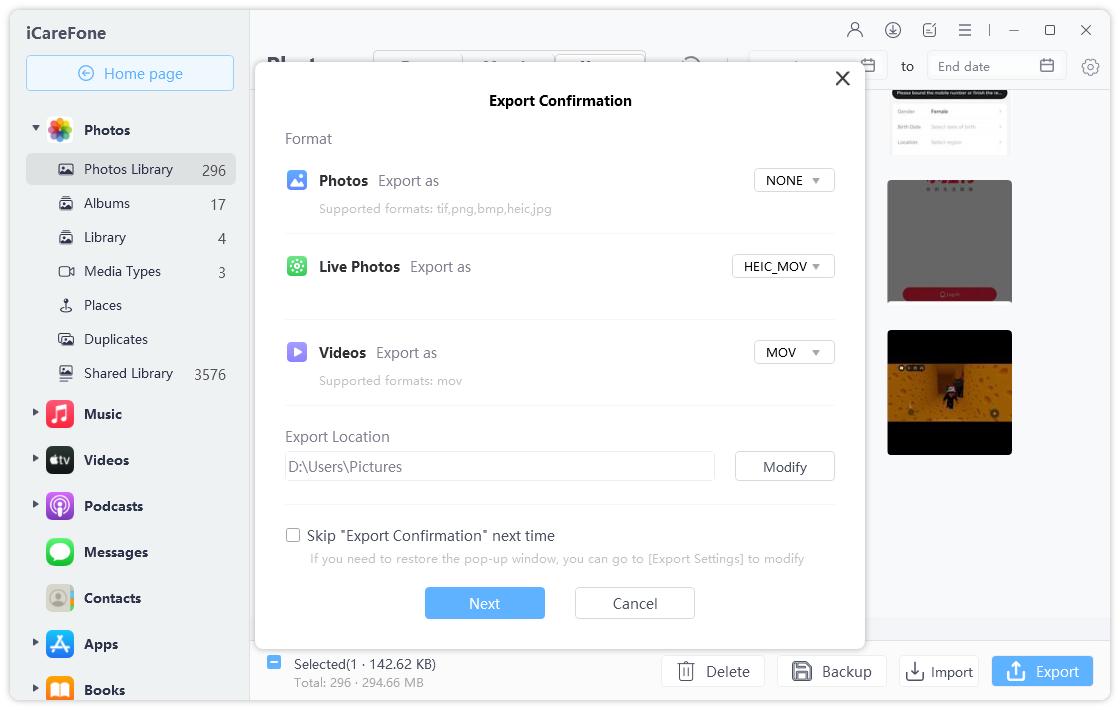
Step 4. In the Photo window, choose your pictures and click on “Export”. It will pop up a window ask you to choose path to save (The default path is on computer desktop). After a few seconds or so, you will see them on computer finally.
Approach 3. Sync Photos from iPhone X/8/8 Plus to Computer by Using iCloud
Apple iCloud enables you to access your data in different devices such as Windows, Mac, iPhone, iPad or iPod touch. There is a function of iCloud Photo Library, which allows you to sync and download pictures to PC automatically. Looking how to do that as below:
- 1.Enable iCloud Photo and iCloud Photo Library on iPhone X/8/8 Plus.
- 2.Download, install and run iCloud on Windows or Mac machine.
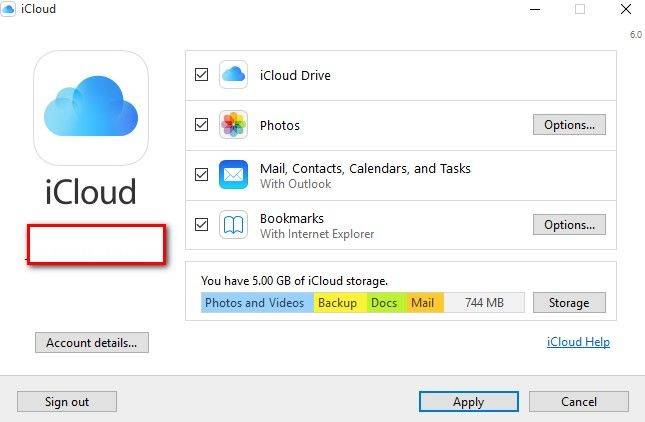
- 3.Login iCloud with correct Apple ID and password.
- 4.Click on “Photos” and then “Apply” and continue the process.
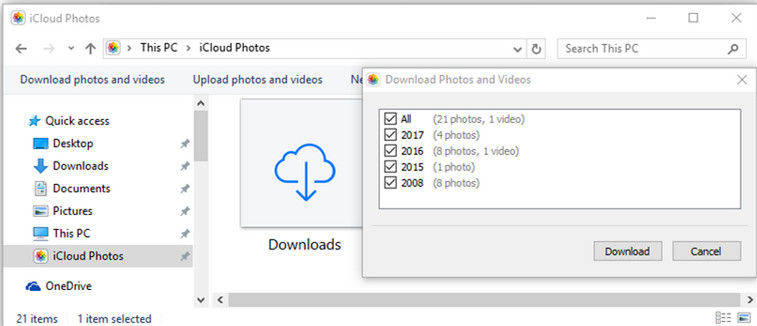
- 5.Open your computer file explorer and choose “iCloud Photos” and then click on “Download Photos”.
- 6.Now you can download photos in the target collection. Tap on “Download” and you are able to migrate photos to computer from iPhone X/8/8 Plus.
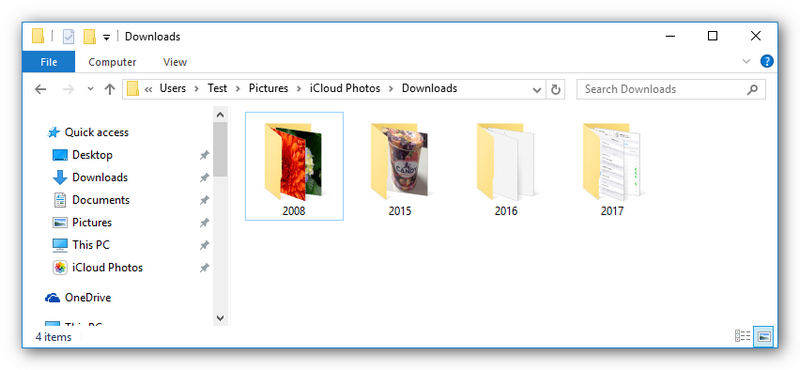
- 7.In the end, you will see your photos under This PC > iCloud Photos > Downloads.
As mentioned above, you might as well single out one of the measures and try to move photos from iPhone X/8/8 Plus to computer simply and instantly. Welcome to start the discussion in comment section once you encounter other problems while transferring photos.


Speak Your Mind
Leave a Comment
Create your review for Tenorshare articles

Tenorshare iCareFone
Best Free iPhone Transfer & iOS Backup Tool
Easily, without iTunes


