Unable to Activate Touch ID on This iPad, How to Fix
Touch ID lets you authenticate your identity to use your iPhone or iPad. It works by scanning your fingerprint to let you enter the device. But, at times due to some reason, the Touch ID is not working on your iPad. In case you might need to follow a few troubleshooting steps to fix the “unable to activate touch id on this iPad” issue. Here, we will introduce you to some of the easier ways to fix Unable to Activate Touch ID on This iPad, to know all about it, keep following the page!
- Method 1. Activate Touch ID from Settings
- Method 2. Hard Reboot Your iPad
- Method 3. Turn Passcode on and Off
- Method 4. Delete Existing Fingerprint and Reset Touch ID
- Method 5. Reset All Setting/Networking Setting on iPad
- Method 6. iPad Touch ID Still Is Not Working? Try ReiBoot!
Method 1. Activate Touch ID from Settings
Your Touch ID is not working may be due to the iPad unlock or iTunes & App Store is turned on. The below-given steps will help in fixing the unable to complete touch id setup issue:
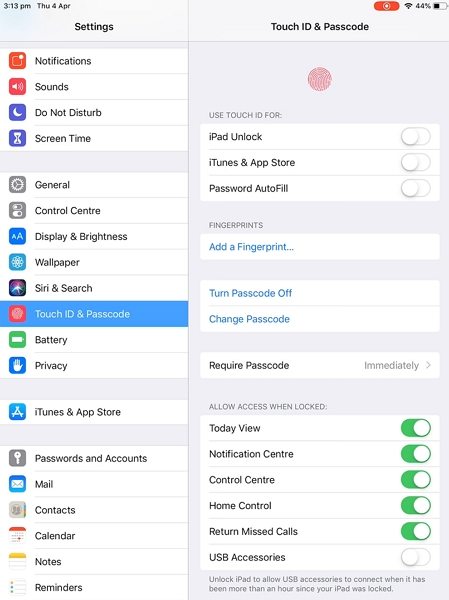
- Go to the Settings and select Touch ID and Passcode from there.
- Now, enter your passcode, when asked.
Disable all of the options you see and restart your iPad.

- After the restart, go to Settings app again.
- Turn off iTunes and App Store.
Method 2. Hard Reboot Your iPad
A hard reboot is an easy and quick fix to many iPad problems. If the above method failed to fix the concern, try to hard reboot your iPad using the below steps:
- Press and hold the on/off button and home button at the same time.
Keep holding them until the Apple logo appears and then release them.

These steps will hard reboot the system to help you resolve the touch id issue.
Method 3. Turn Passcode on and Off
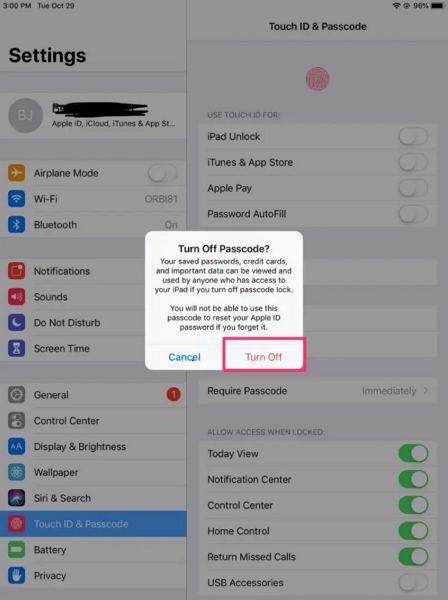
Sometimes, the passcode prevents the touch if from working properly, therefore, you can try turning the passcode on and off by following the below steps:
- Open your device Settings.
- Now, go to “Touch ID & Passcode” by scrolling down. Followed by entering your passcode.
After this, select Turn Passcode Off and re-enter your passcode.

- Now, restart your iPad and then click on Turn Passcode On. Tap Keep when it asks to delete or continue using the saved fingerprints. Finally, type the desired passcode and tap Next.
Following these steps, you should be able to activate touch ID again.
Method 4. Delete Existing Fingerprint and Reset Touch ID
If your iPad unable to activate Touch ID after update, chances that the Touch ID settings get modified. You can try to delete existing fingerprint and add a new one. To remove the existing fingerprint and reset the touch id again, follow the below simple steps:
- Go to Settings of your iPad and navigate to Touch ID & Passcode.
- Now, enter your passcode or password.
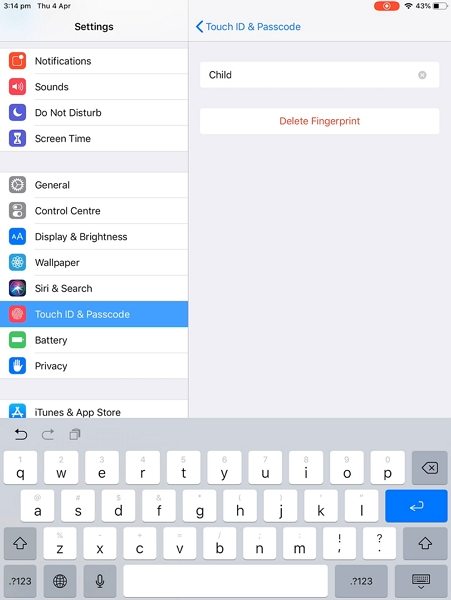
For removing the saved fingerprint, click on the fingerprint name followed by selecting to Delete fingerprint.

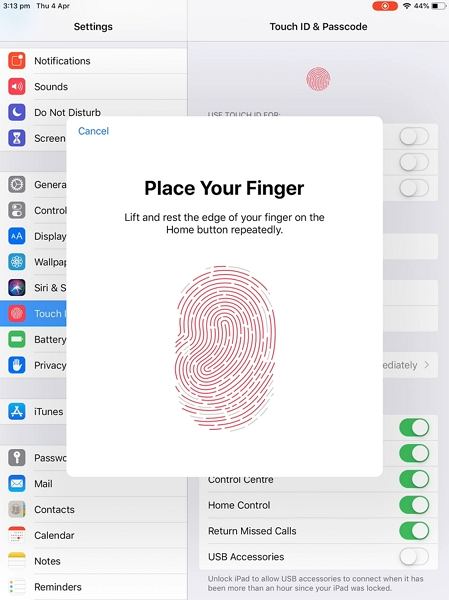
After this, you will be asked to add your fingerprint by clicking on the “Add a fingerprint” option.

Then, add your fingerprint using the finger sensor area. However, ensure that the sensor is clean and dry to avoid any issues.

Now, restart your phone/iPad to check if the issue has been resolved or not.
Method 5. Reset All Setting/Networking Setting on iPad
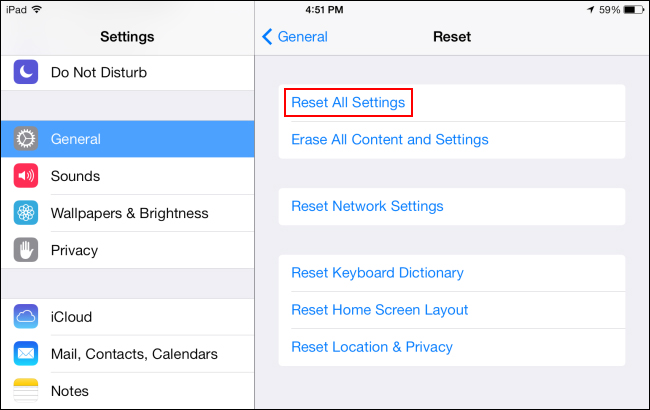
Sometimes some changes in your device settings can also lead to the error “Unable to Complete Touch ID setup please go back and try again”. In this case, you can follow the below steps to reset all settings to modify changes.
- Open your device Settings.
- Go to General and then Reset.
Then, select “Reset All Settings”, followed by entering the password to make changes.

Method 6. iPad Touch ID Still Is Not Working? Try ReiBoot!
If you are done and dusted with all the above methods to fix the “Unable to Activate Touch ID” issue, we recommend using Tenorshare ReiBoot software to fix and repair your iPad and resolve the concern. We recommend using this tool as it's professional, user-centric and offers desirable solutions in just a couple of minutes without any data loss.
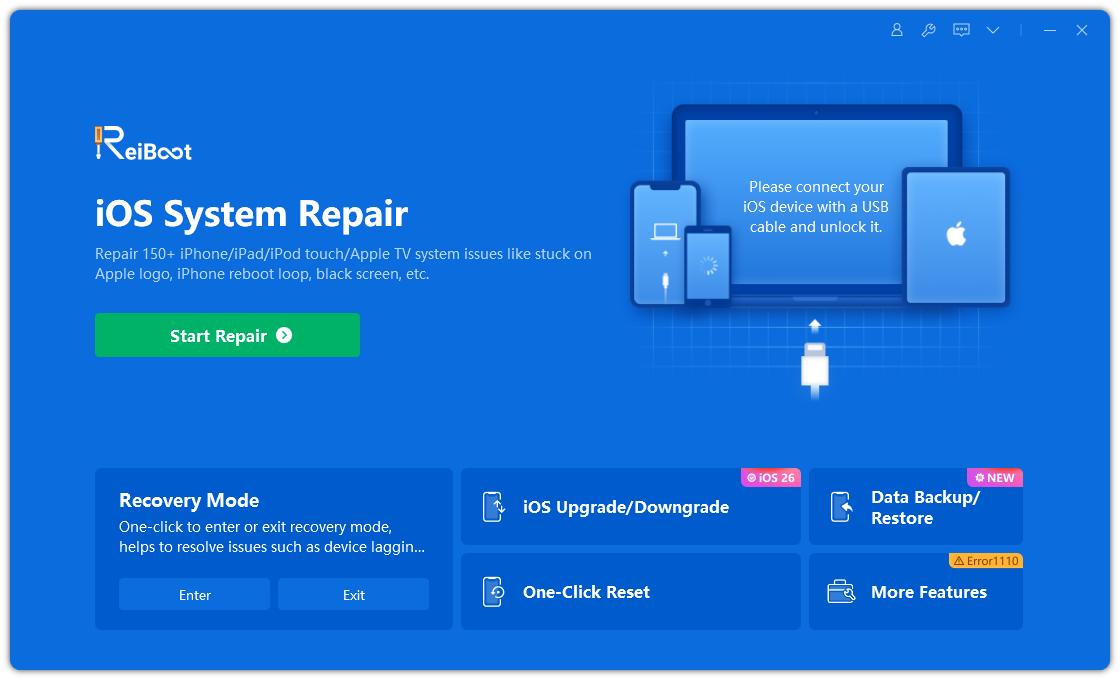
Download and install ReiBoot on your computer. After launching the tool, click “Start” under iOS System Repair.

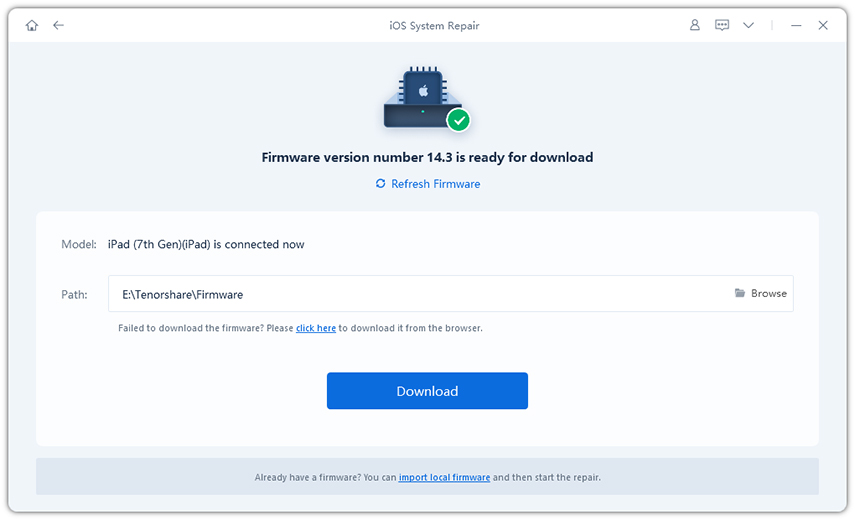
Select “Standard Repair” and then download the firmware package for repairing iPad.

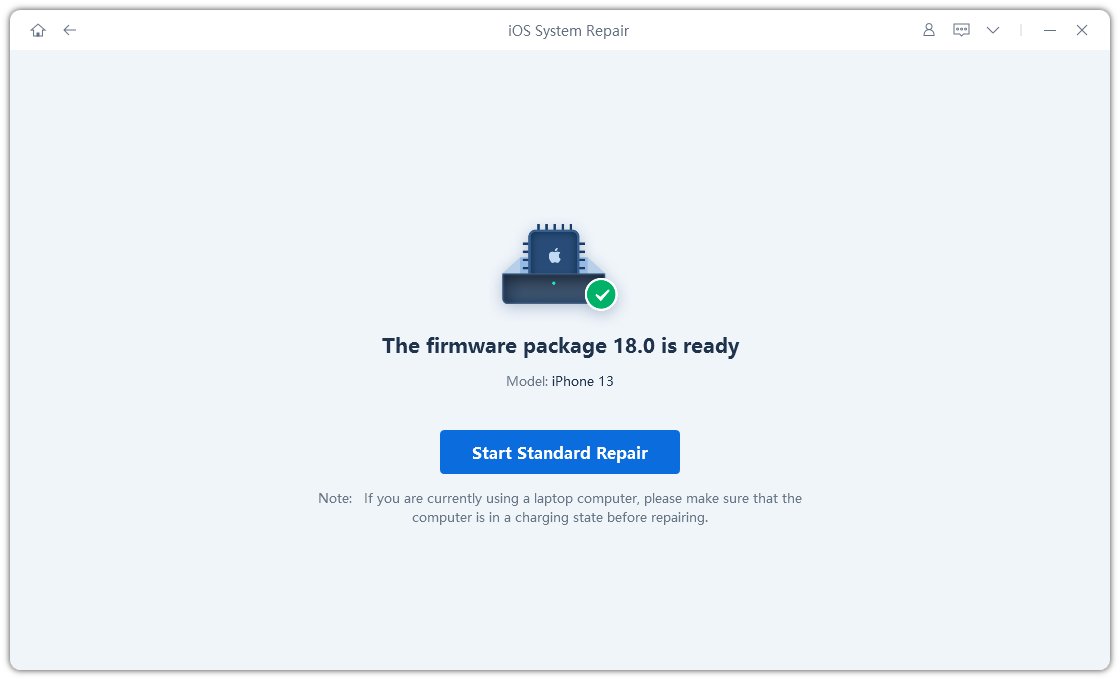
Now, after successfully downloading the firmware package, select “Start Standard Repair” to begin recovery.

Followed by which, your device will automatically restart after a couple of minutes and no data will be erased.
Conclusion
The error “Unable to Activate Touch ID” can be due to several reasons as shared above. You can try any of the given methods to resolve the concern. But, we suggest opting for the last method using Tenorshare ReiBoot for the sure-shot solution!
Speak Your Mind
Leave a Comment
Create your review for Tenorshare articles


