Best 4 Methods to Backup Photos from iPhone to Computer
Your iPhone is filled with several precious photos of you and your friends but what if one day, due to a single mishap all of those photos get deleted? You will be in a lot of trouble and there would be no way to get back those irreplaceable memories. So, it would be safer for you if you backup photos from iPhone time to time. A lot of users don’t actually know how to backup iPhone photos to other devices, so this is why we are here to help and guide you with 4 simple ways to backup your photos from your iPhone.
- Option 1: How to Backup Photos from iPhone Directly
- Option 2: How to Backup Photos to iCloud
- Option 3: How to Backup iPhone Photos to Dropbox
- Option 4: How to Backup Photos to iTunes
Option 1: How to Backup Photos from iPhone Directly
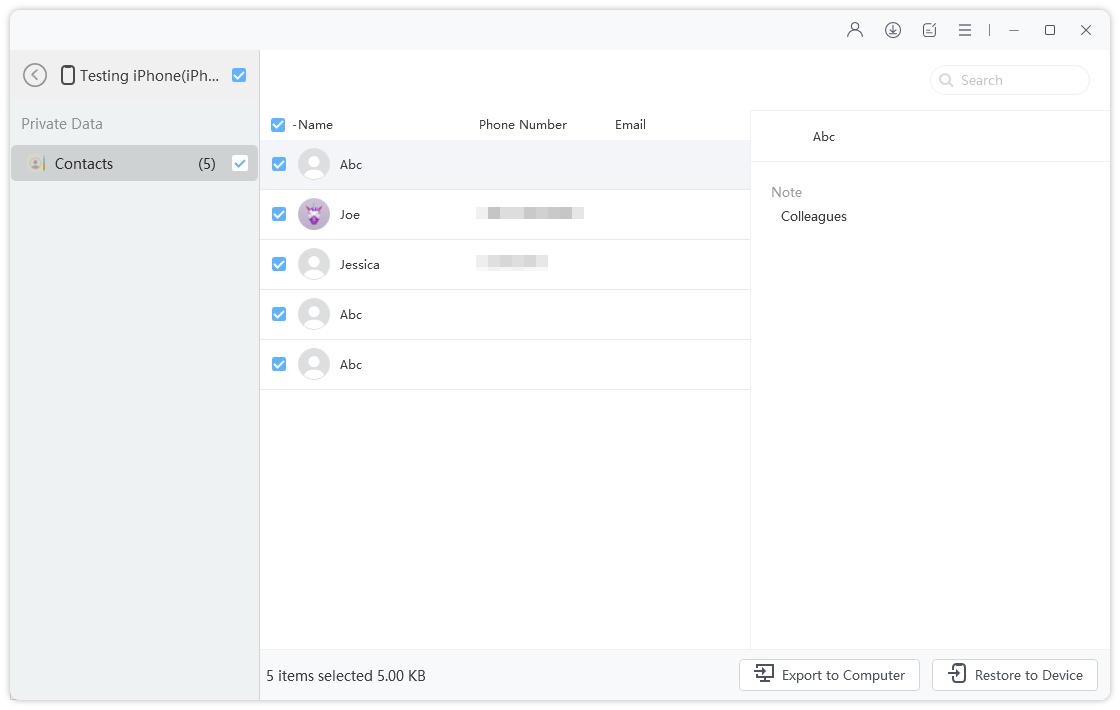
If you are out of space and you are clueless on how to backup photos from iPhone then it would be best for you to use Tenorshare iCareFone for backing up photos from your iPhone directly. The new feature of backing up photos has been introduced with this program and it is a boon for many who are looking for the same.
It is extremely easy to use with a simple interface and clear walkthroughs as well as instructions. There are also other reliable apps like iCloud and iTunes which are Apple certified but this third-party app is very efficient and by far the best choice because of certain reasons. It is very easy to use than those other apps and you can selectively backup basically all kind of files from your iPhone irrespective of size, nature and amount.
Advantages of backing up with Tenorshare iCareFone
- The software provides selective file backup.
- All photos can be easily backed up and they are stored in a same folder from your iPhone, like Camera Roll, Places, People, which are instantly accessible.
- The backup process is fast and efficient.
- No risk of data loss.
- Available for both Windows and Mac.
- You can restore back at any time.
Here’s how to use the software:
1. Download and install iCareFone on your computer.
2. Launch after installation and connect your device. Select Backup & Restore from menu bar.

3. On the next panel various types of data will be visible and by default “Select All” option will be activated.
4. Uncheck that option and just select Photos, found under Media Data.

5. Finally, click Backup below to backup photos on your computer. The whole process will only take a while. After that, you can click View Backup Data to see if the photos are successfully backed up.

And that’s it! You have successfully backed up all your photos from your iPhone. And you can get it restored very easily as well whenever the need be! Don’t miss this amazing software.
Option 2: How to Backup Photos to iCloud
If you want to backup photos to cloud then iCloud is the safest option. It is a cloud service provided by Apple, and every registered user gets 5GB storage space for their data and to get more you have to get a paid subscription. This storage limitation is a big disadvantage and that’s what makes this our second choice after iCareFone. How to back up iPhone photos using iCloud with the help of iCloud Photo Library is mentioned below:
1. Download and install iCloud for Windows on your PC.
2. Launch the app and log-in to your iCloud account.
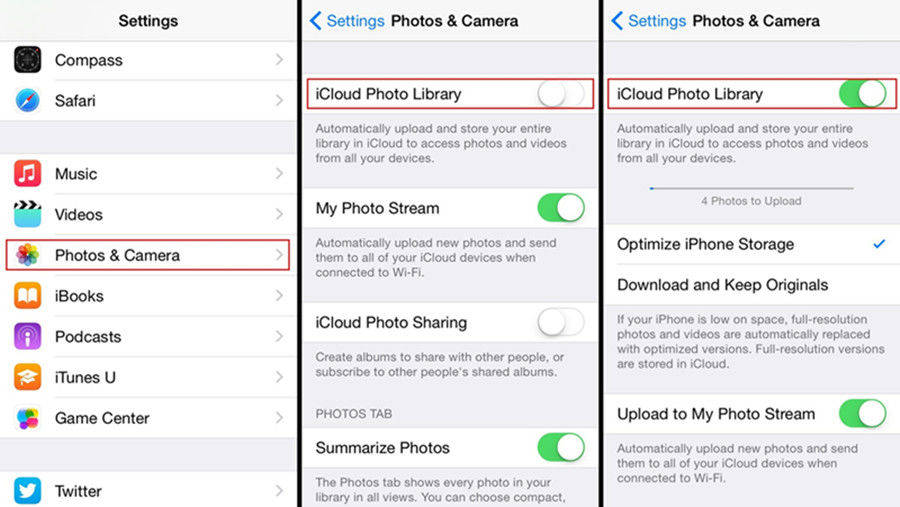
3. Now, go to iCloud and then navigate to “Options” and simply turn on the iCloud Photo Library feature.

4. Now, open your iPhone and go to Settings.
5. Tap on the “Photos & Camera” option.
6. Now, turn on iCloud Photo Library on your iPhone.

The procedure is complete. All the photos will be synced to your PC whenever you will be connected to Wi-Fi. So, if you did not know how to backup photos to iCloud, this is how to conveniently synchronize your iPhone photos with iCloud Photo Library and keep it safe for further use.
Option 3: How to backup iPhone Photos to Dropbox
If you think Apple is the only company that provides cloud service then you are dead wrong. There are various other cloud services available aside from iCloud, like Dropbox, Google Photos etc. All these cloud services were designed with unique features to wirelessly transfer your Photos or other data to the cloud drive or sync them with other devices. Dropbox is also one of a kind cloud service that supports various devices like iPhone and computers and even Androids. But the free membership will get you only 2GB cloud storage and the premium paid membership can be extended up to 1TB. The procedure to backup iPhone photos to PC with Dropbox is mentioned below:
1. ownload and install the Dropbox app on your iPhone.
2. Complete the necessary registration.
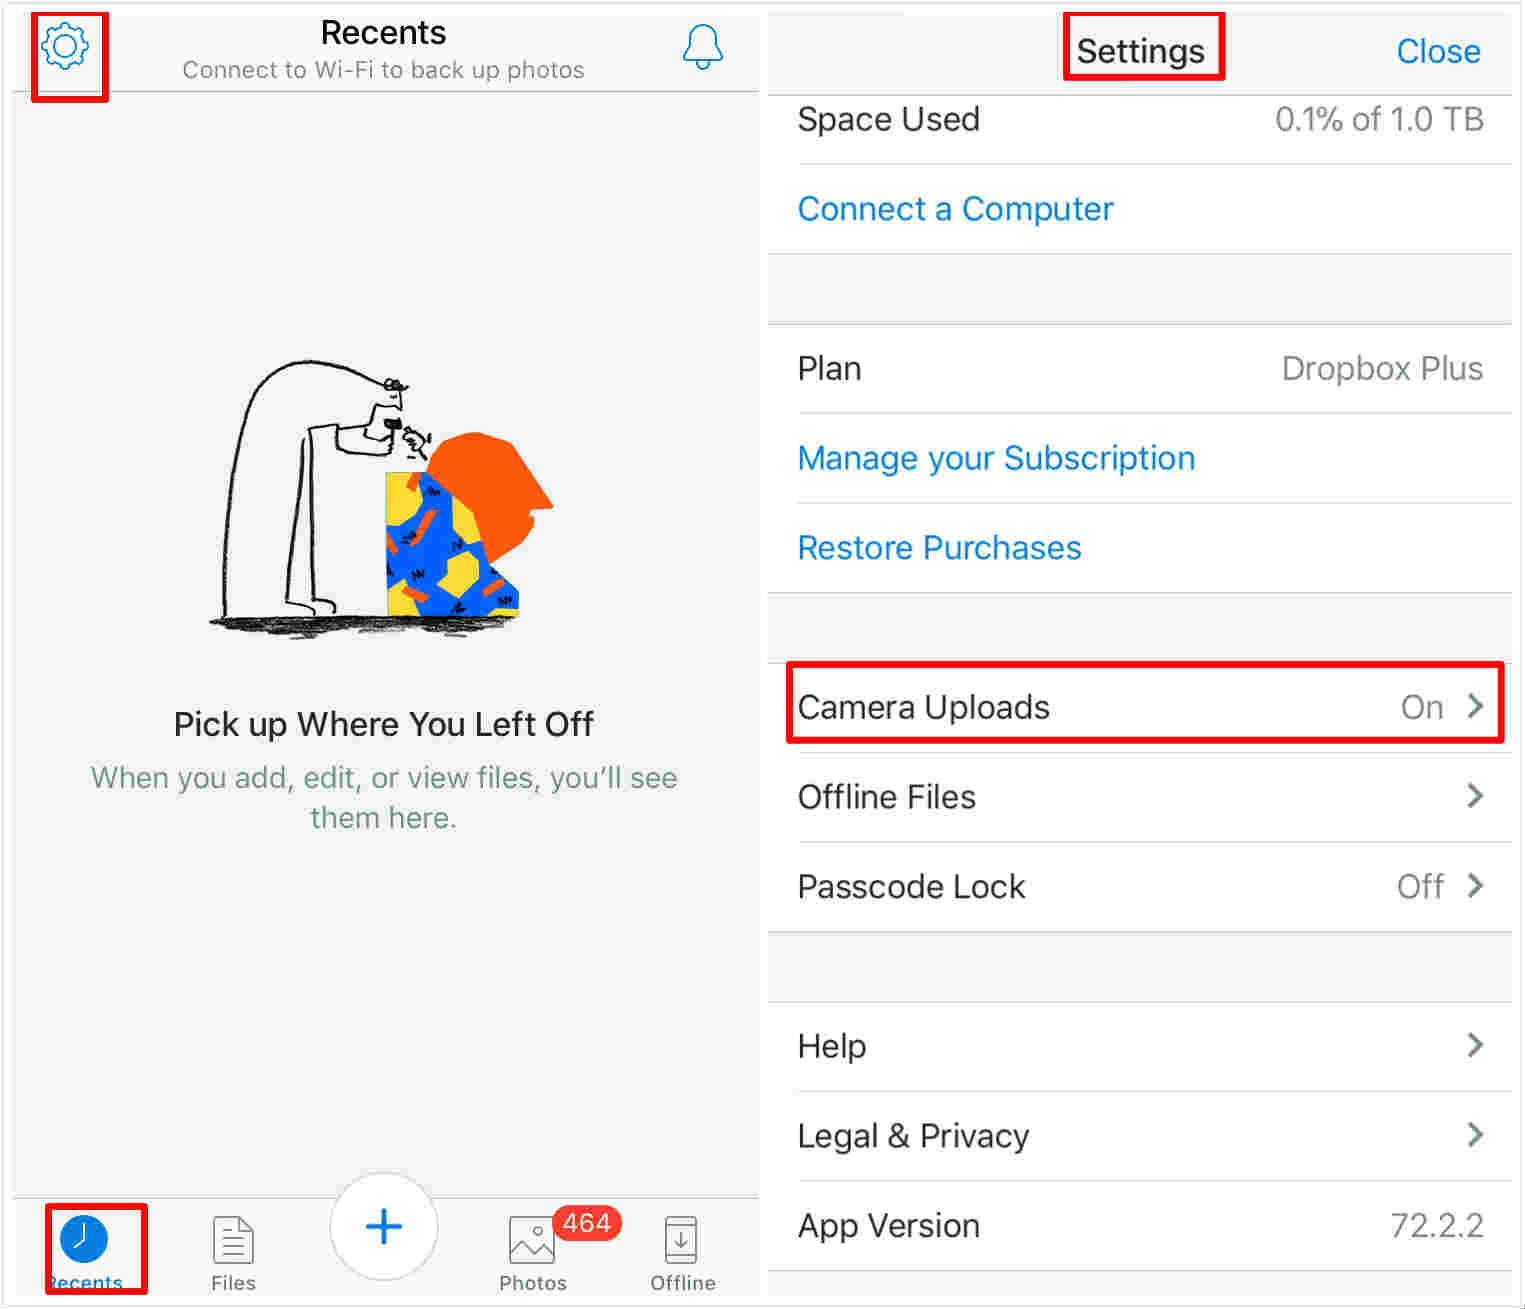
3. Navigate to Settings by tapping the cog icon. Now, select the Camera Uploads options.

4. This will activate the automatic photos upload function. Whenever you are inside a Wi-Fi connection, the photos will be uploaded automatically.
5. Now, go to your PC, follow the similar steps and log-in to your Dropbox account and download the uploaded photos on to your computer.
Naturally, the procedure is very simple. You just have to upload the photos first to your Dropbox account and simply download them on the other device. It is very convenient and suitable for new users thanks to its simplicity.
Option 4: How to Backup Photos to iTunes
Without a doubt, iTunes is one of the most important apps for any iOS user. iTunes provides various functions and one of them is to create backup of your iPhone. Many users consider it is the best way to backup photos as it was the only way to get your photos backed up earlier. iTunes backs up your entire device and not your photos exclusively. So, the backup is completely inaccessible! It has its own set of limitations and now as there are so many better alternatives it is up to you if you are going to use the services of iTunes. Nonetheless, this is how to backup photos with iTunes:
1. Download and install the latest version of iTunes on your PC.
2. Connect the iPhone to the Pc with a USB cable. iTunes will be launched automatically.
3. On the iTunes window, a device icon will appear.
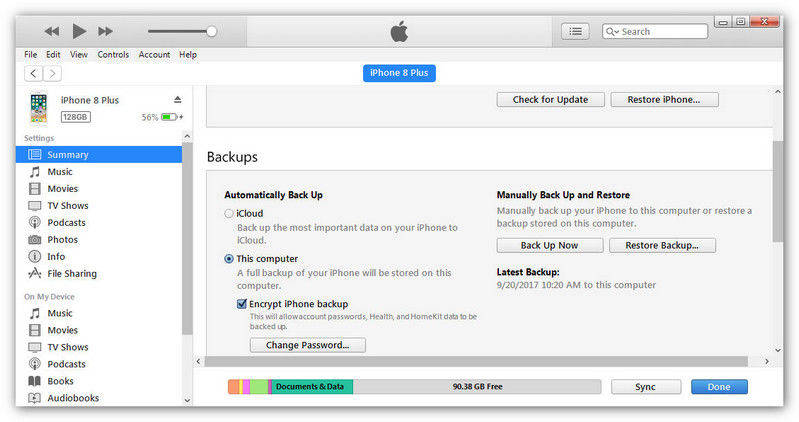
4. Click on that Device icon and navigate to Summary.
5. Finally, go to the Backup section and click on the “Back up now” option and tap “Done”.

All of your iPhone data will be synced and backed up to your PC. Unfortunately, as stated earlier, it is not a flexible app at all! You won’t be able to backup a specific type of file with iTunes. It will back up the whole device and also replace the previous backup of your device made by iTunes. So, make the necessary arrangements beforehand. Also, the backup file is heavily encrypted so, you won’t be able to use it unless and until you restore it again on your iPhone. This is a huge con and this is one of the main reasons why users are not going for iTunes anymore.
Conclusion
Backing up photos is very important for any device and if you are not able to do it properly then all those precious photos will be lost forever. So, this article has provided you with four excellent options for you to back up and save your photos. When you are using an iOS device and you want to backup anything, the first option that comes to the mind is iCloud or iTunes. These two are the official apps provided by Apple. But if you are looking for something other than Apple then you have Dropbox but even if that does not satisfy you then go for Tenorshare iCareFone with your eyes closed. This app will provide the best solution and complete peace of mind! We highly recommend this software because of the ease of usage, the effectiveness and most importantly the advantages it enjoys over other methods listed here. Go for it!
Speak Your Mind
Leave a Comment
Create your review for Tenorshare articles

Tenorshare iCareFone
Best Free iPhone Transfer & iOS Backup Tool
Easily, without iTunes


