Top 2 Methods to Create Non-Encrypted Backup without Precious Password
Are you stuck looking for an ideal method to create non-encrypted backup without precious password? Cease the worry and stick to this article. In this article, you shall be thoroughly guided on the best way to create non-encrypted backup without precious password for your iOS device.
- Part 1: Two Methods to Create Non-Encrypted Backup without Precious Password
- Part 2: How to Create a New iTunes Backup
Part 1: Two Methods to Create Non-Encrypted Backup without Precious Password
A password is a handy feature as far as security and safety of your data are concerned. However, the same functionality can equally become a headache when you utterly want to access encrypted files. Backup files are a category of files that are protected in iOS devices, and most often users forget the respective passwords and end up having quite a rough time. For this reason, some users have opted to use non-encrypted backups. If you want to create non-encrypted backup without precious password, then use the methods elaborated below.
1. Erase Your Device and Set up as New
Step 1. Open your device and navigate to Settings> General > Reset. From the list of settings options, just hit the Erase All Content and Settings tab.

Step 2. If the device prompts that you enter the passcode or Apple ID, enter the corresponding password and confirm that you want to erase your device.
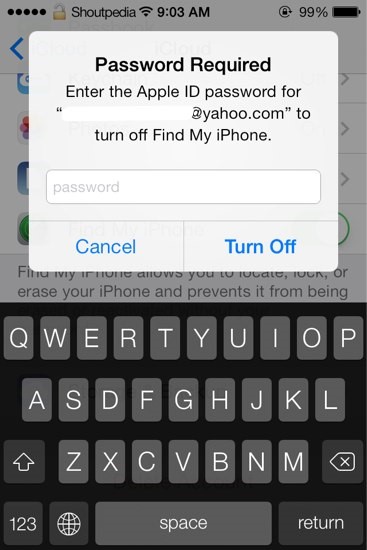
If you have forgotten the password and attempted severally without success, then you will be locked out, and the device gets disabled. However, follow the steps to remove your password either with iTunes or use recovery mode if you had not synced your device or connected with iTunes.
Step 3. If you entered the right the password, then wait for the device to erase. This process would take a few minutes but depends on your device.
Set up as New Device
Step 1. Turn on your device and tap on your country or region when asked to choose the language.
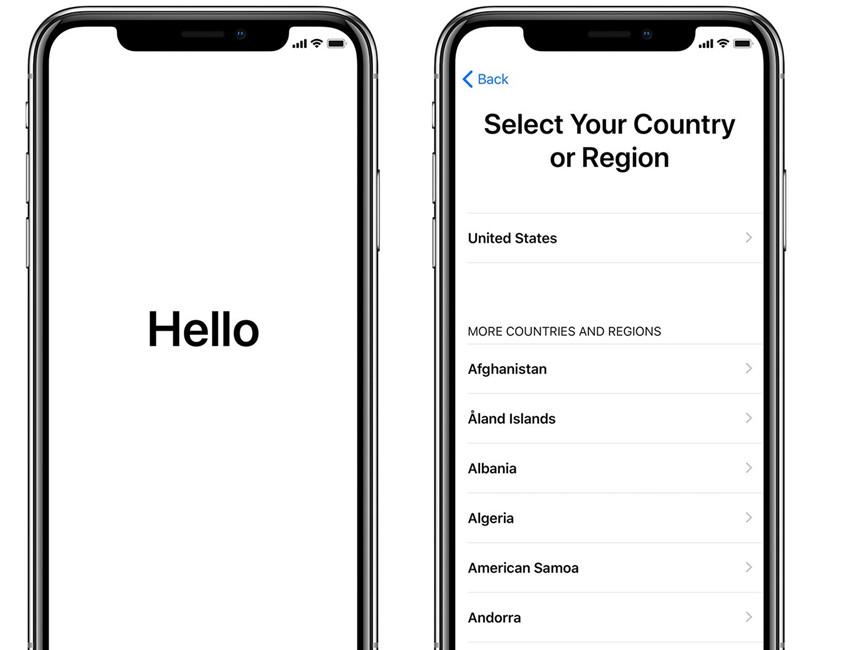
Step 2. Connect to a cellular network or iTunes to activate your device.

Step 3. Follow the on-screen instructions to set up the Face ID or Touch ID then choose a 6-digit passcode in the subsequent window.
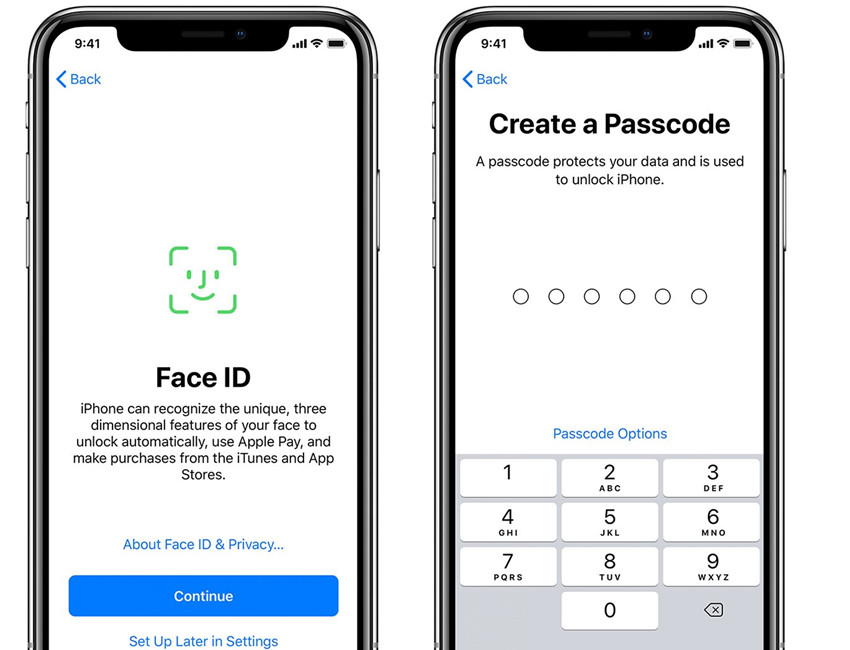
Step 4. Restore or transfer your information and data to the device.
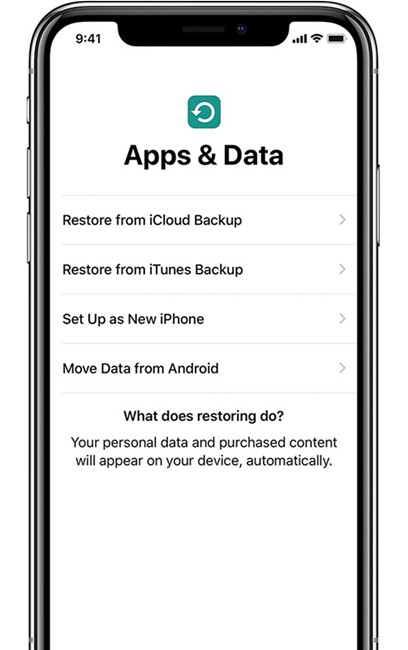
Step 5. Enter your Apple ID and password to sign in then set up Siri and other services.
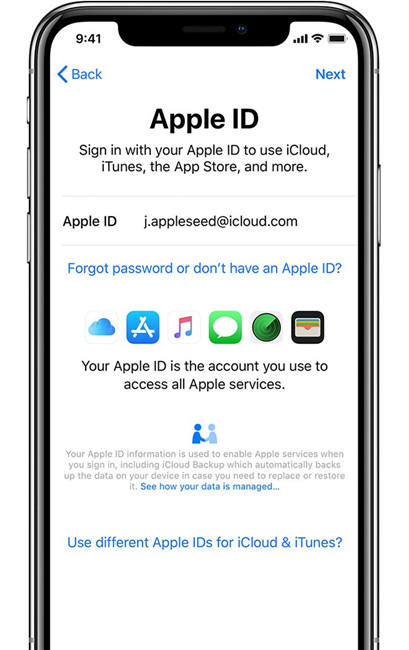
Step 6. Enable Automatic updates as well as other features. Click "Get Started" to finish setting up your device.

2.Remove Backup Encryption Setting with Tenorshare 4uKey - iTunes Backup
Creating non-encrypted backup by erasing your device is one among some possible options but is genuinely not up-to-par. If you are quite serious on how to create non-encrypted backup without precious password, then you need to think outside this option. However, the solution is not a mile away, and Tenorshare 4uKey - iTunes Backup should be the breakthrough in your search for a better way to create non-encrypted backup without precious password. The program is easy and straightforward as you can get rid of the encryption settings within one click irrespective of your expertise level. This is good news for every user who needs a simple, safe, and reliable platform. Of importance to note is that the backup you created will eventually be non-encrypted.
Step 1. Launch Tenorshare 4uKey - iTunes Backup
If you have downloaded and installed Tenorshare 4uKey - iTunes Backup in your PC, just hit the program's icon to open the primary window. Hit the "Remove backup encryption settings" to continue.

Step 2. Connect your iPhone
Use the appropriate USB cable to connect your iPhone to the PC. Use the USB cable that came with the iPhone you want to remove the backup password.
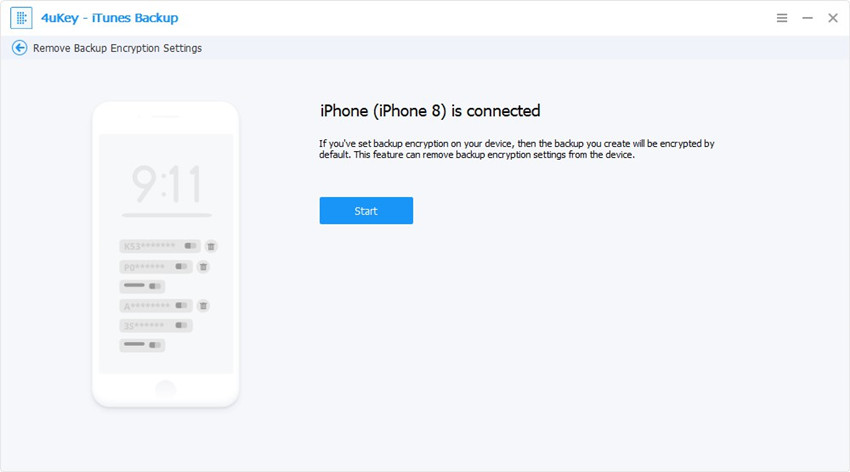
Step 3. Remove backup encryption
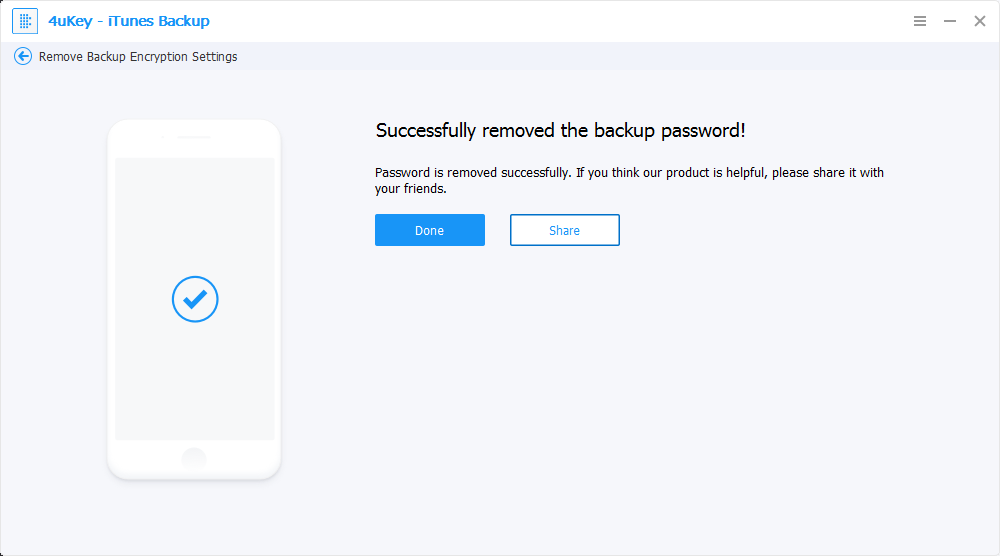
Click the Start button to commence the removal of backup encryption settings. This process should take just some few seconds. Do not interfere with the process until it is successfully completed as you can monitor on the main interface status.
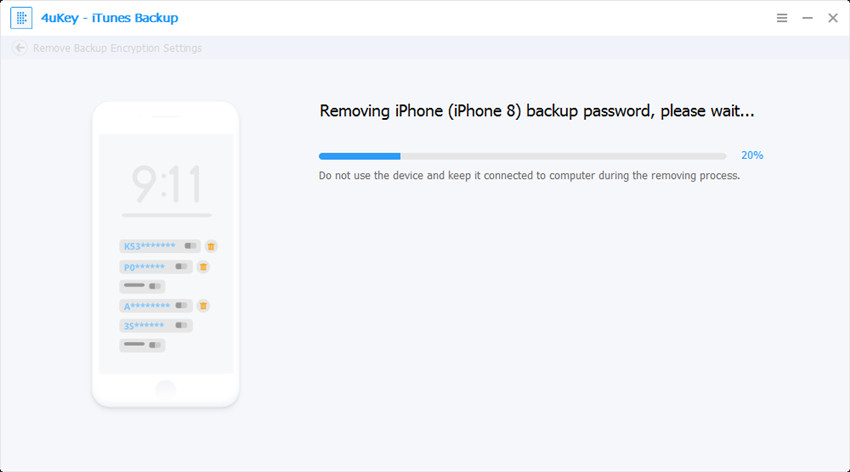
When the process completes, the backup password will be successfully removed.
Part 2: How to Create a New iTunes Backup
After removing the backup encryption settings, now you can create a new backup without previous password, below is how it works:
Step 1. Tap the iTunes icon to display the main window and connect your iPhone using a suitable USB cable. If the iPhone is detected, a pop-up window prompting for confirmation of your device shall be displayed. Just hit Continue.

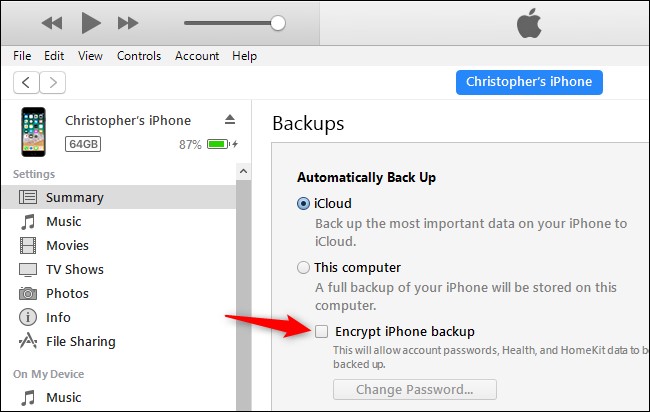
Step 2. Locate and click the Device icon to open an explorer window. Go to the Summary pane, scroll down and choose the Backups option. Enable the "Encrypt iPhone backup" box to enable encrypted password.
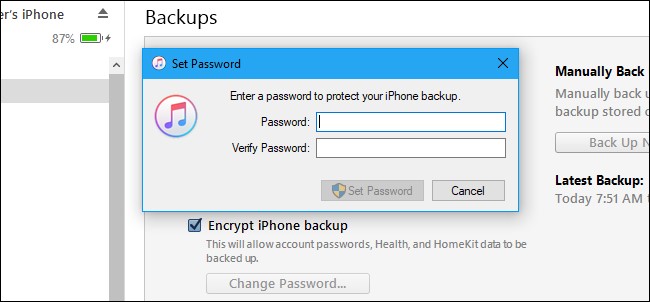
Step 3.You will then be prompted to give a password and verify it. Just enter a suitable password and click to begin backup initiation. Do not disconnect your device while the process is on as you may tamper with the process.
Once completed, just go to Latest Backups to check an account of the most recent backups. Hit the Back Up Now button to allow you to create new iTunes backups in future.

Conclusion:
How to create a non-encrypted backup without a precious password is a seamless process as clearly expounded in this article. However, it is important to use the appropriate method to avoid unforeseen device issues and also to experience a good decryption process. I give a thumbs up to Tenorshare iPhone backup password removing tool as it is by far the best tool to create a non-encrypted backup without a precious password.
Speak Your Mind
Leave a Comment
Create your review for Tenorshare articles
