iPhone Cannot Verify Server Identity? Try these Methods
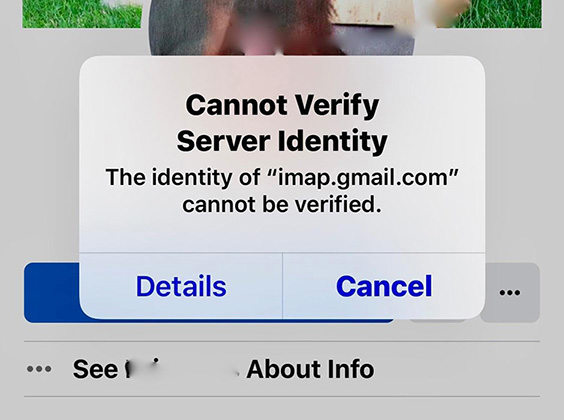
Some iPhone users reported that their iPhone cannot verify server identity. A message pops up with 'cannot verify server identity when they enter the email. Unfortunately, updating didn't fix the issue on some devices. We brought here some efficient methods to solve the problem and keep your device safe from being slow because of installing massive updates. If you want to fix this issue without changing your device, you can try any of the methods that we mentioned below.
- I. What Does 'Cannot Verify Server Identity' Mean
- II. How to Fix Cannot Verify Server Identity on iPhone 7/8/X/11
- III. 'Cannot Verify Server Identity' Still Pop up? Fix It with Tenorshare ReiBoot
I. What Does 'Cannot Verify Server Identity' Mean
There can be many reasons for having this issue with your device when you try to login with your email on your iPhone and start sharing information with the server. If your connection gets interrupted in between the session, you will see a pop-up notification window that will tell you that "Cannot Verify Server Identity." Not only this, but you can also see the same message due to some other reasons, including:
- When you switch the email account
- When you create a new account on your iPhone, the previous one will show you the same error.
- When your server is using an expired certificate
These are some reasons for which the error occurred. So, when you see this error on your screen, you must check for these issues to figure out the error's root cause.
II. How to Fix Cannot Verify Server Identity on iPhone 7/8/X/11
If you are having this issue with your device, the following is the list of procedures that you can try to fix the server error. Without delaying any further, let's start discussing the step-by-step procedure to solve this issue in your device.
Solution 1. Close And Restart The Mail App
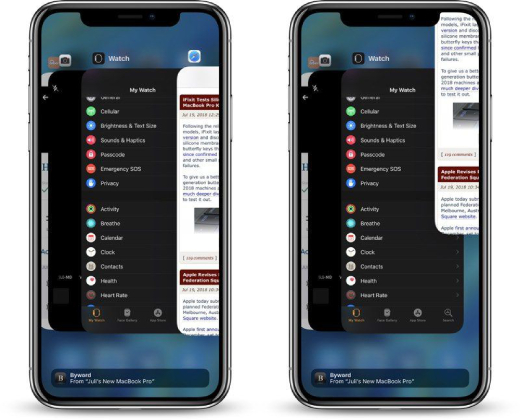
Before, we told you that most of the time, "cannot verify the server identity on iPhone" occurs due to email accounts. You can quickly fix the issue by closing the email application you are using from the background and then restarting it. The following steps are followed to remove the applications from the background.
- First of all, double-tap the home button on the iPhone's home screen. Doing this will show all the background applications that are running.
Then, swipe up to remove all the applications that are running in the background.

- After removing them all, reopen the mail app that you were using.
- Log in again, and you will see that issue is resolved.
Solution 2. Soft Restart iPhone
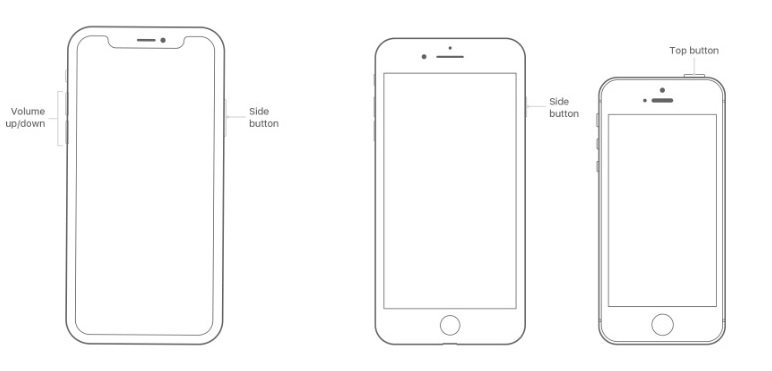
- In iPhone 8 or the latest models after 8, you have to press and release the volume up and down button one after the other and then press and hold the power button until the Apple logo appears on the screen.
- In the case of the iPhone 7 and 7 plus, press and hold the volume down button and power button at the same time until the Apple logo is visible on the screen.
In iPhone 6s and the previous models, press and hold the power button and home button at the same time until you see the Apple logo.

Solution 3. Update to The Latest iOS 15.5
As we told you that if you contact Apple customer support, they will ask you to update your software to fix the issue. The following is the method of updating your software to get rid of the problem.
- Open the "setting" menu by clicking on the screen icon.
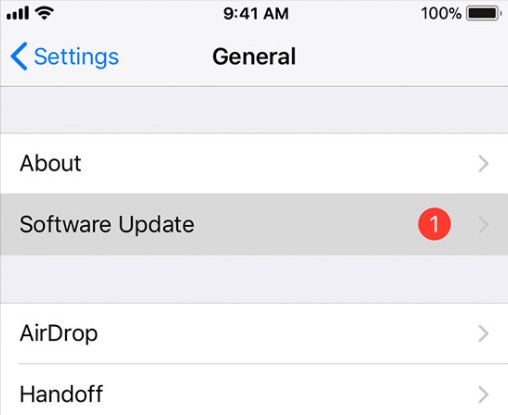
- Then scroll to the "generals" tab.
There you will find the option "software update." You have to click on this option. When you click it, updates will start downloading on your device. After downloading is completed, open your mailing app, and you will see no error notification now.

Solution 4. Reset Network Settings
- First of all, you will have to go to the settings menu, and there you have to click on the "generals" tab.
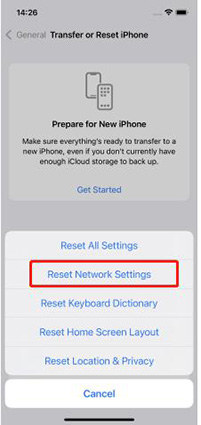
- There you will get an option saying "reset network settings."
- If your device is locked, you will have to enter the password or pin to continue the process.
- When you add the password, you will see a pop-up notification on your screen to confirm the process.
Confirm the notification to continue resetting the network settings on your device.

That's all you have to do to reset the network settings on your device. after following this procedure, hopefully, you will not receive any error messages any further.
Solution 5. Reset to The Factory Settings
Factory reset the settings on the iPhone can also solve the issue, but you have to keep in mind that before using this method, you have to save all your necessary data somewhere else. You should take all your essential data from the iPhone and transfer it to your laptop or some USB device so that you don't lose your crucial data. You have to follow the following steps to reset the iPhone to the factory settings. Have a look!
- First of all, you have to click on the "settings" icon on your home screen. Then, hit the "generals" tab.
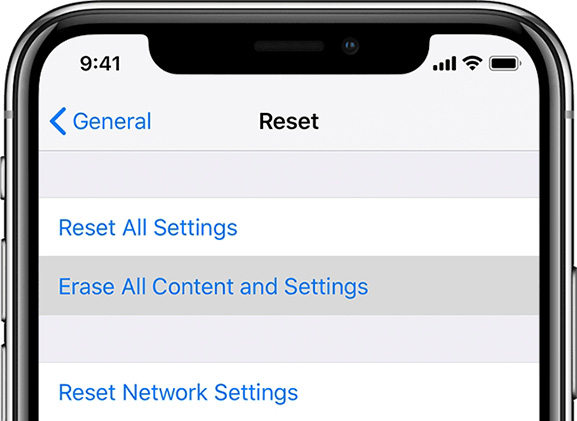
- After that, you have to scroll down until you find the "reset" option.
- Click on the option, and you will be directed to reset the screen.
There you have to click on "erase all content and settings."

- If your device is locked, you will be asked to enter your password. Enter it to confirm the process.
- The screen will prompt a warning that you have to confirm by clicking on "erase."
- After a few minutes, your device will be factory reset. And all settings will come to default. And you will not see the issue "cannot verify server identity" on your iPhone.
III. 'Cannot Verify Server Identity' Still Pop up? Fix It with Tenorshare ReiBoot
Suppose, after using all the procedures that we mentioned above, and you still see the error message. In that case, you can try to use a software application named Tenorshare ReiBoot because it can solve the issue with a guarantee! Note the steps and follow them to get rid of the problem.
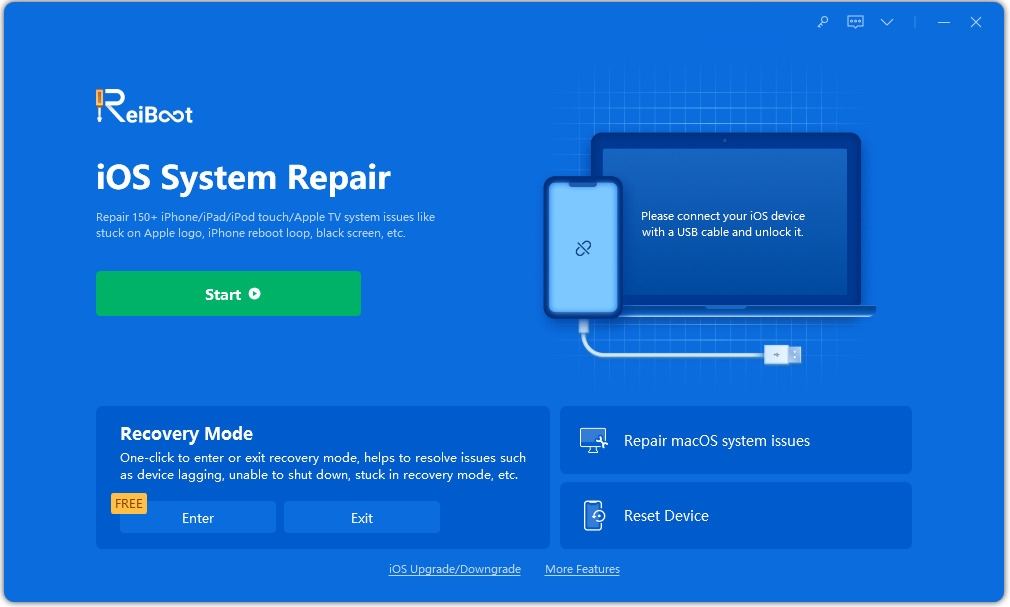
First of all, download the software on your laptop and computer, and launch it. then you have to select the option "repair operating system."

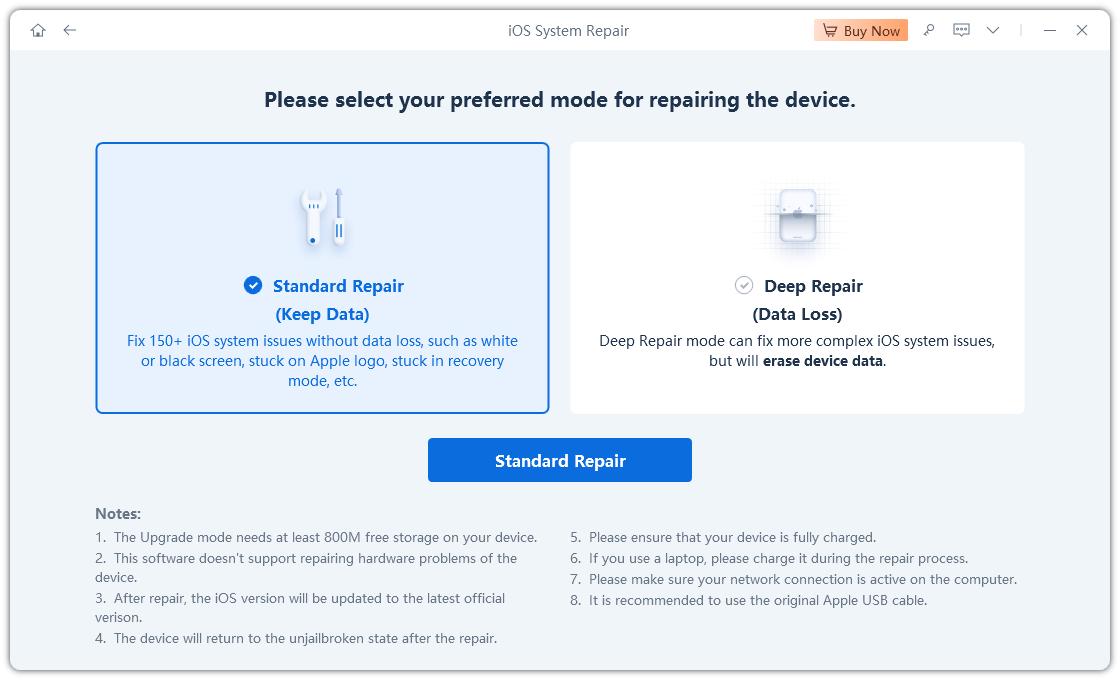
Then you have to hit the option "fix now" to continue the process.

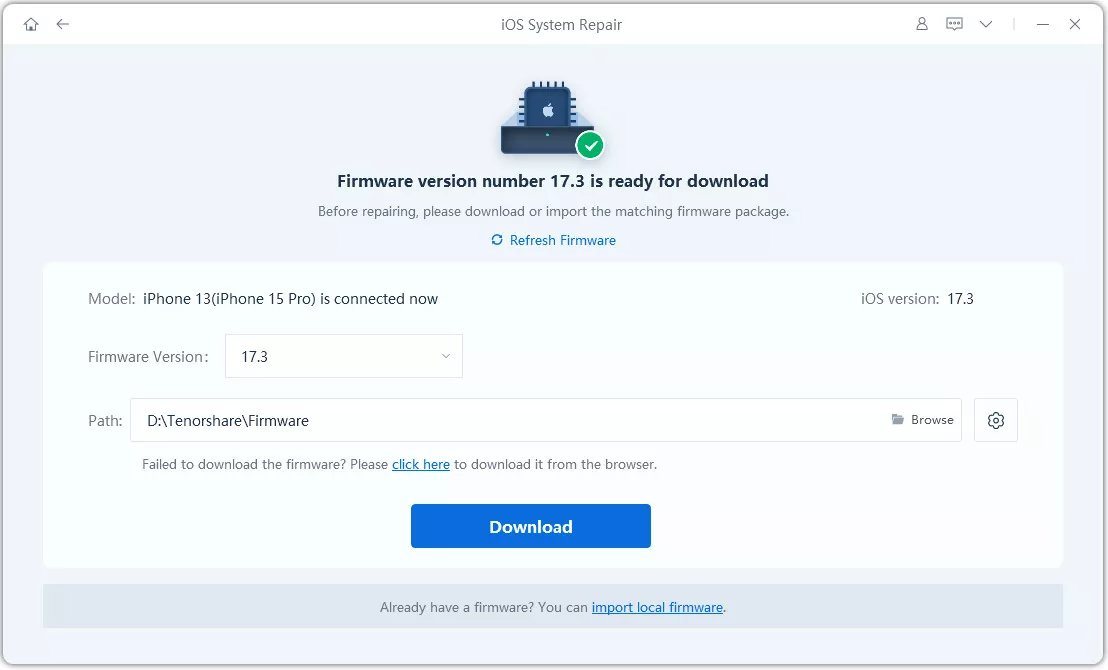
Then download the firmware packages. Download them by setting the path. If you have downloaded them already, you can import them to use.

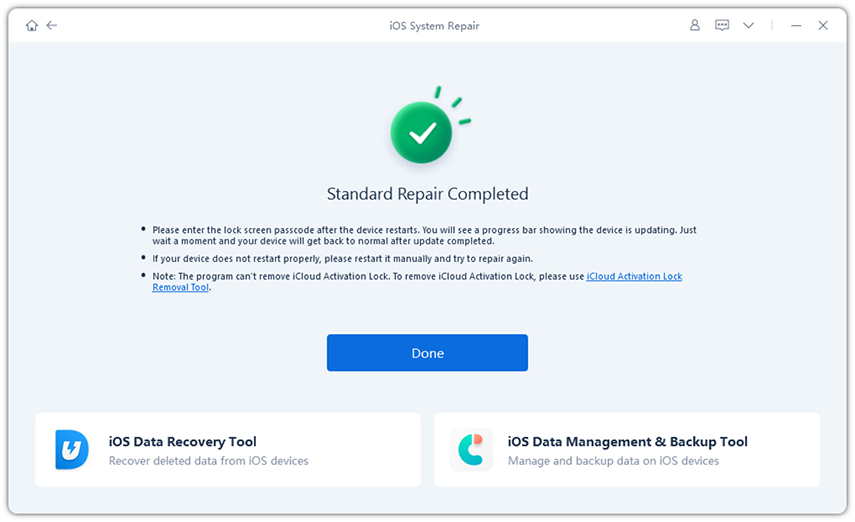
After this, start repairing the operating system, and it will take a few minutes to complete the process. After completion, hit "done" to end the process!

Last words:
These are all the methods that you can use to fix the server identification issue. Use any of these methods and get rid of the problem that is troubling you.
Speak Your Mind
Leave a Comment
Create your review for Tenorshare articles
