How to Sync iPhone to iTunes
We often get to hear this that users do know about how to backup iPhone with iTunes but are unaware about the process of how to sync iPhone to iTunes. Well, for all those users who were looking for a one stop post that answers everything about how to sync iPhone to iTunes, is right here. Read through the articles meticulously and get to know every possible way of syncing iPhone to iTunes.
- 1. Syncing iPhone to iTunes Over USB
- 2. Syncing iPhone to iTunes Over Wi-Fi
- 3. Further Reading: Backup iPhone with Tenorshare iCareFone--Without iTunes/iCloud
1. Syncing Over USB
If you are wondering how to sync iPhone to iTunes, then fret not. This is the traditional way of syncing your iPhone and iTunes. When you turn on iTunes sync, iCloud sync gets turned off. You won't be able to access the computer's music or audio files on your iOS device remotely. Only a single iTunes library can be synced to your iOS device.
- Get iTunes updated and running on your computer. With a USB cable, connect your iPhone to the computer.
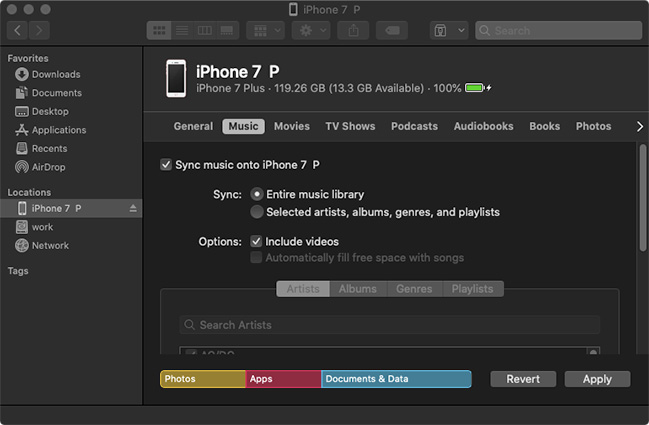
- On iTunes, click your iPhone name and then the under the 'Settings' tab, select the desired file type. Tap on the checkbox against the 'Sync Music'/'Sync Movies' or whatever data type is there next to 'Sync '.

- Now, hit the 'Apply' button at the bottom-right corner of the screen and let the sync process begin. In case the syncing doesn't start on its own, tap the 'Sync' button.
2. Syncing iPhone to iTunes over Wi-Fi
You must be wondering, USB was the traditional method, then how do I sync my iPhone to iTunes using Wi-Fi. For this method it is necessary to set up syncing to iTunes through USB. Though, the data gets synced using Wi-Fi, you need to set it up with USB first.
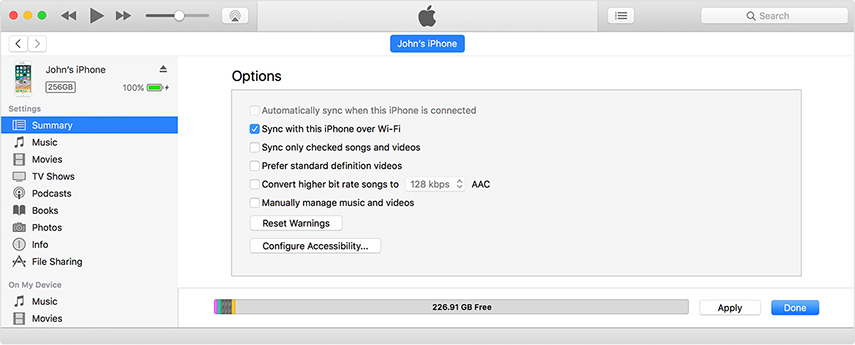
- Connect your iPhone with your computer using a lightning cable and run iTunes. Select your iPhone in iTunes interface.
- Tap on the 'Summary' tab and then click on the 'Sync with this [device] over Wi-Fi'.

- Press the 'Apply' button afterwards.
iTunes detects the iPhone, whenever both of them are on the same Wi-Fi network. Automatic sync occurs the moment you plug the iPhone in to power and iTunes is running on the computer.
3. Further Reading: Backup iPhone with Tenorshare iCareFone--Easy
When you are not pleased with flexibility offered by the before mentioned methods to sync new iPhone to iTunes. Tenorshare iCareFone will ensure you how to sync your iPhone to iTunes the best possible way. It's 'Backup and Restore' helps you easily backup your iPhone data and restore it later without any data loss. You don't need Wi-Fi connectivity to sync or transfer data between PC and iPhone. This iTunes alternative can manage iTunes media files and transfer them as well. You can easily manage media files, sync your iPhone and update everything easily. It has 6 different tools that improves the iOS device performance. You can even fix a diverse range of iOS issues and help you to the most.
Now that you have learnt what Tenorshare iCareFone, let's delve deeper and know the various features of this software :
- It prevents data loss as there is no overwriting of existing data. You can easily read the recovered data on your computer, which is not possible in any other case.
- You can manage,transfer, backup and restore your iPhone data using this application. This tool is a complete iOS device manager that has more features than the traditional iTunes.
- You can preview and selectively restore data as individual files using this software. Either you can select all data or pick what you desire, after previewing it.
- There is no restriction on using the same Apple ID. You can use the same ID for all your iPhone devices.
- Using Tenorshare iCareFone, you can fix all iOS issues without depending on any Wi-Fi connectivity. Be it your iOS device getting stuck on Apple logo, became unresponsive,
Step by Step Tutorial
Step 1 Install and launch the Tenorshare iCareFone on your computer. Now, connect your iPhone using a lightning cable. Then, tap on the 'Backup & Restore' tab over the program interface.

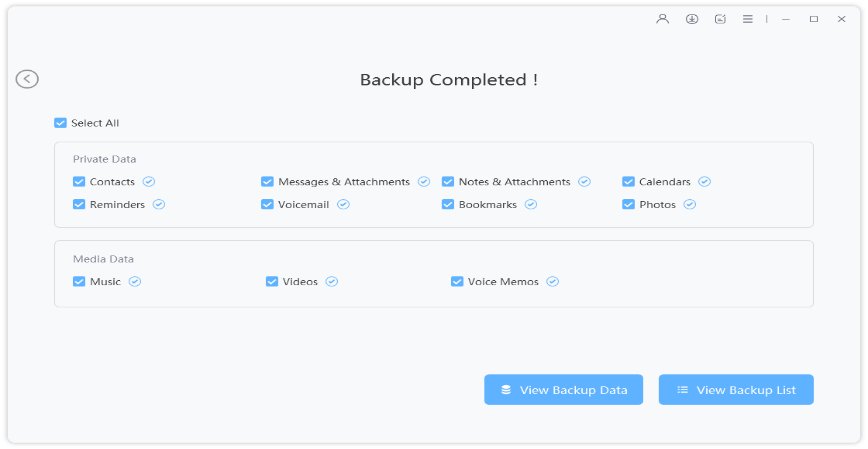
Step 2: In this step, you can either select everything by marking 'Select All' checkbox or selectively pick anything. Hit 'Backup' button afterwards.

Step 3: In a short while all your selected data gets backed up and you can see the 'Backup Completed' message display on top of the screen.

Conclusion
From this article, we have observed that when you want to sync iPhone to iTunes Tenorshare iCareFone brings more to the platter. There are more options to explore than 'Backup & Restore' with this application. Syncing data in most cases leads to loss of data with other methods, but iCareFone prevents any such incidents. With this tool, you are capable of selectively preview and then recover data, which other methods don't allow.
Speak Your Mind
Leave a Comment
Create your review for Tenorshare articles

Tenorshare iCareFone
Best Free iPhone Transfer & iOS Backup Tool
Easily, without iTunes


