Top 12 iPhone Backup Problems and Fixes 2025
For most iPhone users, we rely on iTunes and iCloud to back up our iPhone, iPad and iPod so that we don't need to worry about data loss by accident. However, some users also encountered iTunes/iCloud backup issues from time to time, such as cannot backup iPhone, iTunes backup cannot complete, backup erros etc. In this article, we'll list out some common backup probelms and their fixes.
- iPhone Won't Backup to iTunes/Computer
- iTunes Backup Corrupted/Not Compatible with iPhone
- iCloud Backup Failed/Could Not Be Completed
- iPhone Backup Not Showing in iTunes/iCloud
- iTunes Errors Occurred While Backing Up
- iPhone Backup Password Forgot
- iCloud Backup Will Not Enable on iPhone
- iTunes Stuck on Preparing iPhone for Restore
- Not Enough Space on Computer to Backup iPhone
- Not Enough Space to Restore iPhone Backup
- iTunes Backup Never Finishes/Couldn't Be Completed
- iPhone Backup Cannot Be Deleted
iPhone Won't Backup to iTunes/Computer
Some people found that when connect the device to computer, iTunes will not start syncing. This issue can occur when iTunes version is too old, unproper connection between iOS device and PC, security software protection etc. When this problem happens, check the top 4 ways to fix iTunes not backing up iPhone completely.
iTunes Backup Corrupted or Not Compatible with iPhone
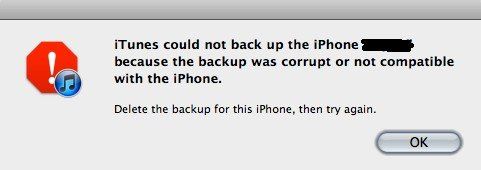
When backing up iPhone, an error may occur saying that iTunes could not backup the iPhone because the backup was corrput or not compatible with the iPhone. You can open iTunes, go to "Edit" -> "Prefenences" to delete the old backups and create a new one. Or you can use an alternative tool called Tenorshare iCareFone to make backups optionally.
Free download and install the program on your Windows or Mac, run the software and click "Backup & Restore" from the interface. Tick the file types you want to back up and click "Backup" to proceed.

iCloud Backup Failed/Could Not Be Completed
Some users might have seen the error message "the last backup could not be completed" during iCloud backup process. This problem is usually caused by the unproper network connection or outdated software. You can try the following ways to fix iPhone backup failed easily.
1. Reboot iPhone
The most basic way is to reboot your iPhone and then enable iCloud back up to have another try.
2. Log out of iCloud and Log in
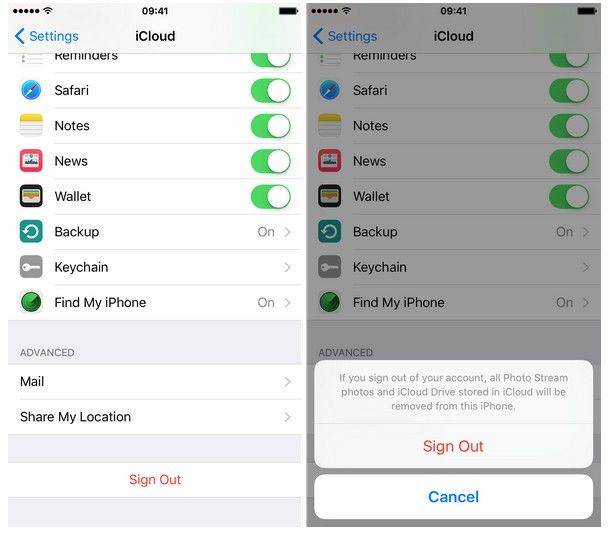
There's also possibility that soemthing went wrong with iCloud. So you are also recommned to log out your iCloud account and then log back in to check if it works. Go to Settings -> iCloud, tap "Sign Out".
3. Update Software
However, if the above methods didn't help, you can check if there's new software update on your device. Go to Settings -> General -> Software Update to download and install the latest iOS.
4. Reset Network Settings
As we've mentioned above, network connection problem is also a possible cause for iCloud backup not completing. Try to reset network settings on your iOS device and back up iPhone again. To reset network settings, go to Settings -> General -> Reset -> Reset Network Settings.

iPhone Backup Not Showing in iTunes/iCloud
For most users who have changed to a new deivce, restore all the data from the previous backup is necessary. However, sometimes people can't find the old backups in iTunes or iCloud. Unsuccessful backup, Apple server problem, network connection can all be the causes of this issue.
If you cannot find iTunes backup:
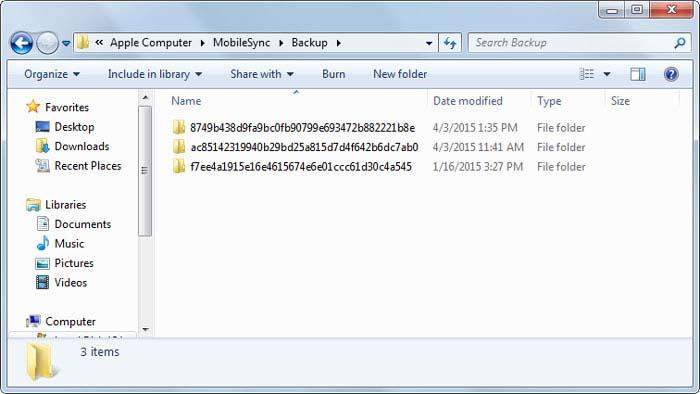
Go to \Users\(username)\AppData\Roaming\Apple Computer\MobileSync\Backup\. All your iTunes backup files will be there.
If you can't view backup in iCloud:
1. Reset iPhone
Soft reset is the easiest way to fix many glitches on iPhone. Press the "Home" button and "Power" button at the same time for 5 seconds until the Apple logo appears on the screen.
2. Log Out iCloud Account
For many iCloud issues, log out the account and then log in again is an effective fix.
3. Delete Unnecessary iCloud Backup
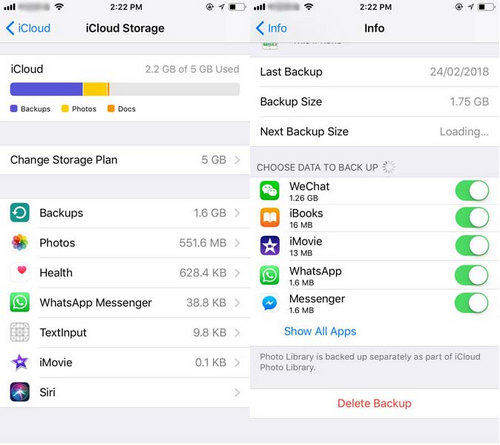
Some backups are not appearing in iCloud due to not enough storage. Thus, you can delete some old or unnecessary files. Tap on Settings -> iCloud -> Storage -> Manage Storage. Select the backup you don't need and click "Delete Backup" to free up iCloud space.
iTunes Errors Occurred While Backing Up
iTunes pops out an error message (error 54, 41 etc.) when trying to syncing or backing up iPhone is another common complained problem. These errors usually happen when the iTunes version is old, authorization and administration issues, the computer storage is limited etc. If you unluckily get any of these errors from iTunes, you can check "How to fix iTunes backup errors" page to find a suitable solution.
iPhone Backup Password Forgot

iTunes allows uers to set a password in the backup files to protect data from spying eyes. However, sometimes people may forget the password and cannot restore the backup. Normally you are recommended to try all the possible password combinations or restore from iCloud backup. But if you unfortunately failed, you may need a iPhone password unlocking tool to crack the password.
Related Read: how to Backup Disable iPhone without iTunes
iCloud Backup Will Not Enable on iPhone
Recenly, some people reported that they cannot enable iCloud backup after iOS 11.2/11.1/11 update. If you've encountered this problem, you can try the troubleshooting steps below.
- Check the Wi-Fi connection and iCloud space.
- Delete some current backups and restart iPhone.
- Go to Settings- iCloud to sign out your account.
- Wait for the next iOS update.
iTunes Stuck on Preparing iPhone for Restore
"Preparing iPhone for restore" notification appears on iTunes sometimes when you trying to sync or restore iPhone. This problem can be caused by the outdated iOS firmware or iTunes version. You can upgrade iPhone and iTunes to the latest version to check if this problem can be solved.
Not Enough Space on Computer to Backup iPhone
When you are trying to back up iPhone or iPad in iTunes, sometimes you may also get an error saying there's not enough free space on computer. You can check the drive usage on computer when this problem occurs and make sure there's at least 5GB space. However, if you keeps getting the error even the storage are enough in computer, you can try the following tips:
- Restart comptuer and your iOS devices.
- Delete the old backup from iTunes.
- Update iTunes to the latest version.
Not Enough Space to Restore iPhone Backup
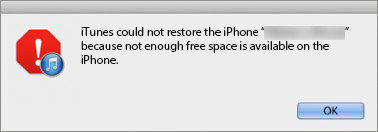
There are also space lackage error on iPhone when trying to back up the device in iTunes. Normally you'll get a notice saying iTunes could not back up iPhone because not enough free space is available. You can go to Settings-General-Usage-Manage Storage to check the storage space. If the sapce have been taken up too much, you can delete some apps or large files. However, if there still enough storage, there might be some other causes. Follow this article to discover more solutions.
Related Read: iTunes Could not Backup the iPhone Because not Enough Free Space
iTunes Backup Never Finishes/Couldn't Be Completed

Sometimes iTunes backup process takes forever to finish. When cancel the operation and try it again, the problem still exists. This problem is usually related to iTunes itselft or the connection between iPhone and computer. You can update iTunes, check the USB connection or use another PC to create backup.
iPhone Backup Cannot Be Deleted
The normal way to delete backup is from Settings -> iCloud -> Storage -> Manage Storage. However, sometimes you may get a message on iPhone screen saying this backup cannot be deleted at this time or because it is in use. Here are some easy fixes you can try when this error occurs:
- Go to Settings -> iCloud -> Backup to turn off the "iCloud Backup" and then turn it on.
- Log out your iCloud account and then log in again just like the above mentioned parts.
- Log in the iCloud on another iOS device and try to delete the backup.
- Update software to the latest version.
In this article, we've shown you 12 most common backup problems on iPhone X/8/8 Plus/7/7 Plus/SE/6s/6 and their fixes. If you think this post is helpful, don't forget to share it with your friends!
Speak Your Mind
Leave a Comment
Create your review for Tenorshare articles

Tenorshare iCareFone
Best Free iPhone Transfer & iOS Backup Tool
Easily, without iTunes


