How to Share iPhone Notes for Collaborative Editing
The Notes app on the iPhone has a handy feature that allows users to collaborate with friends, family, and workmates. Think of it this way, your parents want to send you some groceries at the local grocery store. But the three of you aren't in the same location. Of course, you could just call each other, but an even cheaper option is to add them as collaborators in the grocery shopping list notes; they can then list everything they want regardless of their location. This article explains how to share notes on iPhone X/8/8 Plus/7/7 Plus/6/6S/6 Plus/6S Plus/5S/SE.
- Part 1. How to Share Notes with Collaborators to View & Change Notes
- Part 2. How to View Changes Made by Other Collaborators in a Note in the Notes app on iPhone
- Part 3. How to Stop Sharing a Note in the Notes app on iPhone
- Part 4. How to Remove One Person from a Shared Note
- Extra tip: How to Recover Deleted Notes on iPhone
Part 1. How to Share Notes with Collaborators to View & Change Notes
As mentioned above, you can add other parties to the note you are working on right from the Notes app. This ensures that you no longer need to organize a physical meetup when working on the lyrics for your next song. To share notes on iPhone, follow the procedure below.
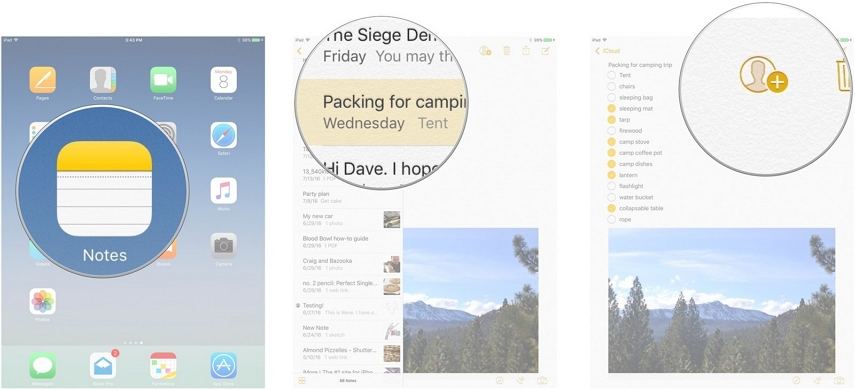
Step 1: Open the Notes app on your home screen.
Step 2: Open a note by tapping it.
Step 3: Tap the collaborate icon. It resembles a blank portrait enclosed in a circle with a "+" sign on its right.
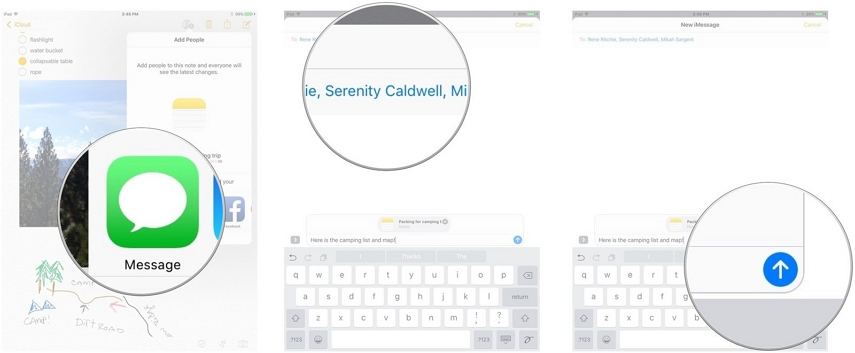
Step 4: Select an option for sending an invitation. Choose one of Message, Mail, third-party social productivity apps or social media.
Step 5: Type the collaborators' names. You can also individually send collaboration invites.
Step 6: Tap the send icon in the text field; it is an upward pointing arrow on a blue background.
Part 2. How to View Changes Made by Other Collaborators in a Note in the Notes app on iPhone
Changes made by other collaborators you share iPhone notes with can be spotted easily. They are highlighted against a different colour background. This is regardless of the type of data added by the collaborators to the note e.g. photos, checklists, sketches, etc.
When viewing the changes, it is important to wait for the other parties to make their changes without interrupting them. Once they are done, you can proceed to make yours especially if you have synced your notes with iCloud.
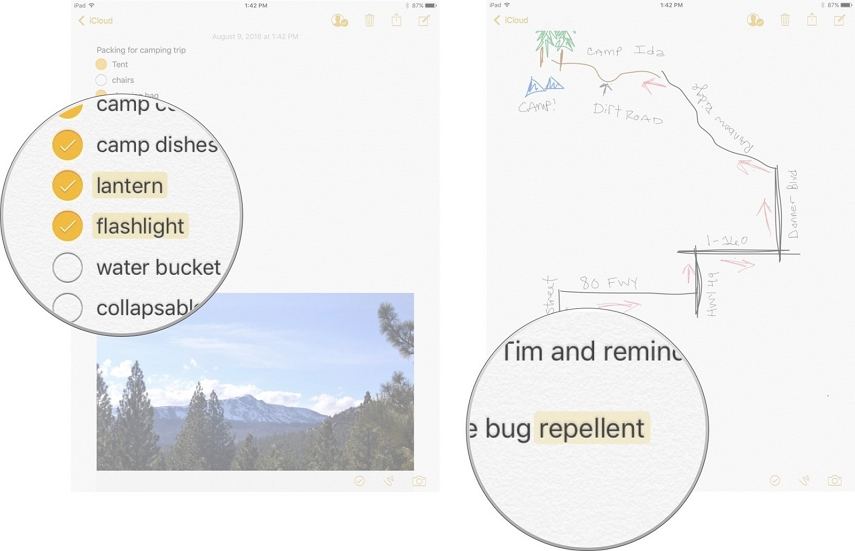
To view the changes, follow the procedure below.
Step 1: Launch the Notes app.
Step 2: Select the note you shared with other collaborators.
Step 3: Tap the collaborate icon. It's a blank portrait in with a tick on its right.
Step 4: Toggle on the Highlight all Changes button.
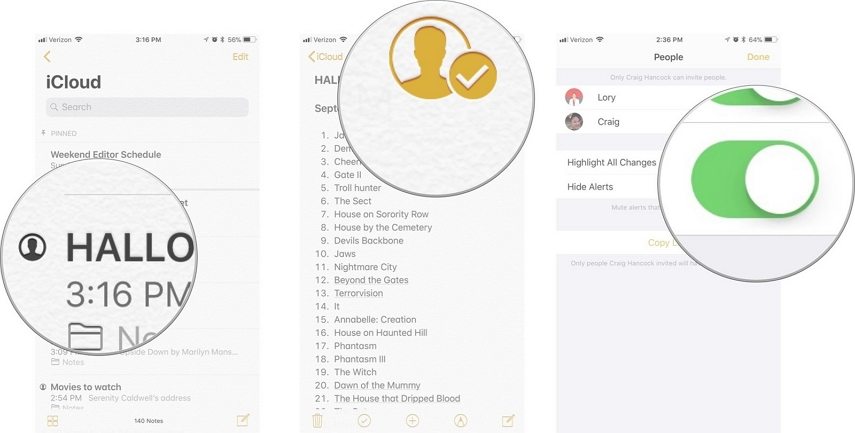
(Note: Each collaborator will have a different colour background.)
Part 3. How to Stop Sharing a Note in the Notes app on iPhone
After completing your notes project, you may of to stop sharing it with the rest of the group. Once you stop sharing, other users will not have access to the note. Follow the procedure below.
Step 1: Launch the Notes app in the home screen.
Step 2: Select the note you were working on with your team.
Step 3: Tap the collaborate icon.
Step 4: Tap Stop Sharing.
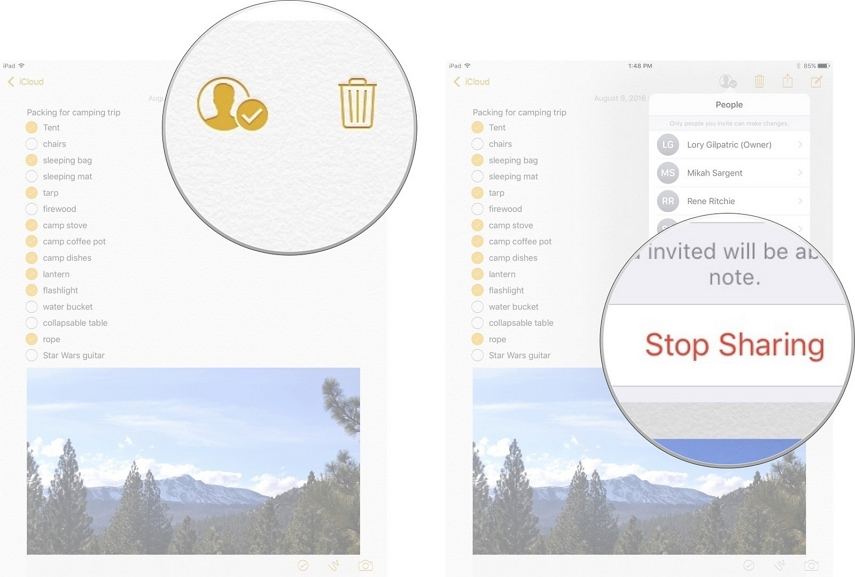
Step 5: Tap Share Link to make it public.
That's how to publicly share calendar event iPhone.
Part 4. How to Remove One Person from a Shared Note
Only the author of the note can add or remove collaborators. When one collaborator makes a change, all participants will view the change but will not be able to know who made it. To remove specific people from a shared note, follow the procedure below.
Step 1: Open Notes app and select the note you are sharing.
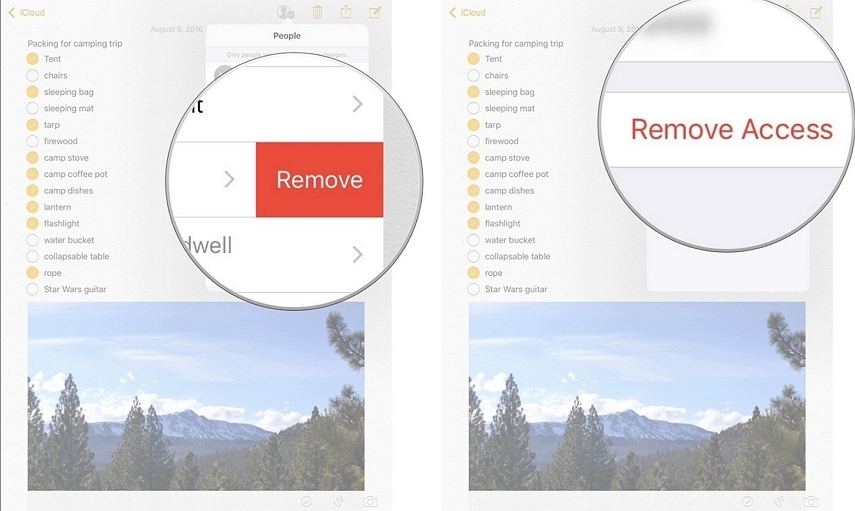
Step 2: Tap the collaborate icon.
Step 3: Swipe to the left and tap Remove. You can also tap a person's name and then tap Remove Access.
Extra tip: How to Recover Deleted Notes on iPhone
In case you have accidentally deleted notes or have lost them after a software update, a jailbreak or malware attack, we recommend that you use Tenorshare UltDatato recover them. Tenorshare UltData is a great tool that allows users to preview and selectively recover deleted noted directly to their iPhones with or without iCloud and iTunes backups. To recover notes, follow the procedure below.
Step 1: Download, install and run Tenorshare UltData on your PC and Mac.
Step 2: Connect your iPhone to your computer using a USB cable.
Step 3: To access all the deleted notes, click Start Scan.
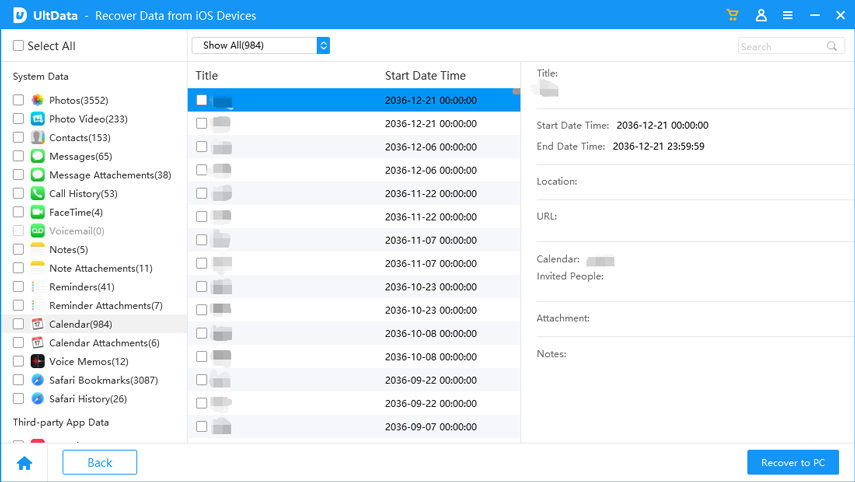
Step 4: Click Notes from the list of data types on the left bar of the interface.
Step 5: Choose the notes you wish to delete then click Recover to restore them.
Conclusion
Want to know how to share notes between iPhones? Simply use the share button at the top of the note you want to share. For collaborative editing, follow the detailed procedures outlined above. In case you have lost your notes, recover them using Tenorshare UltData.
