Top 3 Ways to Backup iPhone X, iPhone 8/8 Plus 2025
This article exemplifies three easy ways to back up contacts, photos, music and videos in your iPhone X, iPhone 8/8 Plus/7/6s/6/5s with or without iTunes.
- Part One: Automatically Backup Files in iPhone X, iPhone 8/8 Plus with iCloud
- Part Two: Backup iPhone X, iPhone 8/8 Plus with iTunes both on Windows/Mac
- Part Three: Selectively Backup Files in iPhone X, iPhone 8/8 Plus with Tenorshare iCareFone (an easy data backup method)
iPhone X, iPhone 8/8 Plus, exactly like its older versions, will surely become a real hit once it is released, especially when it has been rumored for long with exciting new features: LED displays, 3D facial scanning tech, no home button, etc. Whichever version of iPhone you are now using and thinking of replacing with its eighth generation, however, backing up your iOS data is a big issue you cannot avert when it comes to iPhone data security, and a handy ios backup tool will make things a lot easier. If you are looking for such tools to save you from the data loss disaster, the following three would make the best iPhone backup software.
Part One: Automatically Backup Files in iPhone X, iPhone 8/8 Plus with iCloud
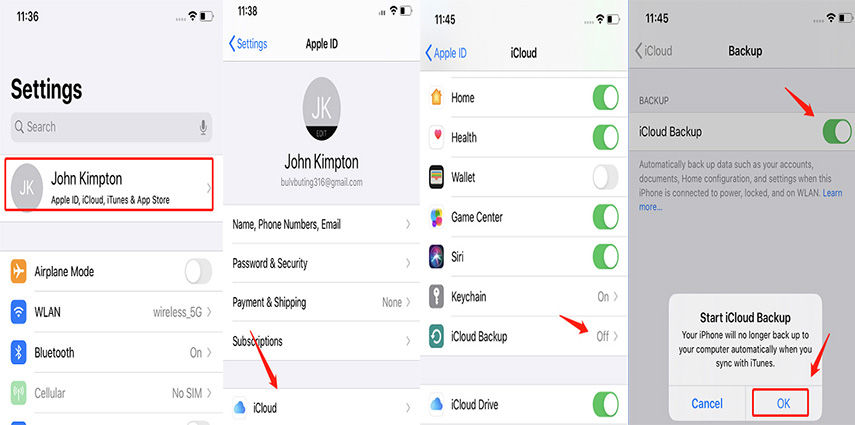
With iCloud, you don't even have to manually clone your iOS files. Give your iPhone some taps, and let iCloud do the rest. Here is how:
Step One: Connect your iPhone to Wi-Fi connection to guarantee a stable backup process.
Step Two: Go to "Settings" >> "iCloud", and tap on the "iCloud Backup" switch if it has not been turned on.
Step Three: Tap on "Back Up Now" if you want. Otherwise, your device will automatically backup for you as long as it is connected to Wi-Fi and your iCloud has enough storage space left.

Part Two: Backup iPhone X, iPhone 8/8 Plus with iTunes on Windows/Mac
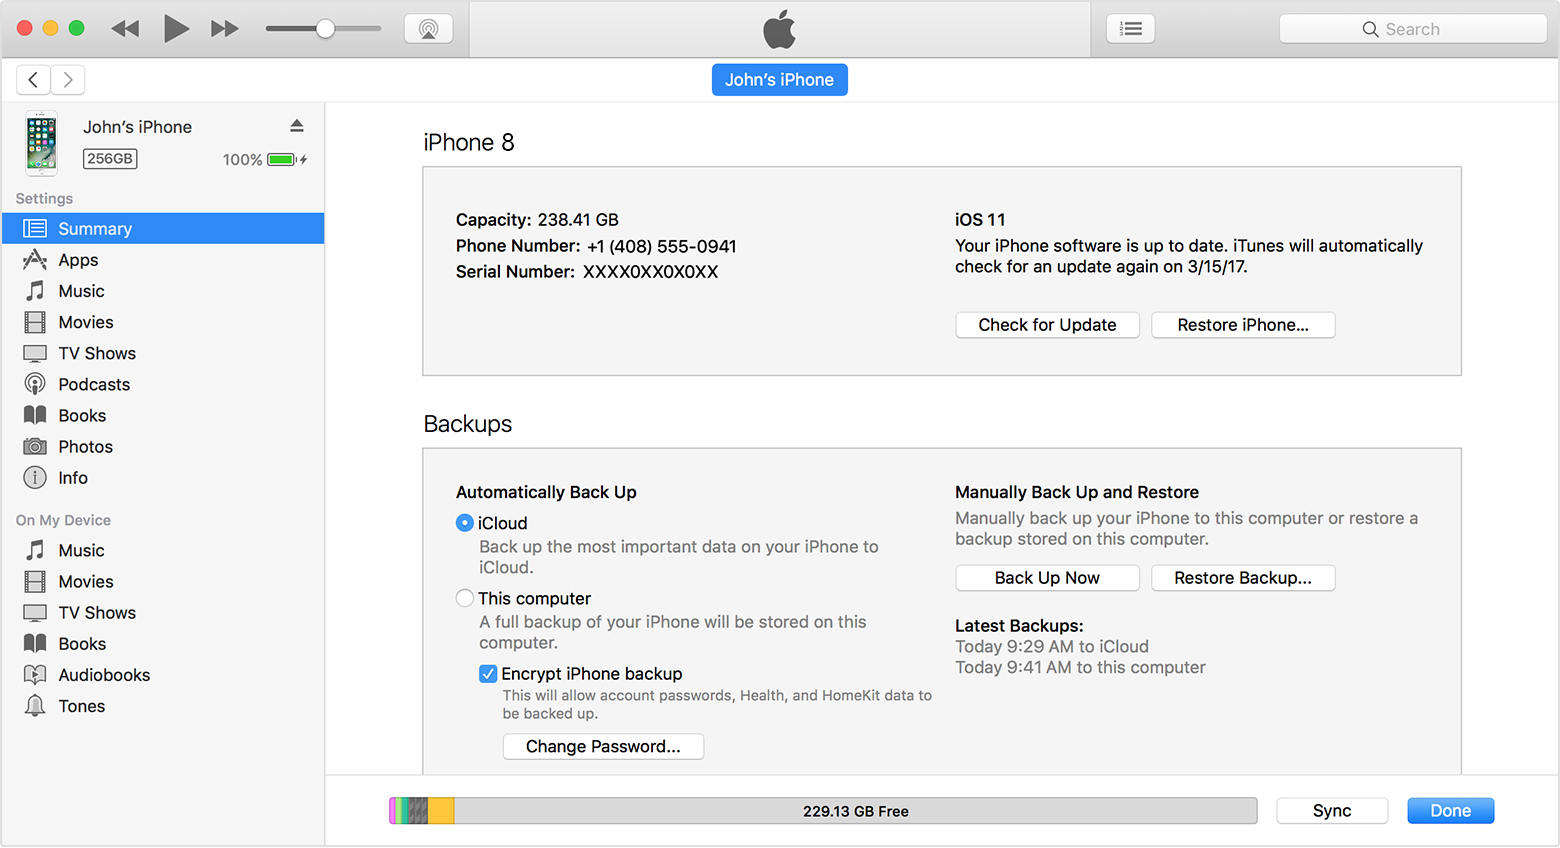
iTunes is also a helpful tool for copying files when you have a PC or Mac Book at hand connected to Internet. To restore iPhone from backup using iTunes is a good way to safeguard your iOS devices. Read the following steps to learn how:
Step One: Connect your iPhone X, iPhone 8/8 Plus with PC/Mac Book with a USB cable, and the iTunes in your computer will automatically be launched and detect your iOS device.
Step Two: Click on your device to show a new interface, and click "Backup Now" to start the backup.

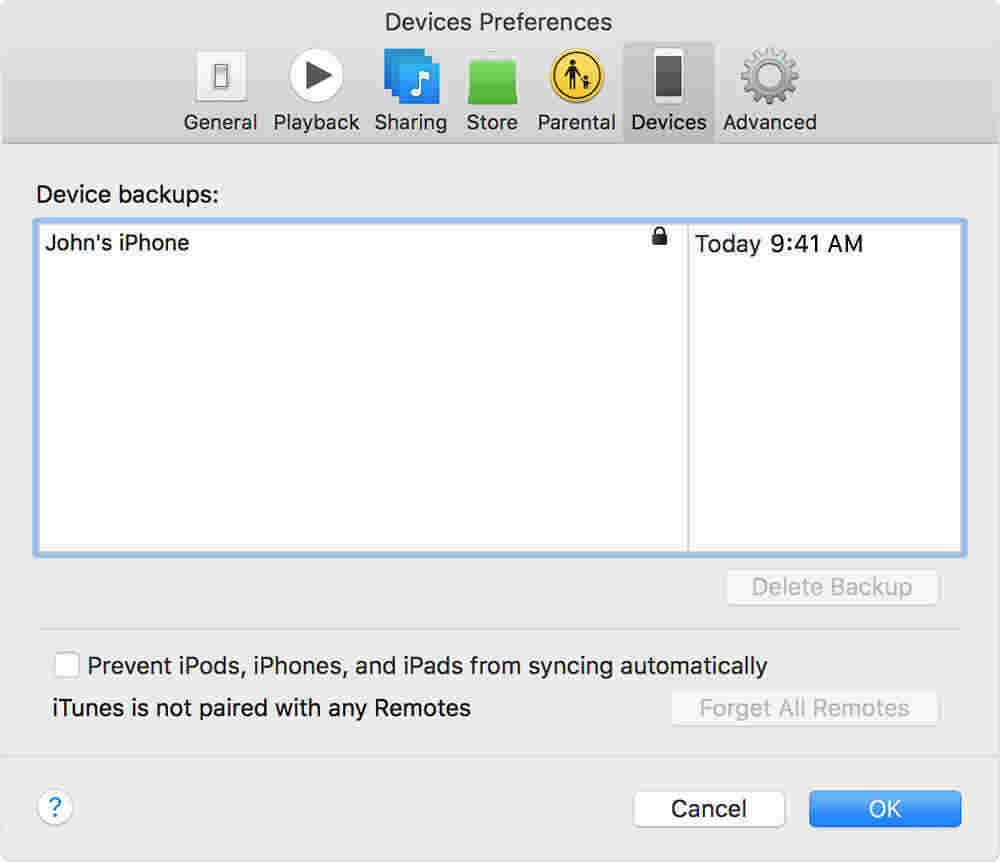
Step Three: Go to "Edit" >> "Preferences" >> "Devices" to check your backup folder.

Part Three: Selectively Backup Files in iPhone X, iPhone 8/8 Plus with Tenorshare iCareFone (an easy data backup method)
Whether you are using iCloud to sync your photos or music automatically or iTunes to copy messages or bookmarks to your computer, neither will enable you to back up data selectively, not to mention that iTunes backups cannot be read in the computer, though such needs are shared by many smart phone users. But all are possible with Tenorshare iCareFone. This software helps you check backup details and backup selected files easily.
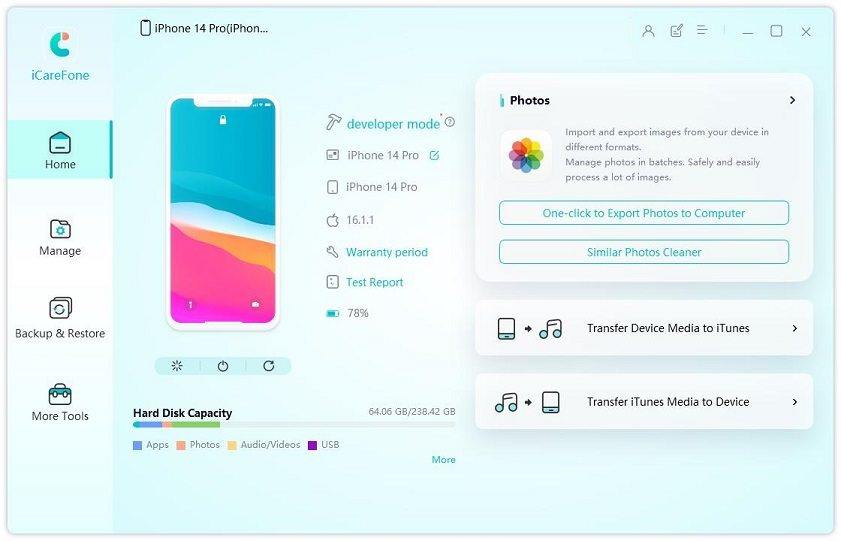
Step One: Launch Tenorshare iCareFone, and connect your iPhone to your computer. Click "Backup & Restore" on the interface.

Step Two: Select any data type you want to backup, and click "Backup".

Step Three: Preview the backed up files when the process is finished. Then click "Restore to device" or "Export to PC" to save the backup data.

Related Read: How to Backup iPhone without Passcode
Summary
This article offers three easy ways to backup iPhone contacts/photos/messages/music/videos. iCloud enables you to back up those files automatically when connected to Wi-Fi. With iTunes, you can choose to sync your files to your computer and restore them whenever needed. Tenorshare iCareFone will be a perfect alternative when you do not wish to backup your iPhone as a whole, but intend to back up and restore them selectively. So next time when you have such needs, choose wisely to have an easy and secured data backup. Look for ways to restore data with Tenorshare iCareFone after backup? Click here for instruction.
Speak Your Mind
Leave a Comment
Create your review for Tenorshare articles

Tenorshare iCareFone
Best Free iPhone Transfer & iOS Backup Tool
Easily, without iTunes


