How to Change iTunes Backup Location on Windows 10/11 and Mac [Sept 2025 Updated]
I wanna change iTunes backup folder location on Windows 11 because I have no space on my C hard drive, but when i search on web theres only tutorials on linking the folder to new place and not changing, can someone please help?
Creating an iTunes backup of your Apple device is an excellent way to prevent data loss. However, many users find it challenging to locate the precise iTunes backup location on Windows 11/10 for restoration or modification. Wondering where does iTunes save backups?
If you're among the iPhone users seeking this information, please follow the article for detailed steps on finding the iTunes backup location for both Windows and Mac systems. You'll also find easy steps to change iTunes backup location on Windows 11/10.
- Part 1. Where is the iPhone Backup stored in Windows 11/10?
- Part 2. How do I Change the Location of iTunes Backup in Windows 11/10?
- Part 3. How to Change Location of iTunes Backup on Mac
- Part 4. How to Change iTunes Backup Location in Windows 11/10 to External Hard Drive
Part 1. Where is the iPhone Backup stored in Windows 11/10?
Where are iTunes backup stored on your PC/Mac? The default location of iTunes backup files is hidden and not easily accessible in both Windows and macOS.
1. iTunes Backup Location On Windows 11/Windows 10
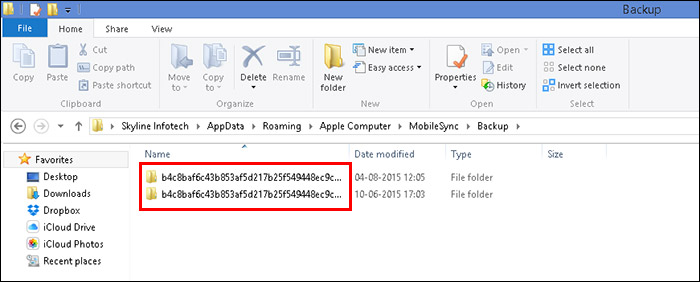
To keep it simple, your iTunes backup files are stored in the "MobileSync" folder. The paths could be
- "C:\Users\YourUsername\AppData\Roaming\Apple"
- "Computer\MobileSync\Backup"
- "C:\Users\YourUsername\Apple\MobileSync\Backup"
Here's how to locate where does iTunes store the backup on Windows 11/10:
Step 1: Open the "Search box" from the "Start" menu or "Taskbar" on your Windows 10/11 PC.
Step 2: If you installed iTunes from the Microsoft Store, type "%appdata%" in the search box and press "Enter".
Step 3: Alternatively, type "%USERPROFILE%" in the search box and press "Enter".
Step 4: In the search results, click on the "AppData" folder and then open the "Apple" folder.
Step 5: Select "Apple Computer" from the list and navigate to the "MobileSync" folder.
Step 6: Inside the "MobileSync" folder, open the "Backup" folder to access your iTunes backup files.
2. iTunes Backup Location On Mac
Just like on Windows, the iTunes backup location on a Mac is in the "MobileSync" folder. Here are a couple of ways to find your iPhone backups on a Mac:
Step 1: If your Mac runs macOS 10.15 or older, open iTunes, go to "Preferences," and click on the "Devices" tab.
Step 2: Right-click on the device you want to find the backup for, and select "Reveal in Finder." This will show the iTunes backup location for that device.
Step 3: If you're using macOS Catalina or later, go to the connected iPhone under the "Locations" section in Finder, and click on "Manage Backups".
Step 4: In the "Device backups" window that appears, right-click on the backup file and select "Show in Finder".
Step 5: A new window will open, displaying the iTunes backup files.
![]() Note:
Note:
Part 2. How do I Change the Location of iTunes Backup in Windows 11/10?
When you change iTunes backup location on Windows 10/11, you’re essentially telling iTunes to save your backup files to a different folder or drive. This is done by creating a symbolic link (also known as a directory junction) that tricks iTunes into thinking the backup files are still in their original location, when they’re actually stored elsewhere.
If you’re comfortable with these steps, here’s how to move iTunes backup location Windows 10/11:
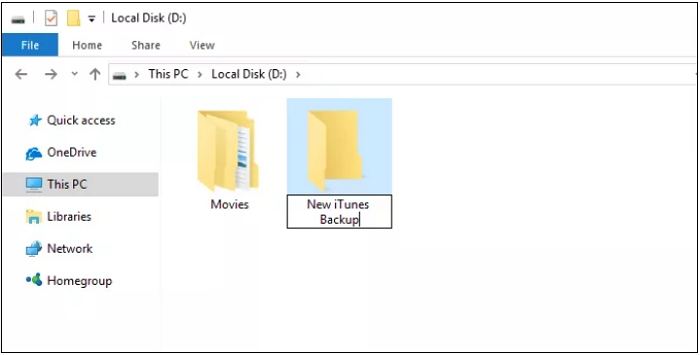
Step 1: First, create a new folder on the drive where you want your iTunes backups to be stored. For example, create a folder named “iTunes Backup” on your F:\ drive.
Step 2: Press the Start button and paste the following into the search box: "%APPDATA%\Apple Computer\MobileSync"
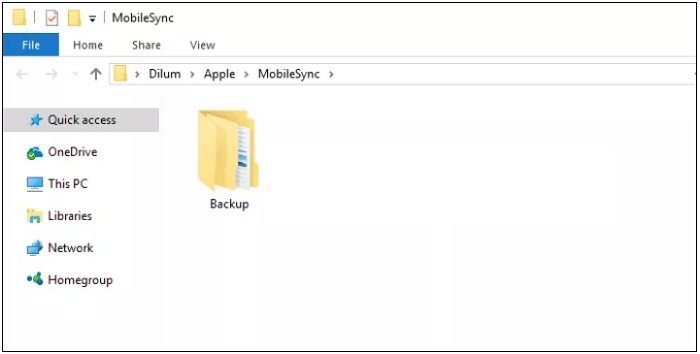
Step 3: This will open the folder where iTunes currently stores its backups. Locate the folder named "Backup" and rename it to "Backup-Old".
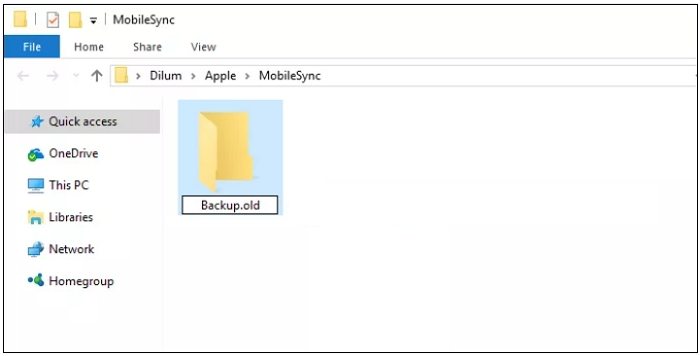
Step 4: While holding down the Shift key, right-click inside the File Explorer pane where the current folder (/MobileSync/) is open. Select "Open Command Window Here" to open a Command Prompt already focused on this directory.
Step 4: Alternatively, you can type "cmd" in the File Explorer address bar and press Enter.
Step 5: At the Command Prompt, enter the following command (adjusting the path to match your chosen backup directory):
mklink /J "%APPDATA%\Apple Computer\MobileSync\Backup" "F:\iTunes Backup"
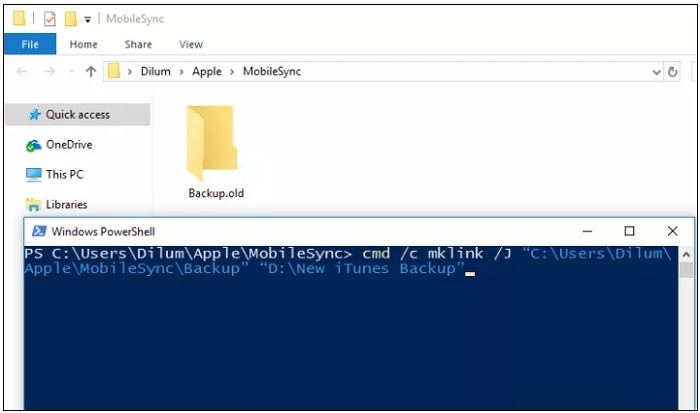
Step 6: The mklink command is used to create a symbolic link, and the /J switch creates a Directory Junction that seamlessly redirects iTunes to your new backup location.
Step 7: You should now see a folder with a shortcut icon in the \MobileSync\ folder, labeled "Backup". When you click on this folder, it will open like a normal folder, but the files will actually be stored on the secondary drive.
Pros:
- Frees up space on your primary drive.
- Allows you to choose where backups are stored, making file management easier.
Cons:
- Involves using Command Prompt and creating symbolic links, which can be confusing.
- Incorrect setup can cause iTunes to not recognize the new location.
- System updates or iTunes changes might disrupt the symbolic link, causing backup failures.
- Troubleshooting can be more complex due to the added layer of symbolic links.
Part 3. How to Change Location of iTunes Backup on Mac
To change iTunes backup location to another drive on a Mac, first build a symbolic link. This strategy tricked iTunes into redirecting its backup files to a different location.
While this can clear up space on your primary disk, it requires using the Terminal and generating symbolic links, which can be difficult if you are unfamiliar with these tools. Incorrect setup or system changes may damage the symbolic link, resulting in backup failures.
Here is how to change the location of iTunes backup:
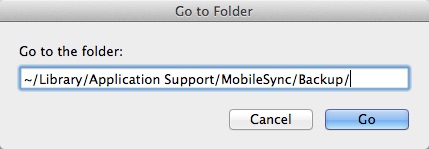
Step 1: From your Dock, open the Finder app. Click on the Go menu and select Go to Folder from the dropdown menu.
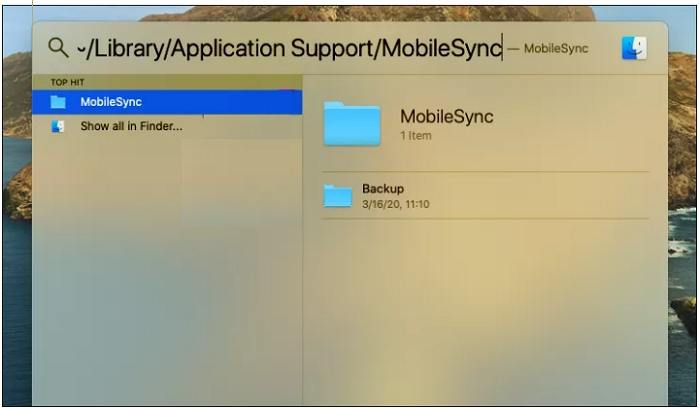
~/Library/Application Support/MobileSync/
Step 2: Locate the folder named "Backup". You can either rename this folder (e.g., "Backup-Old") or move it to another location if you want to keep it. Note that deleting this folder will remove all previous backups.
Step 3: Open a new Finder window by pressing Command + N on your keyboard. Navigate to the location where you want to store your iTunes backups, and create a new folder there (e.g., "iTunes Backup").
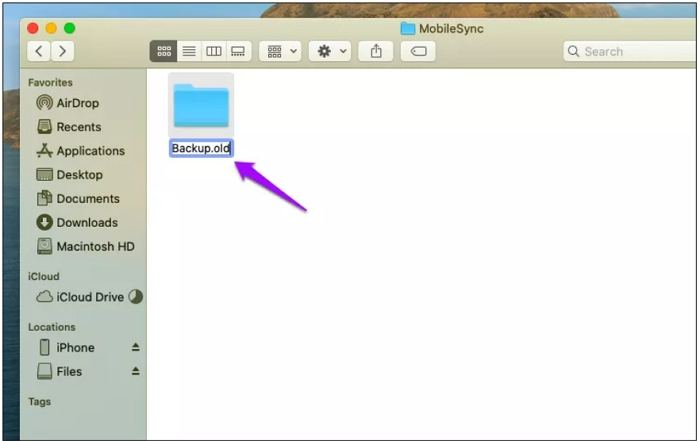
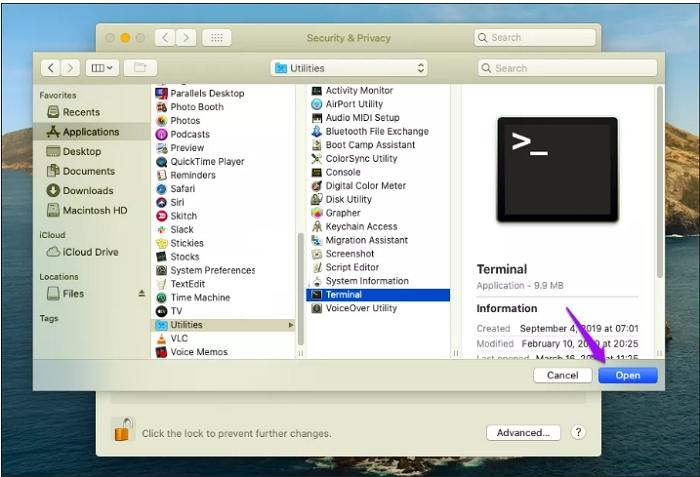
Step 4: Open the Terminal app by going to Applications > Utilities. In the Terminal window, type the following command, replacing [target] with the path to the new backup folder you just created:
sudo ln -s [target] ~/Library/Application\ Support/MobileSync/Backup
Step 5: For example, if your new backup folder is located on an external drive named "ExternalDrive" in a folder called "iTunes Backup," the command would look something like this:
sudo ln -s /Volumes/ExternalDrive/iTunes\ Backup ~/Library/Application\ Support/MobileSync/Backup
Step 5: Press Enter and then type your admin password when prompted.
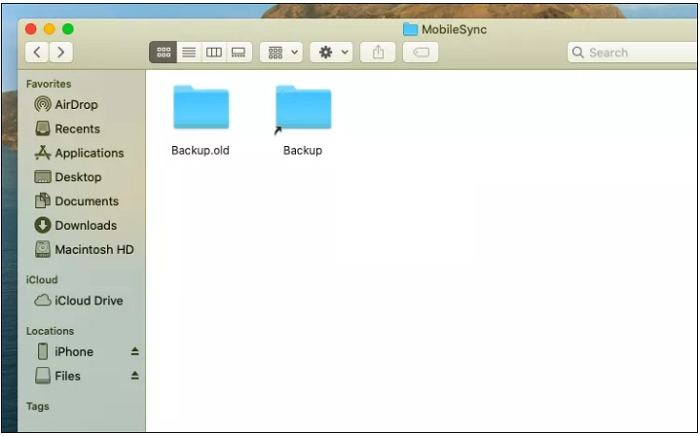
Step 6: A symbolic link is now created in the original iTunes backup directory. When you perform a new local backup, the files will be stored in the new location you specified.
Pros:
- Frees up valuable space on your Mac’s internal drive.
- Allows you to choose any location for your backups, making file management and organization easier.
Cons:
- Uses the Terminal app, which can be intimidating to those unfamiliar with command-line tools.
- Incorrect setup could cause iTunes to not recognize the new backup location, leading to backup failures.
- Future macOS updates or changes in iTunes settings could interfere with the symbolic link, requiring troubleshooting or redoing the process.
Part 4. How to Change iTunes Backup Location in Windows 11/10 to External Hard Drive
If you find the previous ways too complex, or if your local backup space isn't cutting it, Tenorshare iCareFone provides a simple solution. This program makes it easier to manage and relocate your iTunes backups.
Instead of having to deal with symbolic links and directory paths, iCareFone allows you to automatically transfer your iTunes backup data to an external hard drive or another location on your computer. It makes it simple to preview and export your backup files, and you can easily restore them to your original or another device. This strategy not only saves time, but also gives you greater control over your backup storage.
Here’s why it’s a great choice:
- Export iTunes backup to computer/external hard drive
- Backup iPhone to PC/Mac and restore to device/external drive, like WhatsApp chats.
- Transfer photos, contacts, music, videos, messages from iPhone to PC/Mac.
- Back up everything to computer without iCloud/iTunes
How to Back up iTunes to External Hard Drive
-
Launch Tenorshare iCareFone on your computer and connect iPhone using USB cable. If you see "Trust This Computer" option on your screen then unlock your phone and enter the passcode for the proper connection.

2. Click on "Backup & Restore" option that you can see on the top menu bar.
3. Also click “To view or restore previous backup files” option which you can find on the lower left corner of the screen. All the backup files created by iTunes as well as iCareFone will be shown on screen.

4. Select the backup to continue further and if you have encrypted the backup then you need to enter the password to extract the backup files.

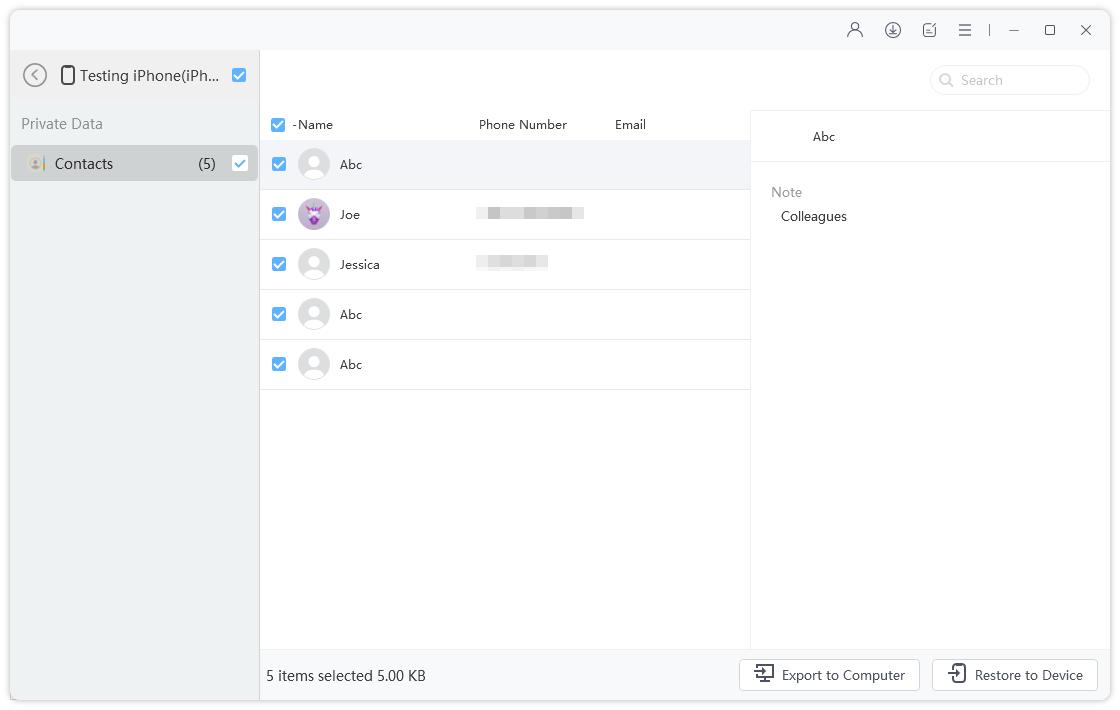
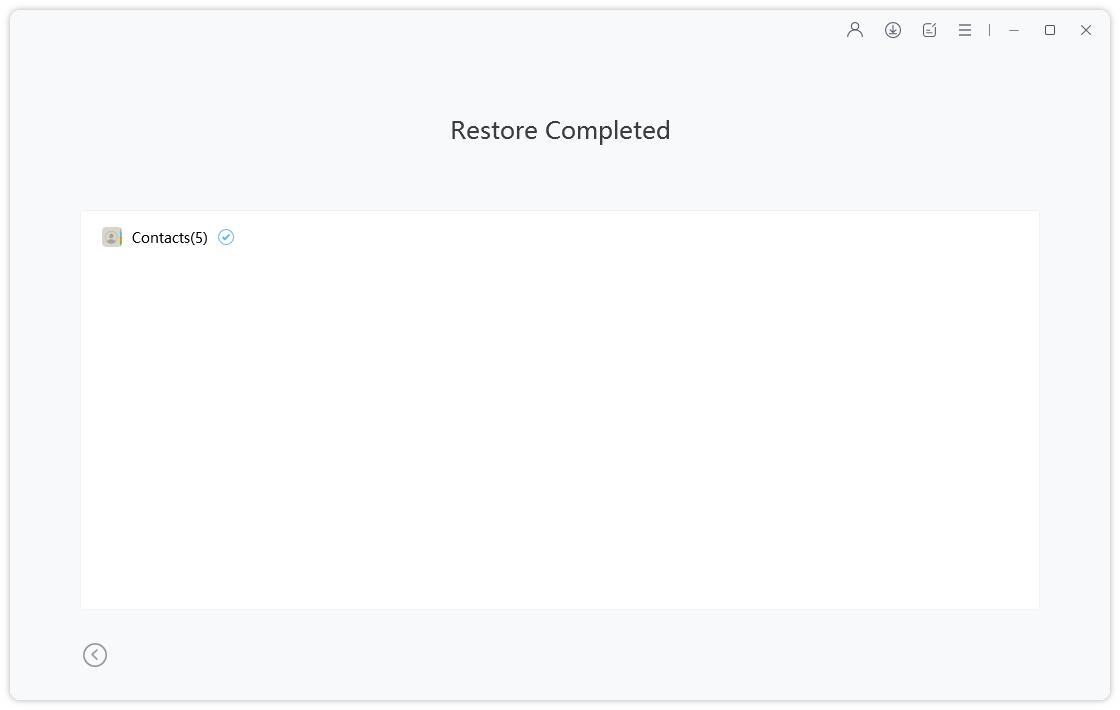
5. Now select the files that you want to restore and even you can choose if you want to export to computer or to your phone.

Conclusion
Searching how to change iTunes backup location or where iTunes saves backups, there are a few methods available, but they can be quite complex.
For a simpler and more user-friendly approach, consider using Tenorshare iCareFone. It’s a great tool that lets you easily change iTunes backup location to external hard drive or another storage option without the hassle. With iCareFone, you can quickly manage your backup files, free up local space, and restore your data with ease.
- Free backup everything you need on iPhone/iPad/iPod
- Transfer music, photos, videos, contacts, SMS without limitation
- Selectively restore files without erasing current data
- 1-Click to transfer photos from iPhone to PC/Mac
- Sopport the latest iOS 26 and iPhone 16
Speak Your Mind
Leave a Comment
Create your review for Tenorshare articles

Tenorshare iCareFone
Best Free iPhone Transfer & iOS Backup Tool
Easily, without iTunes


