How to Create A New iPhone Backup without Encryption
iTunes provides you with multiple ways to create backups for your iPhones. One way is to create new iPhone backup without password and the other way is to create a backup with a password. If you have ever crated an encrypted backup for your iPhone, then all the backup you create afterwards will be encrypted as well. Here, the following guide will teach you how you can change that and allow you to create backups without any kind of password protection.
Backups without password protection are ideal for people who do not have their confidential information stored on their devices. Restoring such backups is also easier compared to the encrypted ones as you do not need to recall the password or anything like that. Just hit the restore button and you are good to go. Let's check out how to create new iPhone backup without encryption:
- Part 1: How to Create New iPhone Backup without Password
- Part 2: How to Turn off iPhone Backup Encryption in iTunes
Part 1: How to Create New iPhone Backup without Password
In order to create a password-free backup for your iPhone, you will need to first remove the encryption settings. Fortunately, there is a software that lets you easily remove encryption settings and the following talks more about it.
The software is called 4uKey - iTunes Backup and it allows you to remove encryption settings on your device with a few clicks. It does not require any advanced setup or anything like that as it can be used just like any other regular software on your computer.
If that sounds good to you, here is how to use the aforesaid software to remove encryption settings for your iPhone backups:
To get started, download the software to your computer and install it.
Step 1Launch the installed software and choose the option that says Remove backup encryption settings.

Step 2Then click on the Start button in the software to continue the process.You will find that the software has started removing encryption settings. The progress bar will be shown on your screen.
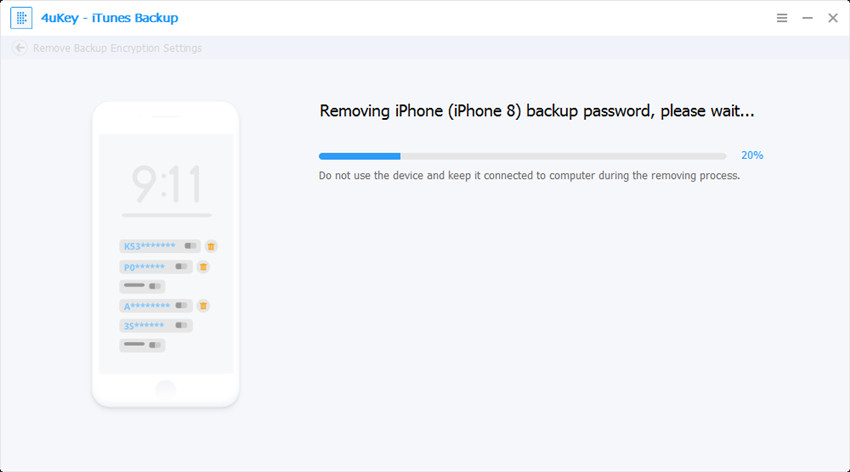
Step 3When your screen turns to something like the following, the encryption settings have been successfully removed.
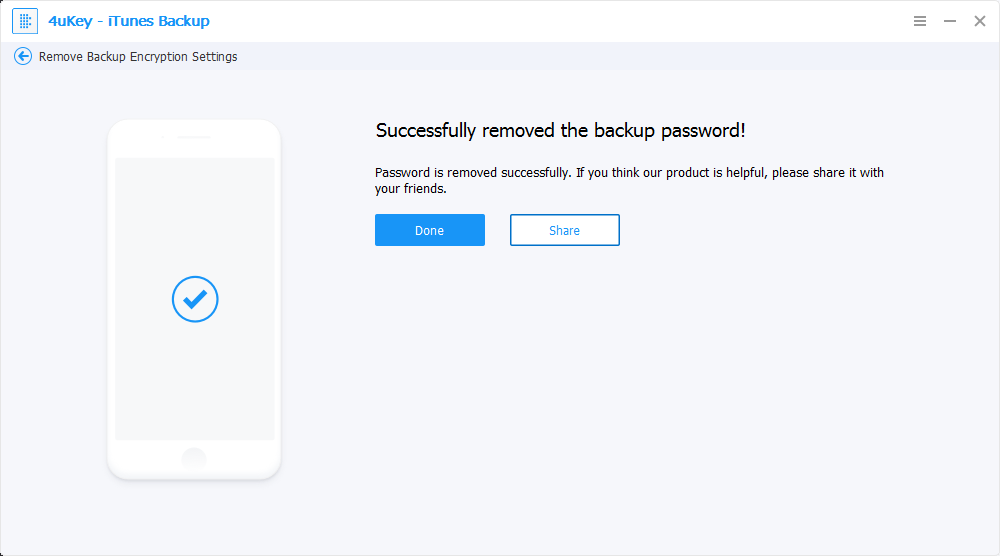
There you go. The software has successfully disabled encryption for your iPhone backups. Now let's get onto the actual procedure of creating an iPhone backup without the password. The following is how you do it on your computer.
Download and install the latest version of iTunes on your computer. Launch the iTunes app.
Connect your iPhone to your computer, find your device in iTunes, click on the Summary tab and then click on the button that says Back Up Now.
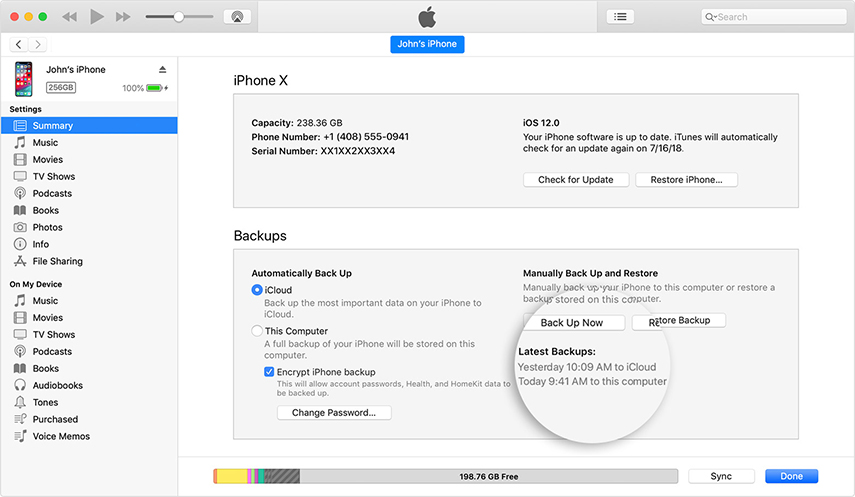
Your iPhone will be backed up without a password in the iTunes app on your computer. That is how you create new iPhone backup without password on your computer.
Part 2: How to Turn off iPhone Backup Encryption in iTunes
If you would prefer using the iTunes app to disable encryption for your iPhone backups, you have a method available to do the task. The app already has an option to let you turn off password protection and it just a matter of finding it and turning it off to create your backups without any passwords.
However, be advised the method may not be as efficient or easy to perform as the one suggested in the previous section of this guide. You are highly recommended to go for that method as it is easy to implement using a professional software.
If you must do the task using the iTunes app itself, the following shows how you can go about doing it on your computer.
Step 1: First thing you will want to do is launch the iTunes app on your computer. Windows users can double-click on the iTunes icon on your desktop to launch the app and Mac users can launch iTunes from the Launchpad.
Step 2: When the iTunes app launches, connect your iPhone to your computer using a compatible cable. Find and click on your iPhone in iTunes, click on the option that says Summary under Settings, and you will find a tick-box saying Encrypt iPhone backup. Simply untick the box to disable the encryption.
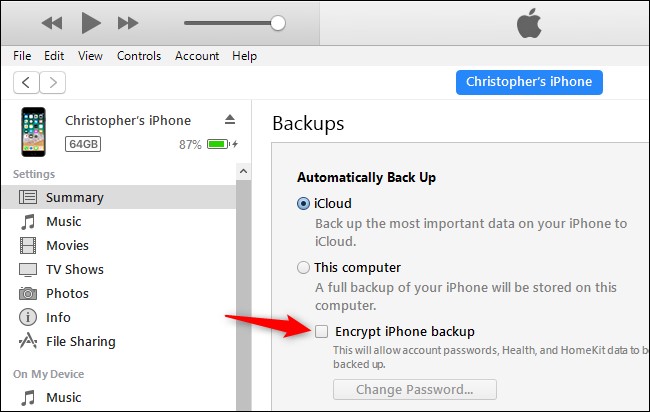
Step 4: Enter in the password you set for your iTunes backups and you should be able to turn off encryption for your backups.
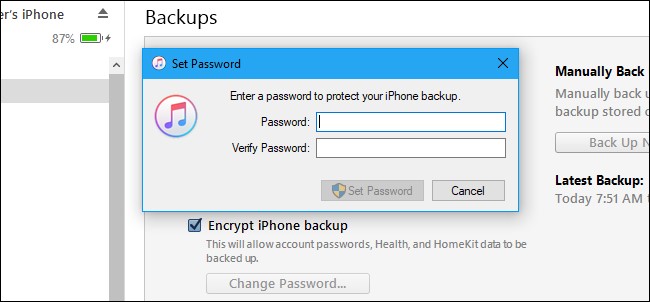
You have successfully disabled the option that forced you to use a password to create backups for your iPhone. Since the feature is no longer enabled, iTunes will never ask you to input a password to either create or restore a backup on your iPhone. If iTunes keeps ask for password, please find the solution by reading this article: How to Fix the iTunes Keeps Asking for Restoring Error.
Conclusion:
As you can see, there are two methods that enable you to do the task. The reason you are suggested to use the first method is because it uses a professional iPhone backup encryption removing software to do the task. The second method only uses an option in the app to disable encryption. We hope the above guide helps you create new iPhone backup without password in the iTunes app. With two easy to follow methods, it's a walk in the park to turn off encryption for iPhone backups.
Speak Your Mind
Leave a Comment
Create your review for Tenorshare articles
