[Issue Solved] iTunes Could Not Backup iPhone
iTunes isn’t known for generating errors but as it happens with every app under the sun, the app sometimes throws errors and causes issues that can’t easily be solved. One of the errors like “iTunes could not back up the iPhone “(name)” because the backup could not be saved on the computer”, or a “session failed” message, with a suggestion to disconnect and reconnect the device before trying again that iTunes sometimes generates is that it doesn’t let you successfully backup your iPhone.
Normally when you backup your iPhone using iTunes, the app is supposed to create a backup and store it on your computer. What happens in the aforementioned error is that the backup process does not go well and you see various error messages on your screen.
If you are one of the victims of the error and can’t get iTunes to properly backup your iPhone, then here we have some solutions for you. The following are some of the fixes that you can apply to resolve the error.
Method 1: Update the iTunes App on Your Computer
Sometimes an obsolete version of iTunes causes backup errors which can be easily resolved by just updating the app on your computer. Here’s how you can go about doing that on a Mac:
1.Launch the iTunes app on your Mac by clicking on Launchpad in the Dock and searching for and clicking on iTunes. The app should open.
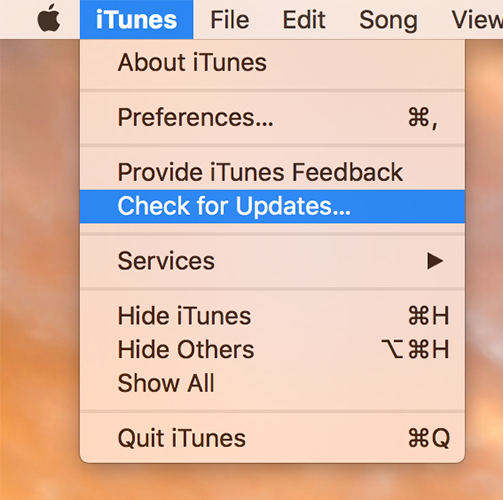
2. When iTunes launches, click on the iTunes menu on the top and select the option that says Check for Updates. This option will check if any updates for iTunes are available.

3. If you see that a new version of iTunes is available, then go ahead and get the app updated with the latest version to resolve the issues you are facing.
Method 2: Delete the Old iPhone Backups
If you have old iPhone backups in iTunes, then those might be causing the issue with creating a new backup. If that’s the case, then you will have to delete those from iTunes and then see if iTunes now allows you to successfully create a new backup.
1.Open the iTunes app on your computer.
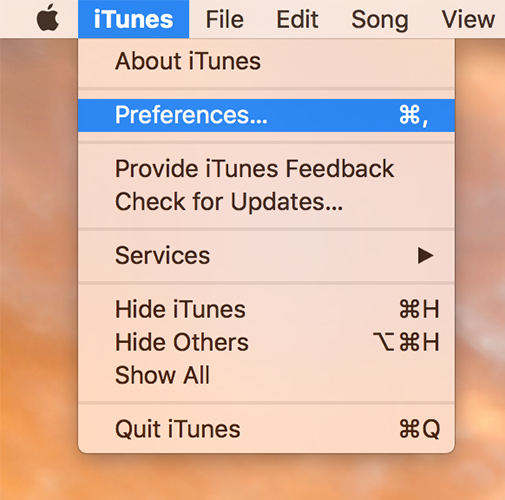
2. When iTunes opens, click on the iTunes menu on the top and select the option that says Preferences.

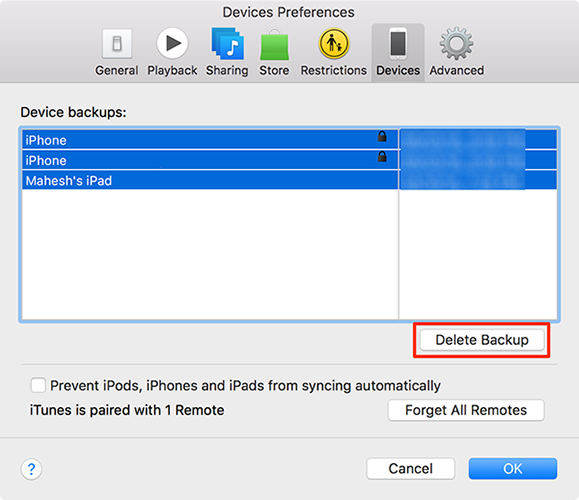
3. When the preferences panel opens, click on the tab that says Devices. That’s where you can see all of the backups you have created using iTunes.
Under the Devices tab, you will see all of the backups you have created so far using iTunes. What you need to do here is select all of these backups and then click on the button that says Delete Backup.

4. iTunes will start deleting the selected backups. When that's done, head back to the main screen of the app and try to create a new backup. It should go fine for you this time.
Method 3: Using iTunes Alternative to Backup Your iPhone
If all fails, you can use this nice small utility called Tenorshare iCareFone that lets you backup your iPhone without using iTunes. Here’s how to use the app to create a backup of your iPhone:
1.Head over to the Tenorshare iCareFone app website and download and install the app on your computer. Run Tenorshare iCareFone and click on the Backup & Restore tab from where you can create new backups.
2. Plug in your device to your computer using a compatible cable. Click on Back up now on the Tenorshare iCareFone app screen and it will help you create a backup of your iPhone. Fllow the on-screen instructions to finish creating a backup of your iPhone.

So, that was how you could use an app like Tenorshare iCareFone to create a backup of your iPhone when iTunes could not back up your iPhone.
Speak Your Mind
Leave a Comment
Create your review for Tenorshare articles

Tenorshare iCareFone
Best Free iPhone Transfer & iOS Backup Tool
Easily, without iTunes


