Fix 'Backup and Sync Has Encountered a Fatal Error' on Mac/Windows
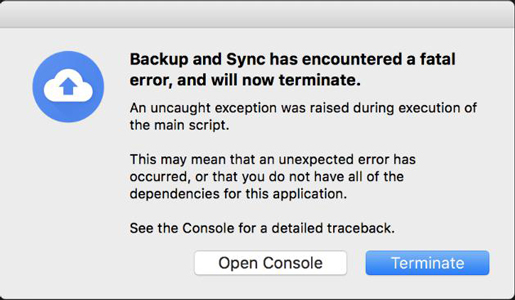
Before going in-depth, we first should know the reasons that cause this fatal error in iOS and windows. We all know the importance of Google drive in taking care of our files by generating a backup for these files to keep them al safe from any loss. Anything causing an error in this facility leads us to the trouble, and we see a fatal error reporting us the error 400. Google sign-in issue is an occasional error. The particular other reasons that can cause this error are:
- Windows firewall blockage
- Invalid drive path
- Interference of antivirus software
- Part 1. Fixing the “Backup and Sync Has Encountered A Fatal Error” on macOS Catalina
- Part 2. Fixing Google Backup and Sync Not Working In Windows
- Part 3: Windows/Mac Tip: How to Recover Data If the File on Your Computer Is Missing
Part 1. Fixing the “Backup and Sync Has Encountered A Fatal Error” on macOS Catalina
We are here to share some of the methods that will help you fix these issues that keep you from generating the backup or sync your files with Google drive. These methods are the simple ones and will help you get rid of all the backup and syncing issues. Without any further delay, let’s get started!
Fix#1. Type Commands into Terminal
In this procedure, you have to follow the following simple steps to lead you to the issue resolution. Let’s start!
- Uninstall “back up and sync from Google” from the application settings and then download it again using the mentioned link: https://www.google.com/intl/en-GB_ALL/drive/download/backup-and-sync/
The next step is to open the terminal application, type the commands, or use iTerm.

- After typing every command that I’m going to tell you, you have to click return command so that you can run the command.
- Reach the terminal window and type “cd ~/Library/Application\ Support/Google”.
- The next command is to make the directory for Google drive, and you have to make sure that it has all the permission sets. The command is “sudo mkdir -p Drive; sudo chmod 700 Drive”.
- If the application tells you to enter the password, you will have to enter the administrator or user password of the device in that place.
- The next step to make sure that you own the Google director you just made. You can do it by typing your username there.
- Sudo chown “your username here” Drive.
- When you follow the whole process carefully, your back and sync will start working as intended. And if it is still not working, you should consult Google support to resolve the issue.
Fix#2. Update to the Latest Google Drive Version
Another thing that can cause trouble in backup and sync from Google is that you may have been using the outdated version of backup and sync. In that case, the only update will be enough to resolve the issue.
Hit the link to download the update: https://www.google.com/drive/download/

- The main thing is that you must read the term and conditions before hitting “agree and continue”.
- When the downloading ends, you have to open installbackupandsync.exe.
- Shift “backup and sync” to the application folder.
- Open “backup and sync”.
- If you see a notification, hit “open”.
- The next step is to log in to your Google account with the same credentials you have made an account.
- Do your desired sync settings and proceed by clicking “next”.
Fix#3. Contact Google Drive Support If Backup and Sync Still Fail to Open
Google support is especially dedicated to helping you with the issues you face and getting rid of. If you want to talk to us on call, you have to follow the following steps.
- In the “backup and sync” screen top left side, click on the menu to access the option “contact us”.
- Then you have to select the issue that you want help about.
- Choose the contact option.
Part 2. Fixing Google Backup and Sync Not Working In Windows
Fix#1. Reinstall Google Backup and Sync
Reinstallation of this backup and sync utility may also save a lot of underlying issues that you are unable to configure and eradicate. The old or corrupted version may also cause this error, and in such cases, reinstalling the right and the latest version is the best solution to this issue. For this, uninstall the currently downloaded version by going to Apps in the laptop settings.
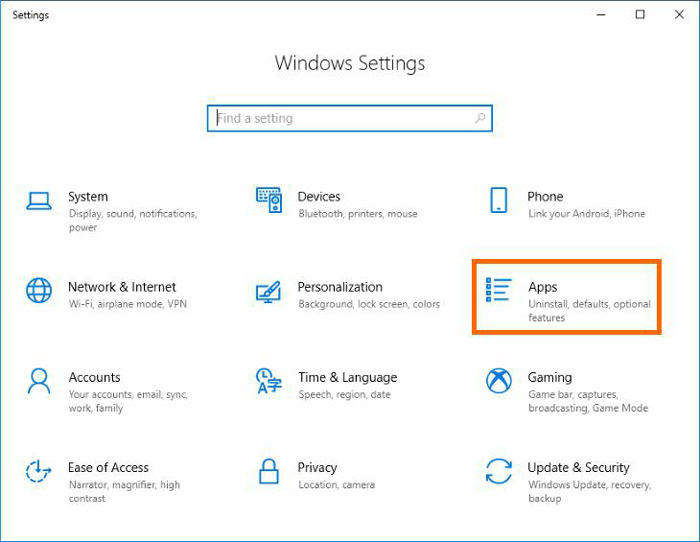
You have to select the app that you want to uninstall.
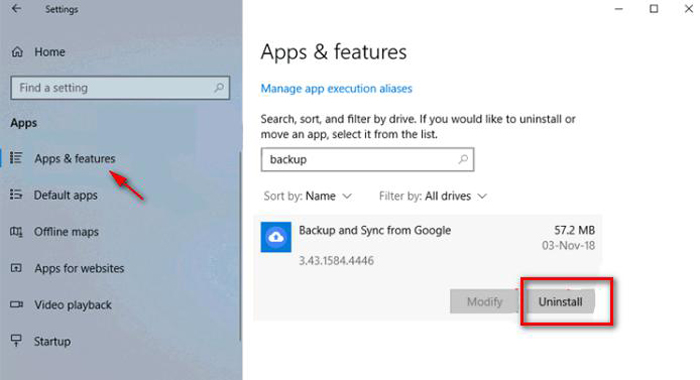
After following all the steps carefully, you have to check whether the issue is resolved or not.
Fix#2. Run Backup and Sync as Administrator
Assigning the administrator rights to backup and sync Google can also resolve the issue. To do this, follow the steps given below.
- Open the backup and sync app properties.
- In the next window, you have to click the compatibility tab.
Click on the option “run as administrator”.

After these steps, you have to check if the problem is resolved or not.
Fix#3. Restart Backup and Sync Application
Restarting backup and sync Google can also eradicate the issue as follows:
- Tap the “backup and sync” icon.
- Click on the three dots menu.
You have to choose the option “Quit Backup and Sync”.

After doing this, the app will stop working, and you can restart the app by clicking on the desktop icon of backup and sync.
Fix#4. Disable Firewall/ Antivirus Programs:
Disabling firewalls and third-party antivirus software can also solve the working error of backup and sync. If you tried all the above methods and your backup and sync are still not working, you can use it to resolve the issue.
Windows/Mac Tip: How to Recover Data If the File on Your Computer Is Missing
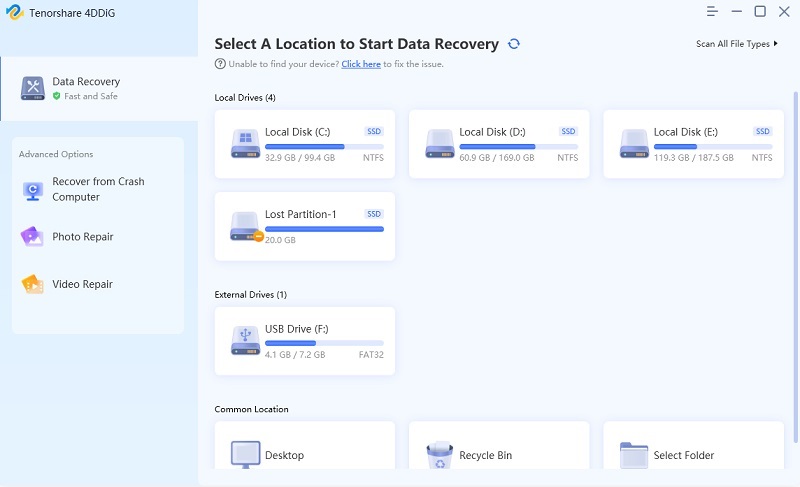
If you accidentally removed the file from your device, you can get the data back using the software utility named Tenorshare 4DDiG for Windows Data Recovery. This tool will help you successfully recover the lost data even if the file is missing on the computer. Want to know how? Let’s learn how!
Select Files Location: In the main screen, you have to give the location of the deleted file, if you don’t know, don’t worry, type “whole computer” to scan the entire computer.

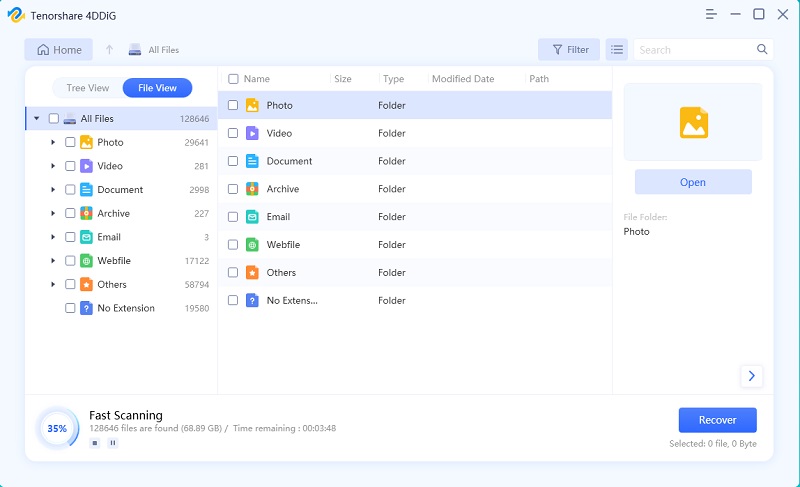
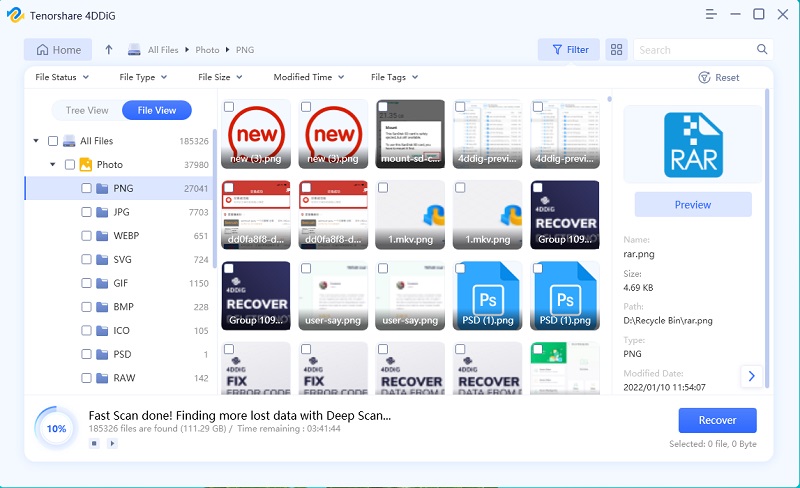
Scan and Preview: The next step is to start scanning, and after scanning, you have to preview the files that you want to recover before recovery.

Restore Deleted Files: The next step is to start recovering the files that you want back.
Check the files that you want to recover from the deleted file section. We recommend you not to save these recovered files at the same destination where these files were deleted.

Save somewhere else in the computer to keep them safe from further loss in disk overwritten and permanent data loss.
Final Words:
We know that backup and sync issues are common issues that almost all the Google backup and sync users have faced once. In the past, solving this issue required much effort, but now, you can do it yourself. It is quite simple to remove the issue from your device. All the methods for resolving the backup and sync, not working issues, are tested and qualified.
So, you can use them with the full confidence that you will get the desired results. If you have been getting worried about this issue on your laptop, put a full stop to your worries. And give a try to any of the methods we mentioned above. We recommend you to use Tenorshare 4DDiG for Windows Data Recovery that you will get rid of this backup and sync not working issue.
Speak Your Mind
Leave a Comment
Create your review for Tenorshare articles


