How to Backup Mac to External Hard Drive
There are tons of ways to ensure your data don’t get lost, and almost all of them assure keeping a copy of your data somewhere else safe. Even better is keeping a copy somewhere in the reach for problems like corruption, lost or failing equipment, and other is to copy somewhere offsite. We’ll go over the best and most secure backup methods for MacOS users, though many of these services will work for Windows too.
There are a couple of reasons to backup Mac to an external hard drive, either for keeping privacy, file security, saving space.
- Considering the file security for a talk, it is always right to keep at least a couple of copies of a file. Who knows whether the file will be corrupted intentionally or malicious software may ruin them on your Mac, or your MacOS crash for no reason.
- Mac has limited space capacity. Whether you're using iMac or MacBook Pro, instead of buying a Mac with more storage, it is cost economical to use external hard drives to back up files from your system.
- Whether you'll donate or give your Mac away, resell, you must have some really important files on the Mac, needing them you to backup for future use. After that, you can delete them from the Mac permanently, which won't affect you.
Sum it up, no matter for what reason, you need to back up your Mac to external hard drives.
- Part 1. How to Back Up Your Computer with Time Machine
- Part 2. How to Backup A Mac to An External Hard Drive Using Disk Utility
- Part 3: How to Recover Lost File from External Hard Drive on Mac
Part 1: How to Back Up Your Computer with Time Machine
MacOS has a fantastic built-in backup tool called Time Machine. Once you insert a hard drive and set up Time Machine software, it will work automatically in the background, saving copies of all your system files, applications. It backups most everything excluding files you don't need like, such as cache files, files in the trash bin, and log files). Time Machine has a solution even if your storage runs out; it will automatically erase the previous version of the data to make spaces for the new ones.
It's pretty much great sleep and wake system for local backups.
1. Plug An External Hard Drive to Your System
All you require is an external drive which is of same size as your drive of Mac. Depending on your trip, insert your external hard drive. You can also set Time Machine with an external hard drive connected to an Airport Extreme router. : Time Machine, by default, will use up all the space available on the drive. In case you wish to use some of the hard drive space for storing, you'll need to partition the drive into two volumes.
2. Fire up Time Machine And Select The Backup destination
Once your external hard drive is inserted, go to System Preferences > Time Machine and then switch from "OFF" to "ON."
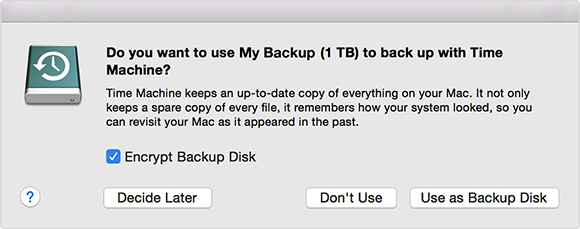
Then hover to the "Select Disk" button to select the volume you want to use for Time Machine. Time Machine will ask you if you're going to use the disk as your backup destination and will provide you the security option to encrypt the backups with a secure password.
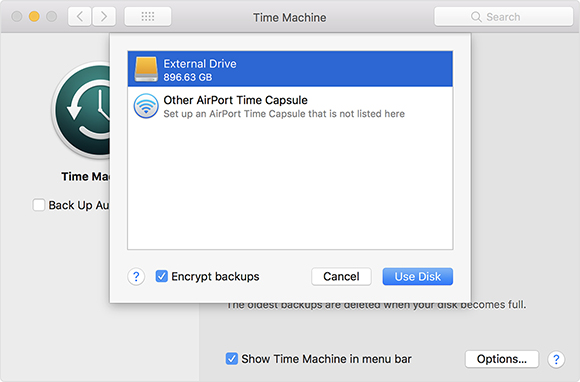
The drive needs to be formatted as MacOS Extended; if it's not, Time Machine will guide you to reformat the drive that will erase all files on it.
3. Let Time Machine Do Its Magic
After all the options selected, backups will happen automatically every hour, daily or weekly, according to you. Time Machine keeps automatic hourly, weekly and monthly backup.

Part 2: How to Backup A Mac to An External Hard Drive Using Disk Utility
Here is how to backup mac to external hard drive without time machine.
1.You will need an external hard drive on how to backup a Macbook to an external hard drive. Connect the hard drive to your Mac. Make sure this drive has sufficient disk space to store your backup files.
2.Then Boot Mac into Recovery Mode. Follow the steps below:
- Shut down your system
- Restart your device and hold down the Command and R key immediately after you hear the startup chime. Keep holding until you see the Apple logos.
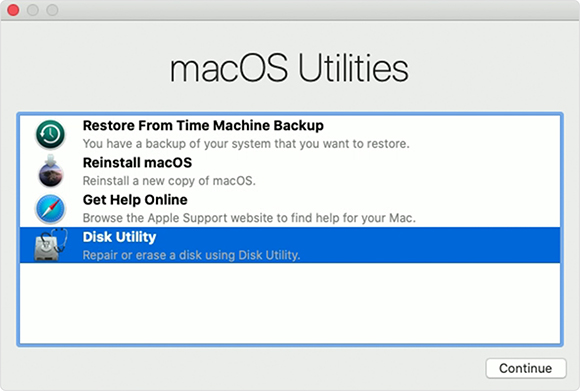
- Wait for OS X utility windows to pop-up
- Select Disk Utility and click hit Continue
- Set the destination you want to back up (such as MacintoshHD)
- Select File - New Image - Image from “Macintosh HD or Your Drive”
- You can change its name if you want to
- Select your external drive
- Choose “compressed.”
- Select Save
- Your backup process will automatically start. It may take some time.
3.You will get a notification when the process is done.
Part 3: How to Recover Lost File from External Hard Drive on Mac
Finally, here is how to recover lost data. You might encounter data loss due to various catastrophes. You can recover lost data on Mac with the help of Ultdata-Mac Data Recovery.
Here is a guide on how to recover lost data from External Hard Drive on Mac, Tenorshare 4DDiG for Mac Data Recovery allows you to restore files from hard drive and external storage devices, which support to recover more than 550+ file types. Firstly, you need to download the software on your Mac. Then, steps to follow:
-
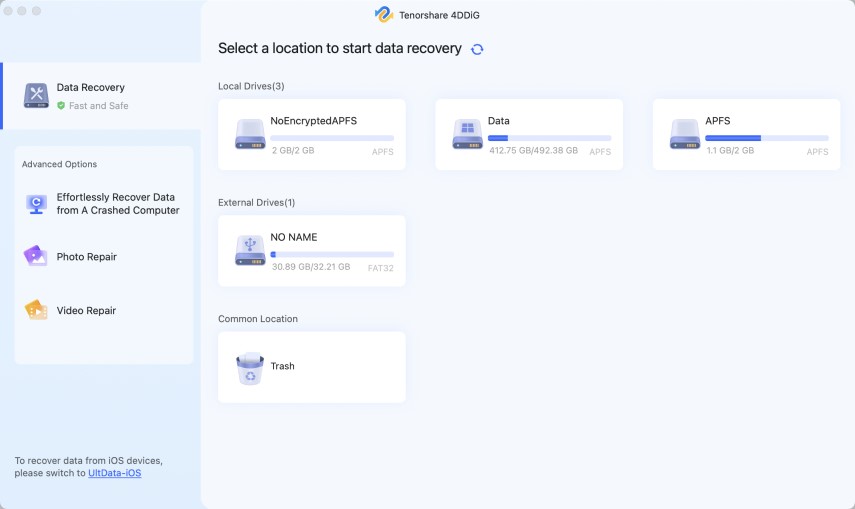
On the home interface, tick the location where the lost files were saved. Because you want to recover lost file from external hard drive, you can select “External Drives” to start to scan.

-
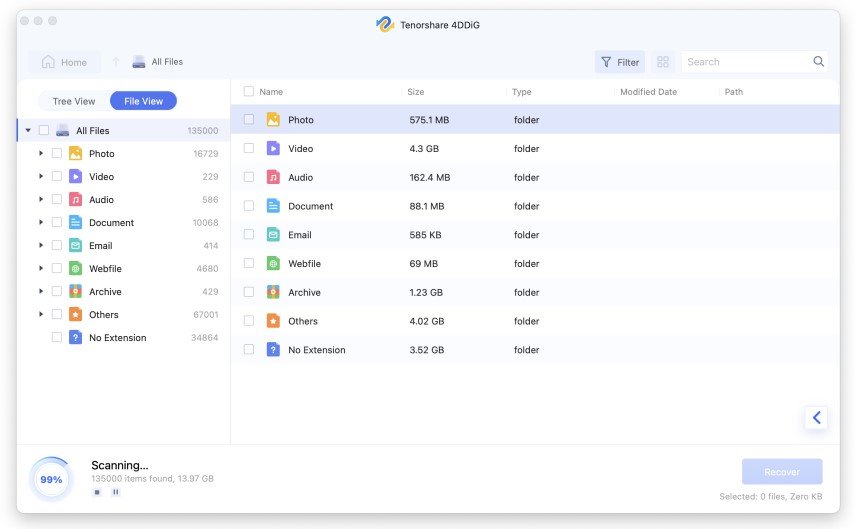
Click "Scan" and UltData – Mac data recovery will start scanning thoroughly. Once it is done, it will list all deleted files in the location you selected.

-
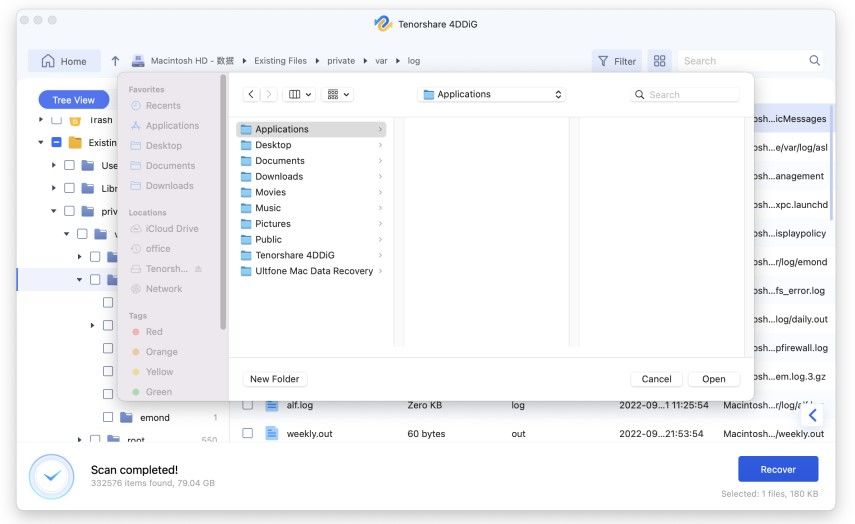
Check the required files and click on the "Recover" to save the recovered data. Do not keep them to the same partition where you lost them; there may be a risk of permanent loss or overwritten.

Conclusion
You never know when you format an HDD, become infected with malware, or accidentally delete an important file. It is essential and pays off to have a reliable, secure file recovery tool so that you can quickly head in and solve the disaster caused. Apple provides various ways on how to backup Macbook pro to external hard drive. Time Machine, Disk utility is some of them. If you delete the backup file by accident or you have no idea why your backup file is missing, don’t worry, Tenorshare 4DDiG for Mac Data Recovery, the third-party software, does a pretty decent job to restore your deleted files.
Speak Your Mind
Leave a Comment
Create your review for Tenorshare articles


