Your Computer Restarted Because of A Problem? Get Solutions Here!
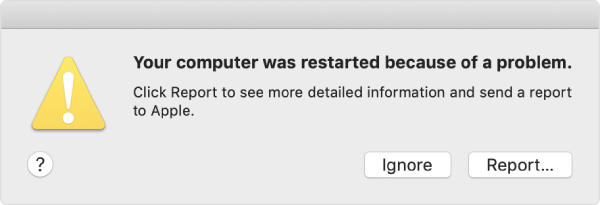
While I was bingeing movie this morning, an unexpected happened to my Mac; it suddenly pops opens the error message saying, “Your computer was restarted because of a problem.” I am not sure how to fix the very problem. Help me with the issue!"
-- From Apple Community

There could be multiple reasons people have been facing the issue since the last update. It’s no wonder Mac can have problems like this; it has happened lots in the past. With this very issue, we are considering the proper fix guide for you. Follow along with us till the end to learn details.
- Why Does My Mac Keep Saying Your Computer Restarted Because of a Problem?
- What to Do If Your Computer Was Restarted Because of a Problem
- MacBook keeps Restarting Causing Data Loss, How to Recover Lost Data?
Why Does My Mac Keep Saying Your Computer Restarted Because of a Problem?
The following listed are the possible reasons why your Mac keeps popping up the error message to restart Mac because of a problem.
- A third party application downloaded on your device, causing system conflict.
- Mac update failed or not updated to the latest OS version.
- Hardware drivers are out-dated and causing the error.
- Hard-disk space full or heavy application is engulfing the entire RAM.
- Mac does not support peripheral or external devices.
What to Do If Your Computer Was Restarted Because of a Problem
There are a couple of actions you can take right away for the fix. Go through the points below.
1. Try Booting into Safe Mode
Safe mode is the method where you can fix the issue with your Mac. You can efficiently resolve any issues regarding regular boot-up with the secure boot. To troubleshoot the very pop-up issue recently showing up on your Mac, follow the steps below.
- First of all, power off/restart your Mac computer.
Now, press and hold the shift key as soon as the computer begins to restart. While maintaining a shift key, you will see the loading bar and Apple logo on the screen.

- Eventually, your Mac loads up, and you are on the safe mode. You can see a Safe boot mark at the top-right corner to make sure you are correct on the very method ready to solve the issue.
- After that, log in to your account. Now, for the fix, if the problem persists in the safe mode, you need to reinstall your MacOS. Also, if the issues do not show up on secure boot, load your computer to normal, which fixes a problem.
2. Install the latest macOS software
If previous fixes do not work for you, try updating Mac to the latest macOS.
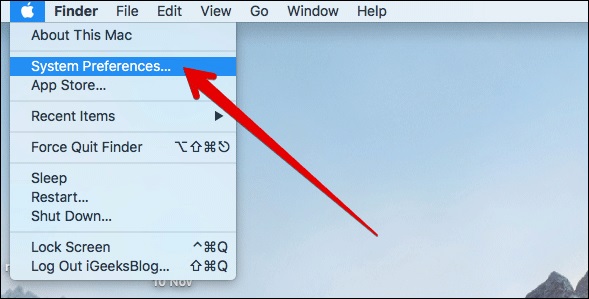
Open up your computer and go to “System Preferences” while clicking on the Apple logo.

- There, you can find the details about the macOS version, click on “Software Update.” The system will check for the update and show the available update for your device.
Create a backup with Time Machine tool and hit “Install Now” to let Mac update begin.

- Download will begin, after it completes, hit restart. After installation and reboot, the previous issues can be solved.
3. Reset Your Mac Hardware Settings
If you think system hardware and other peripherals are causing “your computer was restarted because of a problem” issue, you can reset hardware settings on your Mac for the solution.
- If you have any external peripherals attached to the computer, remove them. Those external devices or systems might have been causing conflict with the system.
- If you have recently installed a new RAM or changed any hardware to the computer, make sure these are compatible with the system.
4. Reinstall macOS
Reinstalling macOS should completely erase and solve issues on your Mac.
- Make a backup and create a bootable flash drive out of the macOS ISO file.
- Power OFF or restart your computer, press and hold CMD + R when it’s restarting.
As soon MacOS utilities show up, click on “Disk Utility.”

- There chose a Macintosh HD drive from the left panel. After that, click on “Erase” from the top menu bar. Now, select a format to APFS and click on the “erase” option.
- Go back to MacOS utilities and click on “Reinstall macOS.”
- Now, continue with the provided instruction and check to agree for installation. Also, choose your Hard Disk to install the OS.
Create a computer account and select your language. After all the steps, you should be right on the new Mac window.

6. Contact Apple
You tried all the above steps and didn’t succeed in solving the issue, now you have come to the stage to contact Apple for the support. You can reach out to the contact page from the link, Apple Contact. You can reach them via customer care, phone call, email, and other methods.
MacBook keeps Restarting Causing Data Loss, How to Recover Lost Data?
Countless issues can occur on our computer; hardware failure, viruses and intruders, human errors, and so on. The very problem we have been fixing with this article has come to address that you can recover your lost data. After your Mac crashes and you reinstall to get rid of the issue, you can recover any type of lost data with Tenorshare 4DDiG for Mac Data Recovery.
- Once you are in the UltData, you can see a couple of disk on the screen. Now, choose the HDD of your system where your previous data resides.
- If you are running the macOS High Sierra version, consider going through the image for the detailed steps to disable SIP.
- Once you select the hard drive, you are redirected to a page where you can find and select data from your computer. You can preview each of the categories. Now, hit the “Recover” blue button.
- Finally, select a destination path for the files and click “Open.” Make sure not to save the files on the previously deleted directory. This may cause permanent of your data.
Conclusion
We have comprehensively run-down the possible fix for the problem; your computer was restarted because of a problem. Reinstalling your MacOS and looking after external peripherals might solve the issue entirely. If you need to back up your deleted data after reinstalling macOS, consider using Tenorshare 4DDiG for Mac Data Recovery. It is a powerful tool designed perfectly for Mac computers.
Speak Your Mind
Leave a Comment
Create your review for Tenorshare articles


