How to Connect GoPro to Mac: Step by Step Guide with Pictures
“I have always been a fan of GoPro. So, I decided to get one, but I am having trouble to get it connected to my Mac. How to connect GoPro to Mac? Any suggestions will be appreciated.”
Users connect GoPro to their computers for editing, sharing or even for saving the files. These procedures are pretty simple, but users are having trouble to connect the GoPro to specifically Mac.
Well, in reality, the procedure is pretty simple. So, we have provided multiple ways to connect the GoPro to the Mac, for the convenience of the users. Here’s how to connect GoPro to MacBook;
- Part 1: How to Connect GoPro to Mac with USB
- Part 2: How to Connect GoPro to Mac without USB
- Part 3: How to Connect GoPro Hero Session to Mac with Quik (a Free App)
- Part 4: How to Connect GoPro to Mac via Wi-Fi
Part 1: How to Connect GoPro to Mac with USB
“How to connect GoPro to Mac with USB?”
The USB method is the most basic way to connect the GoPro to the Mac. It is simple and effective. But before you proceed, you need to get a Micro SD Card reader for the procedure.
Here’s how to connect GoPro to Mac without app;
Step 1: Open the bottom of your GoPro and the SD Card will pop out.
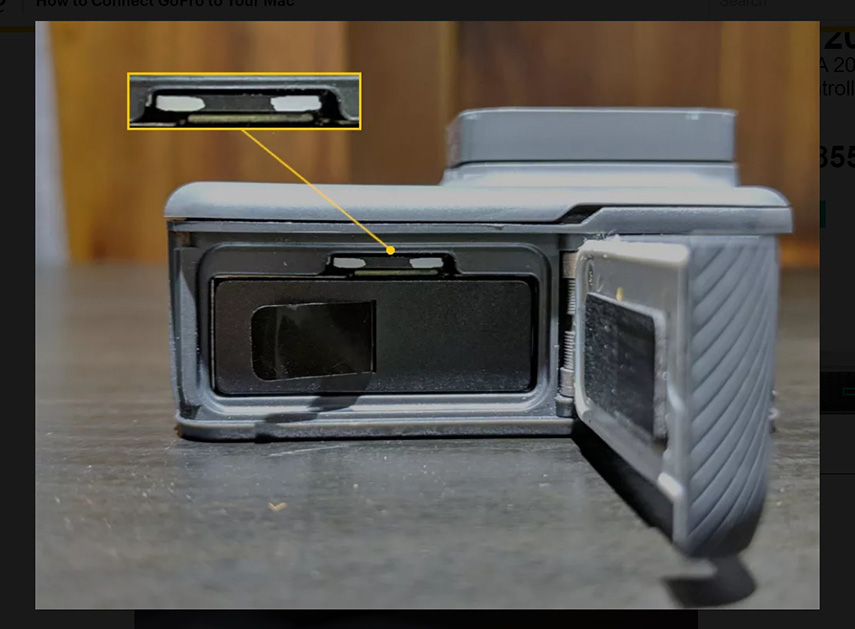
Step 2: Now, take that SD Card and connect it to the card reader.
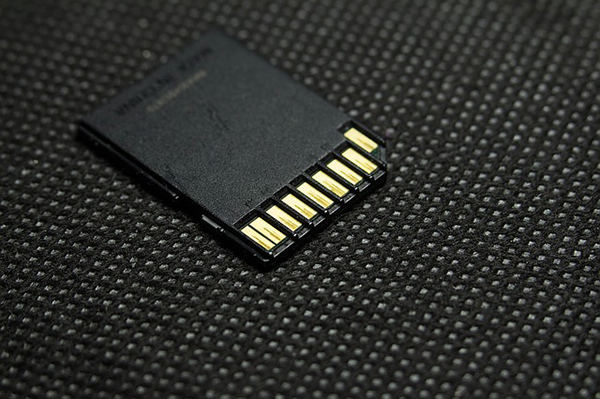
Step 3: Connect the said card reader to your Mac and launch the Finder app.
Step 4: You can click on ‘Untitled’ in the left side of the panel. If the SD card is showing a name, then click on that instead.
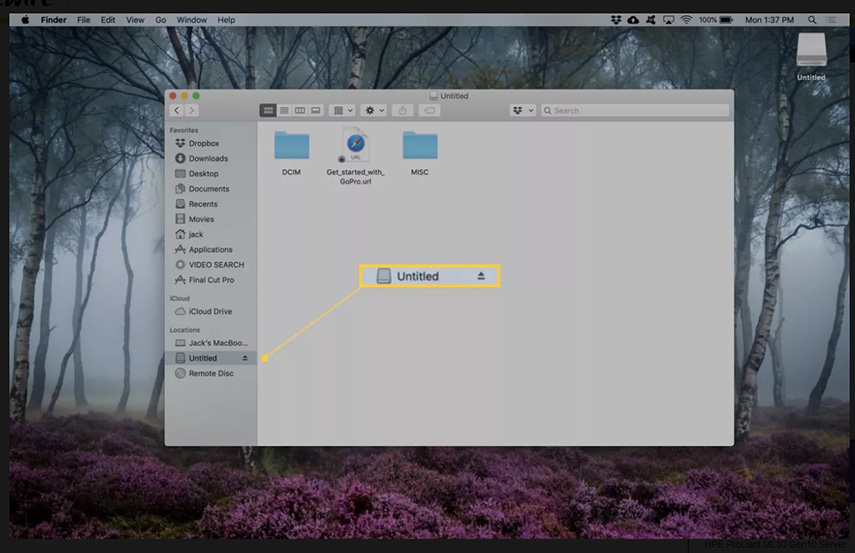
Step 5: Now, navigate to the folder named, ‘DCIM’ and click on the folder named ‘101GOPRO’.
Step 6: Select the files you want to copy and make a right-click on them. Click on ‘Copy Items’ from the drop menu.
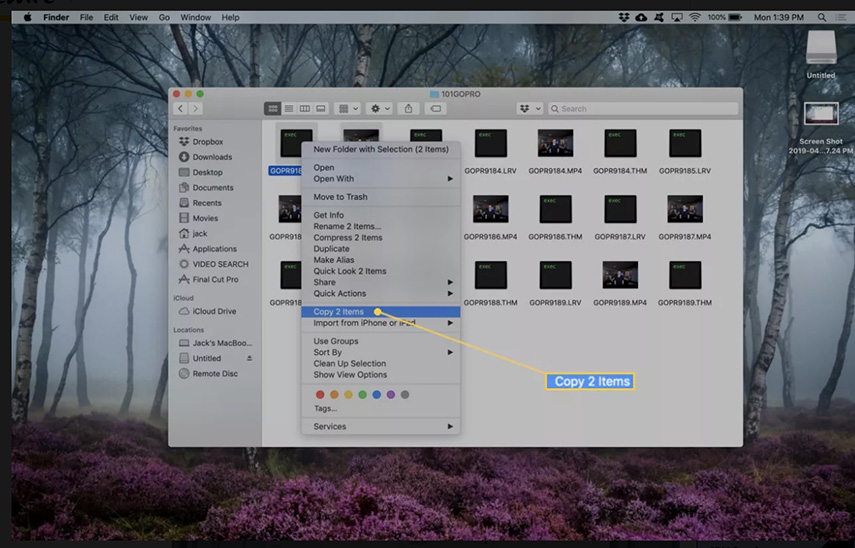
Step 7: Again, go to the Finder app and go to the location where you want to keep the files. Make a right-click and select ‘Paste Items’ from the drop menu.
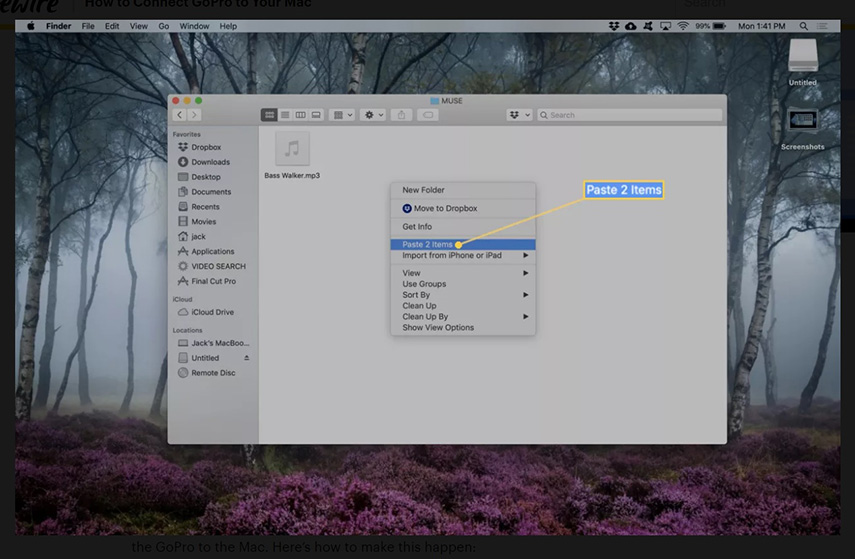
The data have been copied successfully. So, if you were asking how to connect GoPro Hero 3 to Mac? You should try this method. But if you don’t have access to a card reader, then try the other methods, detailed below.
Part 2: How to Connect GoPro to Mac without USB
“How to connect GoPro to MacBook Pro?”
If you are trying to connect GoPro to Mac without the USB, then your only option is to use a built-in program called the Image Capture.
Only a USB C Cable is required for this procedure which is needed as you have to connect the GoPro to the mac. Here’s how to connect GoPro Hero 5 to Mac,
Step 1: Use the USB C cable to connect the GoPro to the Mac.
Step 2: Then turn on the GoPro.
Step 3: Now, navigate to Launchpad from the Dock and type ‘image’ into the search box. Click ‘Image Capture; from the search results.
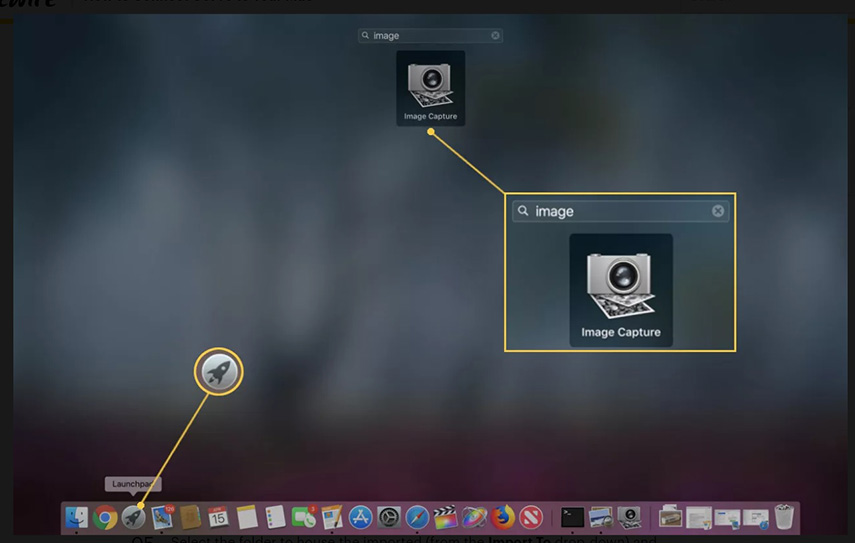
Step 4: After that, you need to click on your name in the GoPro. The navigation window will be on the left side.
Step 5: Now, you have to select a folder to keep all the imported files and click ‘Import All’.
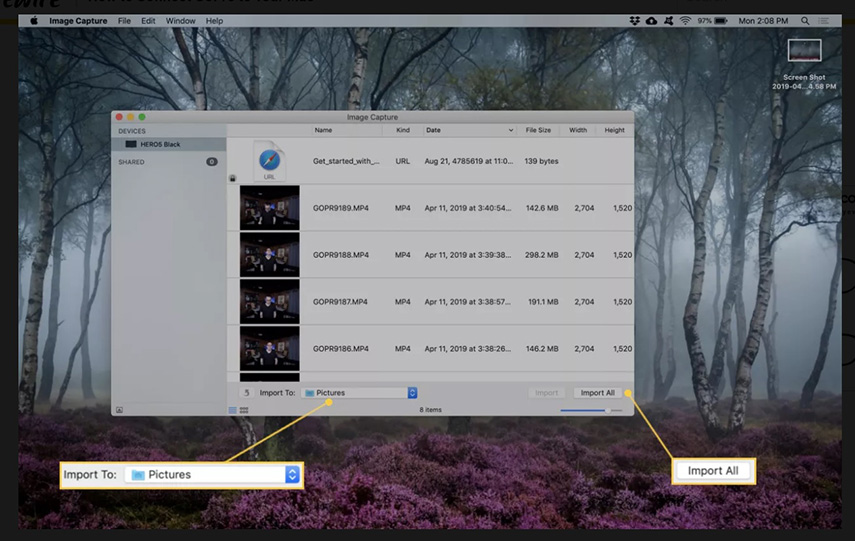
Step 6: The import will take a few minutes to complete. After that, just disconnect the GoPro.
So, the answer to your question; how to connect my GoPro to my Mac? Well, you will be able to do it very easily using the discussed steps via Image Capture.
Part 3: How to Connect GoPro Hero Session to Mac with Quik (a Free App)
GoPro has its own answer to, how to connect GoPro Hero 5 session to Mac? The answer is called Quik. This is a free app designed to provide you desired access; you will also be able to edit the files inside and enjoy all your GoPro photos and videos.
The installation is quite simple, similar to any other app installation on Mac. Here’s how to connect your GoPro to your Mac,
Step 1: So, connect the GoPro to your computer via USB cable and turn it on.
Step 2: Then, navigate to Launchpad on your Dock.
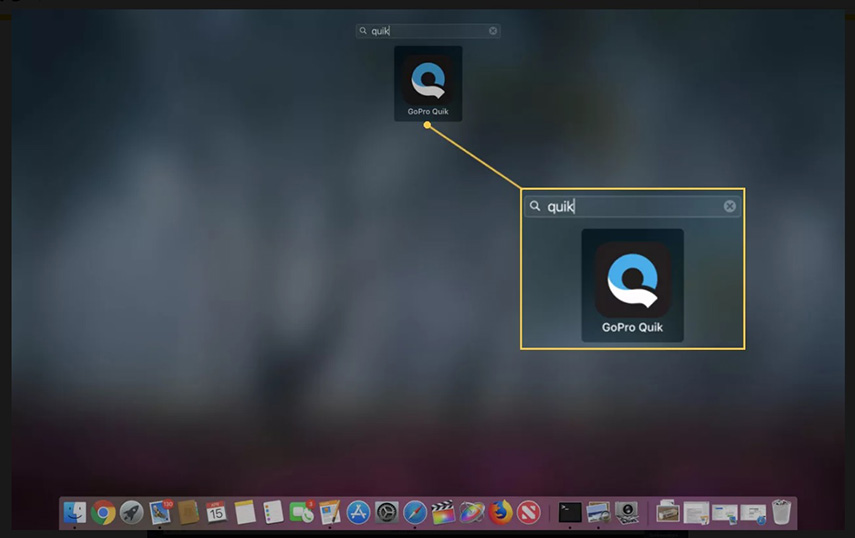
Step 3: Now, click on the GoPro Quik launcher.
Step 4: You need to login to your GoPro account using the associated username and the password.
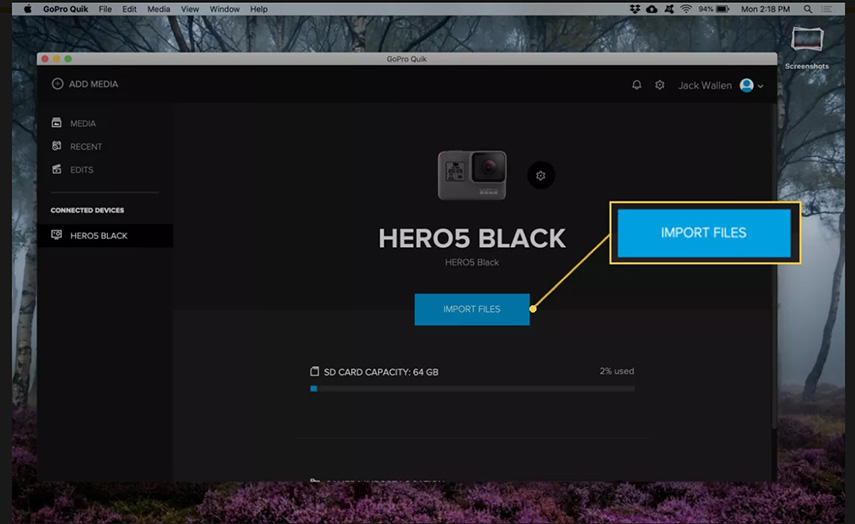
Step 5: Now, click on the ‘Import Files’ and wait for the import to get complete.
After the import, all the files will be available inside the ‘Movie’ folder, and they will be ready to use. Quik is a very useful answer on how to connect GoPro Hero 4 to Mac? You could give it a try.
Part 4: How to Connect GoPro to Mac via Wi-Fi
“How to connect GoPro to Mac Wi-Fi?”
Many users ask for tips on, how to connect GoPro to Mac wirelessly? Well, it is possible to connect GoPro to Mac over Wi-Fi, and the steps are pretty simple too.
But as the name of the procedure suggests, you have to have access to a stable Wi-Fi network to make this procedure successful. Here’s how to connect GoPro to Mac via Wi-Fi;
Step 1: Enable Wi-Fi on your GoPro.
Step 2: Set the camera mode to‘App’.
Step 3: Now, connect your Mac to the same Wi-Fi network. If you are asked for the password, provide it.
Step 4: After that, launch the Camera Suite App and choose ‘GoPro Hero 2/3/3+’.
Step 5: Then, press ‘Connect to Camera’.
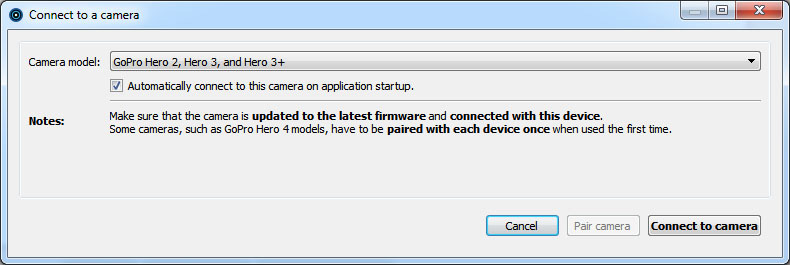
After pressing that button, a connection dialog will appear stating that your GoPro is connected successfully. This is how to connect GoPro to Mac without USB. You can give this method a try; it is quite convenient.
A Useful Tip: Lost Photos from GoPro?
You will be able to connect the GoPro to your Mac very easily using any of the discussed methods on the article above. So, in this part of the article, we are going to discuss the possible steps you can take if you have lost a few or all the photos from your GoPro.
It doesn’t matter how you lost the photos, but as soon as you lose them, you need to stop using the GoPro immediately and then seek a professional data recovery software.
There are numerous data recovery programs available, but the one we are going to recommend is called Tenorshare 4DDiG for Mac Data Recovery. It means you will be able to recover the photos from your GoPro via a Windows computer.
Tenorshare 4DDiG- Mac Data Recovery is an excellent program. It uses state of the art algorithm and equipped with advanced features, which enhances the recovery capability of the program. So, let’s look at the said advanced feature;
- The data recovery is possible regardless of the reason. The data can be formatted, deleted or it can even be lost accidentally from the GoPro but 4DDiG will effectively recover them.
- File recovery is effective and it can be done with ease.
- Tenorshare 4DDiG – Mac Data Recovery is capable of file recovery from hard drives, memory cards, dynamic disks and even from removable disks.
- The data recovery rate is close to 100%.
- Tenorshare 4DDiG – Mac Data Recovery is available at free of and equipped with features like a data scan and preview.
Tenorshare 4DDiG – Mac Data Recovery also provides a very useful and straightforward operating procedure alongside its advanced features. So, let’s take a look at how to recover those lost files via Tenorshare 4DDiG for Mac Data Recovery Data Recovery;
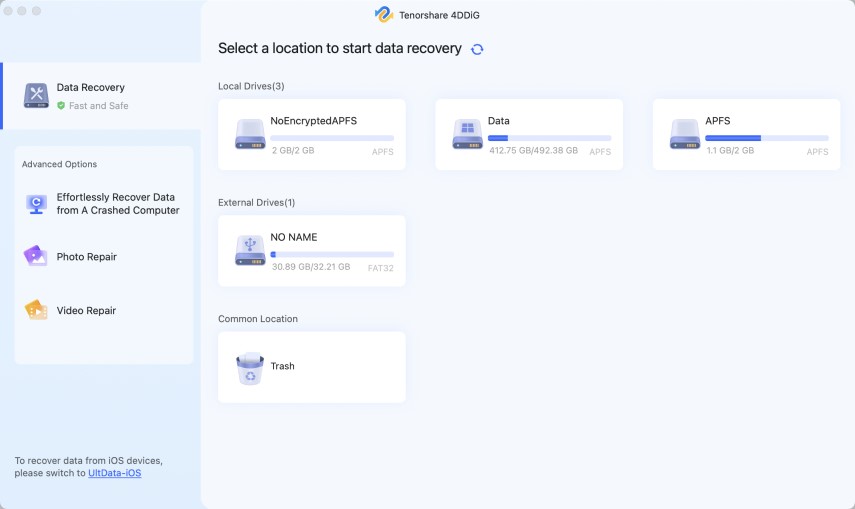
Step 1 So, you will have to download and install 4DDiG on your Mac. After the successful installation, run 4DDiG and select the GoPro SD Card to scan.
Step 2 After a while, 4DDiG will scan all data from your GoPro SD card so that you can select photos to preview.
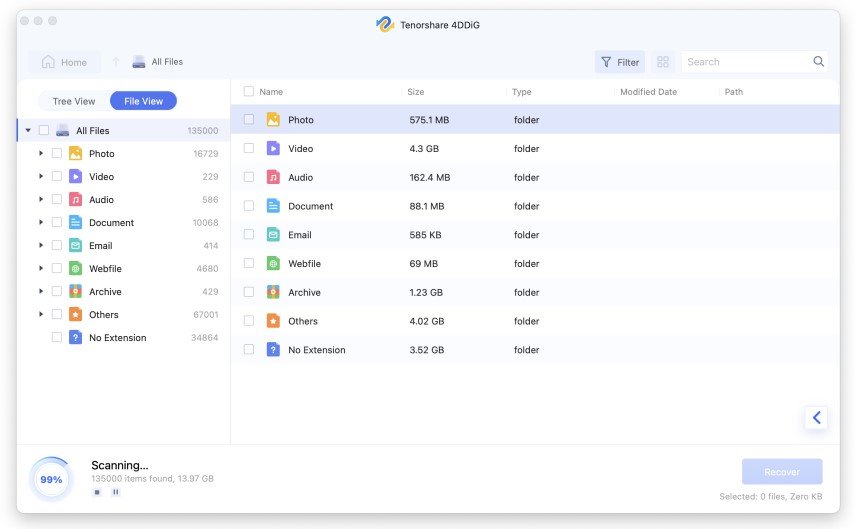
Step 3 During the preview, you can to click on the photos you want to recover, then click ‘Recover’to restore them.
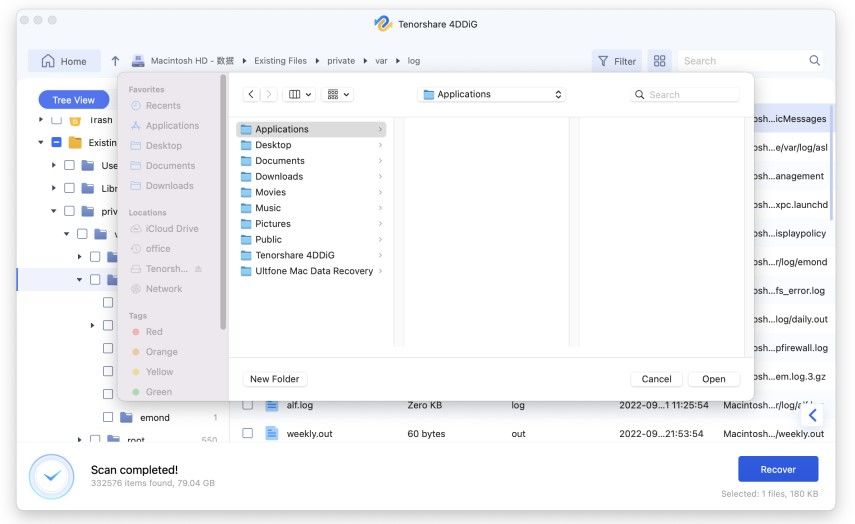
The photos will be recovered after a few minutes. But you must not restore directly on the SD Card, restore them on any other partition.
Conclusion
Hence, if you are still confused about; how to connect GoPro Hero 7 black to Mac? Or how to connect GoPro hero session to Mac? Take a good look at the above article again. We have discussed different ways to connect a GoPro to Mac for transfer of files, editing etc. All 4 methods are different; you can use any as per your convenience. Also, if you have lost files from your GoPro, then you will be able to make the immediate recovery of those files using Tenorshare 4DDiG Mac Data Recover
.Speak Your Mind
Leave a Comment
Create your review for Tenorshare articles


