How Do I Fix macOS Catalina Could Not be Verified
“I was pumped up about the new macOS Catalina. But after downloading the OS, I am getting an error message while trying to install it. How do I fix this?”
macOS Catalina Could Not be Verified is a common error message that came with macOS Catalina. A lot of users have complained about this issue on the official forums but not to worry; there are fixes available that will help you to install this latest Operating System on your Mac successfully. The article below contains all the fixes for this particular error of macOS Catalina, have a look:
- Part 1: Why macOS Catalina Could Not be Verified
- Part 2: How to Solve macOS Catalina Could Not be Verified?
- Extra Tip: How to Recover Disappeared Files after macOS Catalina Update
Part 1: Why macOS Catalina Could Not be Verified
Before we get to the solutions for macOS Catalina Could Not be Verified, you should learn about the reasons behind this daunting error.
There could be quite a few reasons behind this particular error, take a look:
- Check macOS Catalina Compatibility
There could be a compatibility issue. It is possible that the Mac model you are using or trying to update is not compatible with the new macOS Catalina. It could be the reason behind the said error. - macOS Disk Running Error
A disk running error with the macOS could lead to the said error during the installation. - Storage Space is Not Enough
The size of any version of macOS is quite large. And due to that fact, huge storage space is required for the installation. If you don’t have enough space, then macOS won’t install. - Old macOS Installation Files in Application Folder
If the old macOS installation files are still available inside the Application folder, then macOS Catalina could show the said error. - Poor Wi-Fi network
During the installation of macOS, a strong internet connection is required. So, if you are updating macOS via Wi-Fi, then the poor connection can lead to such results.
Part 2: How to Solve macOS Catalina Could Not be Verified?
Here are the most effective solutions for fixing macOS Catalina Could Not be Verified, issue. Take a look
- Way 1: Change System Date and Time on your Mac
- Way 2: Reboot Your Mac and Install macOS Catalina Again
- Way 3: Boot into macOS Recovery to Run First Aid
Way 1: Change System Date and Time on your Mac
It is possible that due to the wrong date and time on your Mac, Apple servers are having difficulty to verify the newly downloaded macOS Catalina. Here are the steps:
- Step 1: Simply, go to the Apple menu and click on ‘System Preferences’.
- Step 2: Then, navigate to ‘Date & Time’.
- Step 3: In the ‘Date & Time’ panel, you need to make sure that you have chosen ‘Set date and time automatically’. Also, connect the Mac to the internet.
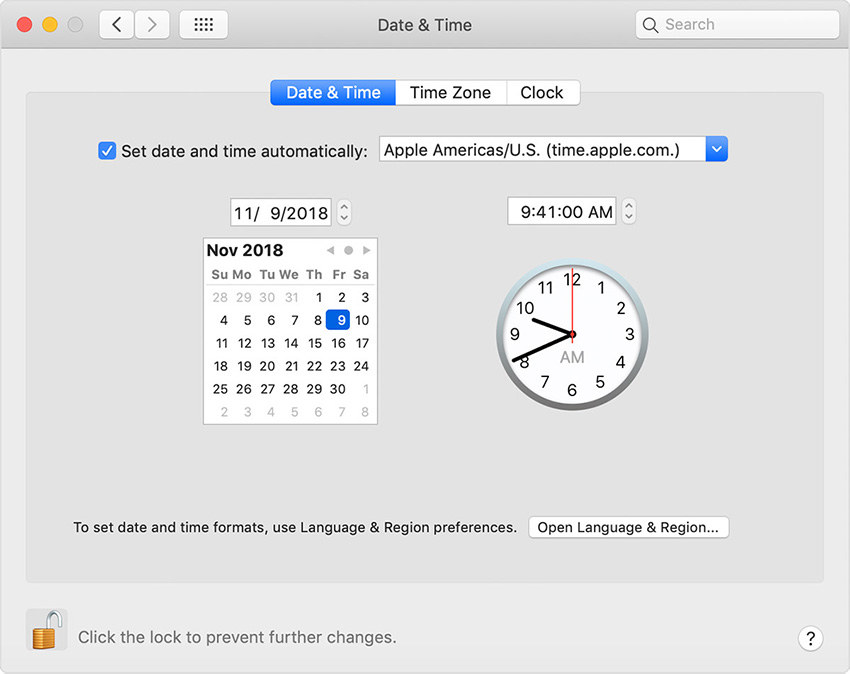
If you don’t have an internet connection, then you have to set the date and time manually. You also need to deselect ‘Set date and time automatically’.
Way 2: Reboot Your Mac and Install macOS Catalina Again
So, if you are unable to install macOS Catalina even after successfully downloading it. Then you need to use the following steps in order to execute the procedure successfully:
- Step 1: First, reboot the Mac.
- Step 2: After the reboot, open ‘System Preferences’ and click on ‘Software Update’.
- Step 3: Mac will search for the update. After it finds it, click on ‘More Info’.
- Step 4: Then, click ‘Update Now’ and you are ready to update. You will be asked to restart the device. You can choose between ‘Not Now’ and ‘Restart’.
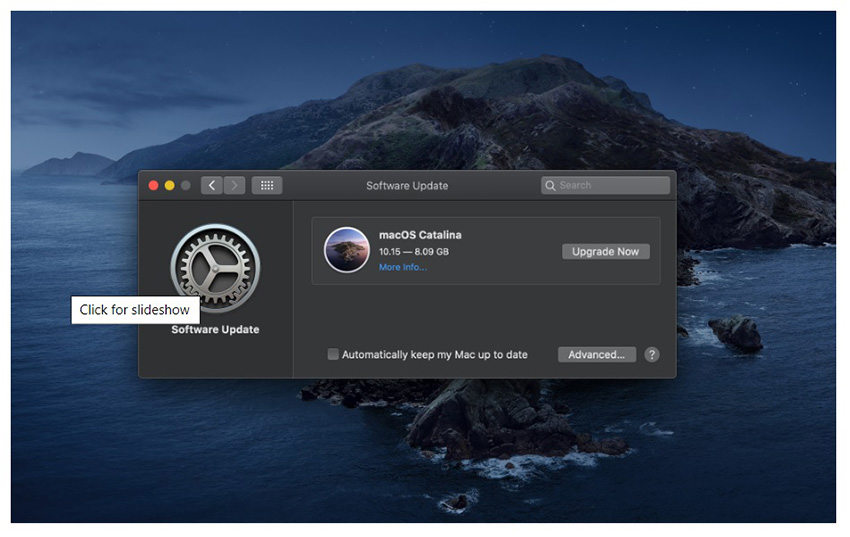
Possibly you will have a successful installation of macOS Catalina, now.
Way 3: Boot into macOS Recovery to Run First Aid
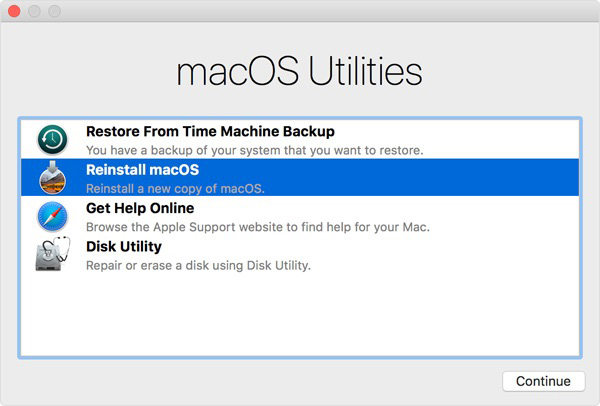
You can also boot Mac into Recovery Mode and try to complete the installation. There is an option called ‘First Aid’, you need to run it in Recovery Mode. Here are steps:
- Step 1: Turn on Mac, press and hold ‘Command + R’ keys immediately after hearing the startup music.
- Step 2: You need to hold those keys until the Apple logo is visible on the screen. The utility window will be visible on the screen.
- Step 3: Choose ‘Disk Utility’ from the window and click ‘Continue’ to proceed.
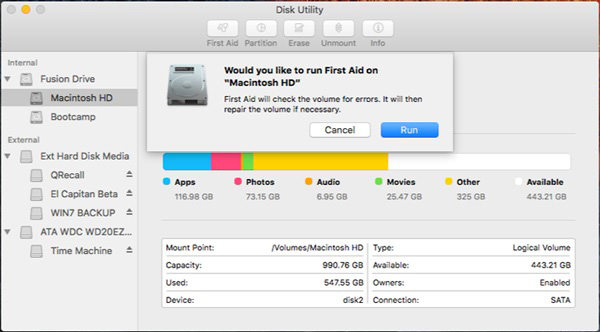
- Step 4: Then, choose the drive that you want to repair.
- Step 5: Click on ‘First Aid’ at the top of the utility window.
- Step 6: Lastly, click on the ‘Run’ button to continue.
Extra Tip: How to Recover Disappeared Files after macOS Catalina Update
Now, it is possible that after all that trouble you went through for installing macOS Catalina; some files from your Mac may disappear. It is a common glitch of macOS Catalina and numerous users have complained about it.
So, if you are facing data loss after the installation, then you need to recover them immediately. As more time goes by, the chances of recovery get lower. It will be helpful for you to use a professional data recovery program.
Such programs are genuine and designed specifically for data recovery. We recommend using, Tenorshare 4DDiG. It is close to a perfect data recovery program with an outstanding success rate. The steps are also very safe and simple too. Take a look:
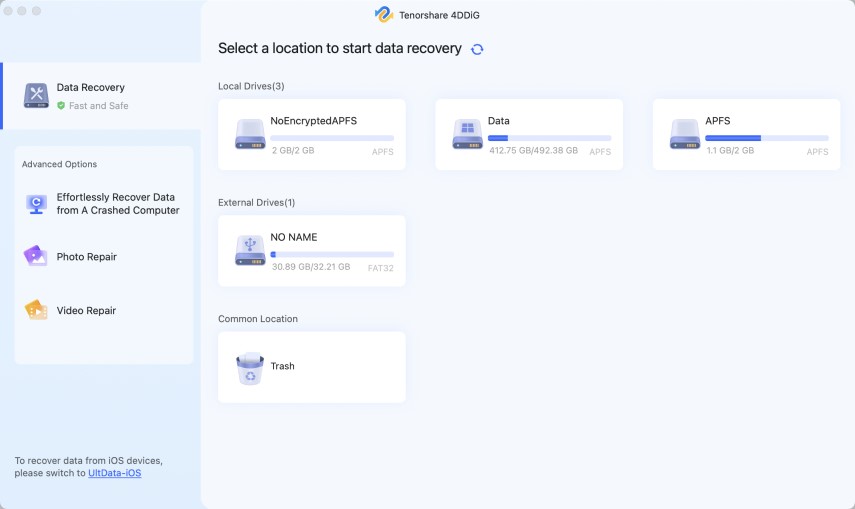
Step 1 Start by download and installation of Tenorshare UltData on your Mac. Upon completing the installation of the program, run UltData. Select the location of the disappeared data on your hard drive and click “Scan”.
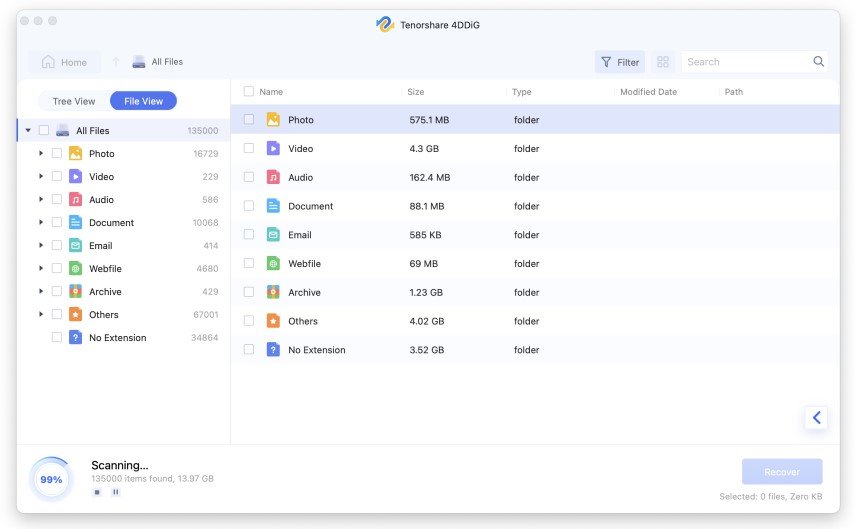
Step 2 The complete scan of the partition will take more than a few minutes. After the scan is complete, the results will be displayed on the screen.
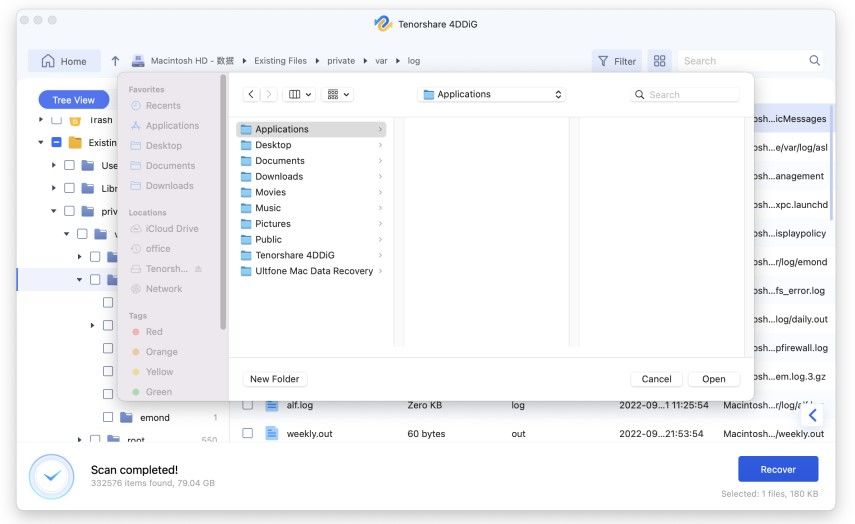
Step 3 Now, you need to choose files from the scan results. The files that were lost after the installation of macOS Catalina. Then, click on the ‘Recover’ button below. You are also required to select a location for the recovered files but choose a different partition, instead of the partition from where they were list initially.
Tenorshare UltData is one of the most effective data recovery programs out there and it is quite excellent. Use it without any hesitation if you have lost a few files from your Mac.
Video Guide: How to Recover Lost or Deleted Files on macOS Catalina?
Conclusion
Hence, macOS Catalina Could Not be Verified is one of the most recognized errors that came with macOS Catalina. And due to that fact, there are quite a few ways available to fix the said issue and complete the installation successfully. But after the successful installation of macOS Catalina, you may have to face another recognized error with the said OS. Lost files! It has happened with numerous users and most of them were unable to recover those files. But if it has happened to you after the installation, then immediately download and install Tenorshare 4DDiG for Mac Data Recovery and use its advanced features to recover those lost files within a few minutes.
Speak Your Mind
Leave a Comment
Create your review for Tenorshare articles


