Step-by-Step on How to Wipe a Mac/Macbook Pro/Mac Air
Have you ever thought about how to wipe a mac to give away? Sometimes you might also want to erase mac before selling or just want to refresh installation of your mac. In this case, how do you wipe a macbook comes to an intractable job. Here are some suggestions available for you.
- Step 1: Before You Wonder How to Erase Everything on a Mac, Have a Backup
- Step 2: Checklists Before You Wipe a Mac Clean
- Step 3: Step 3: How to Delete Everything off Macbook with HDD (Hard Drive Disk)?
- Step 4: How to Completely Wipe a Macbook If Your Mac Comes with SSD (Solid State Disk)?
- Bonus Tips: The Best Mac Data Recovery Software 2019
Step 1: Before You Wonder How to Erase Everything on a Mac, Have a Backup
Usually, before you consider to donate your old mac or resale, there is something you should never forget to do: have a backup, then how to erase and reinstall mac os. There are two ways to back up all data on your mac, which are as bellows:
1.1 Have a Backup with Time Machine.
There is no denying that Apple always affords best experience to users. Time Machine is definitely one of the best built-in applications. Any Apple user can access this to back up important data on mac. It is very simple to use this when you urgently need it.
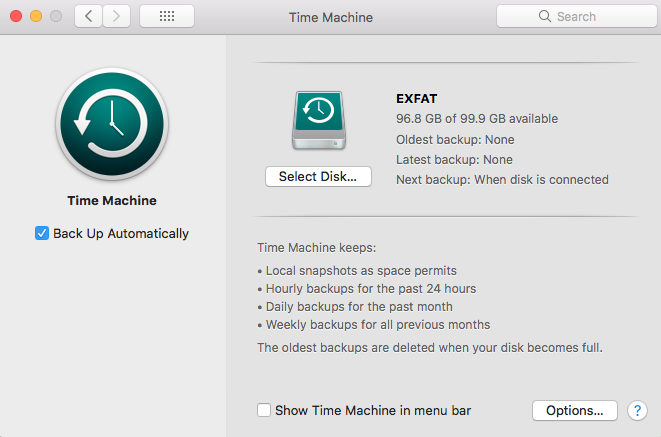
Step1: Select an External drive such as a USB, Thunderbolt or FireWire drive
Step2: Turn on Apple menu at top left corner >System Preferences >Time Machine
Step3: Choose Backup Disk, select your external drive and click Use Disk
Pros:
- Totally free.
- Run silently in the background.
- Timely Backup Data.
Cons:
- Only support an apple specific HFS+ file system to store backups.
- Backup doesn’t record differences inside files.
1.2 Sign in iCloud and Store Files on Mac.
Maybe you forget to use iCloud as useful tool to store files. It is really helpful way to backup data across all of your devices. You can add files from Mac Desktop and Documents folder to iCloud Drive.
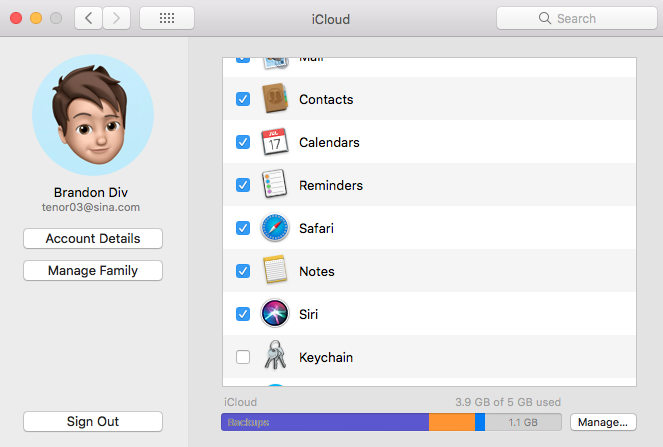
Step1: Turn to Apple menu > System Preferences, click iCloud.
Step2: Log in with Apple ID
Step3: Select iCloud Drive
Step4: Choose Desktop & Documents Folders
Pros:
- Easy to use.
- Support multiple iOS devices to store files.
Cons:
- Limited storage space.
- Part of documents can be stored.
Step 2: Checklists Before You Wipe a Mac Clean
After your files are backed up, then bear in mind that any services should be disrupted from your system. Sign out of iTunes, iCloud, and iMessage, interrupt connection with Bluetooth and erase touch bar data.
List 1: Cancel iTunes Authorization
Why do you need to deauthorize iTunes? Because 5 Macs at most can be authorized up. And therefore be sure to sign out of iTunes account. How to cancel iTunes authorization, please turn on iTunes, click Account at the top of screen > Deauthorize This Computer. Just two easy steps to securely deauthorize your Mac.

List 2: Sign out of iCloud
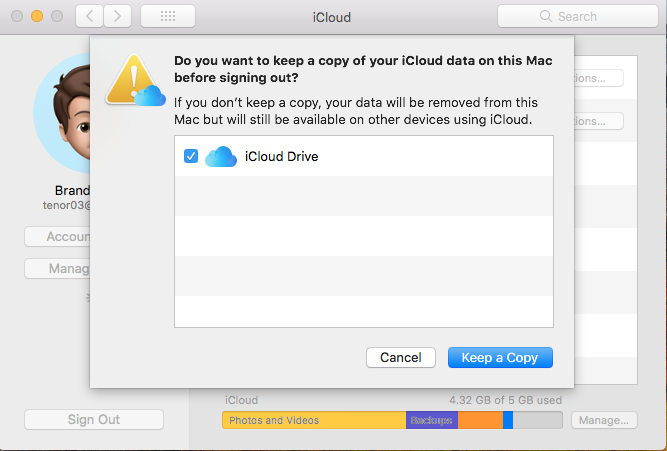
Make sure that some data including note, reminders, bookmarks, etc... are invisible to new owner if you want to sell it. You can directly go to menu bar > System Preferences > iCloud and choose Sign Out. After you sign out of iCloud, these private data are safely kept away from others.
List 3: Sign out of iMessage
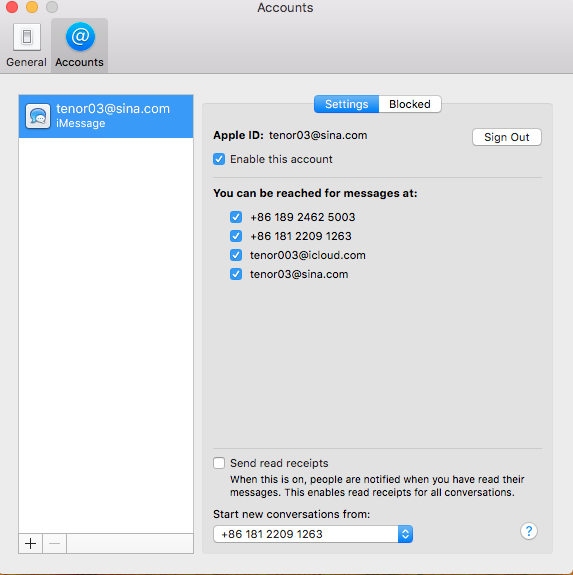
Similarly, don’t you wanna block someone to read private messages? On the safe side, open iMessage and click Messages at the top of your screen> Preferences> iMessage account, click sign out. Simple process to get your iMessage account signed out.
List 4: Disable Pair of Bluetooth Devices (Optional)
In case the Mac and Bluetooth devices have each owners on their own but still keep within Bluetooth range, and you really want to keep these devices, please unpair them.
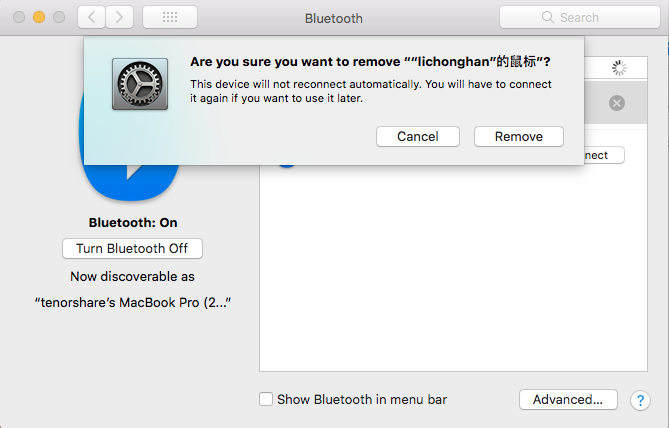
Choose Apple menu>System Preferences, and click Bluetooth, select the device you want to unpair, then click (x) button, finally a pop-up prompts you to cancel or remove, just choose remove button.
List 5: Clear Touch Bar Data
Apart from above about how to wipe your mac, all touch bar data on your Mac is also advised to be erased clearly. Take following steps to achieve the last checkup thing:
Step1: Restart your Mac and immediately try Command+R keys combination(when apple logo appears)
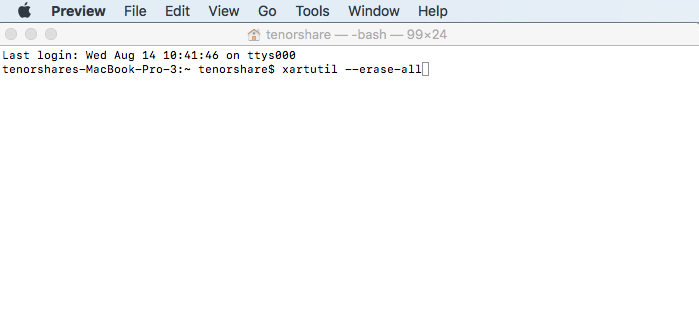
Step2: Select Utilities, then choose Terminal from the macOS Utilities window
Step3: Key in command “xartutil--erase-all” and press return.
Step4: You will be asked and type yes to go on.
Step5: Choose Terminal to quit.
Step 3: How to Delete Everything off Macbook with HDD (Hard Drive Disk)?
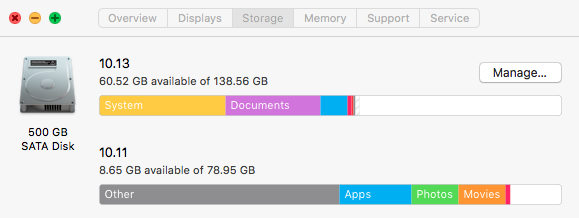
You may wonder what is HDD? It shows below as SATA Disk in the Storage system:
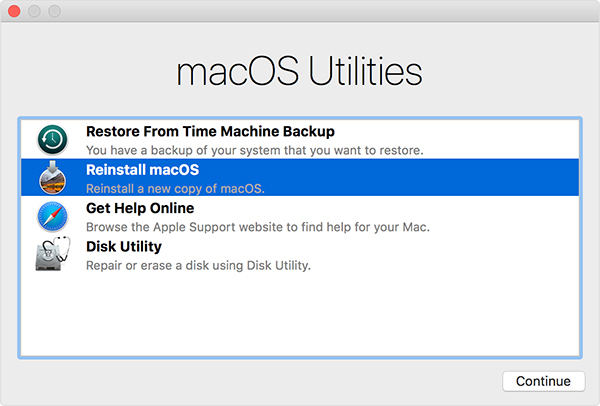
Now, you need to start from macOS Recovery. Please turn on your mac and immediately try one of following key combinations, the Command (⌘)-R is currently recommended.
1. Command (⌘)-R: The latest macOS will be reinstalled
2. Option-⌘-R: You’re able to upgrade to the latest compatible macOS
3. Shift-Option-⌘-R: Install macOS that comes with Mac or the closest version that is still available
After you enter into recovery mode, please take following steps to move forward:
Step1: Wait until "macOS Utilities" window appears
Step2: Select "Disk Utility"
Step3: Choose your startup disk in the sidebar
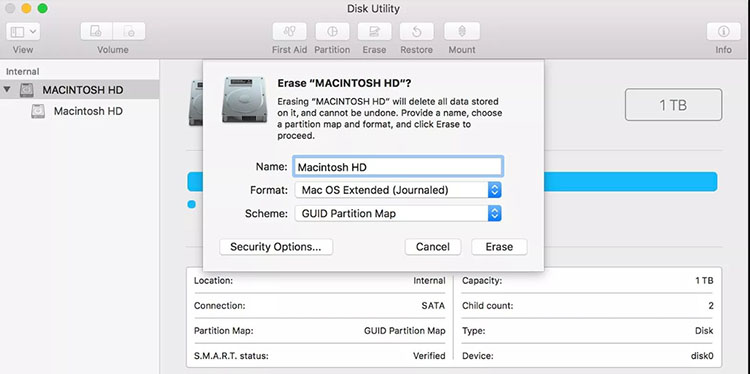
Step4: Click Erase button
Step5: Enter a Name for the disk, choose Mac OS Extended (Journaled) or APF for formatting, and GUID Partition Map for scheme
Step6: Click Security Options (appropriate for HDD) and choose how many times you would like to write over
Step7: Continue to click Erase and exit Disik Utility once completed, then back to main macOS Utilities window
So next, what should I do with my mac? If you don’t want to keep it for yourself, you'd better hold down the Command and Q keys, and then Shut Down the Mac. Otherwise, move to another topic with respect to how to wipe mac clean and start over. Here is the way concerning how to erase and reset mac:
Step 1: Back to macOS Utilites window
Step 2: Click Reinstall macOS
Step 3: Maintain adequate power supply if you’re using a MacBook
Step 4: Click Install and complete set up process
Step 4: How to Completely Wipe a Macbook If Your Mac Comes with SSD (Solid State Disk)?
In comparison with HDD, SSD is kind of hard to be erased to zero by way of standard operation. More, SSD on Mac usually exhibits Solid State SATA Drive plus a Super Drive.
As Apple puts it "With a solid-state drive (SSD), secure erase options are not available in Disk Utility. For more security, consider turning on FileVault encryption when you start using your SSD drive."
You can choose to turn on FileVault, enter your Mac into its Recovery System (restart the Mac while holding down the command and R keys like the HDD mentioned before), and use Disk Utility to erase all data from macbook pro/macbook air after you’ve unlocked it (select the disk > File >Unlock).
Bonus Tips: The Best Mac Data Recovery Software
After you know how to clear mac before selling, you might start to think about what if I lost important data on my Mac? Yes, what should I do to restore data? Tenorshare 4DDiG for Mac Data Recovery can be your good tool to solve this troublesome question. No matter what kind of files, audio, photos, videos, document and etc, almost including over 550 files supported within this software.
Step 1 Select Any Location You Want
Open 4DDiG for Mac Data Recovery after you successfully download. Choose the location you want to scan to fine lost files, documents, videos and other audios.

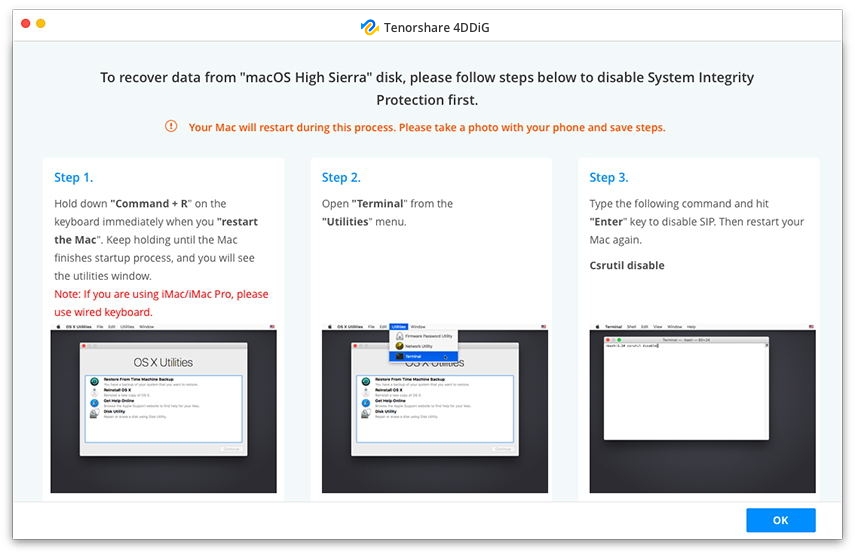
Note: If your Mac is loaded with macOS High Sierra and later system, you need to disable SIP first to allow access of Mac files.
Step 2 Continue to Scan and Preview
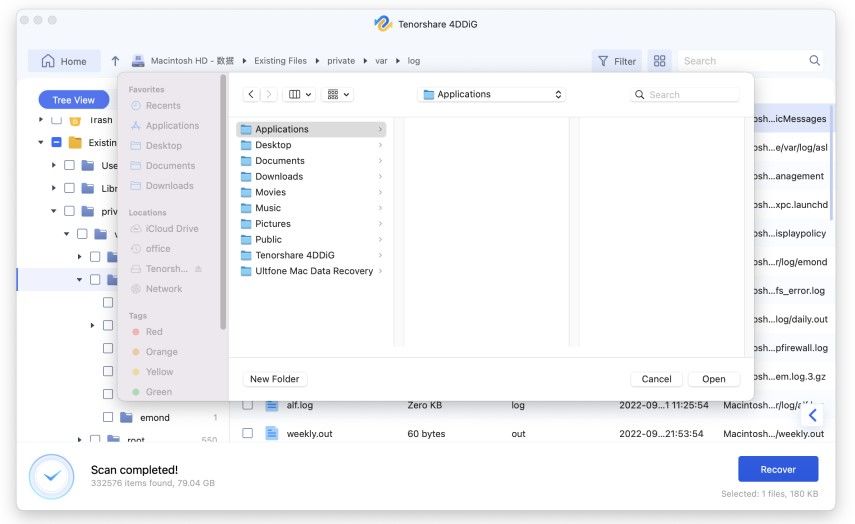
The scan result will be shown below and you are able to look through the majority of files from the location you choose from the beginning.

Step 3 Select Files to Recover
Select files and click Recover button. Warm prompt: do not save the recovered files to the partition where you lost them.
Conclusion
Next time you come across how to wipe a macbook to factory settings or how to clear a macbook pro to sell, remember have a backup on your Mac. More importantly, differentiate SSD and HDD, fully take advantage of respective way to solve disk erase problem when you accidentally feel overwhelmed by them. Of course, in the process of erasing all data on your Mac, it is hard to avoid that data may unexpectedly appear in such situation. If you’re unlucky and have to tackle with that, Tenorshare 4DDiG for Mac Data Recovery is just in time for you to recover lost data. With this software, data is perfectly safe on your Mac.
Speak Your Mind
Leave a Comment
Create your review for Tenorshare articles


