How to Fix Mac Big Sur Stuck on Boot Screen? Top 4 Ways Here for you!
There are a lot of people asking this question- "I updated Mac OS Big Sur, unfortunately it is locked on boot screen for nearly an hour." So, here we are answering to all your doubts and clearing it cut to cut. Sometimes it happens that your Mac is stuck on Mac Big Sur on boot screen, there could be lot of reasons for which you are facing it. Such as "connection issue, space, and, etc." Check out the details down below, I'm you're going to find all your answers over here.
- Part 1: Possible Causes of Mac Big Sur Update Stuck on Boot Screen
- Part 2: 4 Ways to Fix Mac Big Sur Stuck on Boot Screen When Update
- Extra Tips: How to Recover Deleted or Formatted Data on MacOS
- Releated Problems You May Want to Know
Part 1: Possible Causes of Mac Big Sur Update Stuck on Boot Screen
There can be many reasons that may cause the problem of getting stuck on Mac OS Big Sur on boot screen. Here are couple of prerequisites in which you might be lagging for Mac OS Installation.
- Storage: Before updating your Mac, you must be having at least 10 GB of storage left in your computer. If not, you're most likely to get this issue.
- Disable Firewall: If you are having any antivirus installed in your computer or firewall enabled, make sure you disable it before updating your Mac or else you may end up with this error.
- Internet Connection: Lot of users have slow internet connection due to which the Mac OS is waiting for internet connection all the time. You need to connect your Laptop directly with the Ethernet cable rather than connecting it with Wi-Fi. If connection with Ethernet cable is not possible, try to reset your router or switching to different and more stable Wi-Fi network.
- Apple Credentials: Punching in incorrect Apple ID credentials will result in denying your request by Apple Server.
Part 2: 4 Ways to Fix Mac Big Sur Stuck on Boot Screen When Update
1. Uninstall some agents/services
Uninstalling the wrong software agents from your laptop may bring you some help. Here's how.
- Open the terminal window.
- Run the following command as it is.
sudo /Applications/N-agent/usr/sbin/uninstall-nagent
2. Installed the latest beta
Open the safari browser on your Mac followed by heading to developer.apple.com. Now, you have to log in to the Apple Developer. Once you're in, click on the "Enroll your Device" option followed by choosing MacOS.

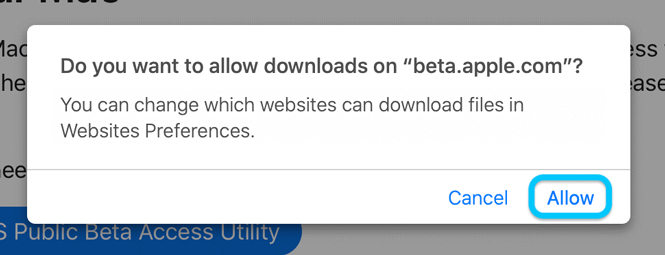
Scroll a bit and you'll find the "Download the macOS Public Beta Access Utility" option, click on it followed by choosing the "Allow" button.

After that you have to open the "downloads" folder of your computer, find "beta utility.dmg" click on it.

- Now, launch ".pkg installer" and follow the appearing prompts. Afterwards, open the "System Preferences" on your laptop followed by clicking on "Software Update".
Your macOS Big Sur public beta version is ready, click on "Download and Install" and you're done.

3. Release the storage (remove apps)
If you are updating your Mac, you must have at least 10 GBs of free space on your laptop. Try to remove some of the unused application, path is given below.
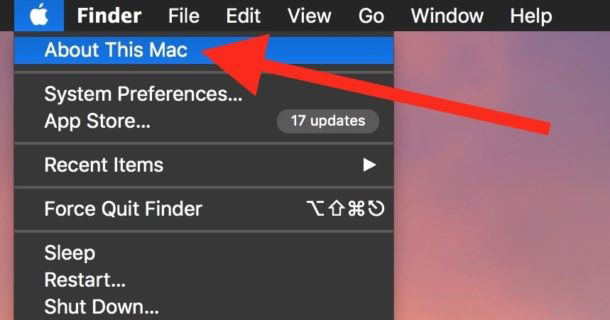
Open the Apple menu followed by going on "About this Mac".

In the following window you will find the "Storage" tab followed by clicking on "Manage".

Lastly, remove the applications that you do not require to free up space.

4. Clean install
Note: You may wish to backup all your important data in the first place.
- Firstly, you need to restart your Mac.
- Then, hold "command + R" key simultaneously on the keyboard. Keep on holding the keys until and unless you see the startup sound followed by "MacOS Utilities window" screen.
- Click on the last option that is "Disk Utility" followed by Selecting "Macintosh drive and Erase" to install the new MacOS. Now, proceed to erase all of your computer data by using "Erase" option.
Proceed to "MacOS Utilities window" after closing "Disk Utility window".

- Click on "Reinstall MacOS" and connect your Mac with Wi-fi network so that your laptop can download latest version of MacOS.
- Once you have successfully done all the above processes, the installation of process of the new version will start downloading. Well, the process completion is totally dependent upon how fast your internet speed is.
You may also want to know Top macOS Big Sur Update Problems and Solutions.
Extra Tips: How to Recover Deleted or Formatted Data on MacOS
Nothing in this world is certain and so as the crucial data on your computer. There are possibilities that you accidentally wipe off all your important data on your computer. But worry not, you just saved yourself by landing over here as we are talking about the best Mac data recovery tool, 4DDiG for Mac Data Recovery Data Recovery. It can solve all kinds of data loss problems. Not only this there are lot to come, let's see what are some cool features of this application that are going to blow your mind away:
- Recover your data in just 3 simple steps.
- Recover any data that is lost or formatted on Mac.
- Also, you can recover your deleted files from external devices (hard drive).
- The most awesome feature is you can recover your data from the dead computer as well.
- Don't worry about your data the recovery rate of your data is really high and 100% secure.
- You can also run this application on the latest macOS 10.15 Catalina.
Let's rock and roll and check out how are going to commit this process.
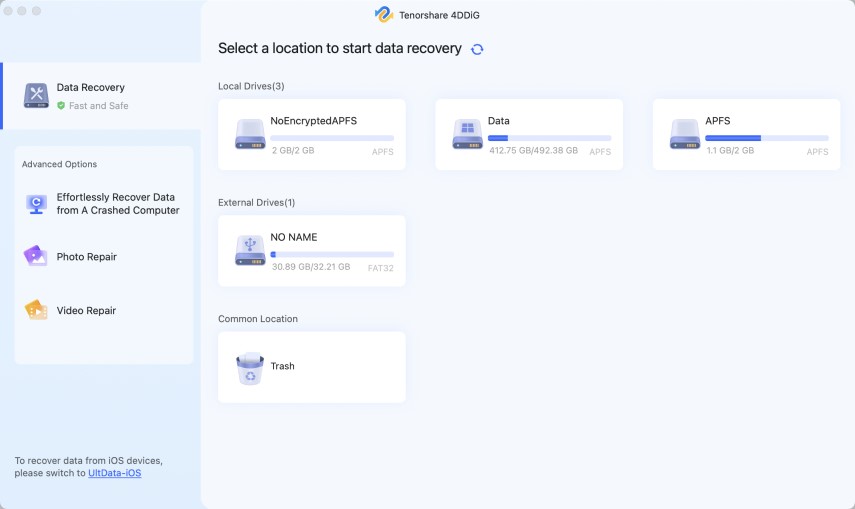
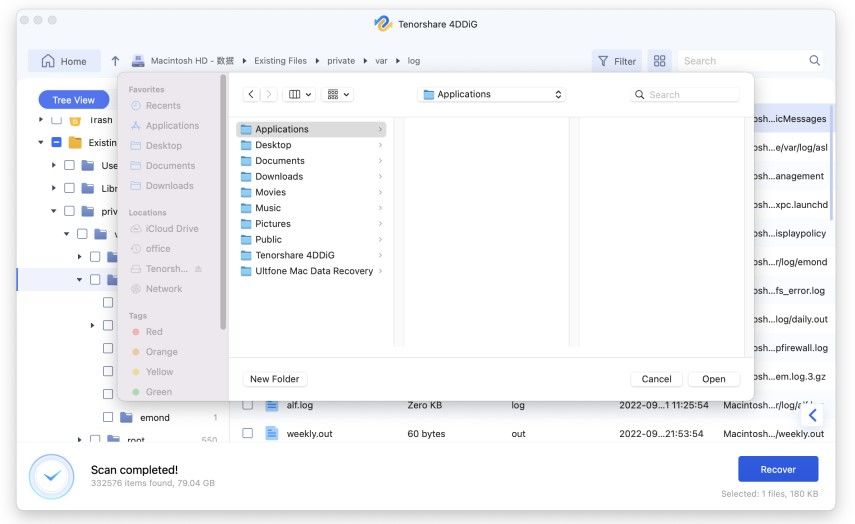
The first step is to install the UltData – Mac Data Recovery on your Mac. Launch it and select the location to start the recovery process followed by clicking on the "Scan" button.

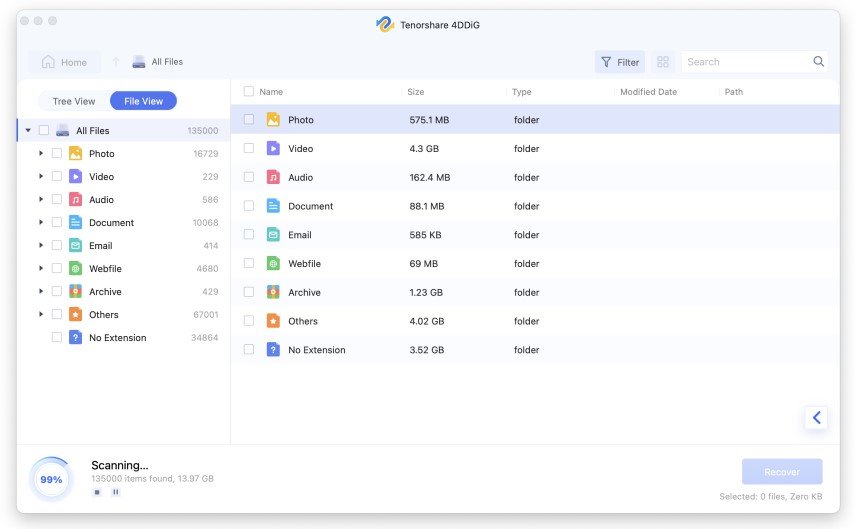
Once you are done with the scan, you can see all the deleted files on your results screen. You may also check the details of the deleted files just by clicking on the file.

Once you've found the file you were looking for, you can click on the "Recover" button and select the location where you want to save your found file.

Releated Problems You May Want to Know
Q1: MacOS Big Sur - Login "hanging"
All you need to do is boot your Mac on the recovery mode and reinstall the new OS, after erasing your hard drive. If the data is important, backup all your data.
Q2: MacOS Big Sur: The startup chime is back
People downloaded "MacOS Big Sur" Beta version have reported that startup chime is back now.
Conclusion
In this article, we have talked about how you can fix you Mac if you are also stuck on the Mac Big Sur on boot screen. We have discussed all the possible way through which you can fix you laptop and run it as it was never stuck. This problem occurs due to- not having enough space, connectivity issues, or maybe you've installed wrong software agent. Don't you worry about anything, we have everything what you need. Go check it out and solve it ASAP.
Speak Your Mind
Leave a Comment
Create your review for Tenorshare articles


