Troubleshooting Guide: Secure Check Fail Recovery Note 4
Are you having issues while flashing your Note 4? Do you get this error, "SECURE CHECK FAIL: Recovery" on your phone? If so, then this article is just for you. If you have flashed your Samsung Note 4 using Odin and got Odin SECURE CHECK FAIL: Recovery error, then it means you have to follow some steps to fix it.
Most people reset their devices which is not the correct method. In this post, we will share how you can fix the issue. Continue reading to find the solution.
- Part 1: Why Am I Getting the Error: Secure Check Fail: Recovery?
- Part 2: How to Fix Note 4 "Secure Check Fail Recovery" Error?
- Bonus Tips: How to Fix Samsung Recovery Mode not Working?
Part 1: Why Am I Getting the Error: Secure Check Fail: Recovery?
Sometimes when you are trying to flash custom recovery on your Samsung Galaxy Note 4, you may find your device get stuck in SECURE CHECK FAIL: Recovery. This error can occur because your device is not compatible or you have downloaded the corrupted files. Apart from them, there can be many reasons why you get this error while Rooting Samsung Note 4. Some of them are mentioned below.
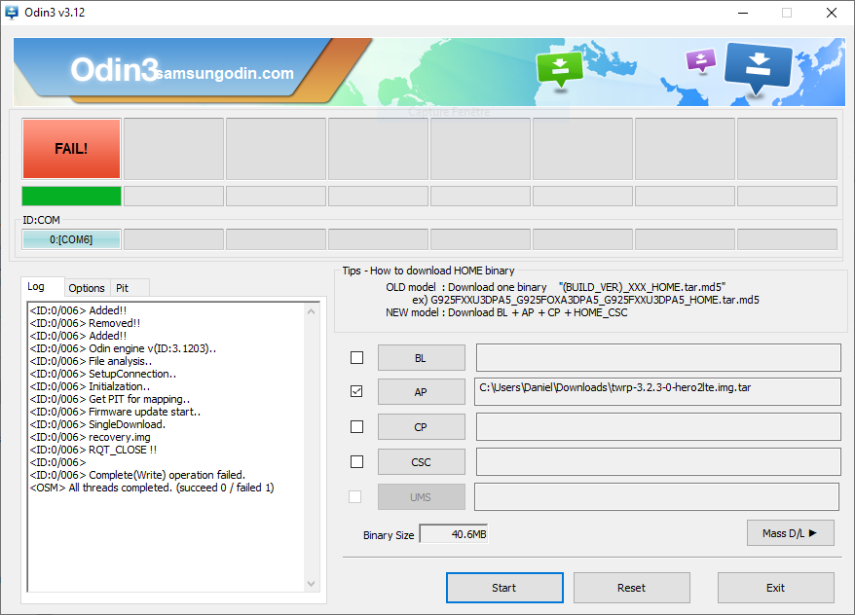
- You haven't downloaded the correct ROM, or the file that you have installed is corrupted. Or you haven't confirmed the MD5 signature tag.
- You have a locked bootloader which is the common reason why you get a recovery failed error.
- The firmware that you have used is not compatible with your device.
- You haven't used the Micro-SD card.
These are common reasons why the odin secure check fail recovery error occurs. But don’t worry, below we have mentioned some steps that you can use to fix this issue. Check the details below to get more information.
Part 2: How to Fix Note 4 "Secure Check Fail Recovery" Error?
How to fix secure check fail: recovery.img error on Samsung Note 4? Here are three different solutions that you can use to fix Note 4 secure check fail recovery issue. Let's discuss them one by one.
- Way 1: Check If the ROM You Downloaded Is Corrupted
- Way 2: Use a Micro-SD Card
- Way 3: Deactivate "Reactivation Lock Security"
Way 1: Check If the ROM You Downloaded Isn't Corrupt
First, you have to check if the ROM file you have downloaded is correct or not. You can easily verify it by comparing MD5 signature. On the other hand, many ROM developers provide hashtags that can also help you verify if the file is correct or not. In case the hashtag is different from the server, it means you haven't downloaded the correct ROM file. So, download it again and verify MD5 signature.
Way 2: Use a Micro-SD Card
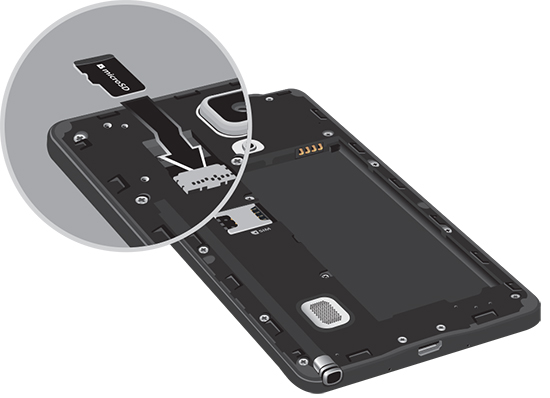
Make sure to use a Micro-SD card if you get into the recovery module. This will help you flash ROM easily. Keep in mind that your SD card should not be corrupted; otherwise, you won't be able to fix this error. To insert a SD card, you need to take out the battery first to force shutdown the device first, and then reinsert the battery. Now, insert a SD card with files and turn on the phone by pressing and holding the Power /Lock button. It should get your issue fixed! However, if this solution didn't work for you, don't worry; you can try method number 3.
Way 3: Deactivate "Reactivation Lock"
The last solution that you can try is to deactivate "Reactivation Lock". This process is really simple, and you can easily follow it. Here are the steps that you can use to follow this process.
-
You can now safely send your phone to uSell
- First, open your device Settings after the device is restarted.
- Now, tap the General option and then selete Security.
- From there, scroll down to Reactivation Lock and then tap the checkbox to uncheck the option if it is selected.
- After that, enter your Samsung Account password and click "Confirm" to wait for the request to be processed.
You will now see the Reactivation Lock is disabled.

If nothing has worked for you, don't worry; you can still fix it using a third-party application. Want to know how? Check the bonus tip section to find interesting information.
Bonus Tips: How to Fix Samsung Recovery Mode not Working?
Tenorshare ReiBoot for Android is the best application that you can use to boot your Samsung device. It's a simple and easy to use application that works for all Android devices. Using it, you can effortlessly fix more than 50 Android system issues including Samsung phone stuck in Odin mode and Samsung keeps rebooting issues.
Now, let's see how this amazing application works and how you can easily fix the Samsung recovery mode not working issue.
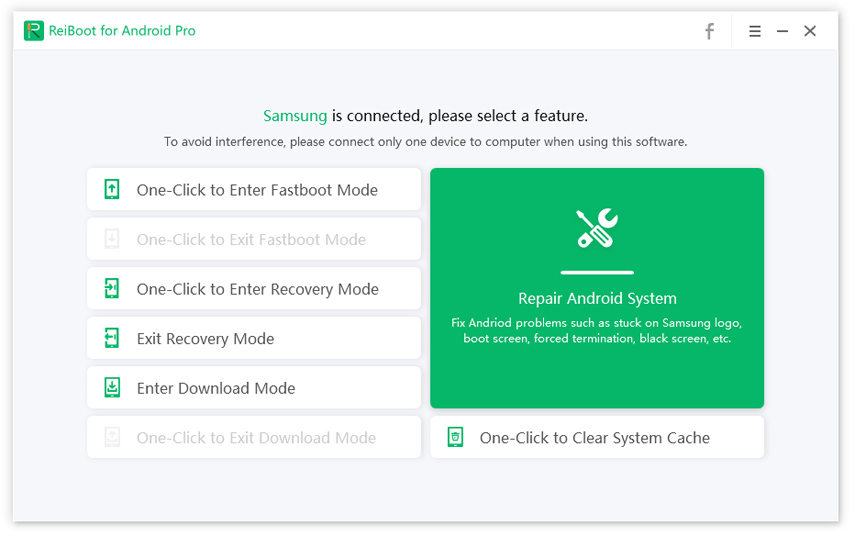
First, you have to download ReiBoot for Android on your computer. Once installed, connect your Samsung device to the computer and click the "Repair Android System" option.

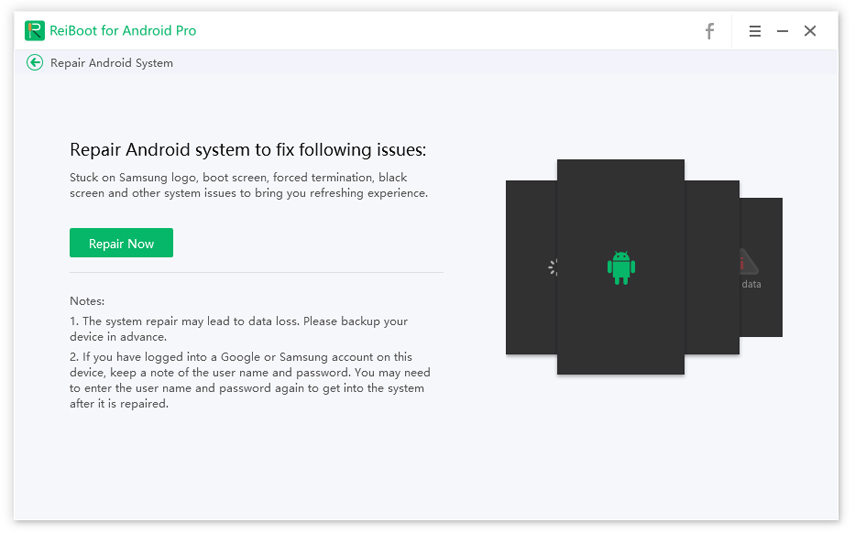
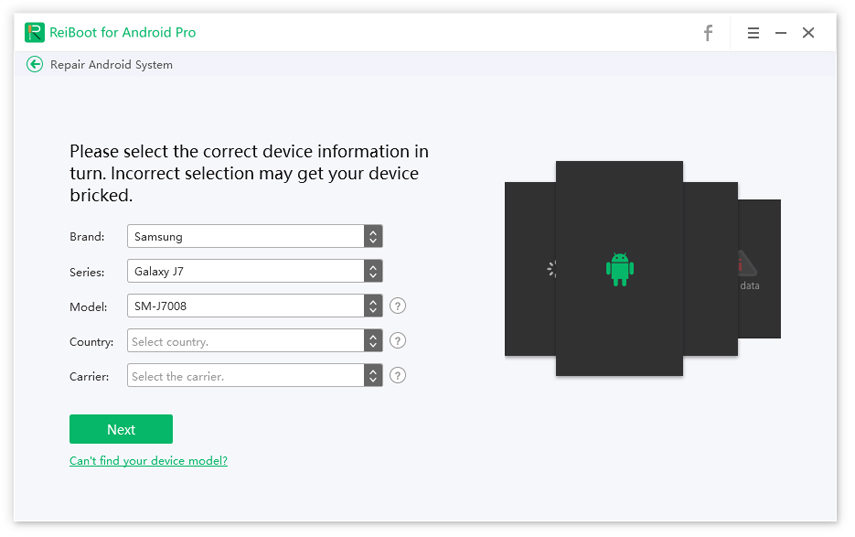
You will see the "Repair Now" option, so click it. You will be asked to select your device information. Don't choose the wrong information; otherwise, it will not fix your issue.

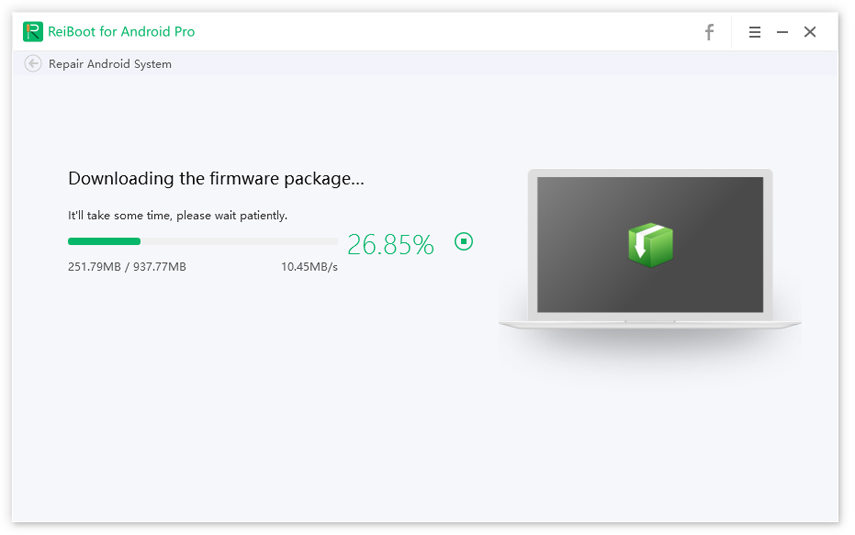
After the required device information is filled in, click the "Next" button, so you can download the Firmware package.


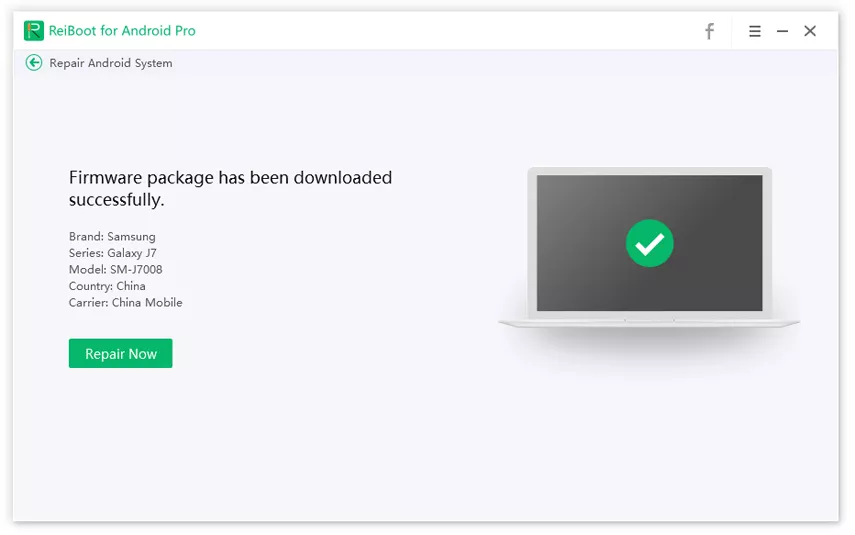
Wait for a while until the firmware package is downloaded. Once you get the package, install it and click the "Repair Now" option.

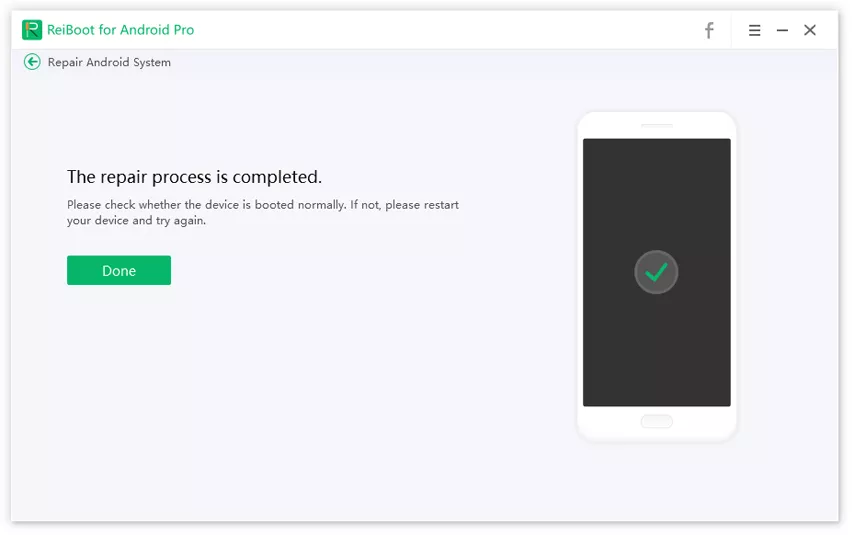
Within a few seconds, your issue will be fixed. In case you still get the same error, then you have to repeat the steps again.

These were the steps that you can use to fix the Samsung recovery mode not working problem. This tool is also recommended if you want to resolve other Android issues.
Conclusion
These were some of the simplest solutions that you can try to fix Note 4 SECURE CHECK FAIL: Recovery error. Make sure to follow the steps right if you need fast results. Also, don't forget to confirm your hashtag with the server whenever you download ROM. On the other hand, you can also use a third-party application named Tenorshare ReiBoot for Android which will help to fix Samsung recovery mode not working issue in no time.
Speak Your Mind
Leave a Comment
Create your review for Tenorshare articles


