Answers about Samsung Galaxy S22/S10/S7 Photo Gallery Save to Google Drive 2025
You might be happy and content to save all your memorable photos in your Samsung galaxy S7’s memory. As per one of the sayings “, a picture speaks a thousand words” therefore, it's crucial to keep all your memorable moments safe at some reliable place.
But, what if you end up losing all your photos? Of Course, it will be heartbreaking, but you don't have to worry if you have maintained a data backup. If you want to know how to backup galaxy S7 to google drive, continue to read on!
- Method 1. Backup Samsung Gallery Photo to Google Drive Using Samsung Share Option
- Method 2. Upload Samsung Galaxy S7 Photo from Gallery Save to Google Drive
- Method 3. Backup Galaxy S7 To Google Drive Using Google Backup and Sync
- Bonus Tips: How to Recover Deleted Photos from Galaxy S7 without Backup?
Method 1. Backup Samsung Gallery Photo to Google Drive Using Samsung Share Option
The first method that you can try for Samsung Galaxy S7 photo gallery save to google drive is by using its sharing option. The below-listed steps will guide you on how to use the sharing option for data backup in Google Drive.
- Step 1: Open your Samsung Gallery and hit on the Share option located at the top of the screen.
- Step 2: Now, from the pop-up page and all options, click on Save to Drive.
- Step 3: Then, verify the Google account that you wish to use for photos backup.
- Step 4: After this, click on the box placed under the Folder and choose the location where you want to save all your photos.
- Step 5: You can alternatively press the new folder icon located at the upper right corner of the screen to create a new folder and save your data there.
- Step 6: Lastly, press the Save button from the lower right corner and wait until all the photos are uploaded to drive.
Method 2. Upload Samsung Galaxy S7 Photo from Gallery Save to Google Drive
The next method that will help on how to upload photos to google drive from android S7 device is by following the below steps.
- Step 1: From your Samsung S7 device’ home screen go to Google and then select Drive.
- Step 2: Now, if you want to watch the tutorial swipe left and press on skip.
- Step 3: After this, click on the files or the folder you want to open.
Step 4: Press on the +sign to upload the files and then click on upload.

- Step 5: Now, choose the file type that you wish to upload such as images.
- Step 6: Then, select the album wherein the images are saved.
- Step 7: Lastly, select the images you want to upload on Google Drive.
Method 3. Backup Galaxy S7 To Google Drive Using Google Backup and Sync
Using Google Backup & Sync is one more way in which you can backup your images from S7 to Google Drive. To know how to transfer photos from phone to google drive via your computer, follow these steps below.
- Step 1: Connect your Galaxy S7 to your desktop using the USB cable and look for the location of the photo folder locally.
- Step 2: Now, download and install Google Backup & Sync on your computer.
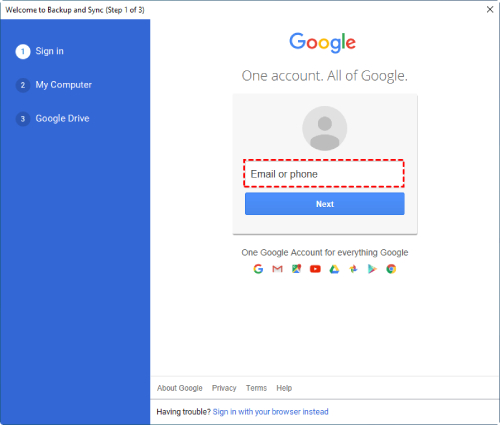
Step 3: After this, launch this app and sign in to your Google account.

Step 4: Then, tap on the Choose Folder option to choose the location of the folder where your photos are saved. You can also opt for the Photos and video upload size.

- Step 5: Lastly, click on Start to begin the automatic photo backup on Google Drive.
So these are the methods with which you can create a backup of all your photos. But what if you forget to create this backup and end up losing all your pictures? Well, the below method will help you on the same.
Bonus Tips: How to Recover Deleted Photos from Galaxy S7 without Backup?
If you have lost your memorable photos from your Samsung Galaxy S7 device and do not even have a backup for the same then there is still a way to get back all your vital photos using Tenorshare UltData for Android. This data recovery tool is pretty easy to use and retrieves all your vital data in just a few simple steps. It is capable of recovering a wide range of data from more than 6000 types of android phones and tablets, effortlessly! Follow the below steps to know how to recover lost photos from Samsung Galaxy S7 using UltData from Tenorshare!
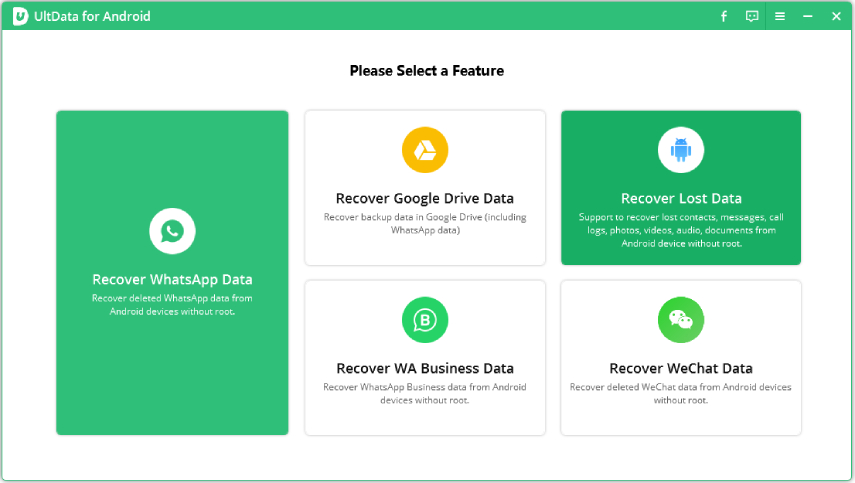
Download Tenorshare Ultdata recovery software from its official site and install it on your desktop device. Now, run the software and click on the “Recover Lost Data” option.

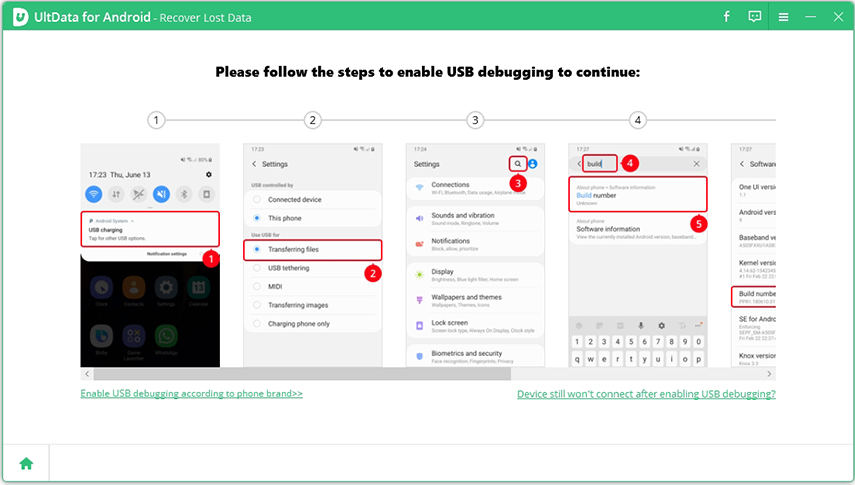
After this, connect your Galaxy S7 and enable USB debugging on it by following the on-screen instructions. Click Ok when you see a USB debugging window popping up.

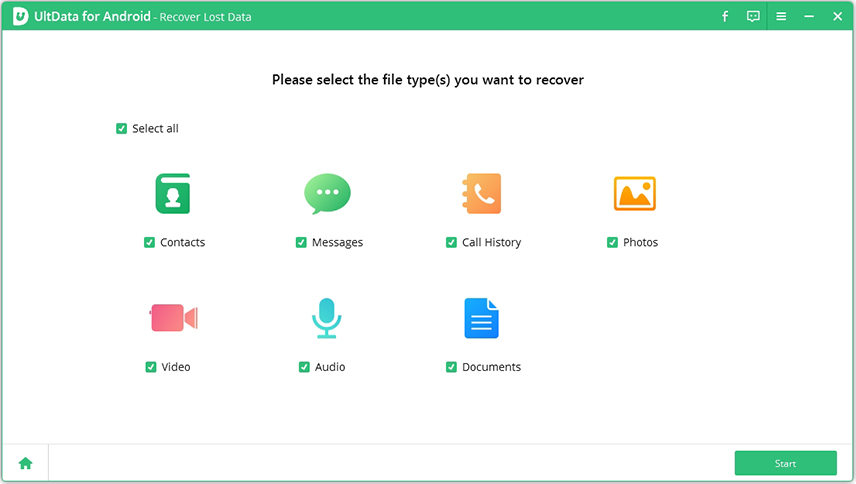
Now, you will see a list of files, scan them at first. Then, click on Start to begin the scanning.

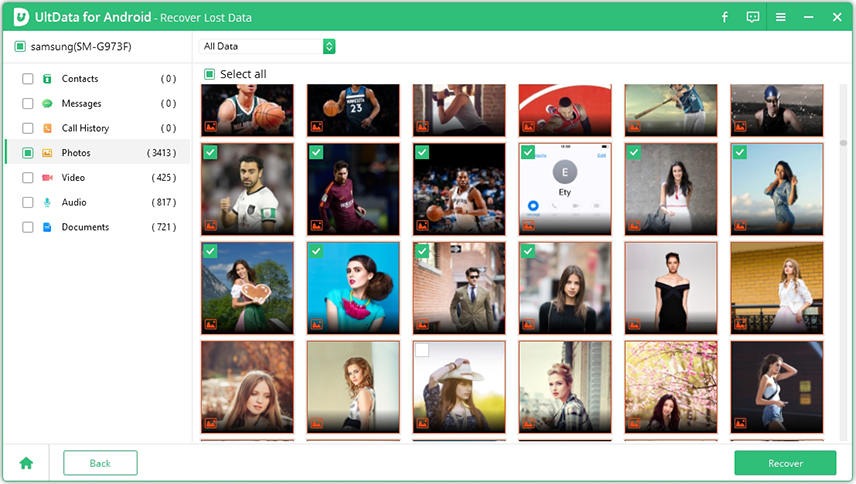
Once the scanning is done, select the photos you want to recover from the left panel and then hit on the Recover button to begin recovery.

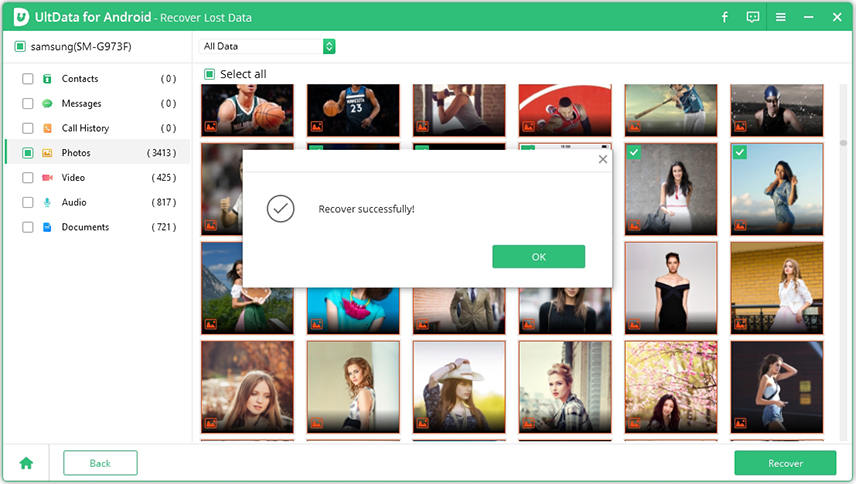
Now, the photos will be recovered successfully.

Conclusion
Your photos can be lost due to any reason such as accidental deletion, physical damage, OS update/crash etc. therefore, you must know how to upload photos from phone to google drive to keep all your memories safe. The above given simple methods will help you backup all your images so that you never lose them. But, if you somehow fail to backup your data and lose it due to any random reason then don't forget to use UltData for Android from Tenorshare to effortlessly get your pictures back!
Speak Your Mind
Leave a Comment
Create your review for Tenorshare articles
Tenorshare UltData for Android
Best Android Data Recovery Software
Highest Data Recovery Rate

