How to Transfer Music from iTunes to iPhone [Easy Guide]
Transferring Music from iTunes to iPhone is a common task for many iPhone users. This article will provide detailed instructions on how to transfer Music from iTunes to your iPhone using various methods, including syncing via iTunes and using third-party tools.
- Part 1: Does iTunes Automatically Sync with iPhone?
- Part 2: How to Transfer Music from iTunes to iPhone with iTunes
- Part 3: Alternative Methods to Transfer Music from iTunes to iPhone without Syncing
- FAQs About iTunes Syncing
Part 1: Does iTunes Automatically Sync with iPhone?
Yes, iTunes can automatically sync content between an iPhone and a Windows PC. When you connect your iPhone to your Windows PC and open iTunes, you can set up automatic syncing for music, videos, photos, and other content.
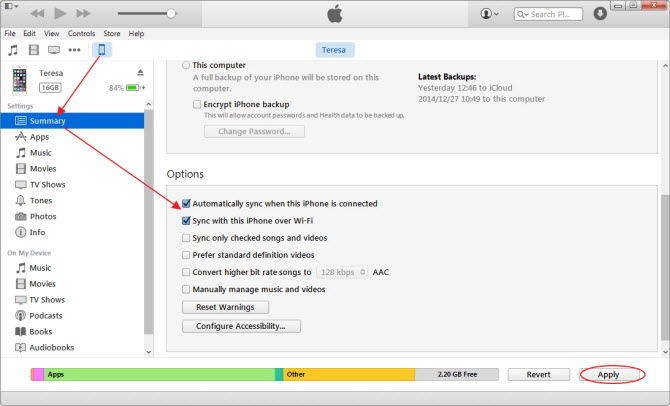
To enable automatic syncing, select your iPhone in iTunes and go to the "Summary" tab. From there, you can check the box next to "Automatically sync when this iPhone is connected" to enable automatic syncing.
If you have an iPhone with iOS 5 or later, you can sync your device wirelessly when your computer and device are connected to the same Wi-Fi network. (How to enable Wi-Fi Syncing)
Part 2: How to Transfer Music from iTunes to iPhone with iTunes
1. Sync iTunes to iPhone via Cable
Here's how to sync iTunes music to iPhone using a cable:
- Connect your iPhone to your computer with a USB cable.
- Launch iTunes on your computer.
- Click the iPhone icon in the iTunes window.
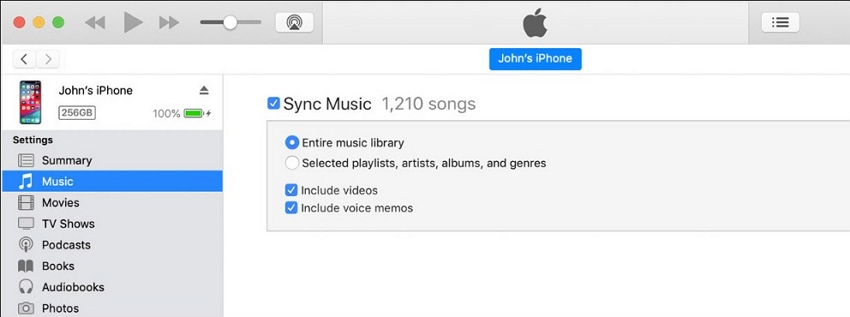
Go to the "Music" tab and check the "Sync Music" box.

- Choose to sync your entire music library or selected playlists, artists, albums, and genres.
- Click "Apply" to start syncing.
2. Sync iTunes to iPhone over WiFi
Follow these steps to sync iTunes to iPhone over WiFi:
- Connect your iPhone and computer to the same WiFi network.
- Launch iTunes on your computer.
- Click the iPhone icon in the iTunes window.
- Go to the "Summary" tab and check the "Sync with this iPhone over WiFi" box.
- Click "Apply" to save the settings.
On your iPhone, go to Settings > General > iTunes WiFi Sync > Apply to start syncing.

Related read Fix iTunes Wont Sync Music to iPhone.
Part 3: Alternative Methods to Transfer Music from iTunes to iPhone without Syncing
1. Use Third-Party App (Recommended)
How to transfer music from iTunes to iPhone without syncing? iCareFone is the best answer.
Tenorshare iCareFone is a recommended tool for transferring iTunes music to iPhone in one click without syncing, and no existing data will be affected.
As an all-in-one iOS data management tool, you can use iCareFone to Transfer media files between iDevice and iTunes without limitations. Besides, it can help iOS users back up data to computer and restore the data to devices without overwriting!
Try it and manage your iOS data in an easier way!
Here’s how to add music from iTunes to iPhone using iCareFone:
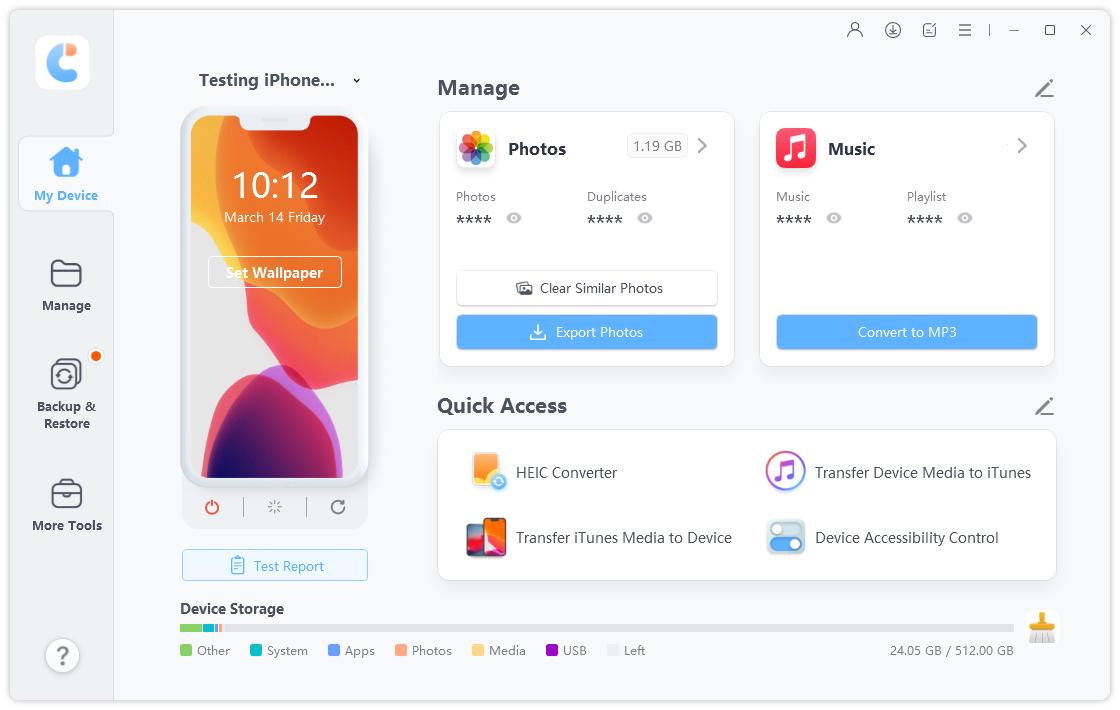
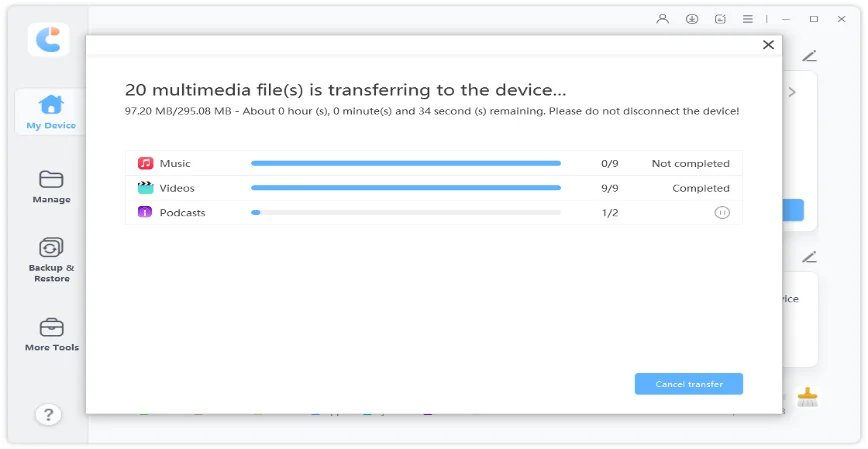
Connect Device Download and install Tenorshare iCareFone on your PC or Mac, and connect your device. After connecting, select "Transfer iTunes Media to Device" from the main interface.

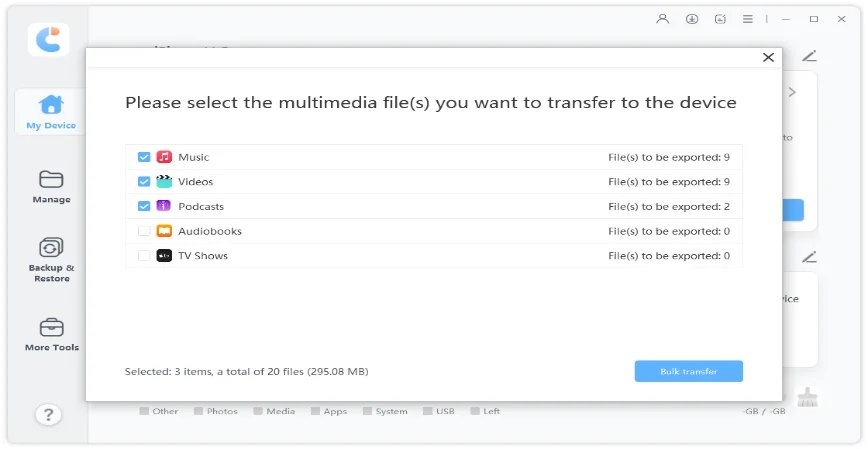
Select Media Files. All media files downloaded or purchased from iTunes will be displayed. By default, all file types are ticked. You can select your desired files to add to your device.

Start Transferring. Click the "Transfer" button to start syncing.
All files will be imported to your iPhone, iPad, or iPod, allowing you to enjoy Music and video files on your device whenever and wherever possible.

2. Use Cloud Services
Cloud services like iCloud, Google Drive, or Dropbox can help you transfer Music from iTunes to your iPhone without syncing.
However, there’s a shortcoming that you can’t play these songs on your Apple Music App. You can only play them on your Google Drive app. And it’s time-consuming if you have many songs to transfer.
Follow these steps:
Drag the music from iTunes to your computer.

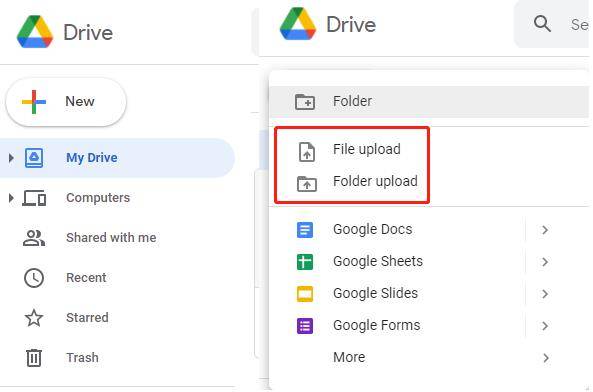
- Then log into Google Drive on your computer and sign in to your account.
Upload your music files to your preferred cloud service from your computer.

- Install the cloud service app on your iPhone.
Sign in to the app using the same account as on your computer. And download the music files from the cloud service to your iPhone.

3. Manually managing Music
You can also transfer your Music from iTunes to your iPhone by manually managing your music files. To do this, follow these steps:
- Connect your iPhone to your computer with a USB cable.
- Launch iTunes on your computer.
- Click the iPhone icon in the iTunes window.
- Go to the "Summary" tab and check the "Manually manage music and videos" box.
- Click "Apply" to save the settings.
Drag and drop your music files from iTunes to your iPhone in the iTunes window. Or choose "Add to device" from the drop down menu.


FAQs About iTunes Syncing
Q1: What can I sync with iTunes?
A: You can sync Music, movies, TV shows, podcasts, books, audiobooks, photos, videos, contacts, and calendars with iTunes.
Q2: Why do some songs on iTunes not sync to iPhone?
A: Some songs may not sync to iPhone due to various reasons, such as incompatible file format, copyright protection, or corrupt files.
To fix this issue, you can try converting the songs to a compatible format, checking for copyright protection, or re-downloading the song from a different source.
Q3: Can I transfer Music from iTunes to iPhone using a different Apple ID?
A: Yes, you can transfer Music from iTunes to iPhone using a different Apple ID. However, you may need to authorize the computer with the Apple ID used to purchase the Music before transferring it to your iPhone.
The Bottom Line
Transferring Music from iTunes to iPhone can be done in various ways, including syncing with iTunes, using third-party tools, or through cloud services. The method you choose depends on your preferences and needs.
If you want a hassle-free solution to transfer Music from iTunes to iPhone without syncing, Tenorshare iCareFone is a recommended option. With its user-friendly interface and some very powerful features, you can quickly and easily transfer Music and other media files to your iPhone.
Speak Your Mind
Leave a Comment
Create your review for Tenorshare articles

Tenorshare iCareFone
Best Free iPhone Transfer & iOS Backup Tool
Easily, without iTunes
