4 Top Methods to Send iPhone Videos to Computer
Sharing videos are a new trend among social media channels. But sometimes, uploading a big video shot from my iPhone tends to take a lot of time to upload. And that's where I use my PC to render and upload some videos. I generally send some of my iPhone videos to my PC from time to time and keep them as back up as well. In case you don't know how to send videos from iPhone to computer, here I have a detailed list of all the methods I use to transfer videos effectively. So, let's get started.
- Way 1: Send Videos from iPhone to Computer by Email
- Way 2: Get Videos from iPhone to Computer with USB Connection
- Way 3: Upload Videos from iPhone to Computer with iCloud Photo Library
- Way 4: Import Videos from iPhone to Computer Using Tenorshare iCareFone
Way 1: Send Videos from iPhone to Computer by Email
Emailing has been the most famous data sharing medium for a long time. I use it every single day to send texts, images etc and I know you use it too. But what you probably don't know is that you can use email to send videos from your iPhone. Yes, it is possible! But this way is only applicable if you have small videos, and sending large videos is not recommended, rather not possible. You can always opt for compressing the videos so as to reduce size in MB, but that would also reduce the quality of your videos. Keeping that in mind, this is how to send videos from iPhone to PC using Email.
1. Simply go to your camera on your iPhone X/8/7/7Plus/6/6Plus/SE/5 etc and open the Camera Roll.
2. Now, select the video you need to transfer to your PC.
3. Navigate to the bottom, and tap on Share icon.
4. You will see a lot of ways to share your video. Here tap on "Mail" from the list
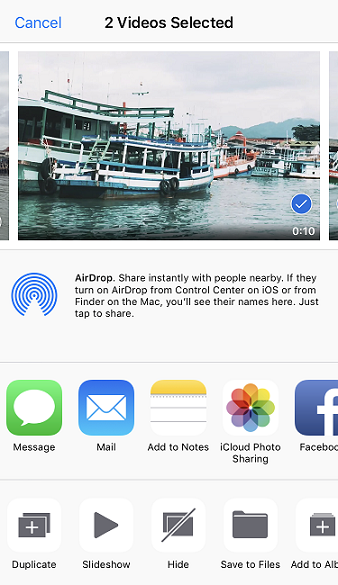
5. An Email creation window will open up with the video attached along with it.
6. Enter the email address and simply send the email.

Now, open your email from your PC and just download the video from the email attachment straight to your favorite location on your PC. That's it!
Way 2: Get Videos from iPhone to Computer with USB Connection
If you want to send a lot of videos without the hassle of compressing them to reduce the size, you can always use your USB to send videos from iPhone to computer. Yes, that small little wonder is capable of doing many things! This is a simple yet direct method that works effectively when it comes to data sharing. For both Windows and Mac, there are inbuilt features that help to transfer any kind of data just by using your USB cable and connecting your devices together. Here's how I use USB to send iPhone videos to computer for both Windows and Mac:
Make sure you have the latest generation iTunes pre-installed in both the cases.
For Windows, use Windows Explorer:
1. Connect your iPhone and Windows PC using the original USB or lightning cable.
2. Go to your keyboard and tap on "Windows"+"E". This is a keyboard shortcut to open the "Windows File Explorer"
3. You may have to tap on 'Trust this computer' on your iPhone if prompted.
4. Now, to find your iPhone on your computer, go to "This PC" or "My Computer" for Windows 10/8 and Windows 7/XP.
5. You will see the "Internal Storage" folder. Tap on it to find the "DCIM" folder.
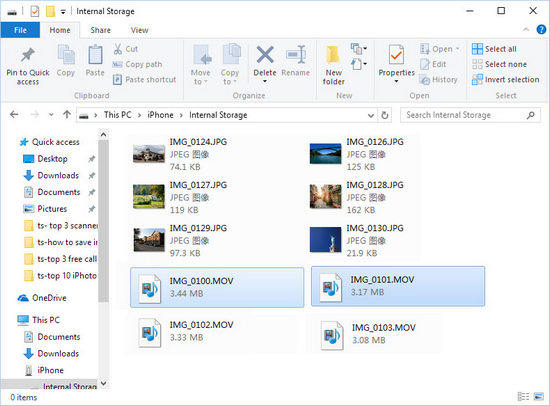
6. This folder may come with many sub-folders containing your iPhone media, that includes your videos. Find and select the videos you want to transfer and just copy and paste them to any desired folder on your Windows PC.
For Mac, use Photos App:
When it comes to Mac, there is a dedicated tool that can manage videos and photos, the Photos App.
1. As usual, Plug in iPhone to your Mac via USB
2. After detection, the Photos App should launch automatically. You can also go the manual route if it doesn't.
3. Now, on the Photos App panel, you will see all your videos listed along with photos.
4. Sort and choose the videos you want to send and simply click on the Import button.

Voila! Your videos will get transferred to your Mac now!
Way 3: Upload Videos from iPhone to Computer with iCloud Photo Library
When started out uploading videos to my computer, iCloud was probably what many recommended me to go for. This is a very common method for iPhone users and it is still used by many. iCloud offers a proper sync and store service named iCloud Photo Library with the help of which you can upload and download media whenever you are connected to Wi-Fi. In simple terms, it syncs your iPhone and computer together so as to fetch any media and that includes videos as well. Here's how to set up iCloud Photo Library on your iPhone and your PC.
On iPhone:
1. Go to "Settings", enter your name and then go to "iCloud". Now, navigate to "Photos"
For iOS 10 and earlier, go to "Settings"> "iCloud" > "Photos & Camera".
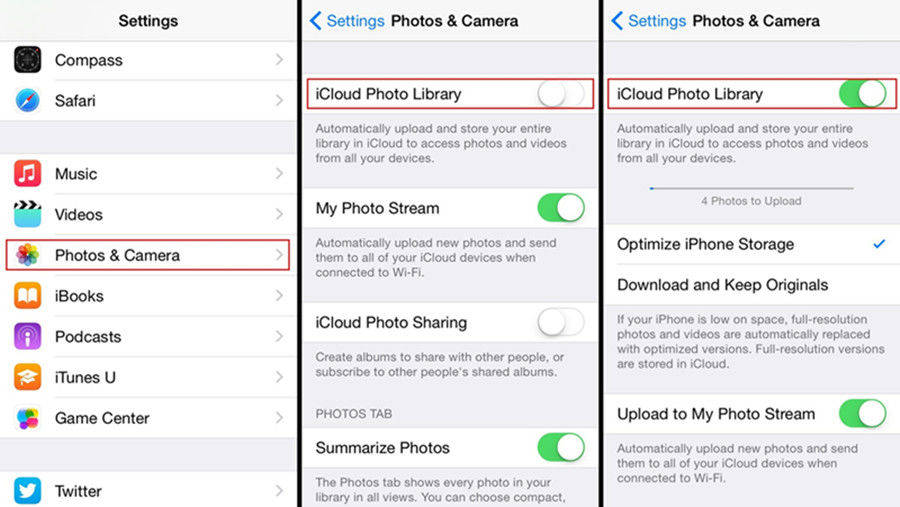
2. Find the "iCloud Photo Library" option and enable it!
For Windows:
1. Download, install and run the latest iCloud for Windows program. Install using the inbuilt wizard provided with the software
2. Sign in to your iCloud account with the help of your Apple ID and password credentials.
3. Now, go to "Options". You can find it beside "Photos" tab.
4. Enable "iCloud Photo Library" from the checkbox and click "Done"
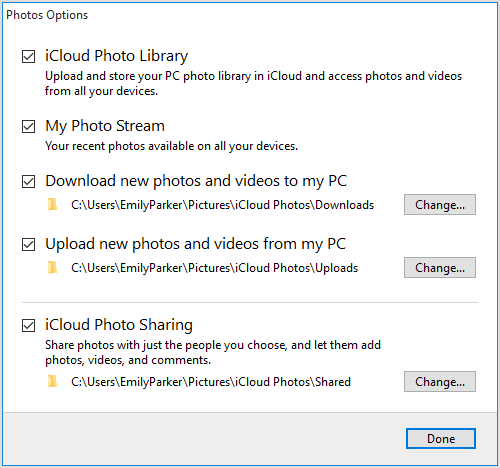
Now that you have setup your iPhone and Windows PC, your videos will get synced automatically while you are under steady Internet connection. So, to get those videos, you need to open the "Windows File Explorer", and look for the "iCloud Photos" folder present inside the "Favorites" section. Double-click on the Downloads folder inside and select the desired videos you need to download. After selection, simply click "Download".
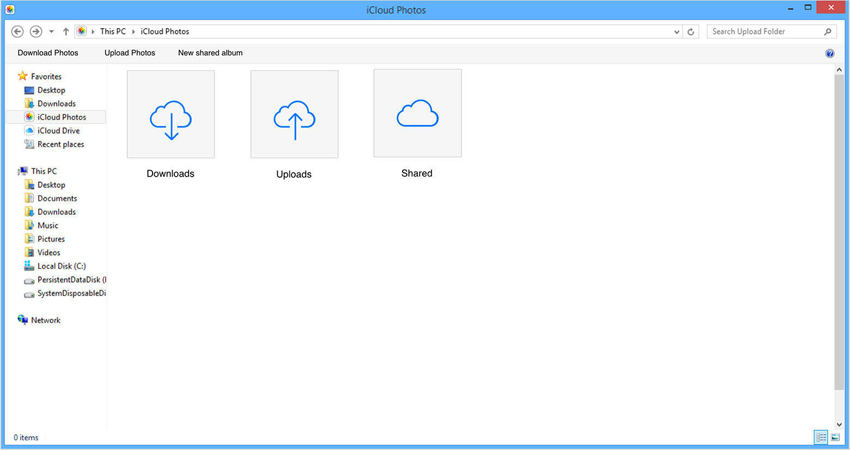
For Mac:
1. Find "System Preferences", and go to "iCloud".
2. Now, go to "Options" enable "iCloud Photo Library"
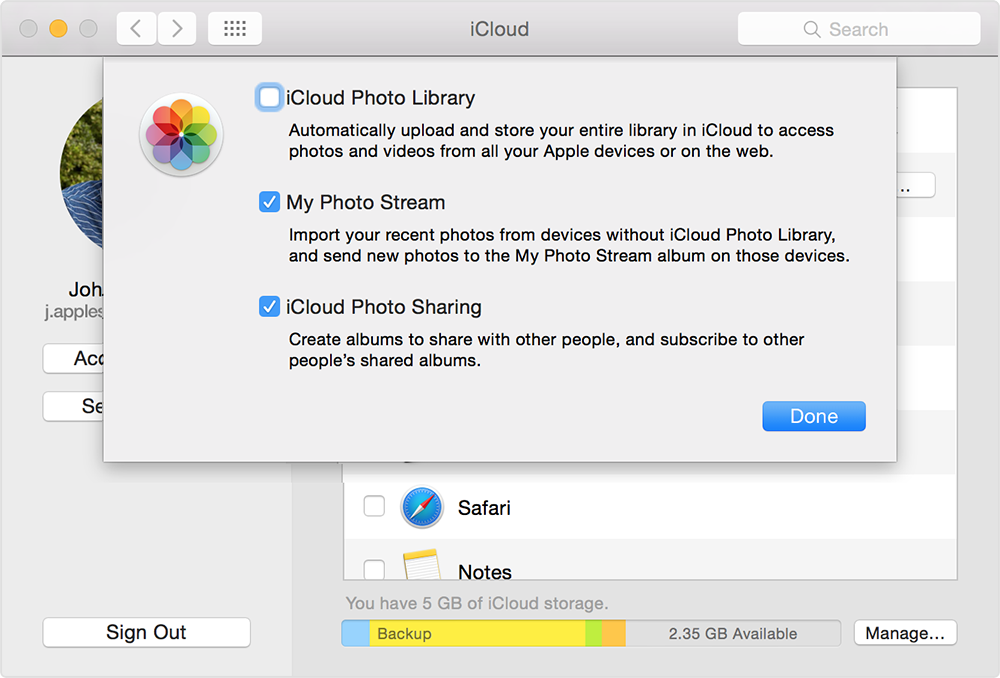
3. Launch the Photos App to get the synced videos
So, here is how to export videos from iphone to computer using iCloud. The biggest con of this method, in my opinion, is the need for steady Wi-Fi and most importantly storage limitation. You only get 5GB of free storage to store your videos in iCloud. And to save more you will be charged a certain amount that goes to hundreds of dollars. And this is where the next and the final method does the job for you.
Way 4: Import Videos from iPhone to Computer Using Tenorshare iCareFone
Tenorshare iCareFone has literally been my go-to video transfer tool whenever I needed to transfer videos from my iPhone to my PC. It is a professional third-party program, that adds as a File Manager and available for both Mac and Windows.
If you want to know how to send long videos from iPhone to computer, this is the best you can go for! You should use this over other methods because of the fact that firstly it has no storage limitation and you can simply choose one video, multiple and even bulk transfer videos with ease. Be it a small video or large video, be it from your camera roll or WhatsApp or downloaded videos, it can transfer anything without compromising quality as it doesn't need any video compressing. It can work without Wi-Fi and you can also preview before transferring your videos. That's a nice touch!
So, here's how to use Tenorshare iCareFone on your computer:
1. First, download and install the Windows or Mac version of Tenorshare iCareFone software on your PC.
2. Launch the software and connect your iPhone and PC via the USB or lightning cable.
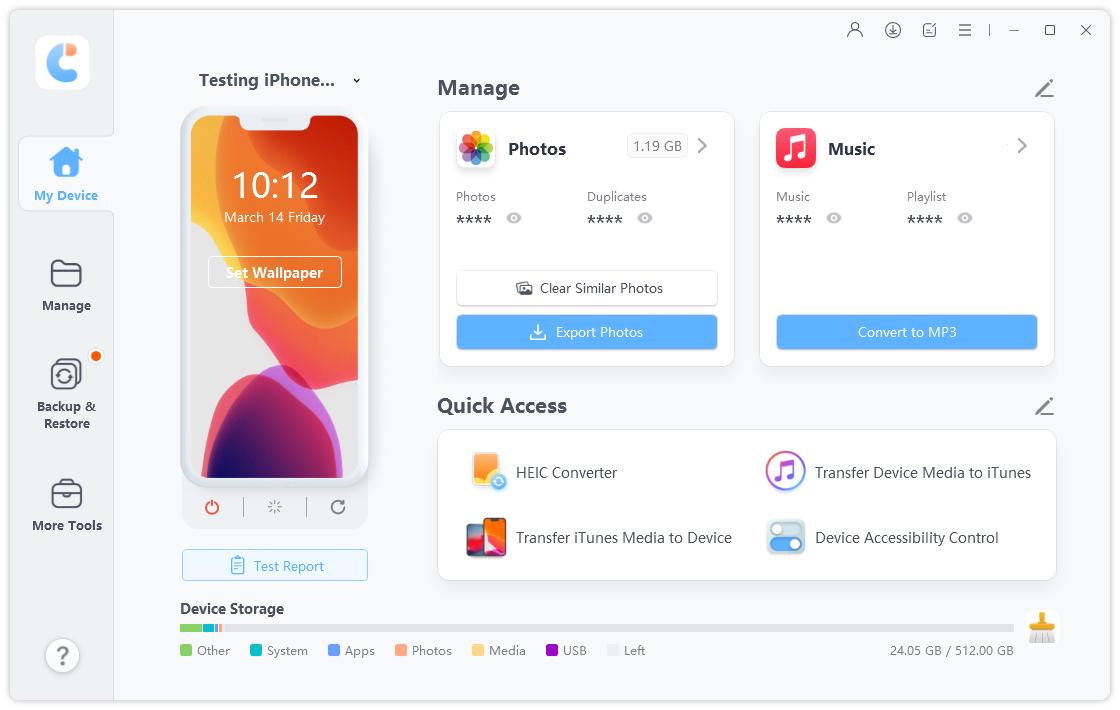
3. Find "File Manager" from the interface and hit "Videos" option.
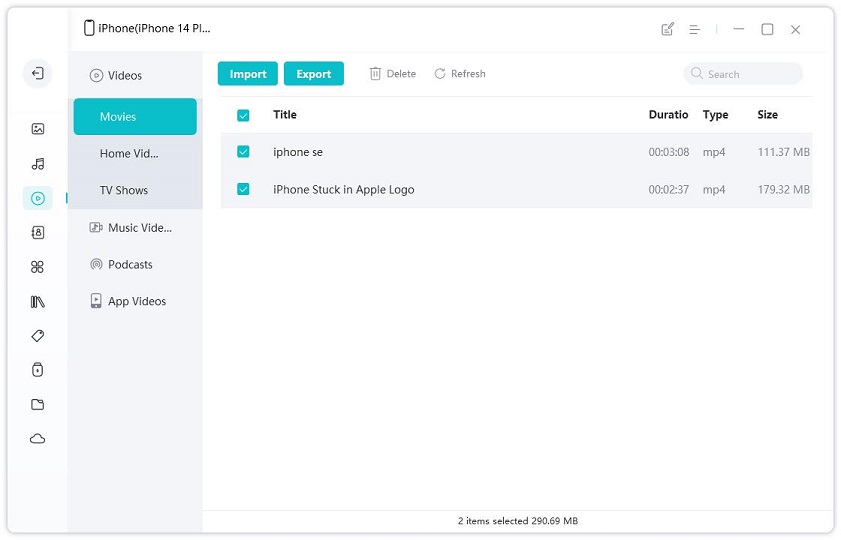
4. Now, you can preview your videos listed on your screen. Select the videos you want to transfer after previewing.
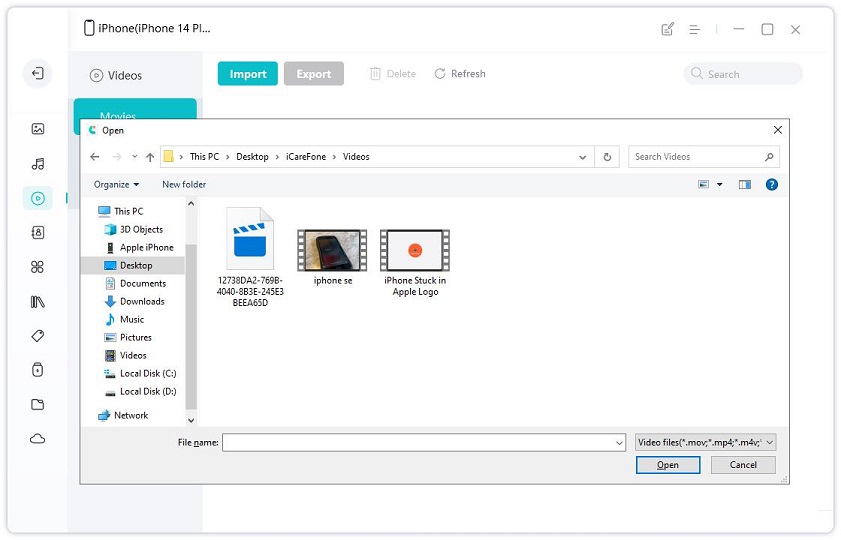
5. Tap on "Export" to finish.
Now all the videos you chose will be exported to your PC in no time! Don't miss this amazing software!
So, here is my list of all the methods on how to send videos from iPhone to PC, for both Windows and Mac. I have used these methods for a long time now, and each of them has its own advantages and cons, except Tenorshare iCareFone. And that's why it is my most favorite transfer method here. I would highly recommend you to go for this software for all your video, photos and media transfer needs. Go for it and it won't disappoint you at all!
If you find this article helpful, don't forget to share and comment below!
Speak Your Mind
Leave a Comment
Create your review for Tenorshare articles

Tenorshare iCareFone
Best Free iPhone Transfer & iOS Backup Tool
Easily, without iTunes


