How to Send Videos from One iPad to Another
"How can I transfer all my iPad videos to my new iPad? Please help me out!"
When you switch to a new iPad, you need to transfer all your valuable data to that brand new device. So, you are changing your old iPad for the new iPad but you don't know how to transfer videos from iPad to iPad. This is where this article comes in. We have compiled a list that provides 5 most effective and proven ways to transfer your valuable data from one iOS device to another, more specifically from one iPad to another.
- Part 1: How to Transfer Videos from iPad to iPad with iTunes
- Part 2: How to Transfer Videos from iPad to iPad without iTunes
- First of all the app is free of cost, and it is available for all platforms.
- It is safe and secure.
- There are no limits when it comes to storing backups in the iTunes cloud storage.
- The download and transfer speed are very slow.
- Selective backup is impossible.
- When you create a new backup it will eliminate the older one.
- Wi-Fi needed for the whole process.
- Not very user-friendly
- Reported crashes
- It is easy to use.
- The interface is very simple.
- Supported on multiple platforms, Windows and Mac. Supports all iPhones and iPads
- Offers 1-click transfer
- The transfer speed is exceptionally fast.
- Does not rely on iTunes.
- Selectively as well as bulk transfer available.
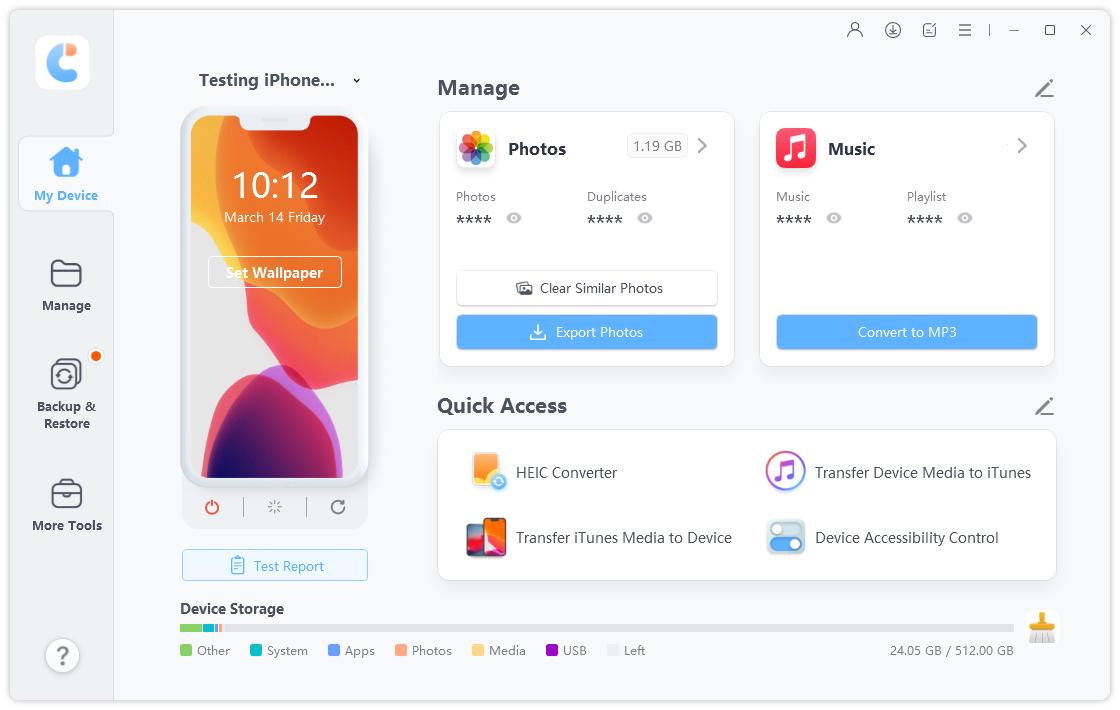
- Download, install and launch Tenorshare iCareFone and connect your iPad to your computer.
-
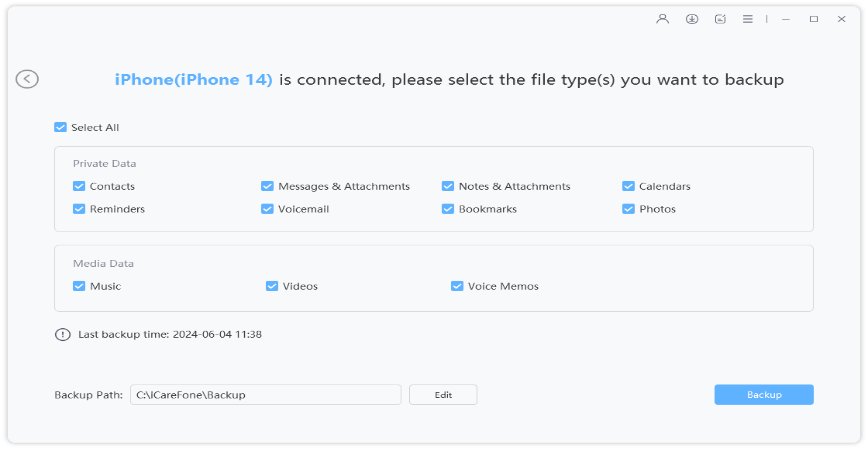
Start the program and click Backup & Restore > Backup on the left menu bar.

-
Various data option will be available, choose the Photos and Videos option and click "Backup". And the backup will be completed in a few minutes.

-
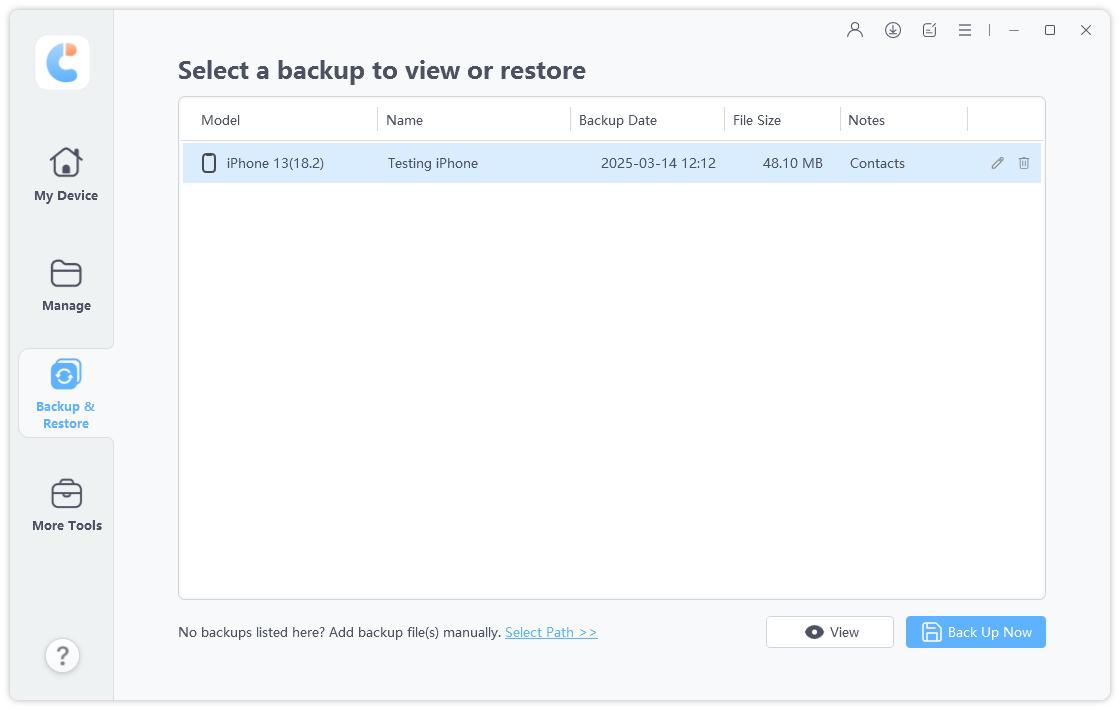
Now connect your another iPad to the computer and go to Restore section at this time.

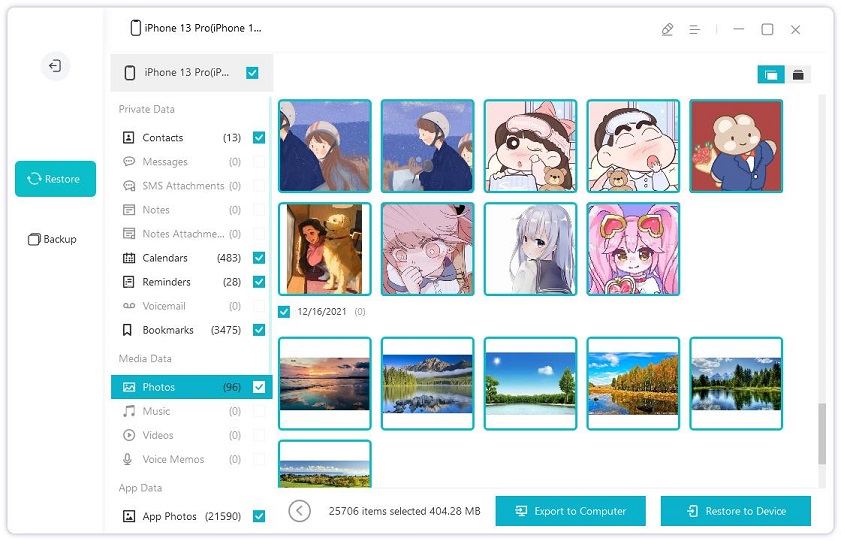
Select the latest backup record and click on View. You can now see all the photos and videos saved on your previous iPad.
Select the photos and videos you want to transfer to your second iPad, and click on Restore to Device.

- All your videos will be sent to your target iPad in no time now!
Part 1: How to Transfer Videos from iPad to iPad with iTunes
iTunes is one of the oldest iOS apps ever created. The app has various features like syncing data, backing and restoring data, music downloads etc. iTunes has the ability to sync data which can be viewed and edited from any iOS device you own but the cloud and the backup service are mostly used. So, if you want to send videos from iPad to iPad with iTunes you need to use the restore and backup option. Follow the instructions below to use it the right way:
1. Connect your existing/old iPad and computer with a USB cable.
2. Launch iTunes.
3. Now, after the computer detects the iPad, click on the iPad icon under the device tab.
4. Select the option "Backup Now", which can be found under "Backup" section of the "Summary" tab.
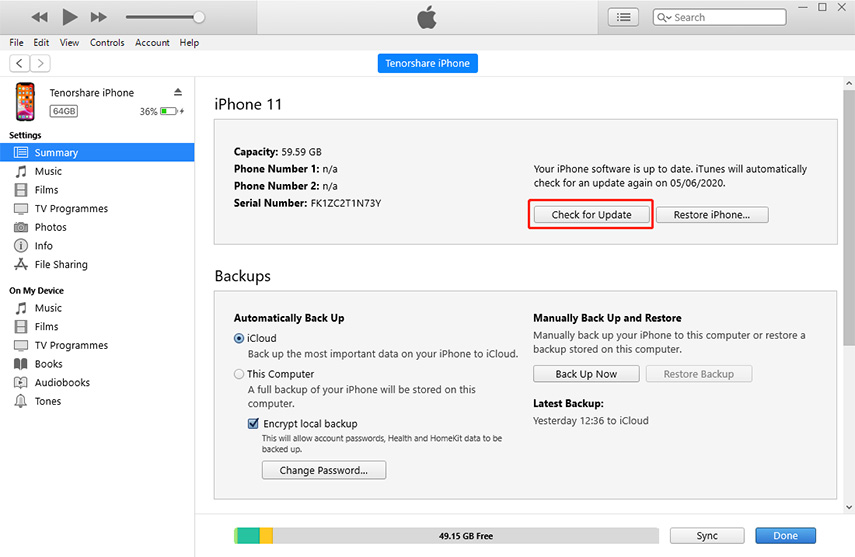
Give some time for the backup to complete. After it is done, disconnect the iPad.
1. Now, connect the other iPad with the computer
2. Progress similarly as mentioned before and tap on the iPad icon in iTunes.
3. Now, tap on the "Restore Backup"
4. Select which backup you want to use.
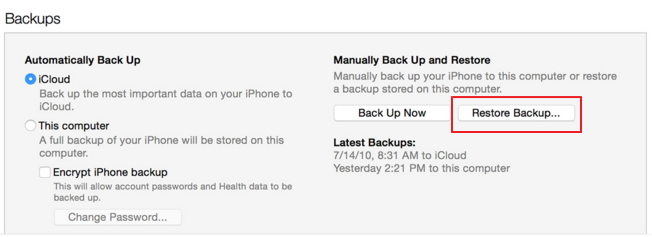
Lastly, tap on "Continue" and iTunes will start to restore the backup on this iPad.
This will help you get access to all your videos on your new iPad instantly.
Advantages:
Disadvantages:
Part 2: How to Transfer Videos from iPad to iPad without iTunes
The most common and traditional way to transfer data from iPad to iPad is to use iTunes or iCloud service. There are users who still use iCloud but when it comes to iTunes, these days the app is not very popular. It is mainly due to the fact that the app has become old-fashioned, there are not a lot of options available and it is very slow. Most importantly it crashes sometimes without any reason. Fortunately, there are a lot of other ways to do it. If your goal is to transfer videos between iPads, read the following ways to make it much easier for you.
Way 1: Transfer Videos from iPad to iPad with Tenorshare iCareFone
If you are looking for an app that will transfer your files safely and easily to another iOS device, then there are a lot of Apple certified apps available on the market. But the third-party app Tenorshare iCareFone goes beyond that when it comes to its performance. This is an app and available on Windows and Mac. It is a specifically designed iOS device data transfer tool which can send that data to another device. In this case, it is the best solution to transfer videos from one iPad to another. Here are some of its stellar features cum advantages:
Here's how to use Tenorshare iCareFone:
Way 2: How to Transfer Videos from One iPad to Another via AirDrop
AirDrop is a new Apple certified app which is able to transfer data between two iDevices. AirDrop is supported on iPhone, iPad, Mac and other iOS devices. It uses Wi-Fi to transfer data from one device to another and completely wireless. So, if you want to know how to get videos from one iPad to another using Airdrop you must read the steps below:
1. Turn on Bluetooth and Wi-Fi on both iPads and connect to the same network
2. Open "Control Center" on both devices and click on AirDrop and select "Everyone" on the discovery settings.
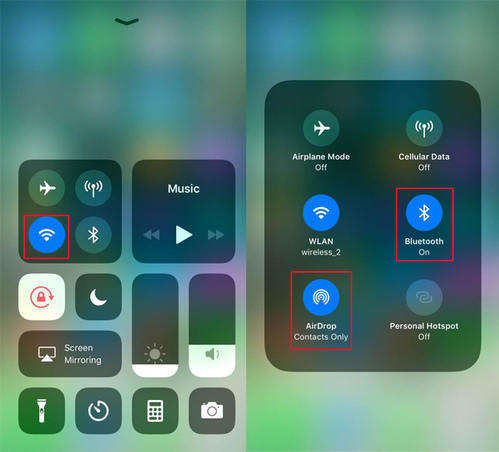
3. Now, open Photos app on iPad and choose the video files you want to send to your target iPad and then tap on the Share button below.
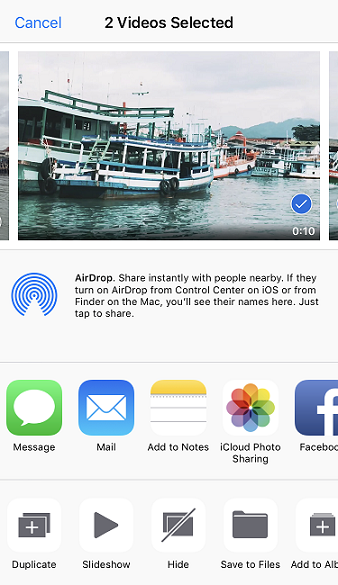
4. Now, tap on AirDrop under the selected videos and choose the other iPad.
5. Now, take the other iPad and "Accept" the files sent by AirDrop.
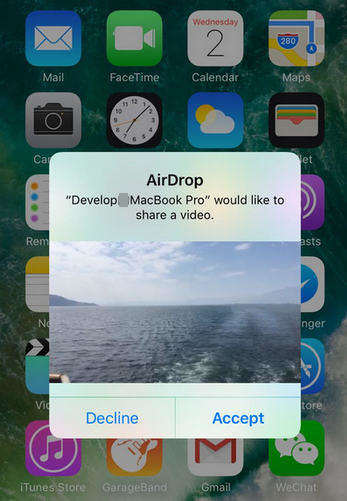
Always remember that if you are using AirDrop to transfer data then you need to keep both devices in a close proximity, within 30 feet of each other.
Way 3: How to Transfer Large Videos from iPad to iPad Using iCloud
iCloud is one of the greatest apps Apple has ever created. This app has some wonderful features such as cloud backup, data syncing and photo or media library. So, when it comes to sending large videos from one device to another, iCloud is a viable option thanks to its iCloud Photo Library feature. It basically syncs all your media mainly videos and photos to all connected devices logged in with the same Apple ID. So, if your goal is to transfer video from one iPad to another, here's how to do it with iCloud.
1. On your iPad/iPad Air/iPad Mini/iPad Pro, go to "Settings", enter name and tap "iCloud" to find "Photos". For iOS 10 or earlier, go to "Settings", then "iCloud", then navigate to "Photos & Camera" to find "Photos".
2. Now, enable "iCloud Photo Library" both your iPads.
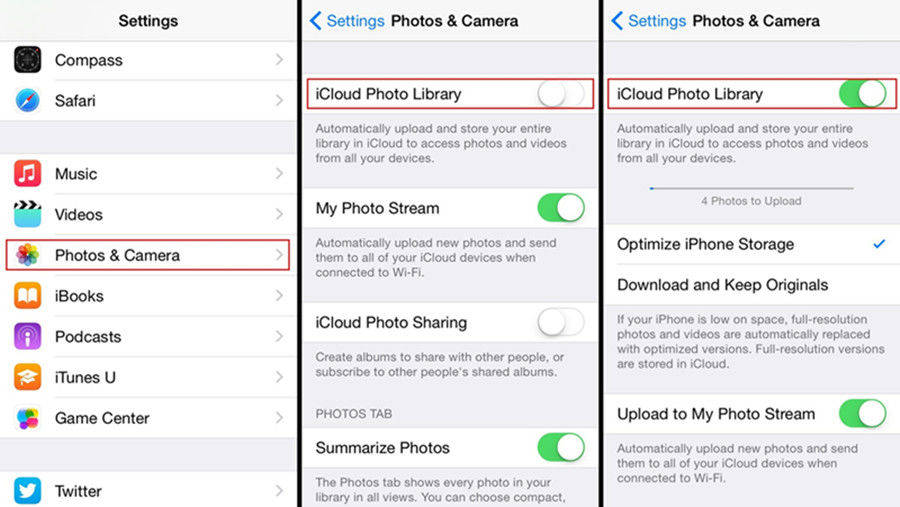
And that's it! Your videos along with photos will be synced to your target iPad in some time.
Way 4: How to Transfer Videos iPad to iPad with Email
Email is a genuine option for wireless data transfer. Although this is a very old method, it is safe and secure enough to transfer videos from iPad to iPad. The only thing you need is the email address to transfer data and a good Wi-Fi or cellular data.
1. Open the Photos App on your iPad.
2. Now, select the videos you want to send and tap on the Share button below.
3. Then select the "Mail" option under the chosen videos.

4. A new Email interface will open; type your own Email address
5. Finally, tap "Send" to transfer the videos
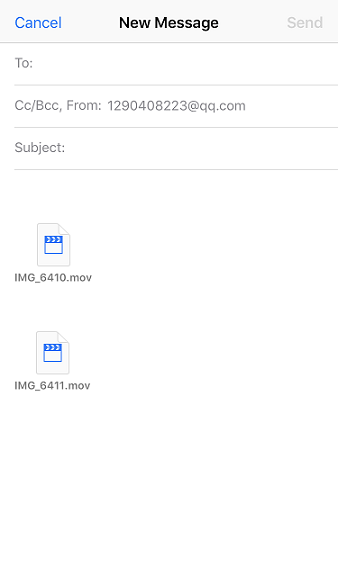
Now, get hold of your target iPad and open your email account which you selected earlier. Find the required email and just download the videos from attachment. Even though this method is fast and secure, it is not suitable for transferring large files. It is not practical enough to send a large number of videos as well.
Conclusion
All of the apps and methods mentioned in the article are very efficient modes of data transfer between iOS devices. The oldest iOS app iTunes is one of the most popular but now that its popularity has taken a hit due to its poor performance; users are looking for other ways to send video from iPad to iPad or rather overall data transfer. Most of the other apps are also Apple certified and they are good and effective but the third-party app Tenorshare iCareFone takes the prize due to its advantages, the feature list and most importantly its effectiveness. The other apps seemed pale compared to this app on our tests. Highly recommended from our side!
Speak Your Mind
Leave a Comment
Create your review for Tenorshare articles

Tenorshare iCareFone
Best Free iPhone Transfer & iOS Backup Tool
Easily, without iTunes


