How to Transfer iPhone Videos to Mac Easily
Nowadays, more and more users are using short videos and vlogs to record their daily lives or share them on related platforms such as TikTok, Youtube etc. Most time, we need to take a video and inport to computer to edit. If you don't know how to transfer videos from iPhone to mac but want to make a video, then you can't miss this article! We are going to talk about 5 ways to help you transfer video beween iPhone and Mac.
- Way 1: How to Transfer Videos from iPhone to Mac Flexibly
- Way 2: How to Import Videos from iPhone to Mac with Photos/iPhoto
- Way 3: How to Upload Videos from iPhone to Mac using iCloud
- Way 4: How to Move Videos from iPhone to Mac Wirelessly
- Way 5: How to Get Videos from iPhone to Mac by iMessage
Editor Recommend: Transfer Videos And Photos from iPhone to Mac in Minutes
Tenorshare iCareFone is the best way to transfer videos and photos from iPhone to Mac. You don't need to worry about the video too big to wait for a long time. With this amazing tool, you can selectively transfer media files within 3 steps. I've liseted the reasons why you should give this software a try:
- Easy to use
- Superior Transfer speeds
- No Wi-Fi needed
- Fully readable and accessible videos or any data after transfer
- Selectively choose videos or opt for bulk transfer
- No iTunes or iCloud restrictions
- No storage limitation
- Compatible with the lastest iOS 14 version
How to use iCareFone:
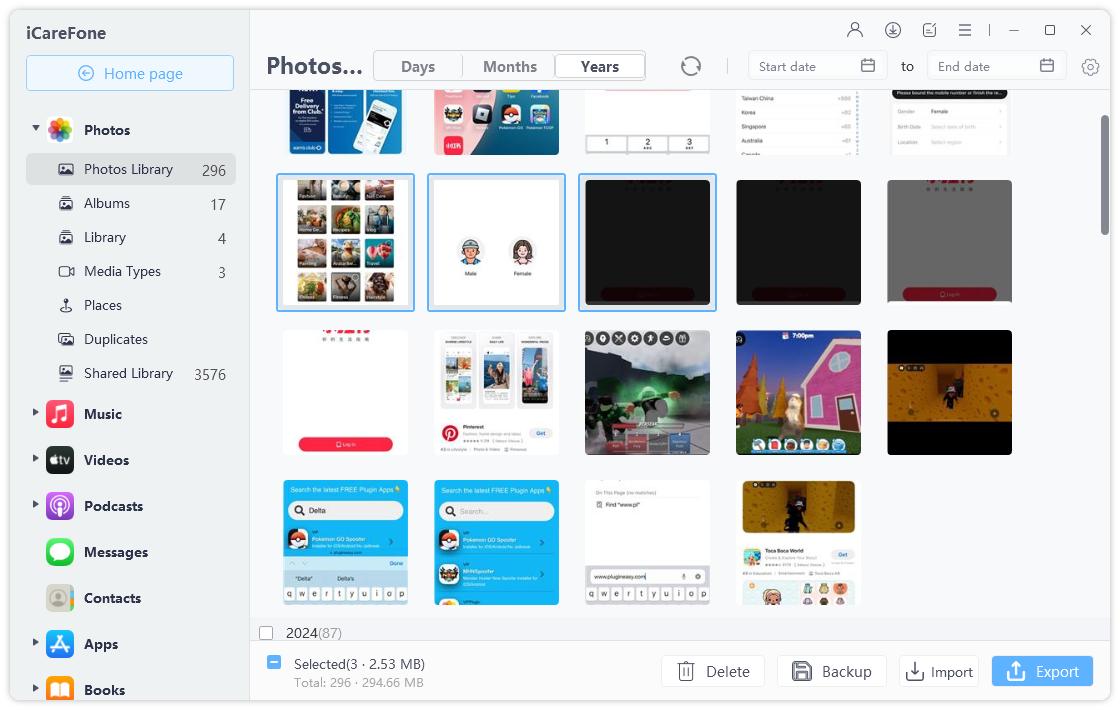
After installing iCareFone, launch it and connect your iPhone to cpmputer and select "Manage".

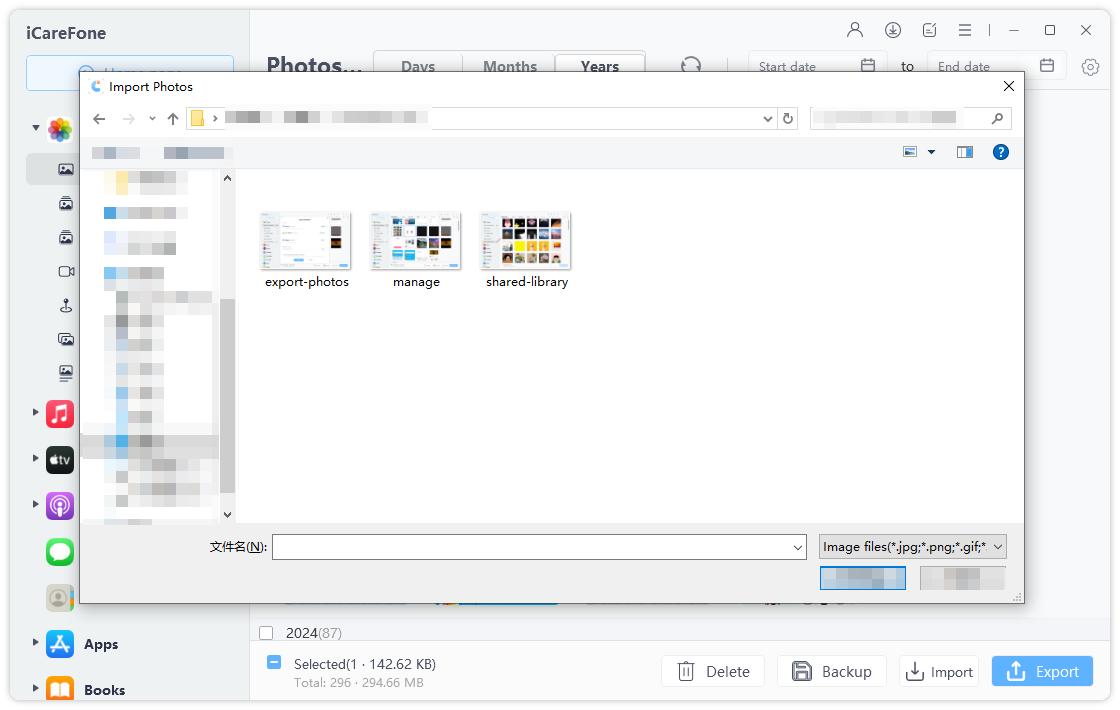
Next, iCareFone will display all your iPhone photos and videos. Select the files you want to transfer and click "Import"

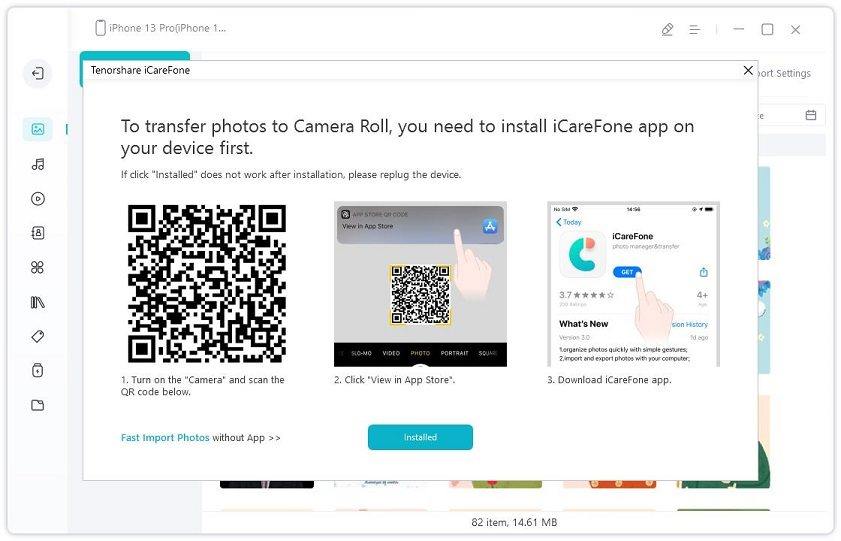
Next, download iCareFone from App Store on your iPhone, and all your photos and videos will auto transfer to Mac.

After that videos will start transferring instantly, with amazing speed. Don't miss this software!
Way 2: How to Import Videos from iPhone to Mac with Photos/iPhoto
After Apple introduced the new Mac OS X Yosemite 10.10.3, Photos App came as the replacement to the older iPhoto app. You can transfer video from iPhone to Mac if the devices were connected via USB cable with Photos/iPhoto. Keep in mind that it requires the latest generation of iTunes to work smoothly.
1. Connect your iPhone with a USB cable on to your Mac, and the Photos App will be launched automatically. If it fails to launch automatically, then launch it manually.
2. Now on the interface, select iPhone and you will see all your photos and videos listed
3. Now, select the videos and tap the "Import" option from the top menu.

4. If you do not need the files after importing them, you will also need to turn on the "Delete item" option. As the Photos App is very convenient and free, it is very popular among the users and rightfully so!
Way 3: How to Upload Videos from iPhone to Mac using iCloud
If iCloud Photo Library is enabled on your iPhone, then it will sync all of your photos and videos from your iPhone, which you can be accessed from any other iDevice. You also need to use the same Apple ID on every device.
If you want to upload your videos from iPhone to Mac using iCloud Photo Library, then you need to activate the feature on both of the device.
1. First, open your Mac and then navigate to "System Preferences". From there go to iCloud, just activate the "iCloud Photo Library" option.
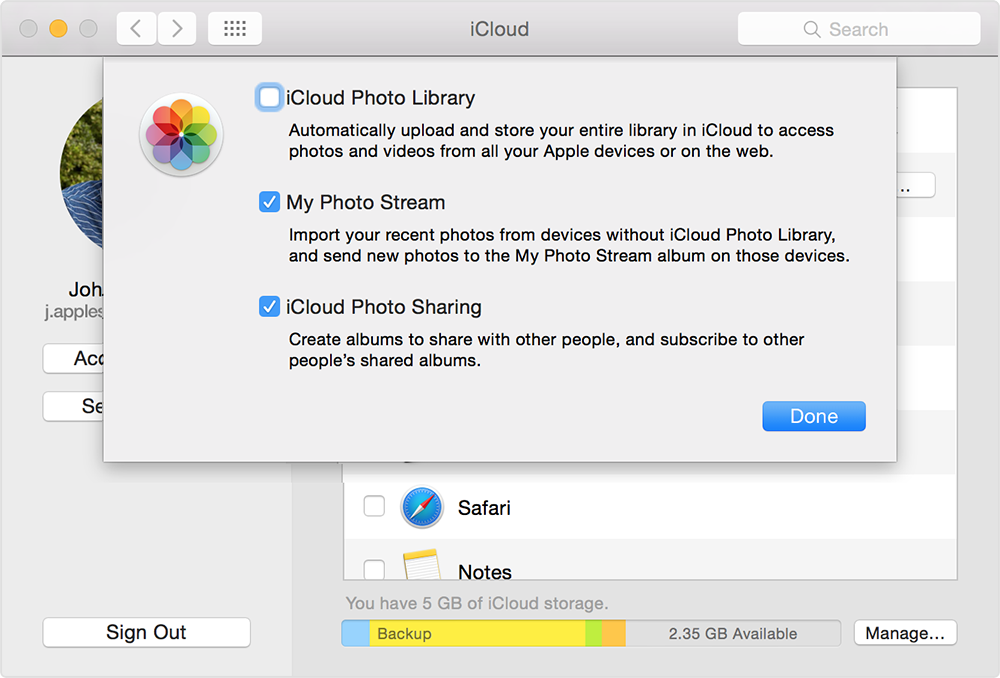
2. On your iPhone, go to "Settings" and then visit your Profile. From there go to iCloud and then enter Photos. Now turn on the "iCloud Photo Library" feature.
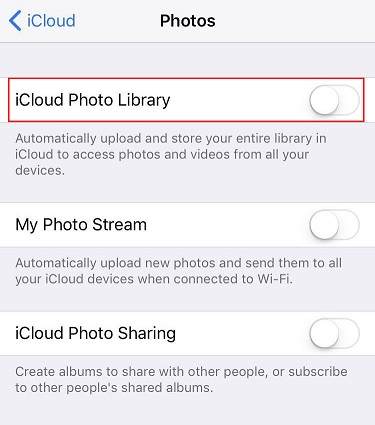
Immediately after activating the feature on both of the devices, iCloud Photo Library will start syncing photos and videos. It will take a few hours to complete the process, but you can monitor the progress from the iCloud interface. You can also get access to your videos from your Mac using the Photos app.
Way 4: How to Move Videos from iPhone to Mac Wirelessly
The AirDrop app works a bit similar to Email as it is a wireless form of transfer. You can add various kinds of data to AirDrop from iPhone and transfer them to Mac. Unfortunately, it is a new app and it only supports the latest Mac OS X Yosemite, you will also need a strong Wi-Fi connection as well.
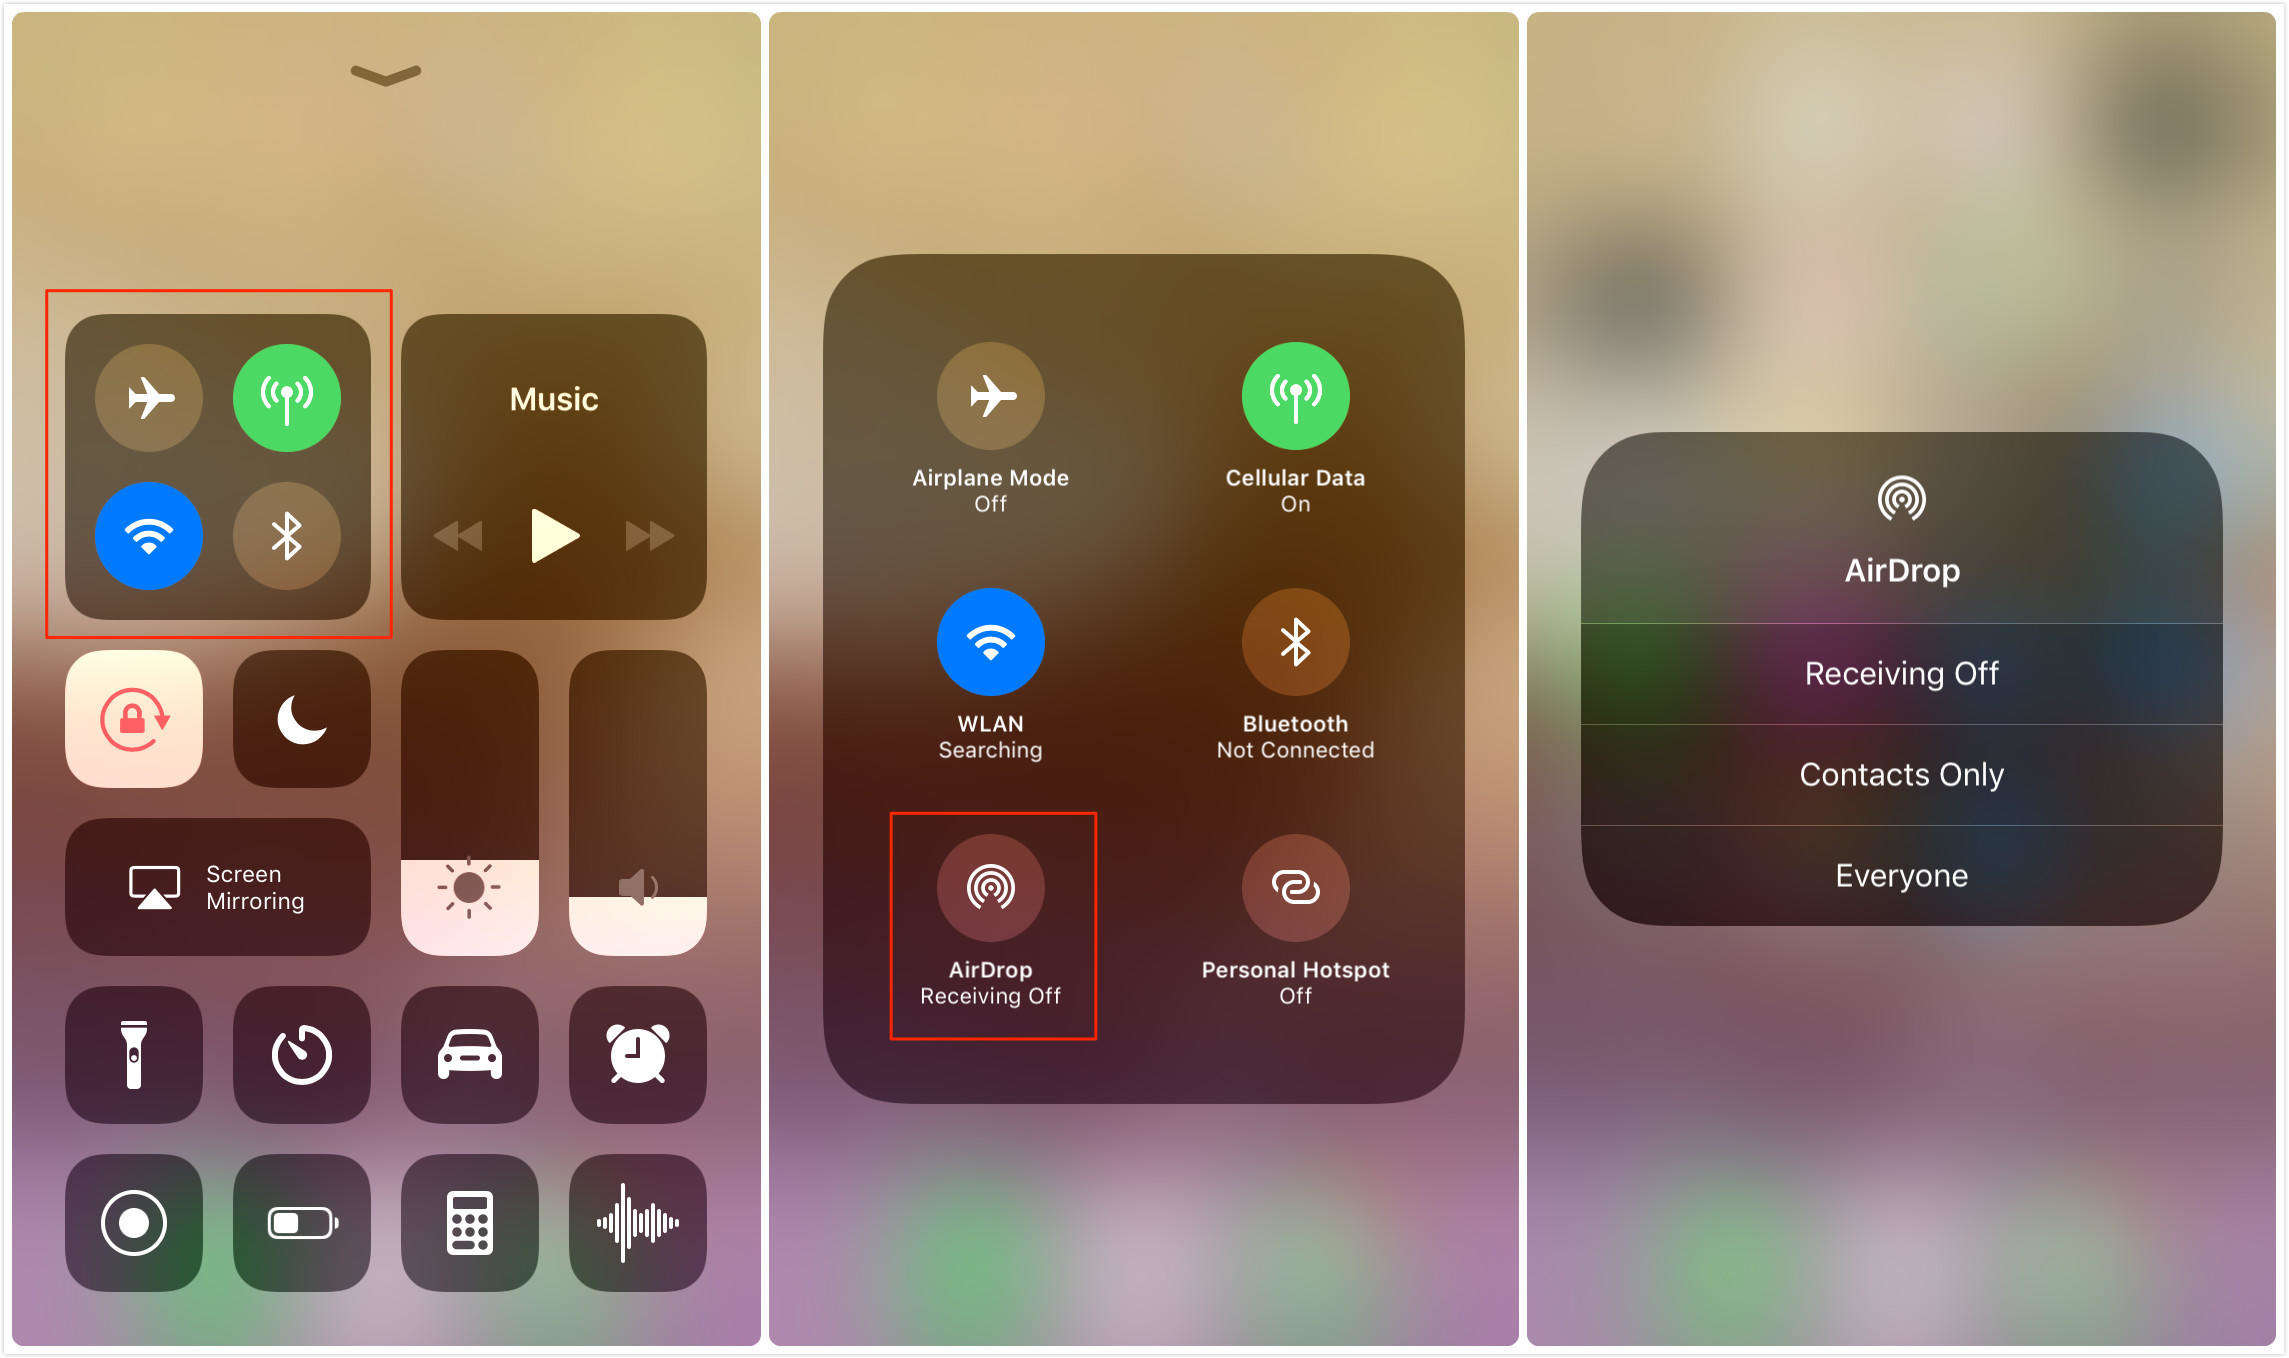
1. So, you should activate AirDrop on your device and select Everyone after connecting both your devices to the same network.
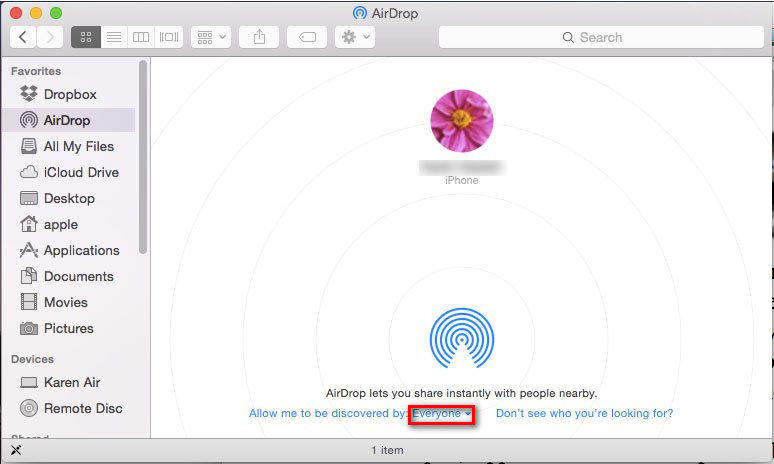
2. Now, open the Finder and run Airdrop on MacBook/MacBook Pro/Air/iMac/iMac Pro and enable Everyone in discovery settings
3. When AirDrop is connected, select the videos from your camera to transfer them to your Mac, you can do that by tapping the share icon.
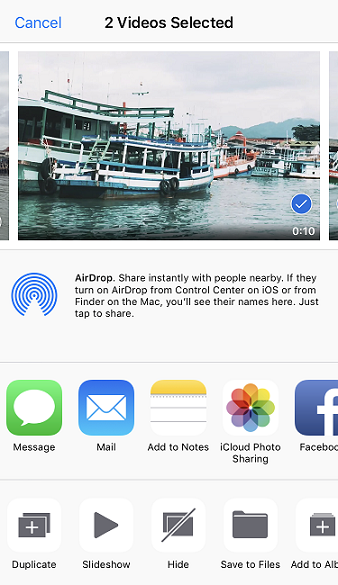
If your Wi-Fi is weak then it would take a long time to transfer the files, otherwise, AirDrop's transfer rate is fast.
Way 5: How to Get Videos from iPhone to Mac by iMessage
iMessage was developed by Apple as a medium of conversation between iOS users. Although the app is not a multi-platform messaging app, it still has subdued the needs of the iOS users. Besides texts, iMessage is also able to send videos between iOS users. This particular function of the app is widely loved and used by many. Here' s how to use iMessage to transfer videos from iPhone to Mac:
1. On your Mac, open Messages.
2. Now, go to "Performances" and then tap on "Accounts"
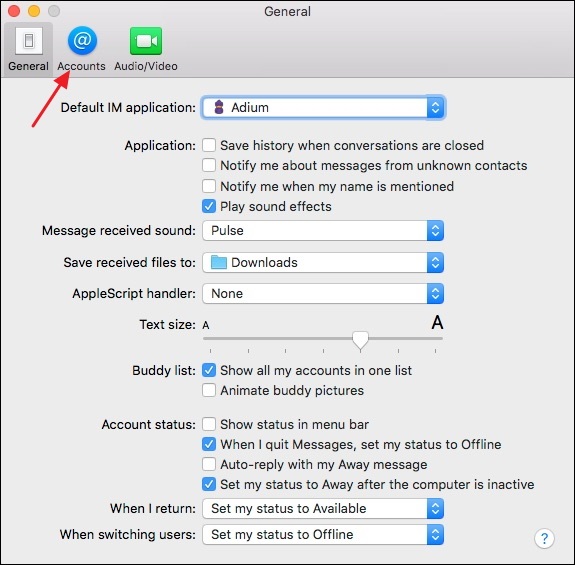
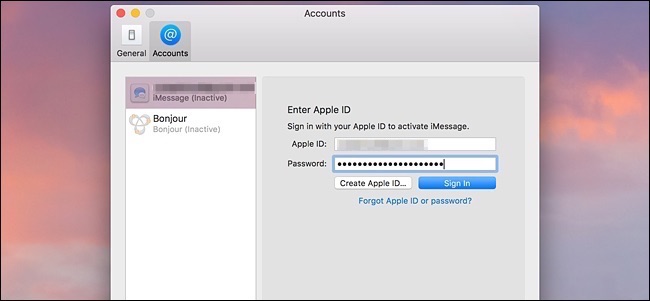
3. Enter the sign in details or the Apple ID and password when prompted.
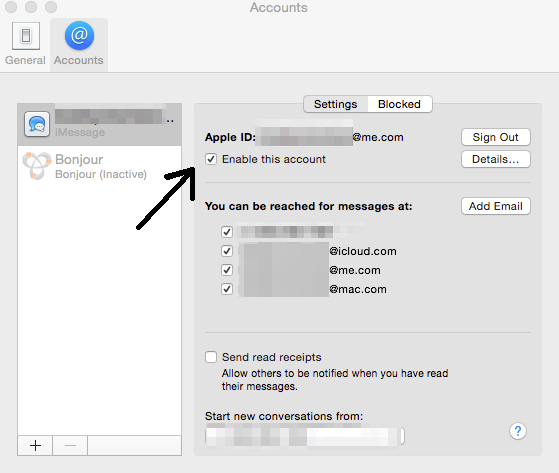
4. After logging-in, tap on "Enable this account" option.
iMessage was designed to compete with various Android messaging apps, this app excelled at its primary task alongside providing the users with an excellent medium to transfer data. Keep in mind, after you login you can only transfer videos between two specific devices and it also comes with storage limitation.
Summary
So, these are some of the most effective ways on how to transfer videos from iPhone to MacBook. And Tenorshare iCareFone is the most recommended method. The advantages it offers over other methods here simply seals the deal! Most importantly, it is really effective, easy to use and super fast. So, our choice in this article is none other than Tenorshare iCareFone and we would highly encourage you to go for it!
Speak Your Mind
Leave a Comment
Create your review for Tenorshare articles

Tenorshare iCareFone
Best Free iPhone Transfer & iOS Backup Tool
Easily, without iTunes


