Samsung Tab 8 FRP Bypass for Android 11/12/13/14/15 - Simplest
If you find yourself locked out of your Samsung Tab 8 due to the Google Factory Reset Protection (FRP) feature, don’t worry you're not alone. Many users face this situation after a factory reset or purchasing a second-hand device.
Fortunately, there are effective methods to bypass this restriction. In this article, we will explore the Samsung tab 8 FRP bypass for Android 11/12/13/14/15, ensuring you can regain access to your device quickly and easily.
- Part 1. Samsung Tab 8 FRP Bypass for Android 11/12/13/14/15 [One Click]
- Part 2. Samsung Tab A8/S8/E8 FRP Bypass Without PC
- Part 3. FAQs of FRP Bypass Samsung Tab 8
Part 1. Samsung Tab 8 FRP Bypass for Android 11/12/13/14/15 [One Click]
One of the most efficient ways to bypass Samsung tab 8 FRP is by using Tenorshare Samsung FRP Tool. It supports a variety of brands, including Samsung, Xiaomi, Redmi, Vivo, Huawei, OPPO, Realme, and OnePlus, making it versatile for many users.
The software is compatible with Samsung Tab 8 models, such as S8, A8, and E8, running Android versions 11 through 15. With its one-click solution, you can bypass Google FRP locks quickly and securely, allowing you to enjoy your device without any restrictions.
Key advantages of Tenorshare Samsung FRP Tool
![]()
- High Compatibility: Works with over 6000 Android devices, including Samsung, Xiaomi, and more.
- FRP Bypass: Remove Google account verification without needing a password.
- Screen Lock Removal: Unlock various types of screen locks including PINs, patterns, and fingerprints.
- Device Support: Compatible with Samsung Tab 8 models like S8, A8, and E8 running Android versions 11 to 15.
- Ease of Use: Simple one-click process to remove Google locks and screen locks.
Steps to Bypass Samsung Tab 8 FRP with Tenorshare Samsung FRP Tool
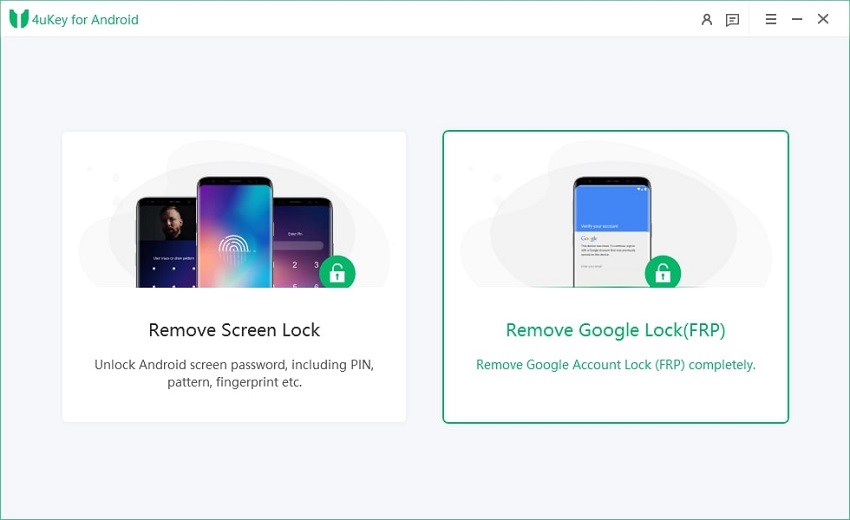
Download Tenorshare Samsung FRP Tool on your computer. Once installed, open it and choose the feature "Remove Google Lock(FRP)" to start the Samsung Tab 8 FRP bypass process.

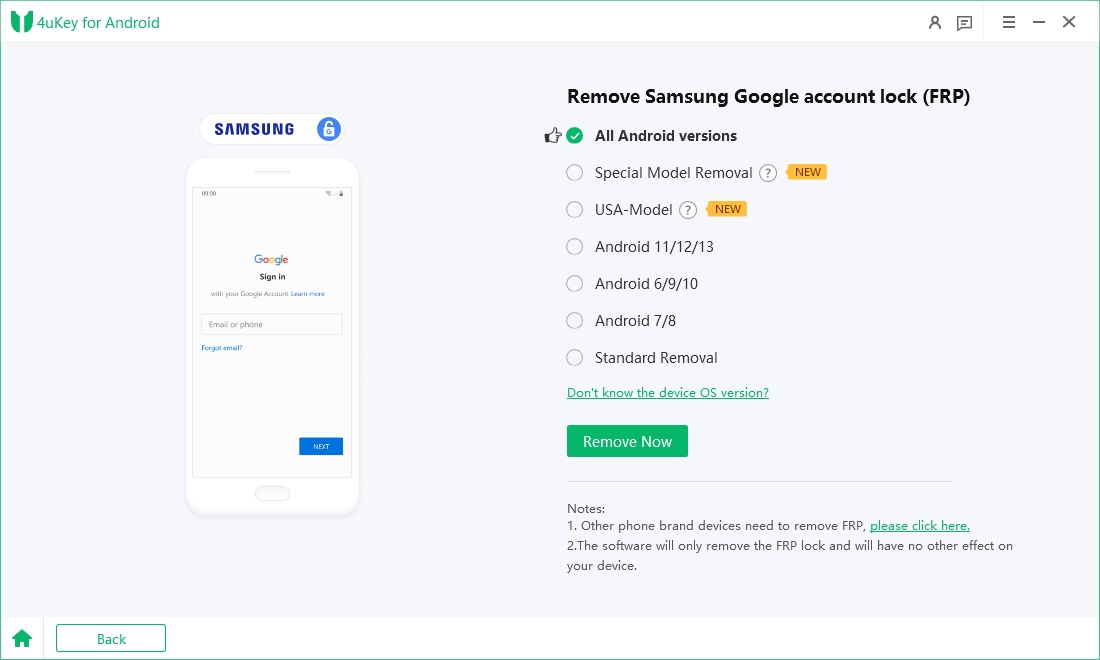
When you connect your Samsung Tab 8 to the computer, you'll need to select your device OS version and click on "Start" to proceed.

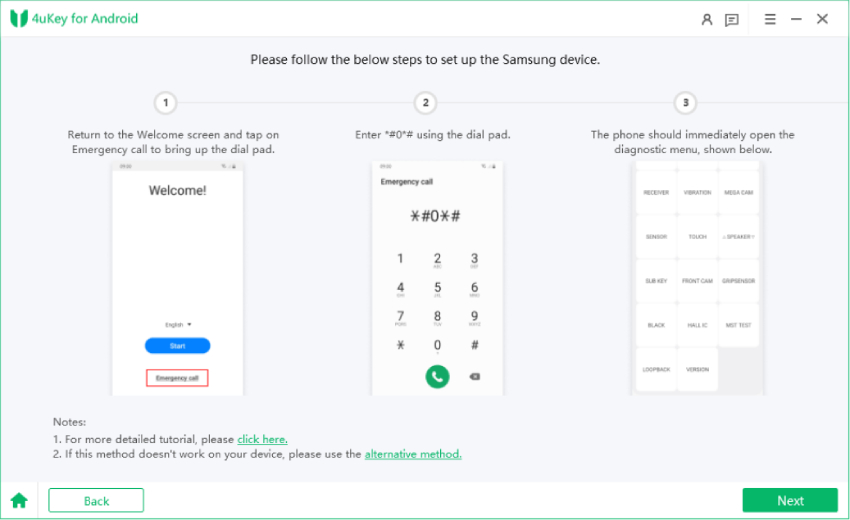
Follow the step-by-step instructions so that Tenorshare Samsung FRP Tool will start removing the FRP lock from your Samsung Tab 8 device.

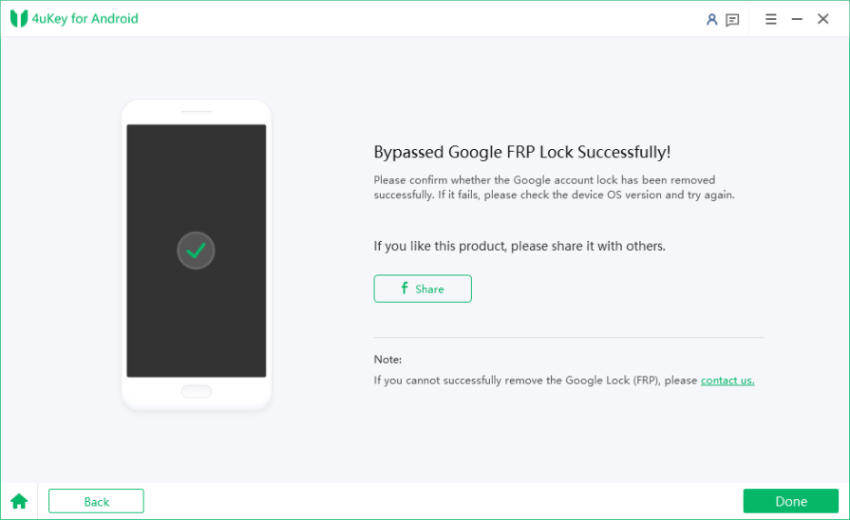
Wait for Tenorshare Samsung FRP Tool to bypass Google lock on your Samsung Tab 8. Once completed, your Samsung device will reboot automatically and you can set up your Samsung Tab 8 as new.

Part 2. Samsung Tab A8/S8/E8 FRP Bypass Without PC
Bypassing FRP on Samsung Tab A8, S8, and E8 devices without a PC can be accomplished using the TalkBack feature. This method is particularly useful for those who do not have access to a computer or prefer a more straightforward approach.
TalkBack is an accessibility feature designed for visually impaired users, but it can also be leveraged to navigate through the setup process and bypass the Samsung FRP lock.
Steps to Bypass Samsung Tab A8 FRP via Talkback
- Reset your Samsung phone. Once it powers back on, wait for the "Welcome" screen to appear. Select your preferred language and tap "Start."
- Connect your device to a Wi-Fi network and enter your Google Account information. You can enter any text in the email field, then long-press to select it and access "Keyboard Settings."
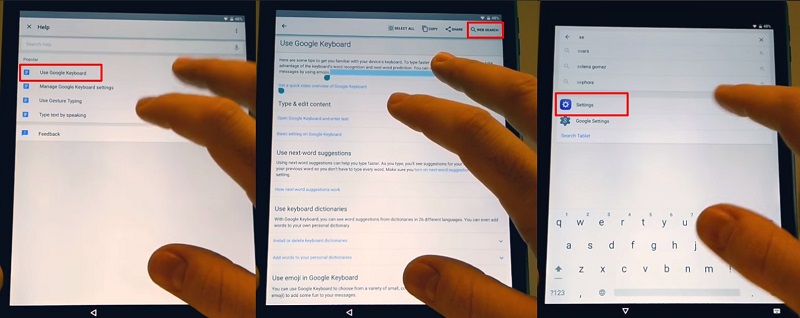
- Open the "About Samsung Keyboard" section, locate "Open Source License," and long-press on the agreement page. Tap the three dots in the corner, and then select "Web Search." Your request may be denied at this point.
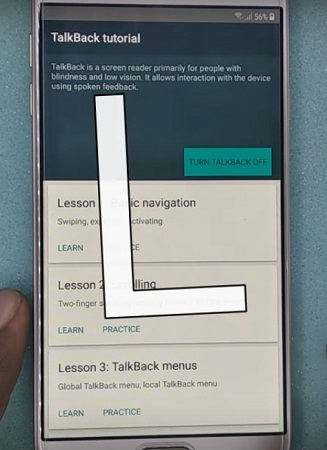
- Go back to the Wi-Fi settings and press the Home button 3-4 times to activate Google TalkBack. During the tutorial, spell the letter "L" on the screen.
- Access the Global Context Menu and repeatedly tap on "Talkback Settings" until you can navigate through the options.
- In the TalkBack Settings, press both Volume buttons simultaneously to trigger a prompt asking if you want to suspend TalkBack. Click "OK" to return to the settings menu.
- Scroll to the bottom of the TalkBack Settings page and tap on "Help & Feedback." From there, select "Get Started with Voice Access."
- Watch the Voice Access video on YouTube, then click the link above the video to open the YouTube app.
- In the YouTube app, tap your profile icon and choose "Terms & Privacy policy" to view it in your browser.
- In the dialog box that appears, tap "Cancel" to access the "Terms of Service" page. Use Google to search for "Lavileztechservice" and download "Andoes Launcher" (or "quickshortcutmaker-2-4-0.apk" if it's unavailable).
- Find "Andoes Launcher" in your Download History under Bookmarks > History or via the notification bar. Tap to open it.
- Upon opening, a dialog box appears; tap Settings, navigate to "Unknown Sources," disable the option, and confirm with "OK."
- Install the launcher. After installation, navigate to Device Settings > Lock Screen & Security > Other Security Settings. Under Device Administrators, uncheck "Find My Device."
- In Settings, enable the visibility of System Apps under Apps. Disable Google Account Manager and Google Play Services.
- Install "Technocare" from Download History. After installation, go to Settings > Clouds and Accounts > Accounts, tap "Add Account," and choose Google from the list.
- After seeing "Couldn't Sign in," tap "Next." Retry until successful. Enter your new Gmail account; the device will verify it.
- Navigate to Settings > Other Security Settings > Device Administrators, enabling Android Device Manager. Enable Google Play Services under Apps, then restart the device.
- On restart, tap "Start" on the "Welcome" screen, agreeing to all terms.
- Select "Don't Restore" during setup to bypass security protocols. Access Settings > About Phone > Software Information, tapping "Build Number" seven times to enable Developer Mode. Activate USB Debugging and OEM Unlock in Developer Options.
- From "About Phone," select "Reset" > "Factory Data Reset," confirming with "Delete All" to initiate the reset process.
- After the reset, the device will start again. Tap "Start" and finish the setup wizard. You will see that the device has verified the Google Account, and you can now use your Samsung device.

Pros:
- No PC Required: Bypass method works entirely on the Galaxy Tab 8 without a computer.
- Free: No software purchases or downloads are necessary.
Cons:
- Complexity: The process can confuse users unfamiliar with TalkBack.
- Time-Consuming: It may take longer than using software like Tenorshare.
Part 3: FAQs of FRP Bypass Samsung Tab 8
Q1: How do I remove a Google account from my Galaxy Tab 8?
Go to Settings > Accounts and backup > Manage accounts, select the Google account you want to remove, and tap Remove account.
Q2: How long does it take to bypass Samsung Galaxy Tab A8 FRP?
Bypassing the FRP on a Samsung Galaxy Tab A8 using Tenorshare 4uKey for Android typically takes just a few minutes.
Q3: Which is the best Samsung Tab 8 FRP unlock tool?
The best tool for FRP bypass Samsung tab 8 is Tenorshare Samsung FRP Tool. Its user-friendly interface and quick results make it the top recommendation for many users.
The most easiest and 100% working Samsung FRP unlock tool for everyone's use. It can bypass FRP on various Samsung models without Google account.
Conclusion
Dealing with the Google Factory Reset Protection on your Samsung Tab 8 can be frustrating, but with the right tools and methods of FRP bypass Samsung tab 8, you can easily regain access.
Whether you choose to use the efficient Tenorshare Samsung FRP Tool or the TalkBack method, you have options that cater to different needs. For the simplest and most effective solution, we highly recommend Tenorshare 4uKey for its speed, ease of use, and compatibility with various devices and Android versions.
- Bypass Samsung FRP with simple clicks, without Google account
- Remove Google account verification completely within 1 minute
- Success rate up to 99% for different Samsung models
- Work on Samsung, Xiaomi, Redmi, Vivo, OPPO, Realme, Oneplus, Huawei and Motorola
