

iCareFone - Free iOS Backup tool & Easy Data Manager
Backup/Transfer/Restore/Manage iOS Data with Simple Clicks
Backup/Manage iOS Data Easily
Backup/Manage iOS Data in Clicks
"I've got a ton of music on my iPhone that I want to transfer to my new Mac. Some of these tracks aren't available on Apple Music anymore. How can I transfer music from iPhone to Mac without losing any songs? Is there a way to do this quickly and selectively?"
Transferring music from iPhone to Mac is a common need for many Apple users. Whether you want to back up your favorite tunes or free up space on your iPhone, knowing how to move your music library efficiently is essential. This guide will explore various methods to transfer music on iPhone to Mac, ensuring you can choose the best option for your needs.
One of the best tools to transfer music from iPhone to Mac quickly and selectively is Tenorshare iCareFone. This powerful, all-in-one iOS data management tool supports iOS 18 Beta, offers a range of features, and easily transfers your favorite music from your iPhone to your Mac with just a few clicks. The process is fast and allows you to selectively transfer only the songs you need.


After downloading and installing Tenorshare iCareFone on your personal computer or Mac, you will need to connect your device to the software to transfer music without iTunes. When the device has been connected, go to the top menu and pick the "Manage" option to get started.
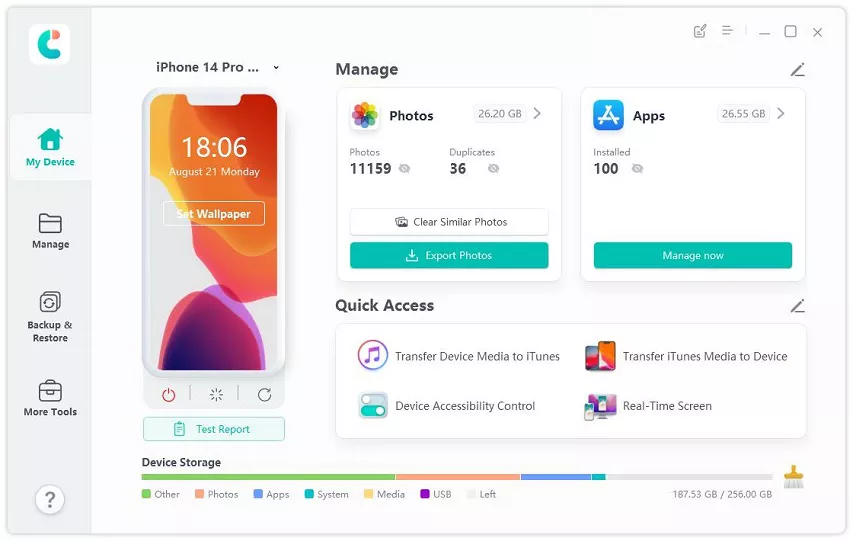
Next, choose the kind of data you want to manage. Every data type has its comprehensive guide on our website. In this scenario, you should go with the Music & Video Apps Library option.

Now choose the music that you need to export and click the export button above. Then you just need to wait for the export process to complete.

Moving music from your iPhone to your Mac wirelessly can be a convenient option if you prefer not to use cables. Here are the two methods.
Using Apple Music is simple as it automatically syncs your music library across all Apple devices. However, this method is only applicable for people listening to music on Apple cloud and have not saved the files locally to their device. It also requires you to subscribe to Apple Music, which will cost you some amount.

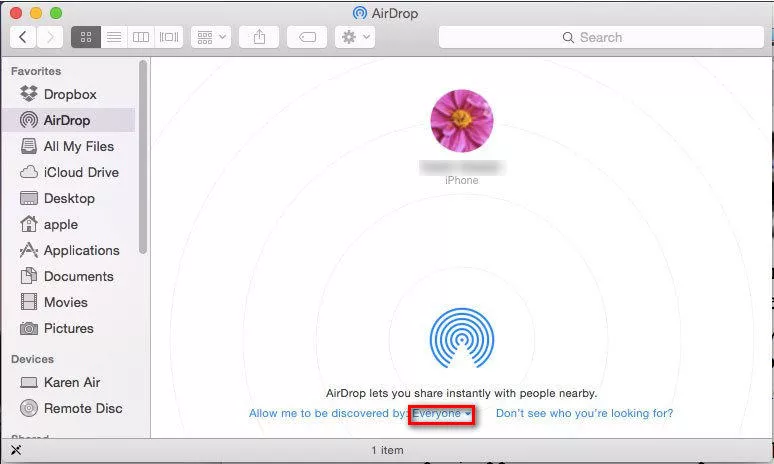
AirDrop offers a wireless way to transfer music files directly from your iPhone to your Mac without needing a Wi-Fi connection. It's perfect for quick transfers of individual songs or small batches of music files that are downloaded to your device.
Let’s look at the steps to move Music files from iPhone to Mac using AirDrop.

If you're looking to sync music from your iPhone to your Mac without any cost, you have a couple of reliable methods. Let’s take a closer look at each of them.
Using Finder on macOS Catalina and later lets you sync music between your iPhone and Mac with ease. It supports USB and Wi-Fi connections, allowing for flexible syncing of your entire music library or specific playlists, artists, albums, or genres. Here are the steps to use Finder for the transfer of music.
iTunes, available on macOS Catalina and earlier, provides a straightforward method to transfer purchased music from your iPhone to your Mac. It organizes your music library, manages playlists, and backs up purchased music files. This is how you can transfer music from iPhone to Mac using iTunes.

To help you decide the best method to transfer music from your iPhone to Mac, here's a detailed comparison table:
After comparing these methods, Tenorshare iCareFone stands out as the best tool to transfer music from your iPhone to your Mac. It offers a comprehensive set of features, including fast and selective transfers, lossless music conversion, and compatibility with the latest iOS version.
Transferring music from your iPhone to Mac can seem daunting, but with the right tools and methods, it becomes a simple task. Whether you choose to use Apple Music, AirDrop, Finder, iTunes, or a specialized tool, each method has its own set of advantages and disadvantages.
If you are looking for the most efficient and versatile solution, we highly recommend using Tenorshare iCareFone. This powerful tool not only makes the process of transferring music from your iPhone to your Mac fast and easy, but also offers additional features like selective transfers, lossless music conversion, and comprehensive iOS data management.

iCareFone Transfer - WhatsApp Transfer, Backup & Restore


then write your review
Leave a Comment
Create your review for Tenorshare articles
iCareFone - Free iOS Backup tool & Easy Data Manager
Backup/Transfer/Restore/Manage iOS Data with Simple Clicks
Backup/Manage iOS Data Easily
Backup/Manage iOS Data in Clicks
By Anna Sherry
2025-03-28 / iOS File Transfer
Rate now!