then write your review
ReiBoot - No.1 Free iOS System Repair Software
Fix 150+ iOS Issues without Data Loss & Safely Upgrade/Downgrade
ReiBoot: No.1 iOS Repair Tool
Fix 150+ iOS Issues, No Data Loss
With over-the-air updates having become mainstream, it has become all the more important to keep your device’s OS up-to-date. But the update may get stuck sometimes due to some reason or the other. A common error that you may encounter while updating your iPad to iPadOS 16 is the iPad unable to verify update error.
So why is iPad unable to verify update? There are several different reasons because of which you can get this error. These include – lack of storage space, network connectivity issues, the download period crossing the timeout or if the update is somehow interrupted in-between. Unfortunately, as long as you get this error, your iPad is stuck on verifying and won’t be able to finish the update. To avoid this, you could try any or all of the methods that are listed below.
When we open any app, the iOS stores in in the RAM with the latest settings so that it re-opens quickly next time. However, sometimes the running instance of the app may be the cause of the issue. Therefore, in this case, it is advisable that you clear the settings app from RAM to refresh it.
To do this, follow the steps given below:
From the Settings window, tap on General and then on Software Update to start the installation of the update again.
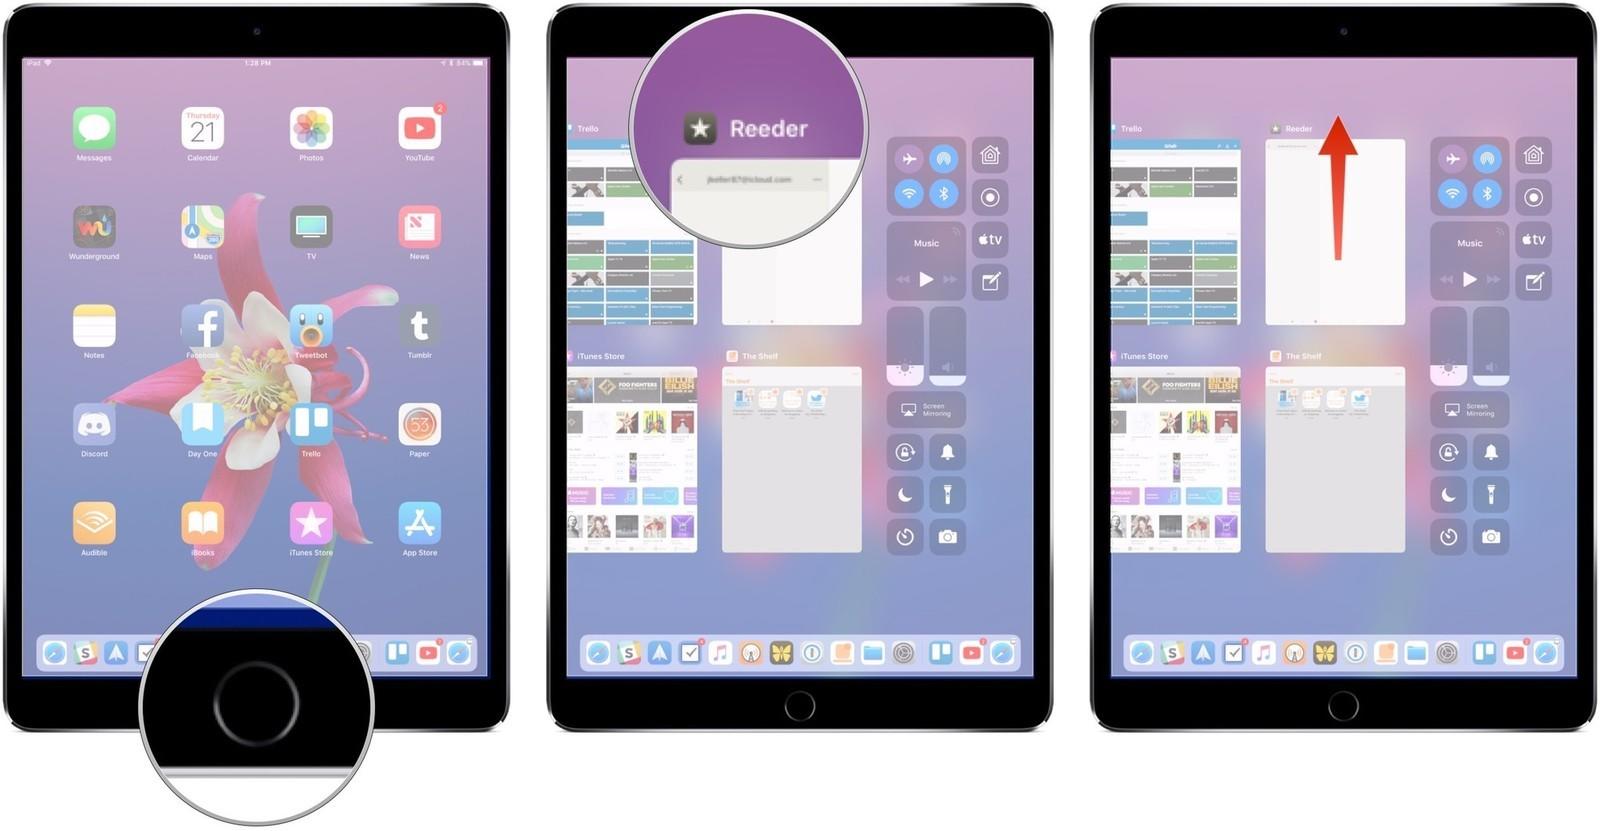
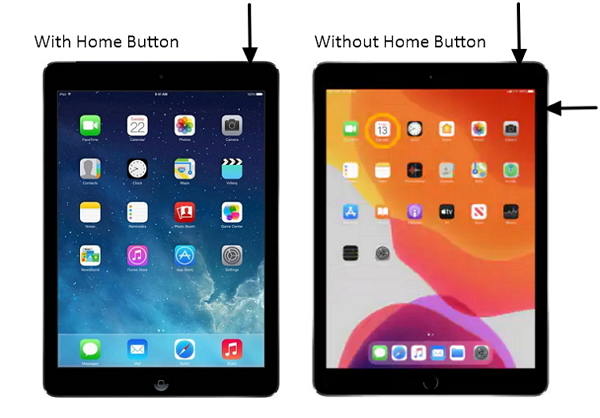
Sometimes the easiest solution is to just force a restart on your device. There are two different ways you could do this depending on your iPad model.
If your iPad has a home button, then you can do the following:
If your iPad does not come with a home button, you can still force restart it by doing the following:
When the device has turned on and is ready to use, try restarting the update installation again.
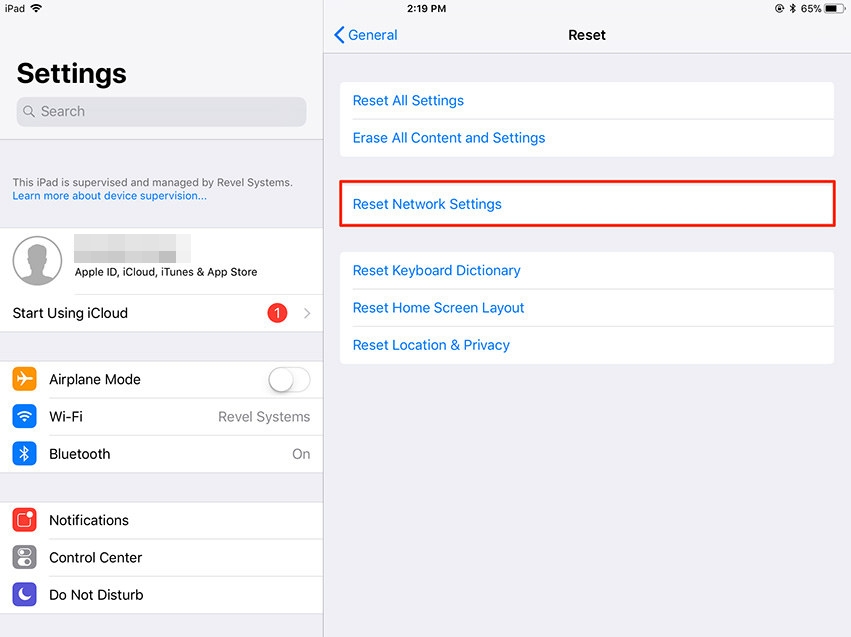
Network issue is a common cause of the update verification error. Since the update is verified from the server, any network/internet issues will lead to a failed verification. If this is what is causing the error in your case, then a quick reset of the networking settings could do the trick.
Of course, this method assumes that your internet connection itself is working in the first place. Before you reset the networking settings, you should know about that any stored Wi-Fi credentials, VPN credentials and Wi-Fi Assist will be deleted by doing this.
Tap on Reset Network Settings.
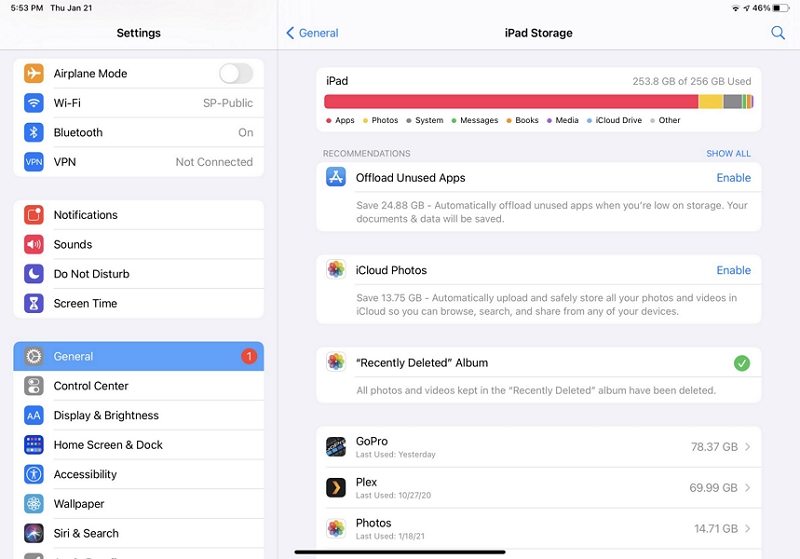
It could be possible that the update has not been downloaded properly or that the update package has become corrupted and is missing essential files that are required to complete it. In such a case, you can delete the downloaded update and re-download it. In order to delete the existing update, do the following:
In the General window, you will find the iPad storage option.
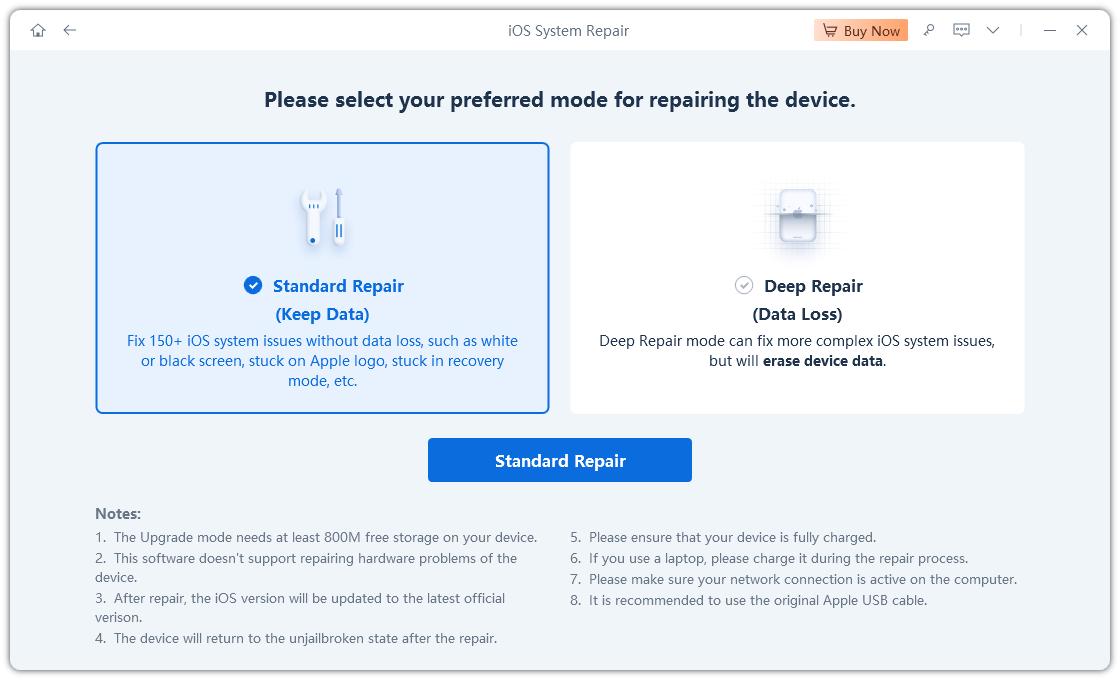
If none of the above methods are working for you then it could be possible that your operating system itself has been corrupted and needs a repair. You can use a good update and recovery software like Tenorshare ReiBoot to update the operating system. ReiBoot provides you with two different options for repair – Standard and Deep Repair. You can first start a Standard Repair to update your iPad without data loss completely. Perform the following steps to do the update:
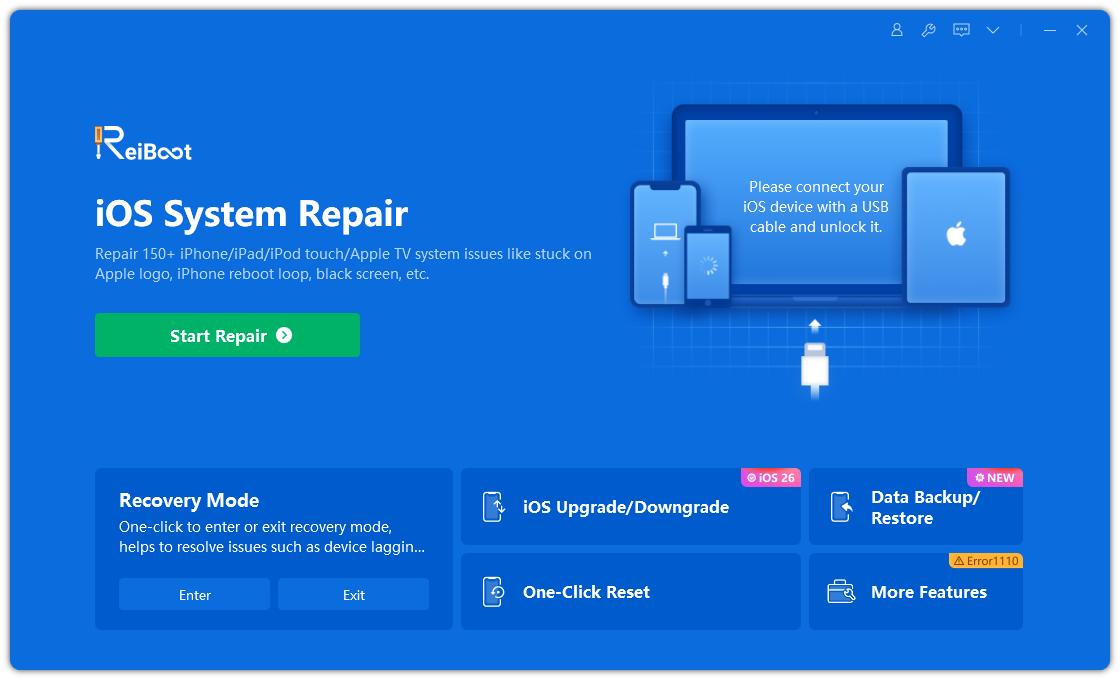
Download and install ReiBoot on your computer. Run ReiBoot and connect you iPad. Click “Start” from the main interface.
After your iPad has been detected, click on Standard Repair.
ReiBoot will allow you to download the latest firmware from the server to start the repair process.
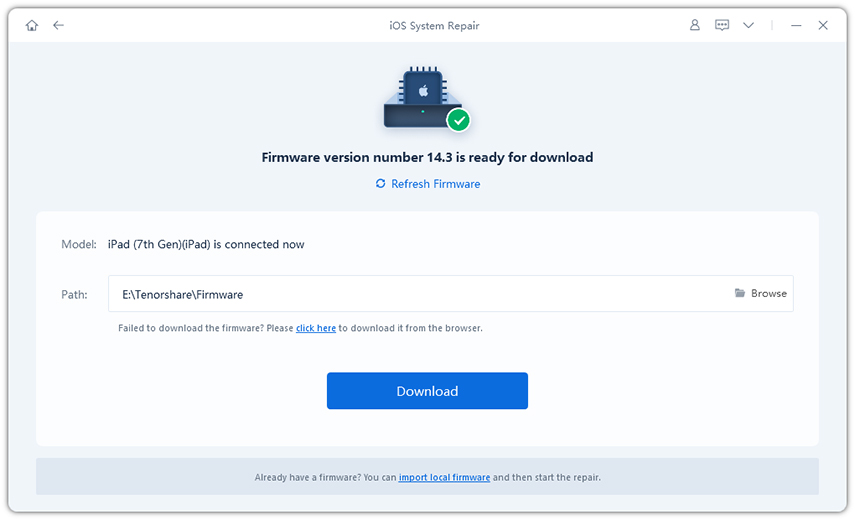
Once the firmware package is downloaded, click 'Start Standard Repair'; to start the system update.
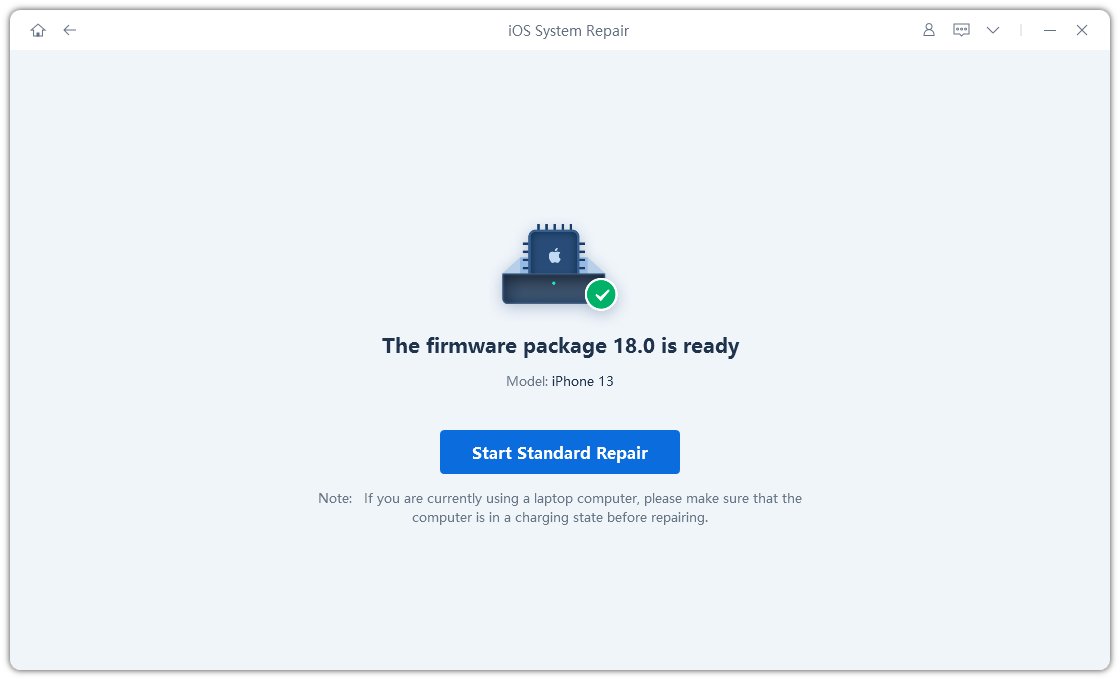
After the repair process is done,your iPad will reboot and your iPadOS system will be the newest version.
Updates usually bring added security features. If your iPad is not able to update successfully it may be left vulnerable to online threats. Therefore, it is vital that you fix this issue. In most cases the issue can be resolved by any of the first 4 methods. But for some cases where the underlying firmware is causing the issue, you will require a recovery software like Tenorshare ReiBoot to perform the update on the operating system.
then write your review
Leave a Comment
Create your review for Tenorshare articles
By Sophie Green
2025-04-17 / iPad
Rate now!