

iCareFone - Free iOS Backup tool & Easy Data Manager
Backup/Transfer/Restore/Manage iOS Data with Simple Clicks
Backup/Manage iOS Data Easily
Backup/Manage iOS Data in Clicks
Download Tenorshare iCareFone to fix your iPhone SE 4 stuck on "Preparing to Transfer" and safely transfer your data. This guide will walk you through the best methods to resolve the issue quickly and efficiently. Keep reading!
The iPhone SE 4 has just launched, and you've decided to upgrade to this powerful device, eager to experience its great features. The next step? Transferring your data from your old iPhone. But what if the transfer process gets stuck? If your iPhone SE 4 is stuck on "Preparing to Transfer," you're not alone. Some users face the same problem. This frustrating issue can happen during the data transfer process, leaving you stuck on the screen for longer than expected. But don’t worry this guide will walk you through 6 practical solutions to fix the problem and get your data transferred smoothly. So let’s get started!

When your iPhone SE 4 is stuck on "Preparing to Transfer," it’s often due to several common causes. Here are the main reasons:

Repeated attempts to fix this problem without proper tools can sometimes worsen the situation. If the issue is unresolved, it's best to pause the transfer process and use reliable recovery tools to protect your data.
If your iPhone SE 4 is stuck on "Preparing to Transfer," it’s time to troubleshoot. Fortunately, there are easy fixes to resolve the issue and continue transferring your data. Let’s go through the solutions one by one.
If your iPhone SE 4 is stuck on "Preparing to Transfer," a simple restart might solve the issue. Restarting can clear software glitches that prevent the transfer process from completing. Here’s how to do it:
Step 1: Press and hold the power button and the volume down button simultaneously until the slider appears on the screen.
Step 2: Slide to power off and wait for about 30 seconds.
Step 3: Press and hold the power button again to turn the iPhone back on.
Restarting your iPhone SE 4 can often resolve temporary software issues, allowing the transfer to proceed without further delays.

If your iPhone SE 4 is stuck on "Preparing to Transfer," distance between your devices could be the cause. The Quick Start feature relies on both devices being in close proximity for a successful data transfer. Follow these steps to fix the issue:
Step 1: Place both your old and new iPhones close to each other, ideally within a few feet.
Step 2: Ensure both devices are powered on and not in sleep mode.
Step 3: Wait for the devices to recognize each other and initiate the transfer.
Keeping the devices close together ensures a stable connection, reducing the chances of transfer errors caused by weak signals or failed recognition.

If your iPhone SE 4 is stuck on "Preparing to Transfer," one of the most common causes is a WiFi issue. Both devices need to be connected to the same WiFi network for the transfer to occur. Here’s how to ensure proper connection:
Step 1: On both devices, open the WiFi settings and confirm they are connected to the same network.
Step 2: If one device is not connected, select the correct network and enter the password.
Step 3: Wait for the devices to reconnect and try the transfer again.
Using the same WiFi network ensures the devices can communicate effectively, allowing the transfer process to proceed without interruptions.

Outdated iOS versions can cause issues during the data transfer process. If your iPhone SE 4 is stuck on "Preparing to Transfer," it’s important to ensure both devices are running the latest iOS version. Here's how to check and update your iOS:

Step 1: Go to Settings on your iPhone and tap General.
Step 2: Select Software Update.
Step 3: If an update is available, tap Download and Install.

Updating both devices to the latest iOS ensures compatibility and fixes bugs that may be causing the transfer to stall.
If your iPhone SE 4 is stuck on "Preparing to Transfer," insufficient storage could be a factor. Clearing unnecessary data and files will free up space and ensure the transfer process runs smoothly. Here's how to do it:
Step 1: Go to Settings > General > iPhone Storage.
Step 2: Review the list of apps and data. Tap on items you no longer need and select Delete.
Step 3: Empty your Photos, Messages, or any other data that you don’t need for the transfer.
Freeing up space on your iPhone helps ensure there's enough room for the data transfer, improving the chances of a successful transfer.

If your iPhone SE 4 remains stuck on "Preparing to Transfer," performing a hard reset can help fix deeper software issues. A hard reset forces your device to reboot, potentially resolving the problem. Here’s how to do it:

Step 1: Quickly press and release the Volume Up button.
Step 2: Quickly press and release the Volume Down button.
Step 3: Press and hold the Power button until the Apple logo appears, then release it.

A hard reset can fix frozen screens or software glitches that might be blocking the transfer. After restarting, try the transfer again to see if it resolves the issue.
Upgrading to a new iPhone SE 4? Don’t stress about transferring your data; Tenorshare iCareFone is here to make the process easy and quick. This all-in-one tool is designed to help you seamlessly move photos, videos, contacts, messages, music, and apps to your new device without complications.
Forget about dealing with iTunes or iCloud limitations—iCareFone simplifies it all with a few clicks.
Key features of Tenorshare iCareFone for transferring data to your iPhone SE 4:


Here's how you can use Tenorshare iCareFone to Transfer Data from Old iPhone to New iPhone SE 4:
Download and install Tenorshare iCareFone on your PC or Mac. Connect your old iPhone and the new iPhone SE 4 to the computer via USB. If prompted, tap "Trust This Computer" and enter your passcode to ensure proper device detection.
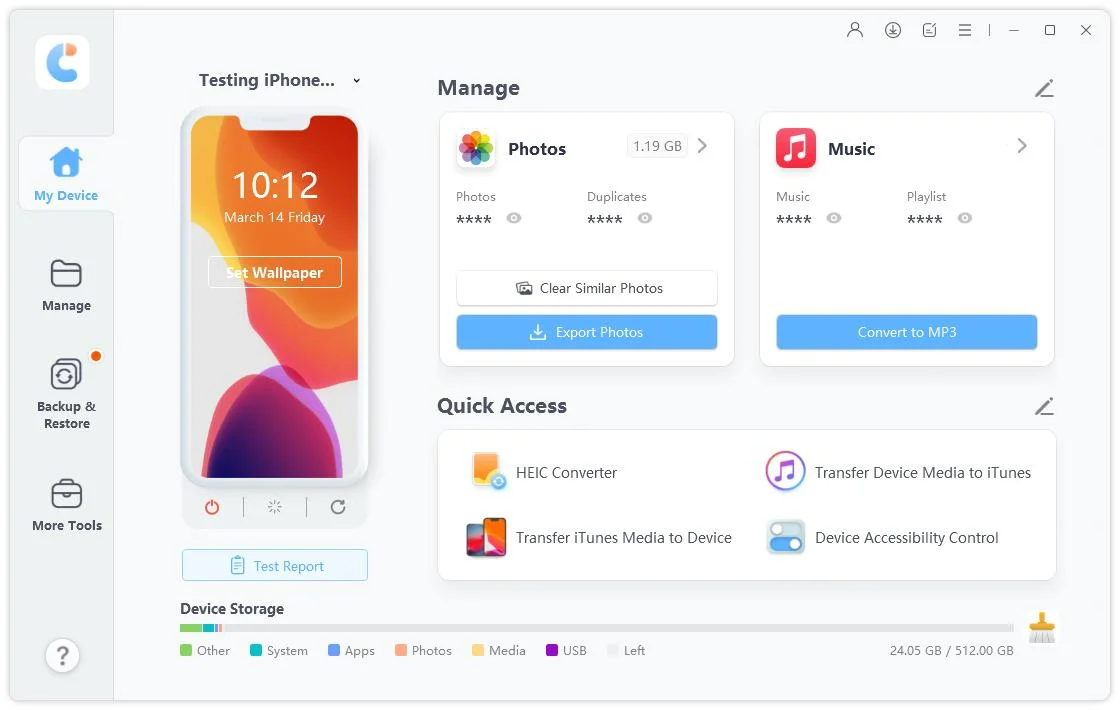
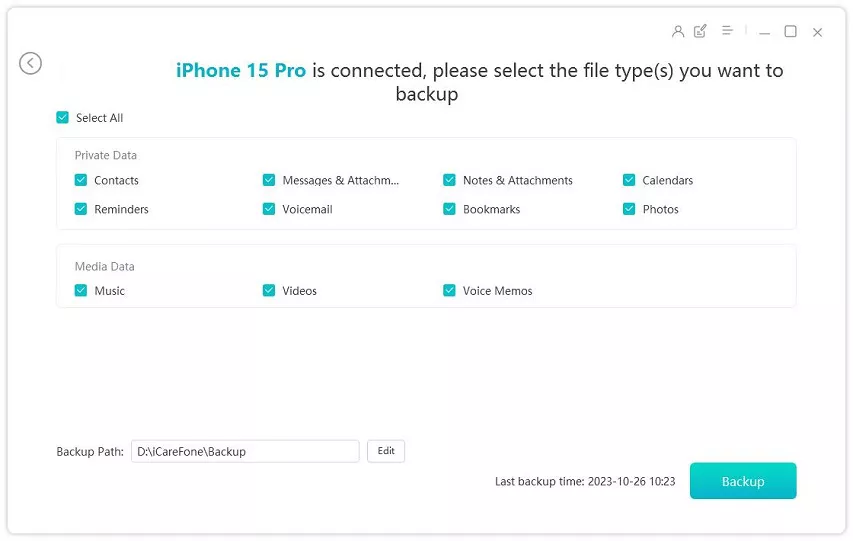
From the main interface of iCareFone, choose the data type you want to transfer (Photos, Music, Contacts, etc.). Then, click Export or Transfer depending on the data you wish to move to your new iPhone SE 4.
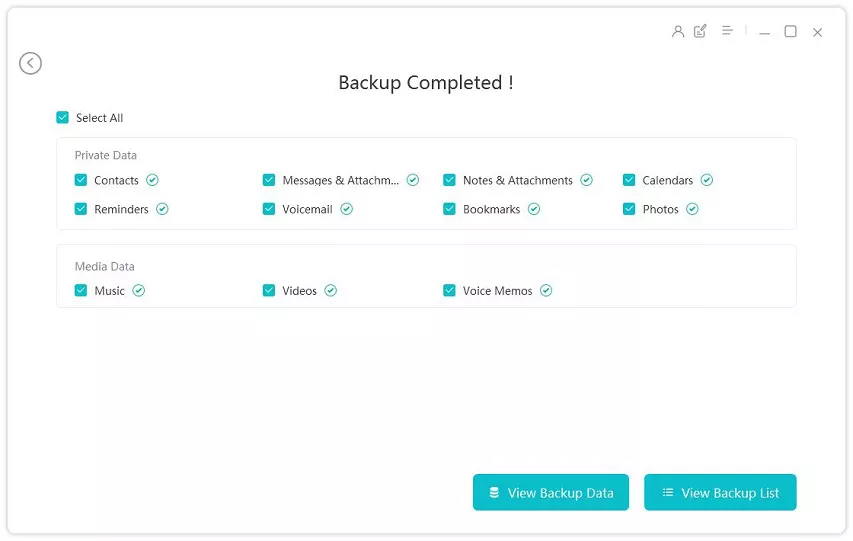
Click Transfer to Device and wait for the process to complete. Once the transfer is done, your data will be successfully moved to your new iPhone SE 4.
Ans: Typically, the "Preparing to Transfer" stage lasts a few minutes. If it’s taking too long, try restarting your iPhone or using a different cable for a faster connection.
Ans: To reset your iPhone SE 4, go to Settings > General > Reset, then select "Erase All Content and Settings." This will help clear any issues before starting the transfer.
Ans: Yes, the transfer can take time, depending on the amount of data. Large files or a slow connection might cause delays, so be patient during the process.
If your iPhone SE 4 is stuck on "Preparing to Transfer," try the solutions provided in this guide to fix the issue. Whether it’s updating your iOS, ensuring a stable connection, or using tools like Tenorshare iCareFone, these methods can help resolve the problem efficiently. For a seamless and stress-free transfer, we highly recommend using Tenorshare iCareFone, as it simplifies the process with just a few clicks.

Tenorshare iCareFone - Best iOS Backup Tool and File Manager


then write your review
Leave a Comment
Create your review for Tenorshare articles
iCareFone - Free iOS Backup tool & Easy Data Manager
Backup/Transfer/Restore/Manage iOS Data with Simple Clicks
Backup/Manage iOS Data Easily
Backup/Manage iOS Data in Clicks
By Jenefey Aaron
2025-04-22 / iPhone SE 4
Rate now!