

iCareFone - Free iOS Backup tool & Easy Data Manager
Backup/Transfer/Restore/Manage iOS Data with Simple Clicks
Backup/Manage iOS Data Easily
Backup/Manage iOS Data in Clicks
For many iPhone users, upgrading to the latest model is a yearly goal; something that’s always on their bucket list. Every new iPhone brings a wave of excitement, offering the latest innovations in technology. With the recent arrival of the iPhone 16e/SE 4, users are eager to make the switch and experience all it has to offer. However, along with the thrill of upgrading comes the challenge of transferring data, especially precious photos, from an old iPhone to the new one. If you’re facing issues with this process, don’t worry. In this guide, we’ll explore effective methods to help you transfer your photos smoothly to your new iPhone 16e/SE 4.

When transferring photos or data to a new iPhone 16e/SE 4, encountering issues like "unable to transfer" can be frustrating. Here are the common causes behind this problem:
Note: In some cases, troubleshooting transfer issues on your own might lead to data loss or other complications. If you're unsure or the problem persists, it's best to stop and use a reliable data recovery tool to safeguard your photos and other important data.
Now that we know the causes, let’s move on to the solutions. Transferring photos to your new iPhone 16e/SE 4 can be done in multiple ways. Here are the most effective and easiest methods to get your photos transferred quickly and securely.
Transferring photos from an old iPhone to a new iPhone 16e/SE 4 can be challenging, especially when iCloud storage is full, Quick Start fails, or iTunes is not an option. Tenorshare iCareFone offers a fast, secure, and hassle-free solution for transferring photos without quality loss or complex settings.


Whether you're facing iCloud sync failures, limited storage, or need a faster way to transfer photos, Tenorshare iCareFone provides a reliable, hassle-free solution.
Now, let’s look at how you can use this tool to transfer photos efficiently.
Download and install Tenorshare iCareFone on your computer. Launch the software and connect your old iPhone using a USB cable. If prompted, enter your passcode and tap “Trust This Computer.”
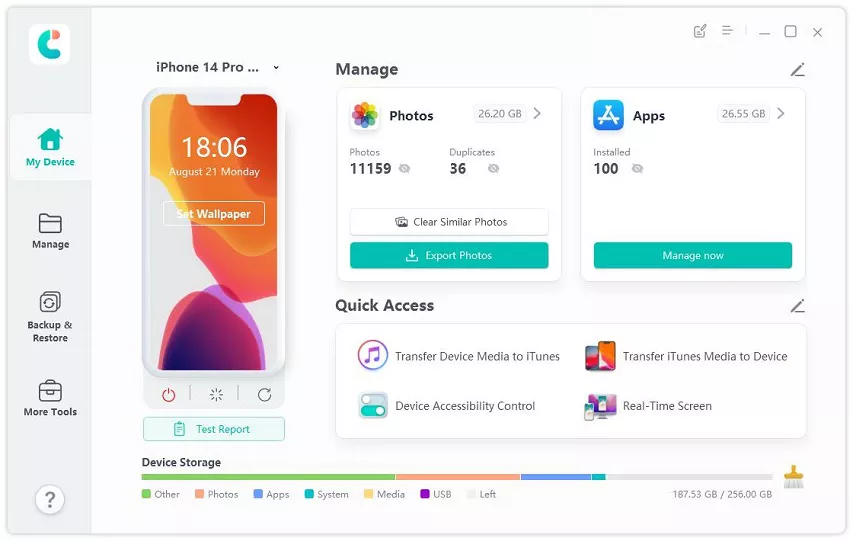
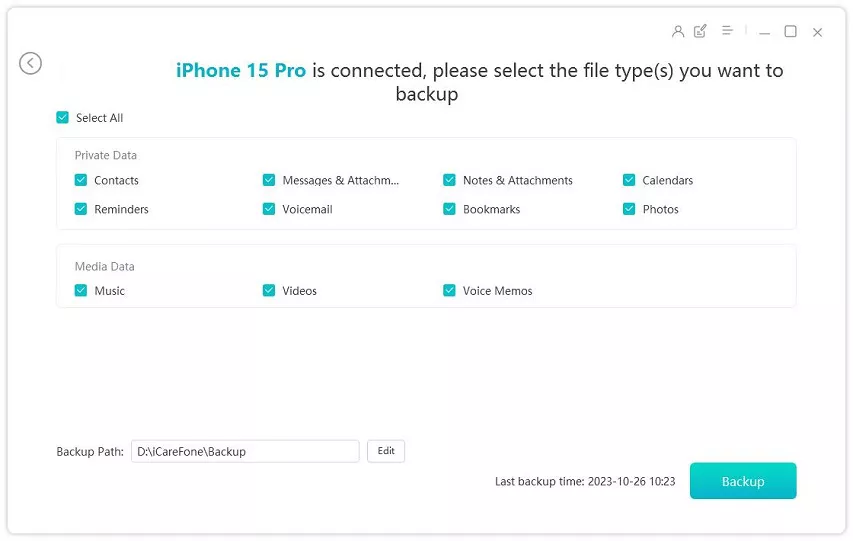
On the main interface, go to Backup & Restore and select Photos from the available data types. Click “Backup” to save all selected photos to your computer.
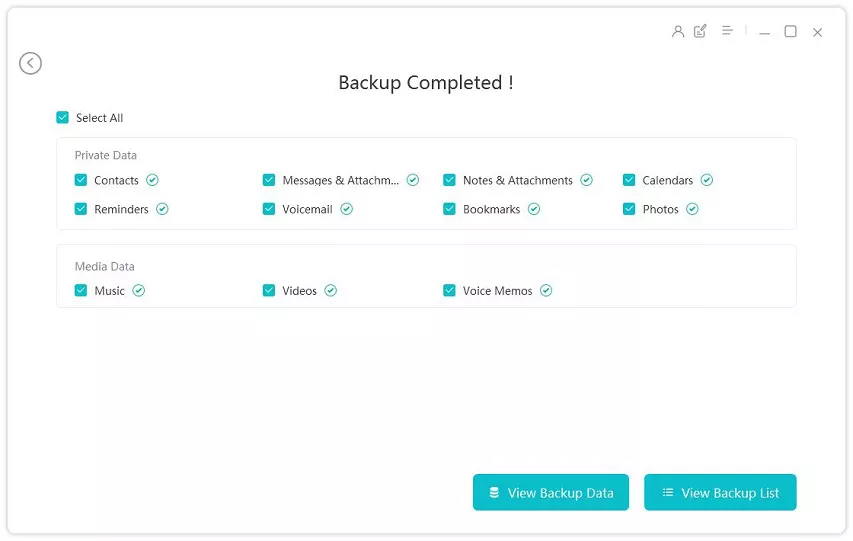
After the backup is complete, disconnect the old iPhone and connect your new iPhone 16e/SE 4. Open the backup file and click “Restore” to transfer the photos to your new device.
AirDrop is a wireless photo transfer method built into iOS. It allows you to quickly send selected images from one iPhone to another without using cloud storage or cables.
This method is best for small transfers but not ideal for large photo libraries due to speed limitations. Additionally, both iPhones must be near each other and have AirDrop enabled for the transfer to work.

Steps to Transfer Photos Using AirDrop:
Step 1: Enable AirDrop on both iPhones. Open Control Center, tap AirDrop, and select Contacts Only or Everyone.

Step 2: Open the Photos app on your old iPhone, select the images to send, tap Share, and choose AirDrop.
Step 3: On the new iPhone 16e/SE 4, tap Accept when prompted. The photos will be saved in the Photos app.
iTunes is a traditional method to transfer photos between iPhones using a computer. This method is useful when you have a large number of photos and prefer a complete backup and restore process.
However, it requires a Windows PC or Mac (macOS Mojave or earlier) since newer macOS versions use Finder instead. It’s not the fastest method but ensures a secure and offline transfer without relying on iCloud storage.

Steps to Transfer Photos Using iTunes:
Step 1: Connect your old iPhone to a computer and open iTunes. Click the iPhone icon, go to Photos, and select Sync Photos. Click Apply to start syncing.

Step 2: Once completed, disconnect the old iPhone and connect the new iPhone 16e/SE 4. Click the iPhone icon, go to Photos, and choose Sync Photos from Computer.
Step 3: Click Apply to transfer the synced photos to the new iPhone 16e/SE 4. After syncing, open the Photos app to view your transferred images.
iCloud is a convenient and wireless method to transfer photos between iPhones using cloud storage. It’s ideal for users who want to access photos across multiple devices without using a computer.
However, this method requires a stable internet connection and enough iCloud storage. If your iCloud storage is full, you may need to upgrade your plan or free up space before transferring photos.

Steps to Transfer Photos Using iCloud:
Step 1: On your old iPhone, go to Settings > [Your Name] > iCloud > Photos and enable iCloud Photos. This will upload all photos to iCloud.
Step 2: On your new iPhone 16e/SE 4, sign in with the same Apple ID and go to Settings > iCloud > Photos. Enable iCloud Photos to start syncing.

Step 3: Wait for the photos to download onto your new iPhone 16e/SE 4. Open the Photos app to check the transferred images. The speed depends on your internet connection and iCloud storage.
If you want to send photos quickly without transferring entire albums, using iCloud Link is a simple and effective method. It allows you to share a link to selected photos, making it ideal for sending images to another iPhone without using AirDrop or iTunes.
However, the recipient must have an internet connection to download the photos, and the link expires after 30 days.

Steps to Share Photos Using iCloud Link:
Step 1: On your old iPhone, open the Photos app, select the images you want to share, and tap the Share icon.
Step 2: Tap Copy iCloud Link. This will generate a unique link to your selected photos.
Step 3: Send the link via Messages, Email, or any messaging app. On the new iPhone 16e/SE 4, open the link and download the photos to the Photos app.
Email is a simple and widely accessible method to transfer photos between iPhones. It works well for sending a few images without needing cloud storage or third-party apps.
However, email services typically have attachment size limits (usually 25MB per email), making this method unsuitable for large photo transfers.

Steps to Send Photos via Email:
Step 1: Open the Photos app on your old iPhone and select the images you want to transfer. Tap the Share icon.
Step 2: Choose Mail, enter your own email address as the recipient, and tap Send. Ensure the total file size is within the email limit.

Step 3: On your new iPhone 16e/SE 4, open the email and download the attached photos. They will be saved in the Photos app.
Creating a Shared Album is a great way to transfer photos between iPhones without cables or external storage. This method is ideal for transferring multiple photos while keeping them organized. It requires an active iCloud account and internet access, but it allows you to share and manage photos easily between devices.

Steps to Transfer Photos Using a Shared Album:
Step 1: On your old iPhone, open the Photos app and select the images you want to transfer. Tap the Share icon and choose Add to Shared Album.
Step 2: Create a new Shared Album, name it, and select your own Apple ID as the recipient. Tap Post to upload the photos.

Step 3: On your new iPhone 16e/SE 4, open the Photos app, go to Shared Albums, and access the photos. Tap Save to Photos to download them.
Cloud storage services like Google Photos, Dropbox, OneDrive, and Google Drive provide an easy way to transfer photos between iPhones. This method is ideal for users who want to back up their photos and access them from any device.
However, uploading and downloading photos depends on internet speed, and free storage is often limited.

Steps to Transfer Photos Using Cloud Storage:
Step 1: On your old iPhone, install and open a cloud storage app like Google Photos or Dropbox. Sign in and upload the photos to the cloud.
Step 2: On your new iPhone 16e/SE 4, install the same cloud app and sign in with the same account.
Step 3: Download the uploaded photos to your device from the cloud app. They will be saved in the Photos app.
If you need a fast, reliable, and hassle-free way to transfer photos between iPhones, using a dedicated photo transfer tool is the best option. These tools are designed to handle large photo libraries efficiently, work without iCloud or iTunes, and offer selective transfer options.
They are ideal for users who face syncing issues, storage limitations, or slow transfer speeds with other methods.
Steps to Transfer Photos Using a Dedicated Tool:
Step 1: Download and install a trusted photo transfer tool like on your computer. Connect your old iPhone using a USB cable.
Step 2: Open the software, select Photos, and click Export to back up images to your computer.
Step 3: Disconnect the old iPhone, connect your new iPhone 16e/SE 4, and use the tool’s Import feature to transfer the photos back to your new device.
Ans: You may have a poor internet connection, iMessage disabled, or MMS turned off. Ensure you have a stable network and enable MMS or iMessage in Settings > Messages.
Ans: Open the Messages app, select a contact, and tap the Photos icon or the + button. Choose an image and tap Send to share it via iMessage or MMS.
Ans: You can use AirDrop or NameDrop on compatible iPhones. Enable AirDrop, bring the devices close, select the photo, tap Share, and choose the other iPhone to transfer.
Transferring photos from an old iPhone to a new iPhone 16e/SE 4 can be easy with the right method. Whether you use AirDrop, iCloud, iTunes, or a dedicated tool, choosing the best option depends on your needs. For a fast, secure, and hassle-free transfer, Tenorshare iCareFone is the best solution. It allows one-click photo transfer without iCloud or iTunes restrictions. Download Tenorshare iCareFone today for a smooth and efficient transfer experience!

Tenorshare iCareFone - Best iOS Backup Tool and File Manager


then write your review
Leave a Comment
Create your review for Tenorshare articles
iCareFone - Free iOS Backup tool & Easy Data Manager
Backup/Transfer/Restore/Manage iOS Data with Simple Clicks
Backup/Manage iOS Data Easily
Backup/Manage iOS Data in Clicks
By Jenefey Aaron
2025-04-22 / iPhone SE 4
Rate now!