then write your review
ReiBoot - No.1 Free iOS System Repair Software
Fix 150+ iOS Issues without Data Loss & Safely iOS 26 Upgrade/Downgrade
ReiBoot: No.1 iOS Repair Tool
Fix 150+ iOS Issues, No Data Loss
Many iPhone users ask that how do I reset my iPhone camera settings. What will happen if you reset the iPhone camera settings? How to fix iPhone camera not working?
Are you curious about this problem? Don’t worry, this article will give you an answer.
“How to reset iPhone camera settings” and “how to reset iPhone camera settings to default” are the common questions of many iPhone users.
You can reset iPhone easily by resetting all the settings of the iPhone to default. But you can’t able to reset iPhone camera settings only without resetting other iPhone settings. In another word, if you have to reset the camera settings of your iPhone, the other iPhone settings will also be going to be reset as default settings.
To fix any problem with iPhone’s camera, you can try resetting the camera settings. When you reset all of the iPhone settings, the data is not deleted or lost. This only resets the setup of some apps.
Many iPhone users visit our blog section to inquire about how to reset camera settings in iPhone. To know how to reset camera settings on iPhone:
Here you will find the option of Reset all settings.
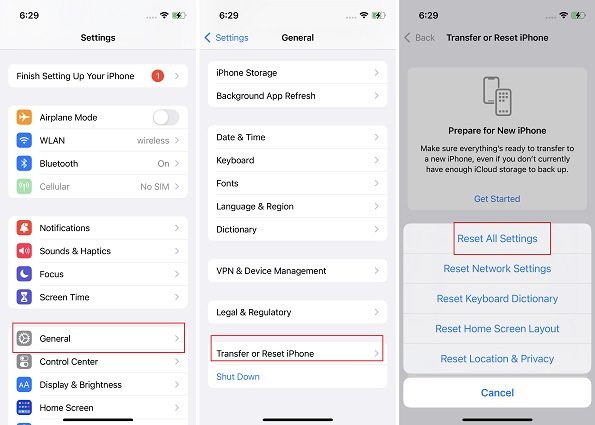
Once you click on the “Reset all settings” button, all of the iPhone’s settings will go back to the default settings. Let me explain it to you with an example. If you had enabled the “grid” feature before in your camera settings, after resetting it will automatically turn off.
However, it will not erase the apps or personal data. The settings that will also reset include, Apple pay cards, privacy settings, home screen layout, location settings, and keyboard dictionary. Any media or data is not removed.
Many iPhone users do not know how to reset your camera on iPhone and how to change the iPhone’s advanced settings to click a better photo. Some camera settings are discussed here that will not only allow faster shooting but help you to induce professional touch in your clicked photos.
This “faster shooting” feature of the iPhone relates to the rate at which images are clicked and processed. It allows users to click more pictures by quickly tapping the shutter button. Although this feature has its perks, many new iPhone users find it bothersome as they can’t able to take quality pictures at a fast rate.
This feature is turned on by default in iPhone camera settings and users can turn it OFF manually by following the steps given below:
Go to the “Camera”, and turn the prioritize faster shooting off.
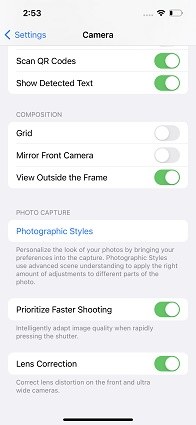
The “scene detection” feature of the iPhone enables automatic detection of the scene that you are taking a picture of. Moreover, it can also apply a tailored look to the scene to enhance the quality of that scene. Many users can’t able to handle this feature as expertise is required to handle this feature.
This feature is also turned on by default in iPhone camera settings. For turning it off, perform the following actions:
Locate and turn the “scene detection” off.

The lens correction feature of the iPhone adjusts the photo that is taken with an ultra-wide camera or front camera. It produces a natural-looking photo. This feature is turned on by default. For turning it off, perform the following actions:
Many "camera not working" issues such as camera stuck, black screen, etc. are caused by the iOS system glitch.
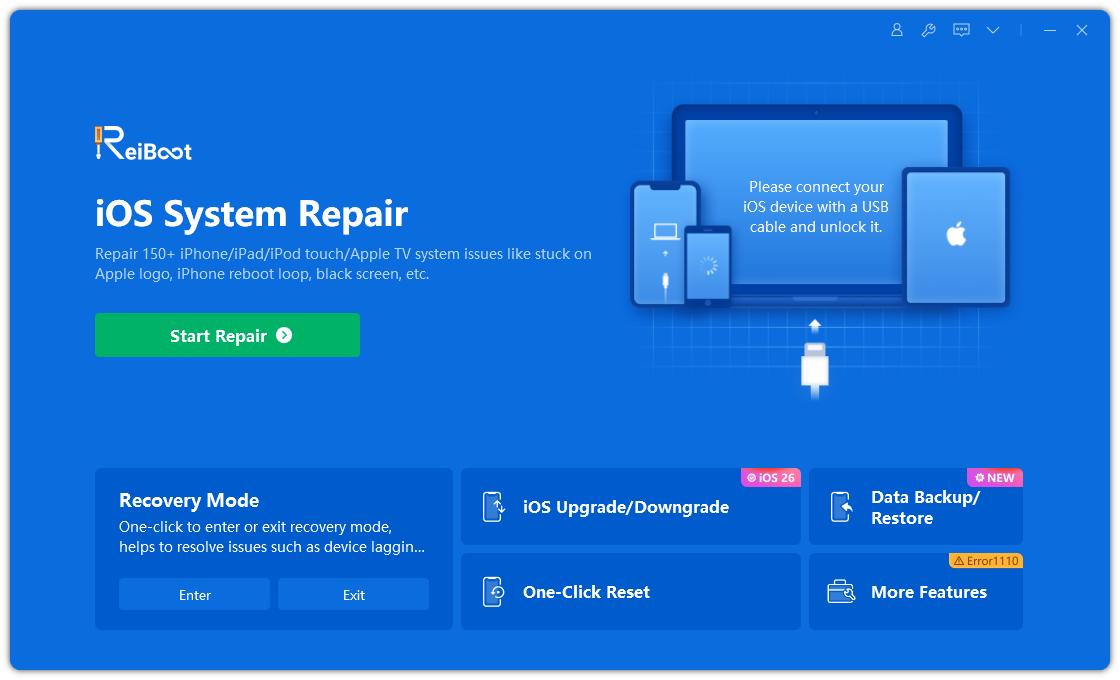
Tenorshare ReiBoot is the best way to repair the iPhone system problems. It is a professional system recovery tool. It has several features to solve iOS problems. It also allows putting the iPhone in recovery mode or exiting from recovery mode by one click only.
The best thing about using it is that it will resolve the issue without deleting any data from the iPhone. Follow these steps to use ReiBoot for repairing the iOS system to solve this problem.
Download and install ReiBoot on the computer. Connect the iPhone with the computer using a lightning to USB cable. A “Start” button will appear on the interface; click on it.
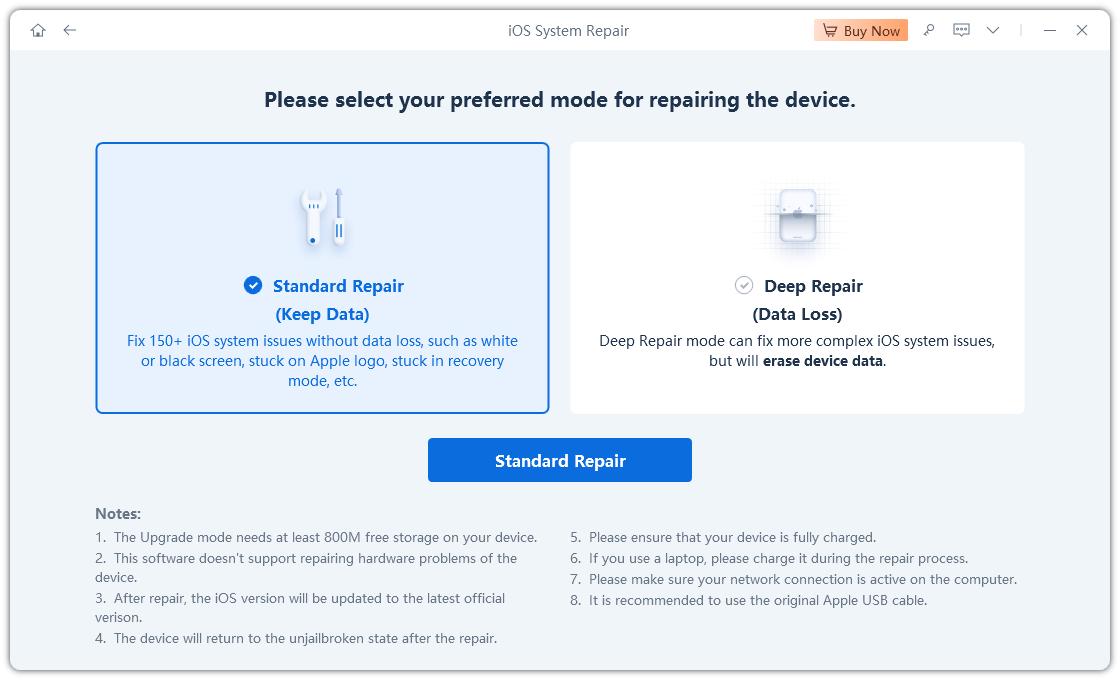
A new interface will appear that shows a list of different operations. Tap on the “Standard Repair” option.
Now you will be asked to download the firmware setup. Click on the “download” button appearing on the screen.
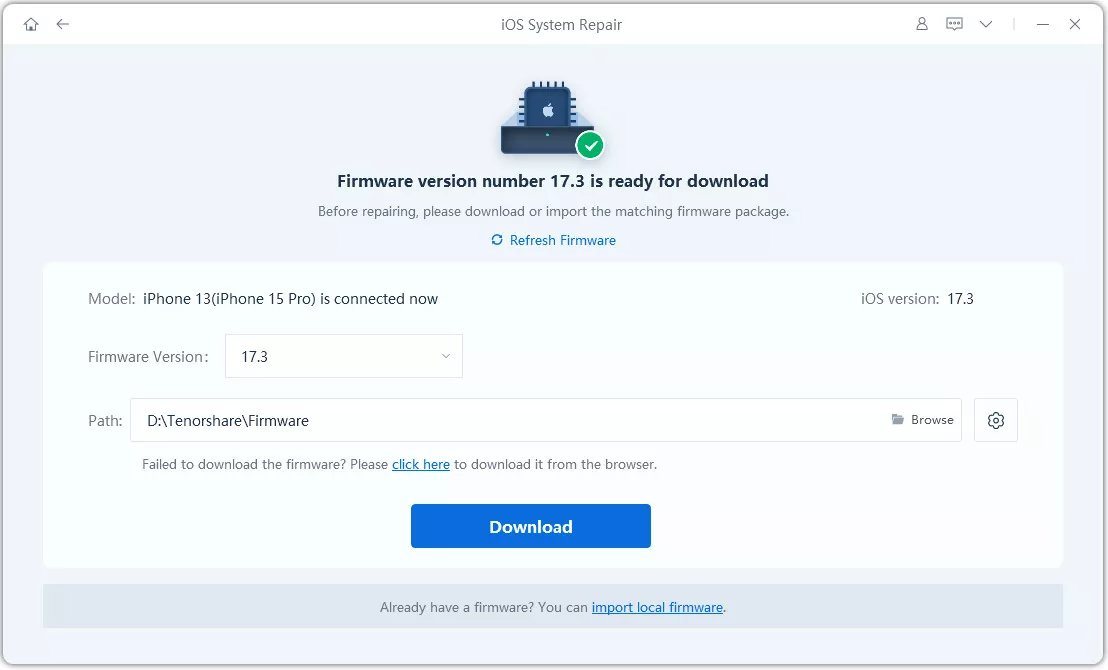
Now tap on the “start the repair process”. The interface will show that the standard repair is in progress.
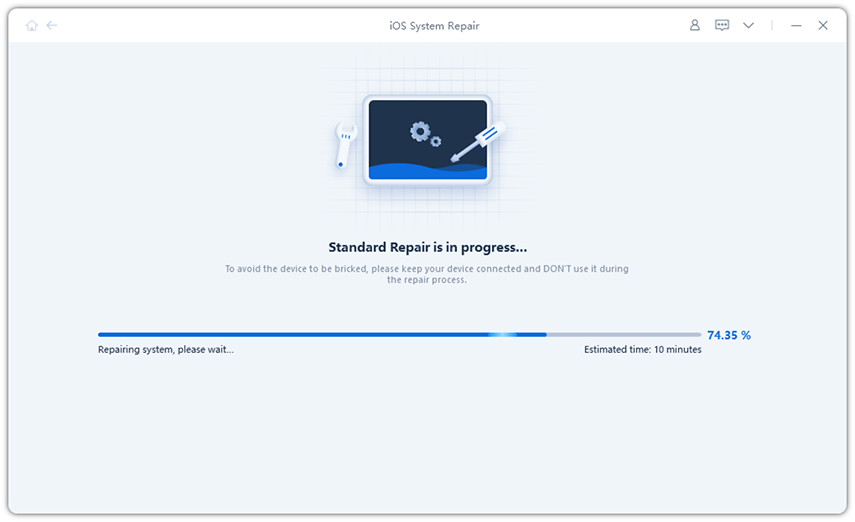
The repairing process will last for some time. Upon completion, the interface will show “standard repair completed”.
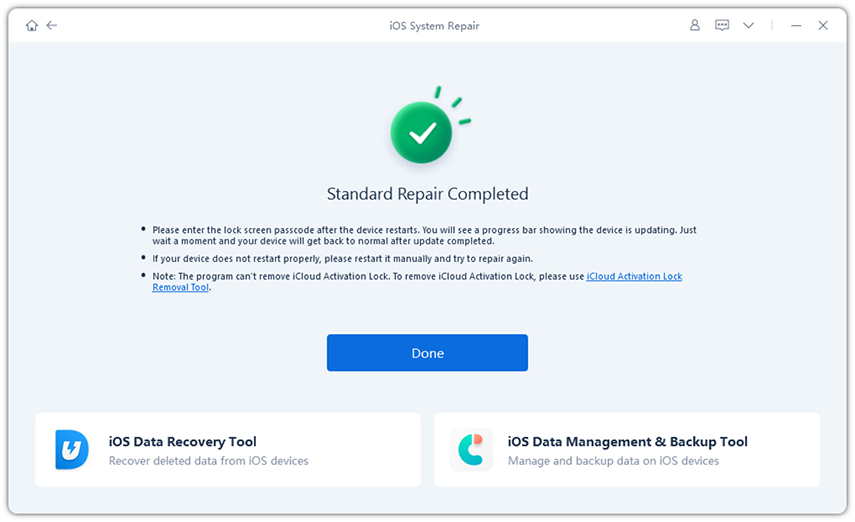
Most of the camera-related issues get fixed by the standard repair feature of ReiBoot. If the problem is not solved yet, again repeat the process and this time selects the “Deep Repair” option (this feature may cause data loss).
All iPhone users should know that how to reset camera iPhone and how to reset the advanced settings to better use your camera.
And sometimes, the camera might not work properly. It may be due to some system problem. If your camera is not working properly, you can try ReiBoot to solve the iOS system glitch.

then write your review
Leave a Comment
Create your review for Tenorshare articles
By Anna Sherry
2026-01-05 / iPhone Tips